Chapter 1. Creating a Basic Presentation
PowerPoint 2007 is the great equalizer. Even if youâre familiar with previous versions of PowerPoint, when it comes to PowerPoint 2007 youâre pretty much in the same boat as someone whoâs never even heard of presentation software. Thatâs because the entire PowerPoint interface has changed. As you saw in the Introduction, Microsoft has done away with toolbars, renamed and reorganized menu options, and even axed a couple of features.
Fortunately, the new interface makes quite a bit of sense once you get used to it. Thatâs what this chapter is for: to familiarize you with PowerPoint 2007 by walking you through the creation of a basic bullets-and-background slideshow presentation. Youâll learn how to create a new slideshow, choose a look and feel, add text and slides, print speaker notes and handouts, and finally, how to unveil your masterpiece.
Note
Part 3 shows you how to jazz up your basic slideshow with diagrams, charts, sounds, animations, and more.
Beginning a New Presentation
Youâve got two basic choices when it comes to creating a new presentation:
You can start from scratch, using a blank canvas. If youâre familiar with earlier incarnations of the PowerPoint program, or if youâre interested in learning the ins and outs of PowerPoint quickly, then youâll probably want to choose this option. (As daunting as âfrom scratchâ sounds, you donât have to do all the work yourself; Section 1.2 shows you how to apply a canned look and feelâor themeâto your new presentation.)
You can create a new presentation based on an existing template, theme, or presentation. A template is a generic presentation file designed for you to reuse. Complete with themes (see the box), background images, and even generic content (such as page numbers and placeholder text), templates let you jump-start your presentation by giving you everything you need except your specific content. If youâre creating a presentation for your local school board, for example, then youâll need to add the content that describes your findings, conclusions, and suggestions.
Templates are the better option when you need to crank out a presentation in a jiffy. PowerPoint comes with a handful of professionally designed templates and themes, but you can also create presentations based on a template, theme, or presentation that youâve previously created, or one that youâve found online and downloaded onto your computer.
PowerPoint divides these two basic choices into six specific options that are based on whether you want to piggyback your new presentation on an existing template, theme, or presentation. When you fire up PowerPoint and select Office button â New, you see the following six choices for creating a presentation, each of which is described in detail in the following sections:
Blank and recent. Lets you create either a blank presentation or a presentation based on one of the themes or templates you recently applied to a PowerPoint presentation.
Installed Templates. Lets you create a presentation based on one of the handful of generic templates that comes with PowerPoint, such as Classic Photo Album or Corporate Presentation.
Installed Themes. Lets you create a presentation based on one of the canned look and feel options that comes with PowerPoint, such as Apex, Metro, or Opulent.
My templates. Lets you create a presentation based on a template that you created, or that you downloaded from the Web.
New from existing. Lets you load an old presentation into PowerPoint 2007, make changes, and save the newly changed presentation using a new filename.
Microsoft Office Online. Lets you hunt for professionally designed templates and themes on Microsoftâs Web site.
Creating a New Presentation from Scratch
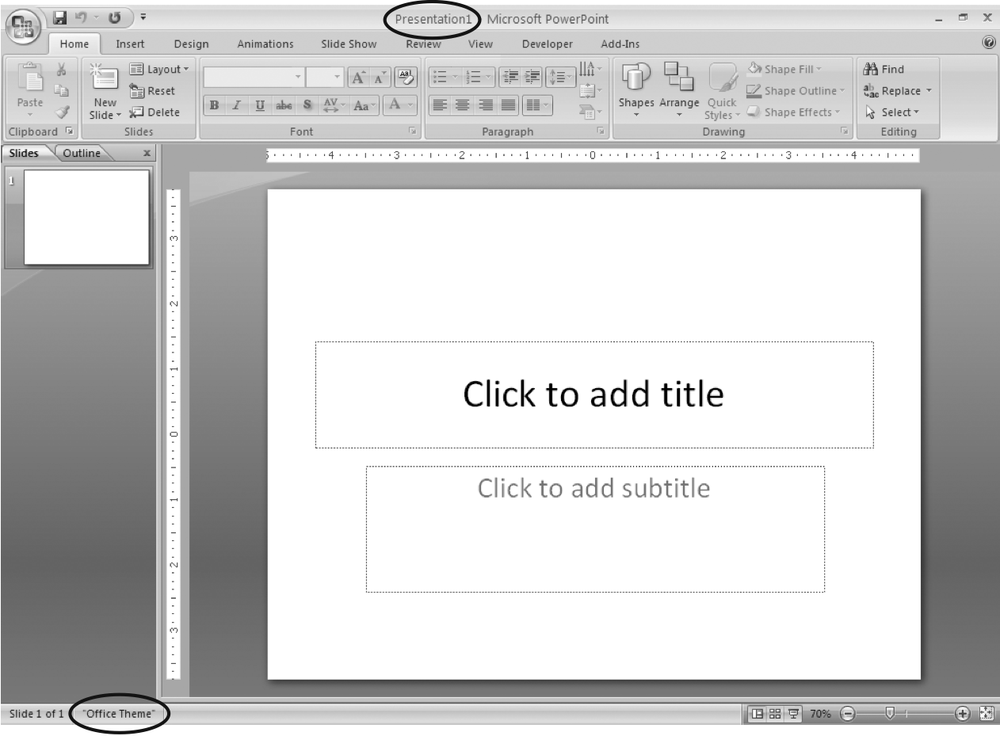
When you launch PowerPoint, the program starts you off with a brand-new presentation cleverly named Presentation1 (Figure 1-1).
Typically, you dive right in, adding a look and feel (Section 1.2), text, pictures, and so on to the blank presentation PowerPoint hands you. But if youâve closed or saved your freebie, hereâs how you create an additional blank presentation:
Select Office button â New.
The New Presentation window (Figure 1-2) appears.
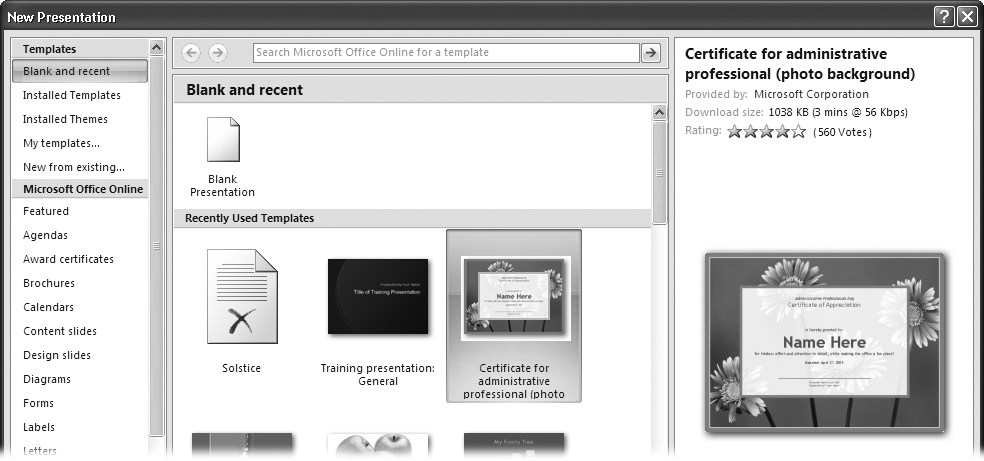
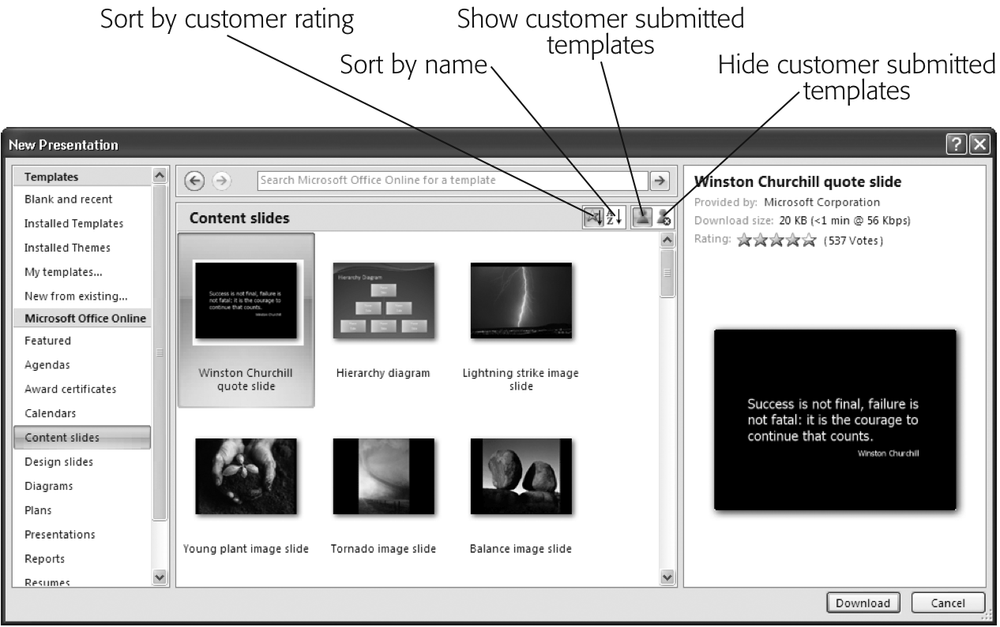
Figure 1-2. Because folks typically want to create a new presentation either from scratch or based on a favorite (and, therefore, recently used) template, the âBlank and recentâ option is automatically selected. But you can choose instead to create a presentation based on an existing presentation, or on a theme or template youâve created or downloaded from the Web.On the left side of the New Presentation window, make sure the âBlank and recentâ option is selected.
If itâs not, click it to select it.
In the New Presentation window, double-click Blank Presentation (see Figure 1-2). Or you can click Blank Presentation and then click Create.
Either way, a new blank presentation named Presentation2 (or Presentation3, or Presentation4 depending on how many new presentations youâve created since you launched the program) appears in your PowerPoint workspace.

Tip
To create a new blank presentation without going through the New Presentation window, press Ctrl+N.
To find out how to add content and design elements to your newly created presentation, zip down to Section 1.3. Section 1.8 shows you how to save your new presentation.
Creating a Presentation from an Existing Template, Theme, or Presentation
PowerPoint lets you get a jump on your new presentation by starting with an existing template, theme, or presentation and then filling in your content. You can choose from the many templates and themes that come with PowerPoint, or you can go online and search for a specific template or theme that matches your needs. You can also reuse any of the templates, themes, or presentations that you (or your co-workers) have previously created. The following sections describe each of your options.
From an existing template
A template is a generic presentation designed (by Microsoft, by a third-party vendor, by you, or by whoever created the template) to be used again and again. Templates help you crank out presentations quickly, because all the design work has been done for you. All you have to do is add your content: the text, charts, graphics, and other elements that convey your particular message.
Templates vary widely, but all contain predefined themes (color schemes, background images, title and bullet point layouts, and text fonts). Some templates contain additional format and design elements and even some generic or placeholder content. Some templates are businesslike, with sober colors and artwork; some are whimsical, with wacky fonts and brightly colored balloons all over the place. The template motifs you can find are nearly endless, which makes it relatively easy to choose a template that fits the mood and structure you want to create for your presentation.
PowerPoint gives you four different options for creating a new presentation using an existing template: Recently used templates, Installed Templates, âMy templatesâ (templates youâve created yourself), and Microsoft Office Online. The option you choose depends on where you want PowerPoint to hunt for the template, as described in the following sections.
Recently used templates
PowerPoint keeps track of the templates you apply to your presentations and displays the last few in a list. So if you tend to use the same two or three templates to create all your presentations, chances are youâll find this option the easiest.
Hereâs how to create a new presentation using a template you recently applied to another presentation:
Select Office button â New.
The New Presentation window appears.
In the left side of the New Presentation window, make sure the âBlank and recentâ option is selected. (If itâs not, click to select it.)
In the middle of the New Presentation window, scroll through the template thumbnails.
Tip
Mousing over a template briefly displays the location of the template (for example, C:\Program Files\Microsoft Office\Templates\QuizShow.potx for a built-in template stored on your computer, or âOffice Websiteâ for a template located on Microsoftâs Web server). You might find this information useful if, for example, youâre hunting for a template you remember finding online.
Click to select the template you want to base your new presentation on.
In the right side of the New Presentation window, a preview appears (see Figure 1-3). Depending on whether the selected template is stored on your computer or on Microsoftâs Web server, PowerPoint displays a Create or Download button, respectively, at the bottom of the New Presentation window.
Click Create (or Download).
The New Presentation window disappears. (If you clicked Download, then a Downloading Template message flashes briefly on the screen.) PowerPoint then loads the selected template into a new presentation it names Presentation1 (or Presentation2, or Presentation3, depending on how many presentations youâve created since you launched PowerPoint).
Installed templates
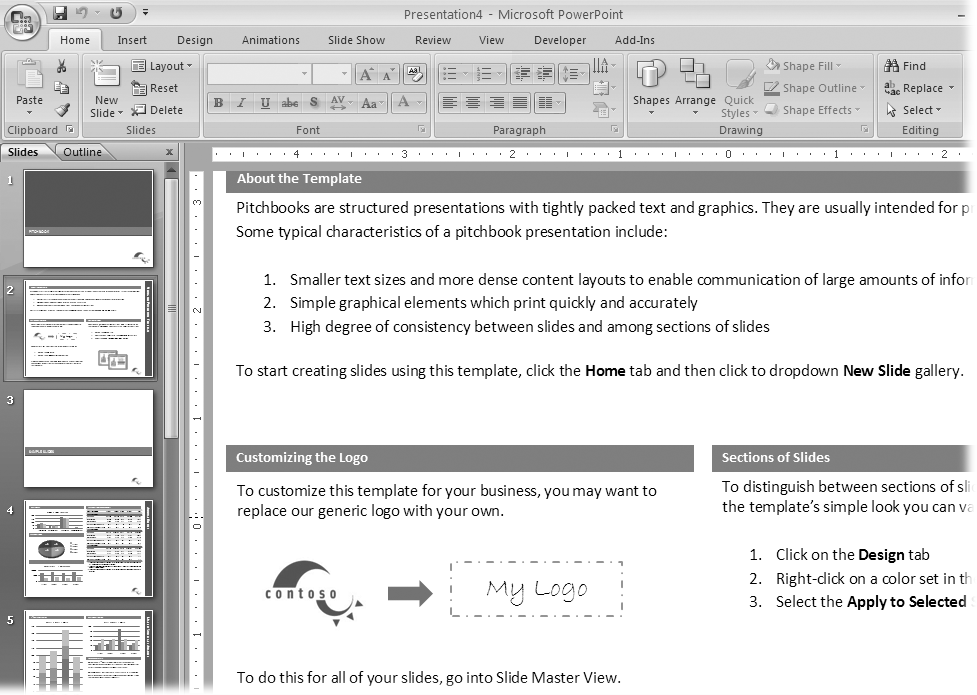
When you installed PowerPoint, you automatically installed a handful of professionally designed templates, including templates that let you set up photo albums (Classic Photo Album and Contemporary Photo Album), corporate-style slideshows (Corporate Presentation), layouts for print publications (Pitchbook), animated question-and-answer tutorials (Quiz Show), and big-screen slideshows (Wide Screen Presentation 16Ã9).
To use one of these built-in templates to create a new presentation, follow these steps:
Select Office button â New.
The New Presentation window appears.
In the left side of the New Presentation window, click Installed Templates.
Several template thumbnails appear in the middle of the New Presentation window.
Click a template to select it.
A larger version of the template appears in the preview area (the right side) of the New Presentation window.
Click Create.
The New Presentation window disappears, and you see a new presentation file based on the template you selected. Figure 1-4 shows you an example.
Tip
Instead of clicking a template and then clicking Create, you can save a step by simply double-clicking the template.
My templates
Each time you create your own template (Section 1.9) or download a template from Microsoftâs Web site (Section 1.1.2.1), PowerPoint automatically stores the template in a special directory on your computer similar to this one: C:\Documents and Settings\[Your Name]\Application Date\Microsoft\Templates.
Note
PowerPoint controls where you store the templates you download from Microsoftâs Office Online Web site, and it suggests where to store the templates you create from scratch. But if you bypass Microsoftâs Office Online Web site and download a template from another Web siteâor if you override PowerPointâs suggestion of where to store a template you create from scratchâthen you wonât be able to reuse these rogue templates using the steps described in this section. Instead, you want to follow the steps you find on Section 1.1.2.3 for creating a new presentation from an existing presentation file.
To use one of these templates to create a new presentation, follow these steps:
Select Office button â New.
The New Presentation window appears.
On the left side of the New Presentation window, click âMy templates.â
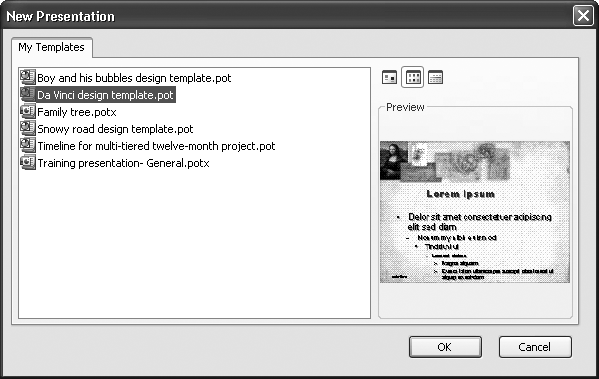
The New Presentation window vanishes, and the New Presentation dialog box shown in Figure 1-5 appears.
In the New Presentation dialog box, select the template you want to use and click OK.
The New Presentation dialog box disappears, and PowerPoint displays a new presentation file based on the template you selected.
Figure 1-5. PowerPoint stores the templates you createâor that you download from Microsoftâs Office Online Web siteâin a special folder so that you wonât confuse them with PowerPointâs built-in templates. To change how the template icons appear, choose from Large Icons (which makes the template names easier to read), List (shown here), and Details (which displays the date the template was created).
Online
Although lots of Web sites offer PowerPoint templates for download, you should check Microsoftâs Office Online Web site first for a couple of reasons. One, Microsoftâs templates are free; and two, checking Microsoftâs site is one-click easy, as described next.
Tip
Because Microsoft lets its customers upload templates willy-nilly, the quantity and quality of the templates you find on its site can vary widely. Figure 1-6 shows how to weed out customer-submitted templates, leaving only those designed by official Microsofties.
Select Office button â New.
The New Presentation window appears.
On the left side of the New Presentation window, under Microsoft Office Online, choose the type of template youâre looking for, such as Brochures or Content Slides.
Template thumbnails appear in the center of the New Presentation window (Figure 1-6).
Click a template thumbnail to select it; then click Download.
A validation message box appears, letting you know that Microsoft is gearing up to check your copy of PowerPoint to make sure itâs not bootlegged. (If Microsoft doesnât find a legitimately purchased copy of PowerPoint on your computer, then you wonât be able to download templates.)
In the validation message box, click Continue.
Microsoft checks out your copy of PowerPoint. If it passes muster, a Downloading Template message appears briefly, after which PowerPoint displays a new presentation file based on the template you selected.
The rest of this chapter shows you how to add text and change the look of your newly created presentation.
From an existing (built-in) theme
If you know which theme you want to apply to the new presentation youâre creating, then you can save a click or two by applying it when you create the presentation file. (The alternative is to create the presentation file and then apply the theme, as described on Section 1.2.)
Note
PowerPoint only lets you apply PowerPoint-supplied themes when you create a presentation. If youâve created your own theme or downloaded one from the Web, then you need to create your presentation first and then apply the theme (see Section 1.2).
To create a new presentation based on one of the themes that comes with PowerPoint:
Select Office button â New.
The New Presentation window appears.
On the left side of the New Presentation window, click Installed Themes.
Several theme thumbnails appear in the middle of the New Presentation window.
Click a theme to select it.
A larger version of the theme appears in the preview area (the right side) of the New Presentation window.
Click Create.
The New Presentation window disappears and you see a new presentation based on the theme you selected. Figure 1-7 shows you an example.
Tip
Instead of clicking a theme and then clicking Create, you can save a step by simply double-clicking the theme.
From an existing presentation
If youâve already got a presentation on your computerâcreated in any version of PowerPointâthen you can load that presentation into PowerPoint 2007 and use it as the basis of a new presentation.
Youâve got two options for loading an existing presentation: the Existing Presentation window, which is a good choice if youâve never used PowerPoint before; and the Open window, which is handy if youâre familiar with PowerPoint.
Note
A third, quickie alternative exists for creating a new presentation from an existing oneâbut this alternative works only if youâve recently edited the existing presentation. To try it out, click the Office button and then, from the list of Recent Documents that appears, choose an existing document. After PowerPoint opens the document, immediately save it (Office button â Save As) with a different name.
The New from Existing Presentation window
If youâre new to PowerPoint, then youâll appreciate the New from Existing Presentation window, which simplifies the process of opening an existing presentation. And unlike using the Open window, using the New from Existing Presentation window automatically generates a new file name, so you donât have to worry about accidentally overwriting your original presentation.
To create a presentation using the New from Existing Presentation window:
Select Office button â New.
The New Presentation window appears.
Click âNew from existing.â
The New from Existing Presentation window appears.
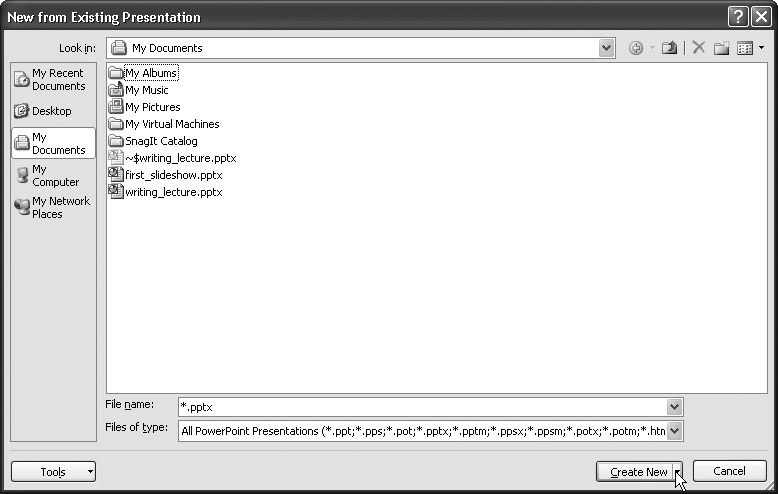
Select the file you want to open, as described in Figure 1-8, and then click Create New.
The New from Existing Presentation window disappears, and the presentation you selected appears in your PowerPoint workspace. PowerPoint gives the presentation a new, generic name (PowerPoint2, PowerPoint3, and so on) to remind you to rename the file before you save it. (Section 1.8 shows you how to rename files.)
Figure 1-8. To browse your computer for an existing PowerPoint file, either click the folder icons you see on the left side of the window, or click the âLook inâ drop-down menu. When you see the PowerPoint file youâre looking for, click it to select it. Then click Create New to load it into PowerPoint under a new name.
Note
Creating a new presentation from an old one is very similar to creating a new presentation from a template, as you saw on Section 1.1.2.
The Open window
The Open window gives you more options for opening an existing presentation than the New from Existing window does. Youâll find these options useful in certain situations, such as when you want to protect an existing presentation by opening it in read-only mode, read through all the slides to make sure itâs the one you want, and then save a copy.
To open an existing presentation using the Open window:
Choose Office button â Open (or press Ctrl+O).
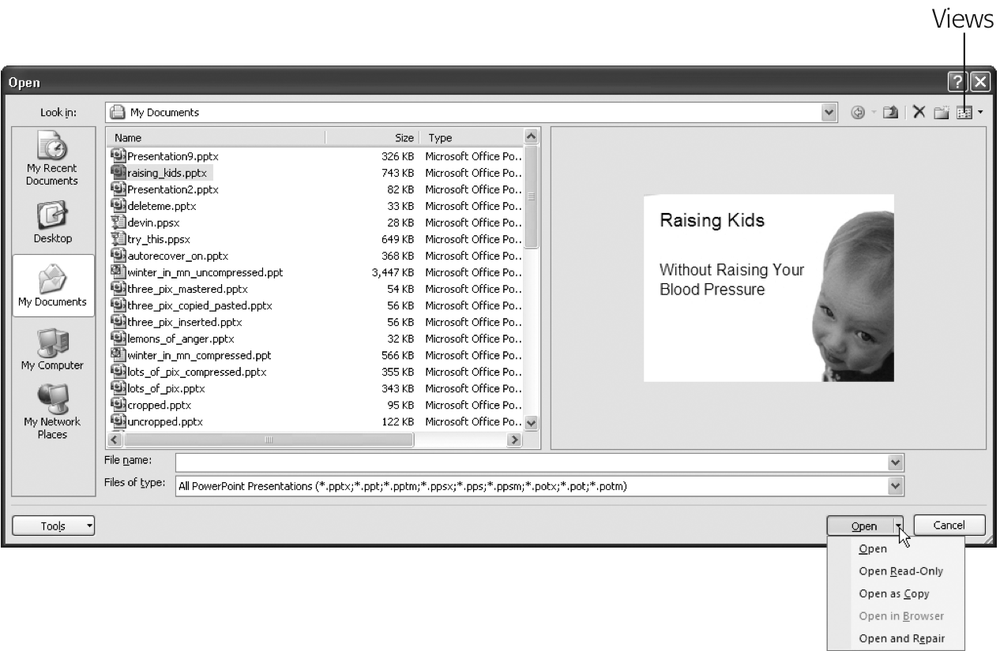
The Open window shown in Figure 1-9 appears.
Select the file you want to open, either by clicking the folder icons you see on the left side of the window, or by clicking the âLook inâ drop-down menu. When the PowerPoint file youâre looking for appears in the list, click it to select it.
Tip
To see a preview of each file on the right side of the Open window as you select it, click the Open windowâs Views icon (Figure 1-9) and select Preview.
Choose one of the following options:
Open. Opens the selected file.
Open â Open Read-Only. Opens a protected version of the file that lets you make changes to the presentation, but doesnât let you save them unless you specify a new filename.
Open â Open as Copy. Opens the presentation file, but renames it Copy(1)filename.pptx.
Open â Open in Browser. Opens the selected HTML file in Internet Explorer (or your default browser).
Open â Open and Repair. Tells PowerPoint to fix a corrupted file before it tries to open it.
The file you selected appears in your PowerPoint workspace.
Choosing a Theme for Your Presentation
No matter which approach you use to create a presentationâfrom scratch, from an existing presentation, from a template, or from a built-in themeâonce you have a presentation, you can change how it looks in one fell swoop by changing its theme.
A theme is a collection of characteristics including colors, fonts, and graphic effects (such as whether the shapes you add to your slides have drop shadows). For example, applying the built-in Deluxe theme turns your background a tasteful shade of blue and displays your title text (which appears in the Corbel font) in an attractively contrasting, gently shadowed shade of yellowâall thanks to the theme.
You can change all of these characteristics individually, of course, as youâll see in Chapter 3. But applying themes gives you more bang for your buck in several important ways:
Using themes is quicker than changing individual settings one at a time. Applying a theme is a two-click proposition. Changing the dozen-plus settings controlled by a theme would exercise your click finger a lot more than that. And themes save you time youâd otherwise spend figuring out which colors look good together.
Using themes helps ensure a decent-looking, readable slide. Consistency is an important design principle: it sets the tone for your presentation and lets your audience focus on your message. When you change settings manually, you can end up with a distracting mishmash of colors and fonts on a single slide or across slides. Not so with themes. Once you apply a theme, the theme takes control of your settings. If you change the background color of your slides, then the theme automatically changes the title and subtitle fonts to compatible colorsâcolors that arenât just readable against your new background, but attractive, too.
Note
You can change the color scheme, fonts, effects, background, and layering order for any given theme without âbreakingâ the theme. For example, if you change the subtitle color from white to black, then PowerPoint automatically adjusts the background color and other settings so that your subtitle text is still readable. But you can also override theme settings. Section 3.2.4 shows you how.
Using themes lets you create a consistent look and feel across Microsoft Office-produced materials. You can use the same themes you use in PowerPoint in Word and Excel, too. Thatâs handy if you use Microsoft Office to produce multimedia presentations: no more Arial 12 spreadsheets paired with Baskerville 10 reports and purple Helvetica PowerPoint slides. When you apply the same theme to your Word documents, Excel spreadsheets, and PowerPoint slides, you end up with a consistently presented, harmonious whole.
Hereâs how to apply a theme to a PowerPoint presentation:
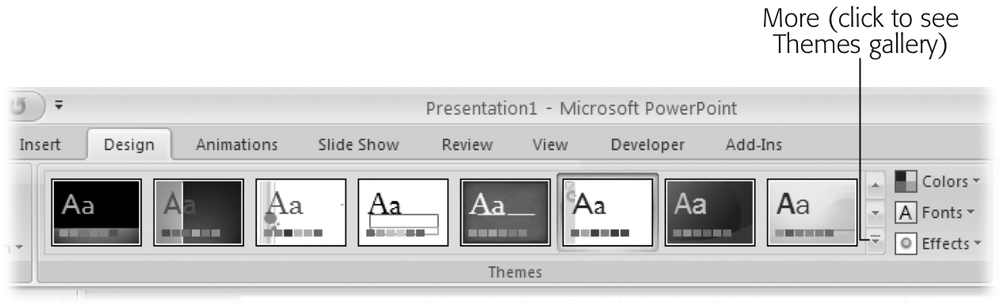
Click the Design tab.
The Design ribbon appears, complete with a Theme gallery (Figure 1-10). (For more on PowerPoint 2007âs new ribbons, check out Section 3.2.)
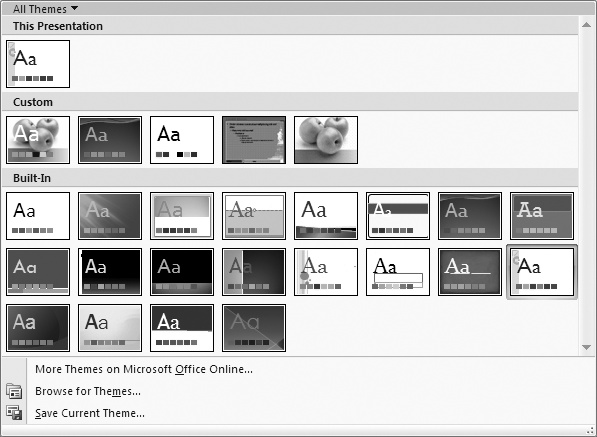
Click the More icon at the bottom-right corner of the Themes section (Figure 1-10).
Additional themes appear in the gallery, as shown in Figure 1-11.
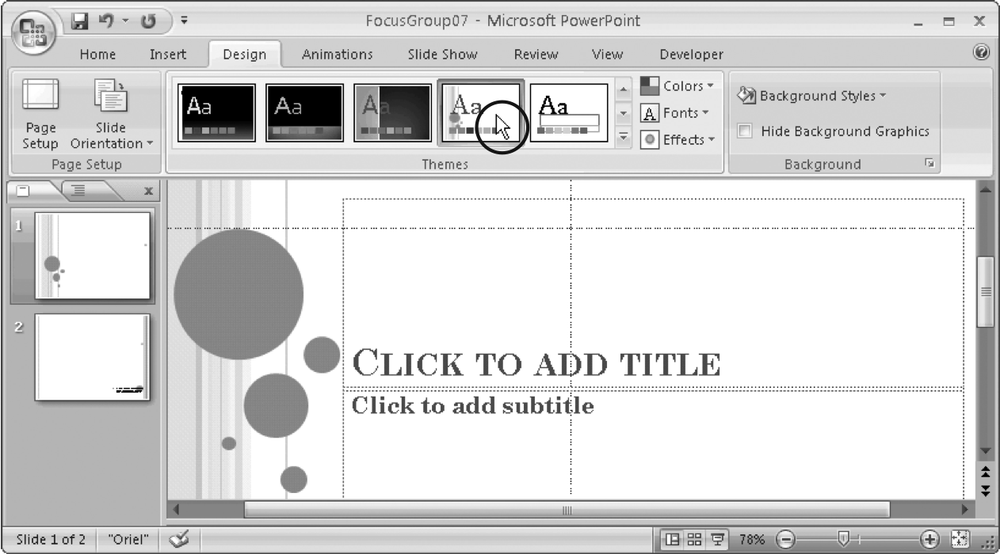
Mouse over the themes in the gallery one by one.
PowerPoint previews each theme as you mouse over it (Figure 1-12) so you can get an idea of how each will look applied to your presentationâs content and layout.
Figure 1-12. No more clicking Preview or Apply and waiting around: simply mousing over a theme temporarily applies it to your presentation. To apply the theme for good, click the theme to select it. If you change your mind, you can revert back to your presentationâs original theme by applying the Office Theme theme.Click a theme to select it.
PowerPoint applies the selected theme to all of the existing slides in your presentation, as well as all the new slides you create.
Tip
In addition to letting you apply a theme to all the slides in your slideshowâwhich is normally what you want to do, and whatâs described in this sectionâPowerPoint lets you apply a theme to only selected slides. Applying more than one theme to a slideshow is useful when youâre creating a distinct before-and-after presentation or other multi-section slideshow and want each section to look distinct. For details, check out Chapter 4.
Adding Text
Youâll want to add at least some text to most, if not all, PowerPoint presentations you create. (See the box for advice on how much prose to add to your presentation.) Knowing that, the PowerPoint designers made it easy for you to add text to your slides. The following sections show you how.
Adding Text to an Existing Text Box
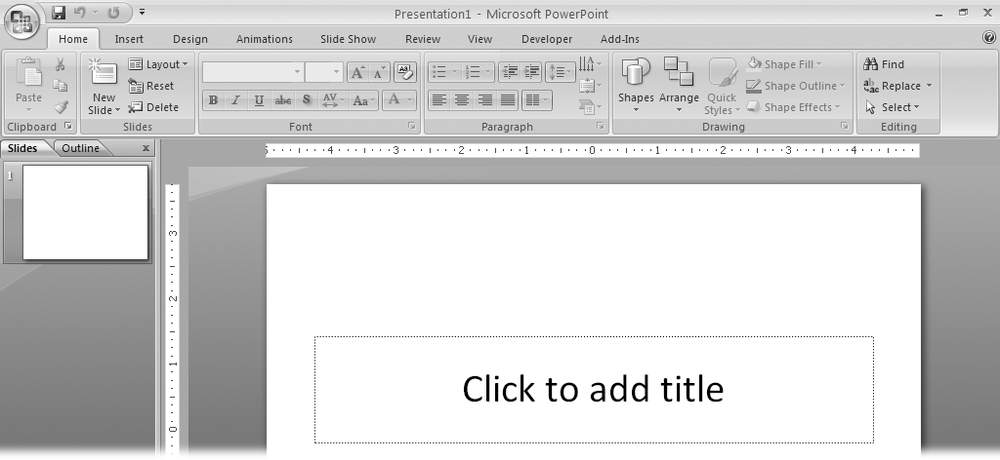
When you start to work with a new presentation, the ribbon displays the Home tab, which should look somewhat familiar if youâve used PowerPoint 2003 (Figure 1-13).
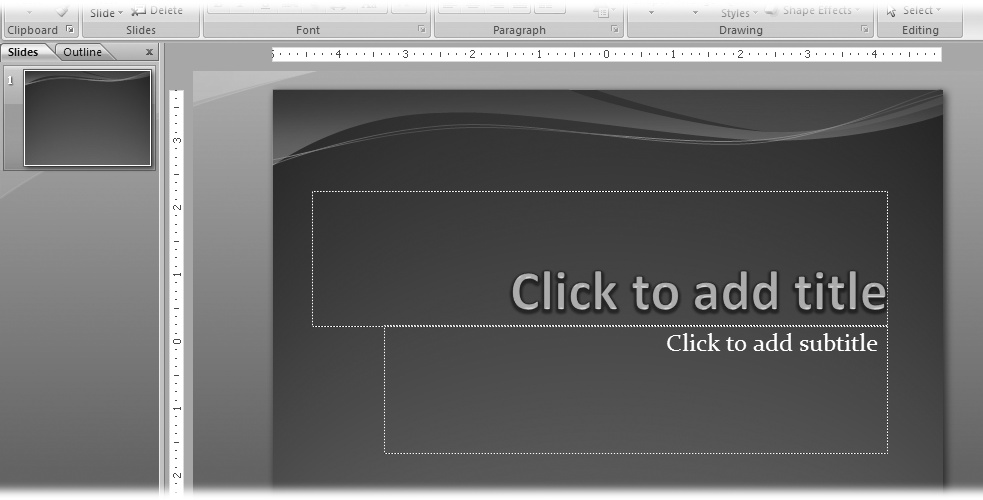
Blank presentations come complete with title and subtitle placeholder text boxes. To replace the placeholder text in either of these two text boxes with your own text, simply click inside the placeholder and begin typing. When you do, two things happen:
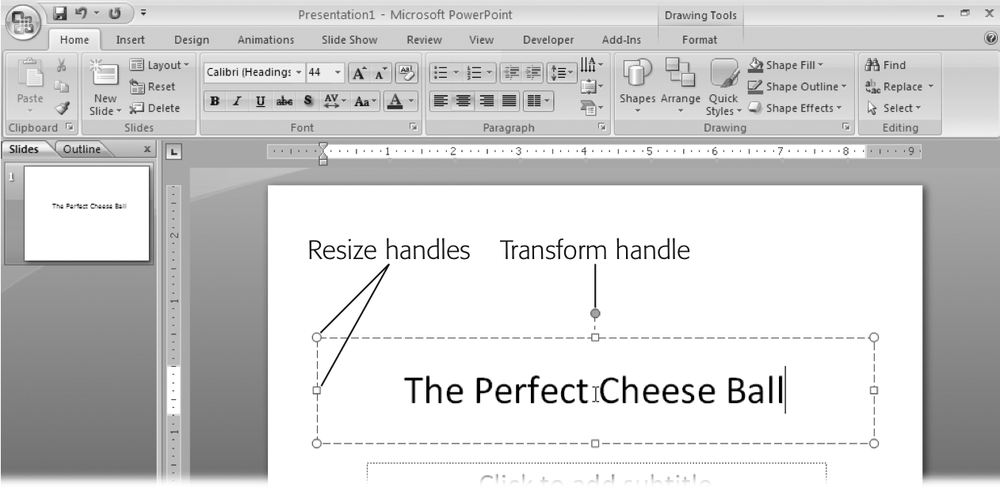
PowerPoint displays the Drawing Tools | Format tab and, on the Home ribbon, activates many of the text formatting options (Figure 1-14). You can use these options to change the font, size, and color of your text, turn your text into a right-justified paragraph or a bullet point, and much more. (Chapter 3 describes your options in detail.)
Resize and transform handles appear at the corners and edges of the text box (Figure 1-14). Tiny white resize handles, which are square on the edges of the text box and circular on the corners, let you stretch or shrink your text box by dragging them. The circular green transform handle appears above the top of your text box and lets you tilt it. Drag the handles to tilt or resize your text box.
Figure 1-14. As soon as you click a text box, PowerPoint activates the text formatting and drawing tools and reveals the Drawing Tools | Format tab. Now, in addition to typing your text, you can format it, change its color, or add an effect (such as a glow or bevel). Drag any of the eight white resize handles to resize your text box; drag the circular green transform handle to rotate the text box. Chapter 3 covers text manipulation in more detail.
Adding a New Text Box
Youâre not limited to the placeholder text boxes PowerPoint starts you off with: you can add as many additional text boxes to your slides as you like.
Note
Chapter 3 shows you how to format text boxes, as well as the text inside them. Chapter 5 shows you how to add placeholder text boxes to slide masters.
To add a new text box to a slide:
Click the Insert tab.
The Insert ribbon (Figure 1-15) appears.
On the Insert ribbon, click Text Box.
In the status bar at the bottom of the screen, PowerPoint displays a helpful hint (âClick and drag to insert a text boxâ). When you mouse over your slide, you notice that your cursor looks like a tiny down arrow.
On the slide, click where you want your new text box to appear.
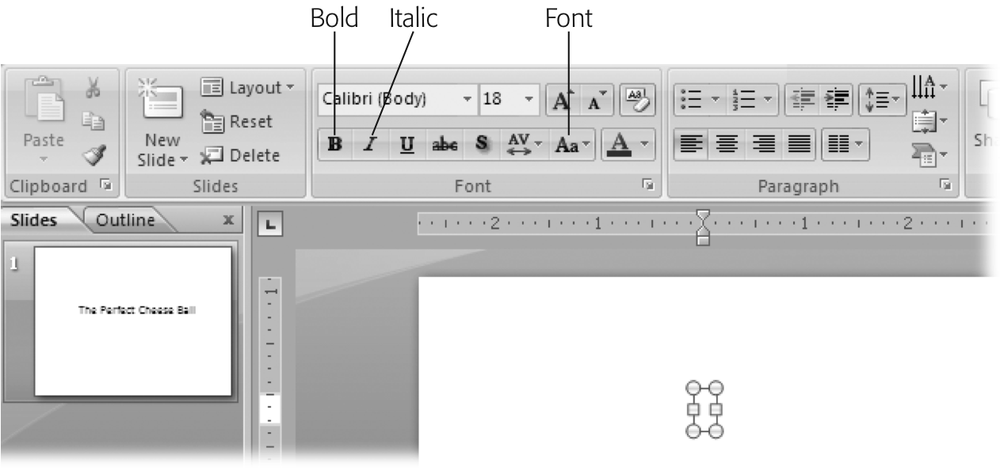
A text box appears with the cursor handily positioned inside (Figure 1-16). The Drawing Tools | Format tab pops up, and on the Home ribbon, PowerPoint activates most of the formatting options, ready for you to format your text.
Figure 1-16. Choosing one or more formatting options (such as Bold, Italics, or Font) before you begin typing tells PowerPoint to apply those options to your text automatically as you type. (Youâll find more on formatting in Chapter 3.)Type your text.
The text box expands automatically to accommodate your text.

Note
In addition to adding text directly to your slides, as shown here, you can also paste or type text onto shapes (for example, a Stop sign). Chapter 9 shows you how.
Adding More Slides
When you create a new blank presentation, PowerPoint spots you one slide. But in most cases, youâll want your presentation to contain a lot more slides than that. Fortunately, adding a new slide is easy, as youâll see in the following sections.
PowerPoint gives you two options: adding a slide with layout identical to the current slide, and specifying a different slide layout. A slide layout is a description of what content appears where on a slide. For example, applying a Title Slide layout to a slide positions title and subtitle text placeholders near the middle of your slide, and nothing else. Applying a Title and Content layout positions a title text placeholder near the top of a slide, and an object placeholder beneath that.
To add a slide with a layout identical to the current slide:
Select any non-title slide.
PowerPoint doesnât automatically duplicate title slides for a pretty obvious reason: 99 percent of the time, you donât want two title slides in a single presentation.
Note
For the one percent of the time when thatâs exactly what you want, add a slide, and then change the slideâs layout to Title Slide as shown on Section 4.1.1.
Click the Home tab.
The ribbon you see in Figure 1-17 appears.
Figure 1-17. Clicking the New Slide button is the quickest way to add a slide to your presentation. You can always change the layout, of course, but when you want to add a different kind of slideâsay, one with a subtitle or columnsâyou can save yourself some time by choosing a new slide layout right off the bat, as shown in the steps below.Click the New Slide button.
PowerPoint inserts a new slide after the current slide. If thatâs not what you want (for example, if you want to add a slide to the beginning of your presentation), then you can easily change the order of your slides. Section 5.2.3 shows you how.

Tip
PowerPoint gives you another way to add a new slide with a layout similar to the current slide. In the Slides pane (at the left side of your workspace, as shown in Figure 1-16), you can right-click the page after which you want to create a new slide. Then, from the menu that appears, select Duplicate.
To add a slide with a different layout:
On the Home ribbon, click the down-arrow next to New Slide.
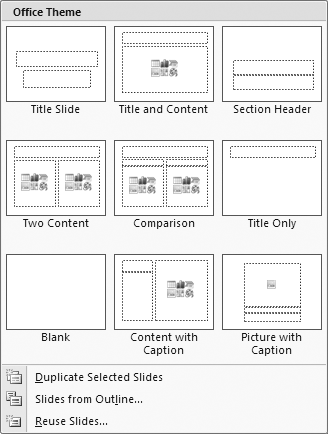
A menu similar to the one you see in Figure 1-18 appears.
Click to select the slide layout you want. Your choices include Title Slide, Title and Content, Section Header, Two Content, Comparison, Title Only, Blank, Content with Caption, and Picture with Caption.
PowerPoint adds your new slide after the current slide.
Moving Around Inside a Presentation
Moving around your presentation when you only have one slide isnât much of an issue. But once you start adding slides, youâll want a way to hop quickly from your first slide to your last. Youâll also want to jump to specific slides in the middle of your presentation; for example, to tweak a particular slideâs layout, to add content, or to delete it.
PowerPoint gives you several ways to flip through your presentation. This section acquaints you with the easiest and most useful options: using your workspace scroll bar, using the View pane on the left side of the screen, and using the Home ribbonâs Find function.
Navigating with the Scroll Bar
In PowerPoint, you see a scroll bar on the right side of your workspace similar to the one in Figure 1-19.
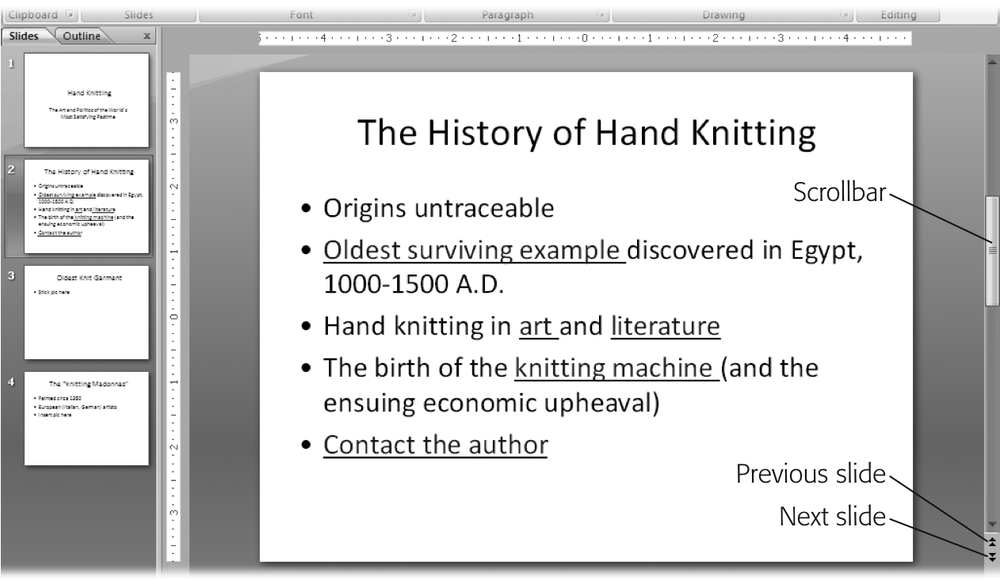
To scroll through your presentation, all you need to do is click the scroll bar and drag up (to scroll toward the beginning of your presentation) or down (to scroll toward the end). As you go, PowerPoint displays each slide in turn.
Tip
To flip forward (or back) through your presentation one slide at a time, click the Next Slide (or Previous Slide) arrow shown in Figure 1-19.
Navigating with the Slides and Outline Tabs
Slides and Outline tabs are not views (they both appear in Normal view) but are tabs that let you see slide thumbnails or an outline of your slideshow, respectively, in the Slides (Figure 1-20) or Outline (Figure 1-21) pane.
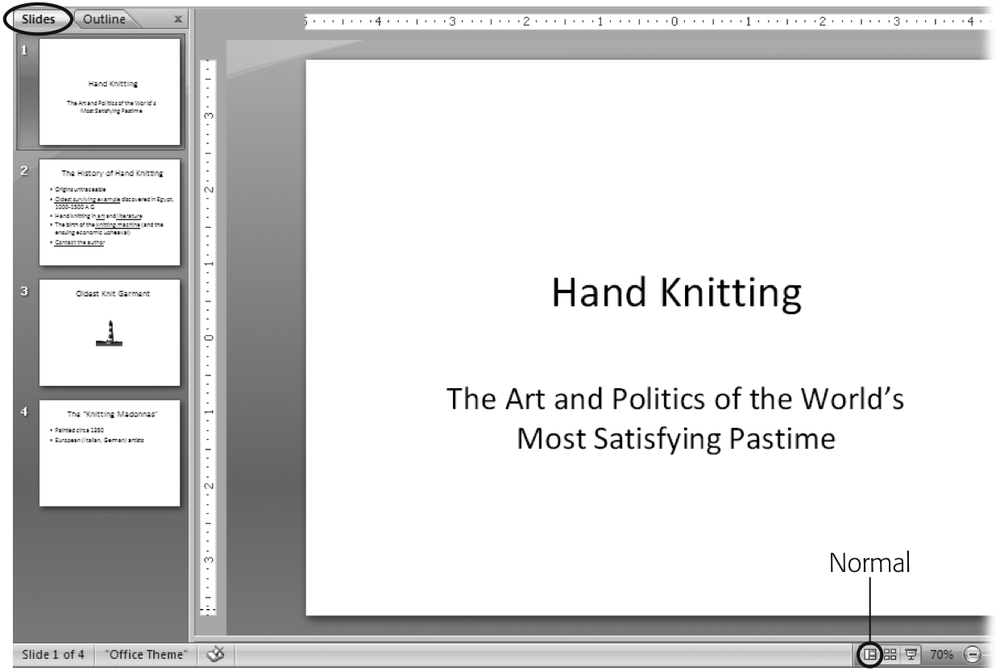
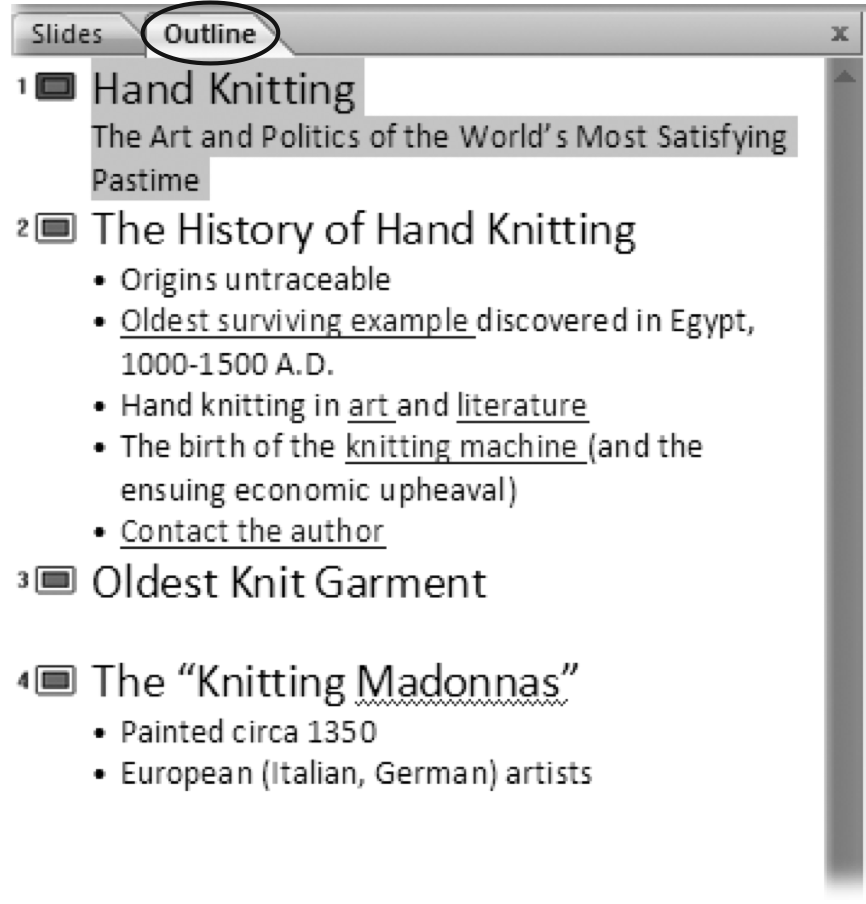
PowerPoint assumes you want to use Slides view until you tell it otherwise. To change views, click the Outline tab shown in Figure 1-21. To switch back to Slides view, click the Slides tab (Figure 1-20).
Note
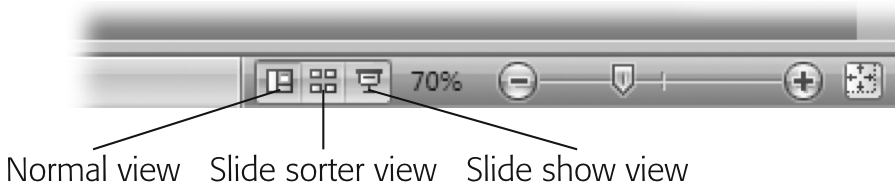
If you donât see the View pane at all, select View â Normal (or click the Normal icon shown in Figure 1-20) to display it.
Using Find
When youâve got a lot of slides and youâre looking for one containing a specific word or phrase, youâll want to bypass Views in favor of the Find function. Similar to the Find feature in other Windows programs, PowerPointâs Find function lets you search for specific words quickly and easily. Hereâs how to use it.
Press Ctrl+F.
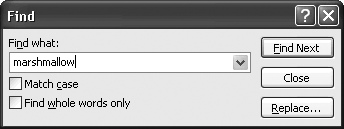
The Find dialog box appears (Figure 1-22).
Figure 1-22. Another way to display this Find box is to head to the Editing section of the Home tab and then click the Find button. Chapter 2 shows you how to use the more advanced Find functions, including Replace, which lets you automatically replace the text you find with different text.In the âFind whatâ box, type in the text you want to find (in Figure 1-22, the text is marshmallow).
If you like, you can click to turn on the âMatch caseâ checkbox (which tells PowerPoint to look for marshmallow but not Marshmallow, MARSHMALLOW, or MaRsHmAlLoW) or the âFind whole words onlyâ checkbox (which tells PowerPoint to look for marshmallow but not chocolatemarshmallowgraham). When you finish, click Find Next.
PowerPoint displays the slide containing your text. If it doesnât find a match, it shows this message: âPowerPoint has finished searching the presentation. The search item wasnât found.â
Adding Speaker Notes
Speaker notes are optional text notes you can type into PowerPoint. You can associate a separate speaker note with each slide of your presentation. Your audience canât see speaker notes, but you can. You may find speaker notes useful:
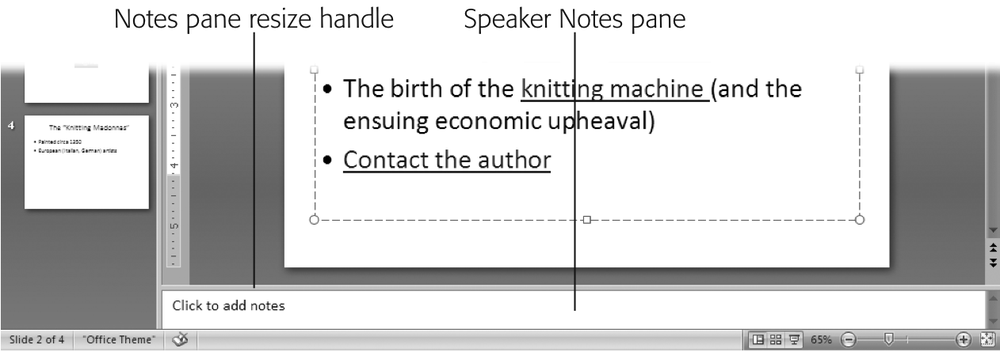
While youâre putting your presentation together. If you know you need to add a graphic to slide six and a couple of bullet points to slide 33, then you can jot down reminders to yourself in the Speaker Notes pane (Figure 1-23). Then, before you put your presentation to bed, you can view your speaker notes and double-check that youâve caught everything.
While youâre delivering your presentation. You can set up your presentation so that your audience sees your slideshow on the screen while you see your notes (on your own computer monitor). Or, if youâre the tactile type, you may prefer to print out your speaker notes and keep them with you during your presentation.
Note
Chapter 8 covers speaker notes in more detail.
To add speaker notes for a particular slide, click in the Speaker Notes pane (Figure 1-23) and type away.
Note
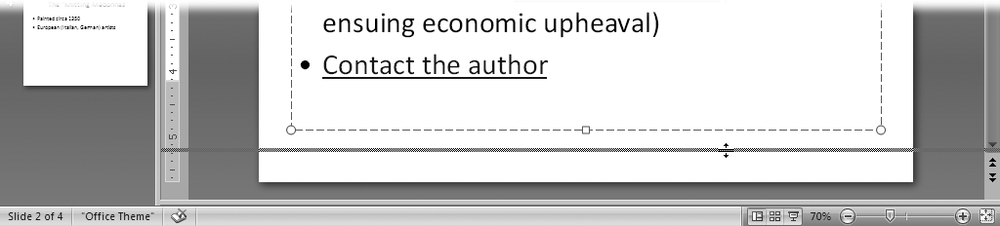
If you donât see the Speaker Notes pane, then click the Speaker Notes paneâs resize bar at the bottom of the workspace and drag upward, as shown in Figure 1-24.
Creating and Printing Handouts
You donât have to do anything special to create handouts in PowerPoint. Thatâs because handouts in PowerPoint are nothing more than slides printed one or more to a page.
Select Office button â Print â Print Preview.
The Print Preview ribbon appears, and PowerPointâs best guess at how you want your handouts printed appears in the workspace.
Note
You can change the way your handouts print on a presentation-by-presentation basis, as described in this section. But if you find yourself making the same changes time after time, then youâll want to customize PowerPointâs printing assumptions. Chapter 13 shows you how.
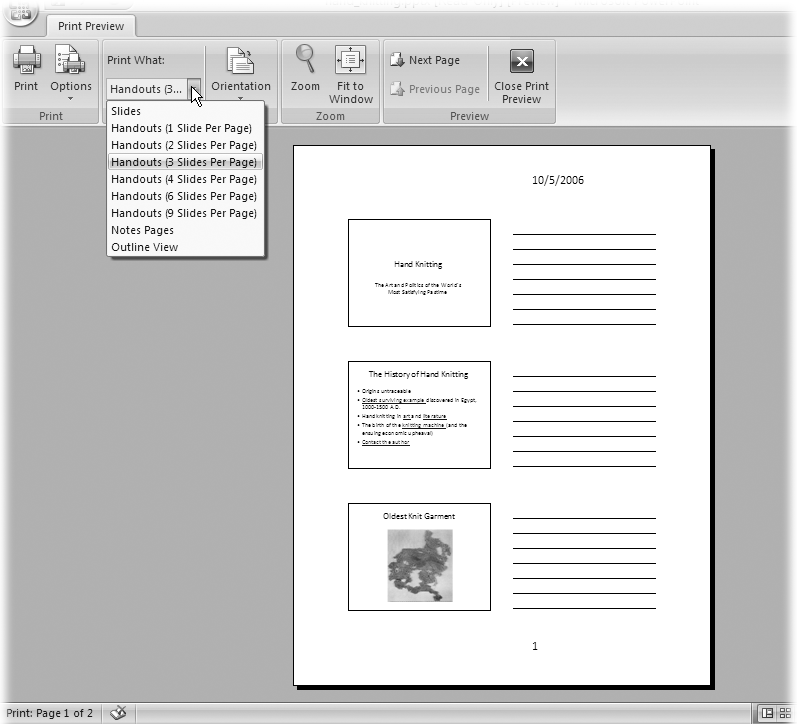
Click the âPrint whatâ drop-down box and then, from the menu that appears, choose how you want PowerPoint to print your handouts (Figure 1-25).
PowerPoint redisplays the handouts preview based on your selection.
Click Print.
The familiar Print dialog box appears.
Note
Chapter 8, which shows you how to print your presentation, walks you through the Print dialog box step by step.
Click OK.
PowerPoint prints your handouts.
Click Close Print Preview (Figure 1-25) to dismiss the Print Preview ribbon and return to your workspace.
Saving and Closing a Presentation
Lightning storms hit, coffee cups spill, and power cords work themselves out of walls (especially if you have a dog who likes to chase squeaky toys). After youâve created a new presentation file and spent some time working on it, youâll want to save it every so often so that when your system crashes, you can recover your work. And if youâre like most folks, youâll also want to save and close your presentation each time you wrap up a work session.
Saving and closing a PowerPoint presentation are both straightforward tasks. If youâre familiar with any other Windows programs, then youâll recognize most of the steps.
To save a newly created presentation:
Select Office button â Save.
The Save As dialog box appears (Figure 1-26).
Click the âSave inâ drop-down box to choose a directory to store your file in.
In the File name field, type a new name for your file.
Shoot for short, unique, and memorable; you donât want to have to spend a lot of time hunting for your file a week from now.
Click the âSave as Typeâ drop-down box to select a file format. (The box explains your options.) Most of the time, youâll choose the .pptx format.
Click Save.
The Save As dialog box disappears and PowerPoint saves the file in the format you specified.

Tip
You can set PowerPointâs AutoRecovery options so that the program saves your files automatically every few minutesâa boon for folks whose computers tend to crash frequently. Chapter 13 shows you how to customize PowerPointâs AutoRecovery options.
Tip
An easy way to save your presentation as a PowerPoint 2003 (or earlier) file is to select Office button â Save As â PowerPoint 97â2003 Format.
To close a presentation, simply select Office â Close. When you do, PowerPoint closes your presentation with no fanfare. If youâve never saved this particular file, however, a dialog box pops up asking you if you want to save the changes you made. Click Yes to display the Save As dialog box shown in Figure 1-26 and proceed as described above.
Running a Presentation
Chapter 7 shows you everything you need to know about setting up and running special types of presentations: for example, recording narration, hiding certain slides, and creating stand-alone presentations that run on kiosks.
But for running through a basic presentation on your very own computer, the process is simple:
Press F5 or click the Slideshow icon you see at the bottom of the screen, as shown in Figure 1-27.
PowerPoint replaces your workspace with a full-screen version of your slideshow, beginning with the currently selected slide.
Figure 1-27. Clicking the Slideshow icon at the bottom of your workspace is one of the easiest ways to run your presentation.Tip
Pressing Shift+F5 and clicking the Slideshow icon both tell PowerPoint to run your slideshow beginning at the current slide (not necessarily the first slide). To run your slideshow from the beginning, you have three choices: press F5, click the Slideshow icon, or select Slide Show â Start Slide Show â From Beginning.
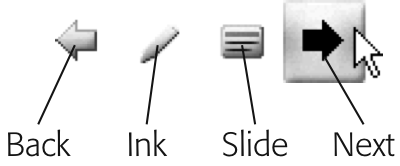
Click the forward and backward arrows that appear at the bottom of the screen (Figure 1-28) to step through your presentation. (Figure 1-28 describes how to end the presentation before the last slide.)
After the last slide, PowerPoint displays a black screen containing the words âEnd of slide show, click to exit.â
Figure 1-28. PowerPoint displays ghosted controls (Back, Ink, Slide, and Next) when you run a presentation. Mousing over these controls highlights them so you can see where to click. To end your slideshow immediately without having to flip through every last slide, you have two choices: either hit Esc or click the Slide icon and then, from the menu that appears, choose End Show.Click anywhere on the screen (or press the Space bar or Enter).
PowerPoint returns you to your workspace.
Get PowerPoint 2007: The Missing Manual now with the O’Reilly learning platform.
O’Reilly members experience books, live events, courses curated by job role, and more from O’Reilly and nearly 200 top publishers.

