Chapter 10. Mobilizing Games with PhoneGap
Going Mobile!
Nowadays it seems that everyone is making, planning to make, or thinking of making applications for mobile devices. Mobile is the next great (or maybe actually the current) place to make money by selling applications. The Apple iPhone is currently one of the most popular personal communication devices, and the iTunes Store gives budding application developers a place to show and sell the fruits of their labor. Apple separates their application-development platforms into three categories: Desktop (OS X), Browser (Safari), and iPhone/iPad/iPod Touch (iOS).
Most iOS applications, especially games, are written in Objective-C and compiled directly to the platform using the Xcode IDE. This is a large barrier to entry to develop native applications, as Objective-C is not widely used on platforms other than Apple devices. Up until early 2010, Objective-C/Xcode was the only viable development system for targeting iOS development.
In this chapter, we will “port” our HTML5 Canvas application to the iPhone using a technology called PhoneGap. PhoneGap allows an HTML application to run natively on an iPhone by packaging the application as a Safari Mobile “app.” This app can be run from the iPhone interface, and it will look and act like an app compiled in Objective-C. Applications packaged with PhoneGap can even be sold in the iTunes Store.
Note
Other third-party tools can be used to create iOS applications and games. For example, Unity (http://unity3d.com/) is a powerful game-development platform that can target iOS. In addition, there are tools such as Ansca’s Corona SDK (http://www.anscamobile.com/) that use scripting languages to harness the power of the platform.
Introducing PhoneGap
PhoneGap is an open source development tool created by Nitobi (http://www.nitobi.com) that acts as a software bridge between standards-based HTML development and several mobile platforms. Using PhoneGap, the HTML5 Canvas developer has access to the various hardware APIs for supported devices through an abstraction layer. This software interface allows the same code to be used to target features common among various devices—such as geolocation, touch screens, microphones, and other hardware capabilities—so that separate code does not need to be written for each device.
Warning
You will need an Intel-based Macintosh running Xcode to be able to compile a PhoneGap project. There currently is no development platform for Windows that will allow compiling Safari Mobile applications to the iOS platform with an Objective-C wrapper.
We won’t target too many specific iPhone features in this chapter. In the allotted space, we will cover the basics needed to take a simple application and get it up and running in the iPhone simulator, and then onto a physical device. We will then implement an accelerometer feature into our application.
Note
For further reading, Jonathan Stark’s Building iPhone Apps with HTML, CSS, and JavaScript (O’Reilly) covers PhoneGap and hardware feature API integration in detail. If you’d rather try this with Android, explore the similar Building Android Apps with HTML, CSS, and JavaScript (O’Reilly), also by Jonathan Stark, which applies PhoneGap to create applications for Android.
The Application
The application we are going to create is a simple BS Bingo game. BS Bingo was designed on paper well before mobile devices were available. This cynical game concept is based on the feeling (by some) that the typical business workplace has been overtaken with Dilbert- or Office Space-esque annoying corporate jargon and doublespeak. This doublespeak seems to have deeply rooted itself in the workplace over the last 20 years, mostly to the annoyance of software developers (such as ourselves).
In the pen-and-paper version of the game, each player brings a “bingo card” to a meeting where he expects to hear a lot of this corporate doublespeak. The bingo card is a 5×5 grid, and each of the 25 squares is filled with one of the annoying words or jargon phrases. During the meeting, each player marks off squares as the words or phrases are said aloud by the unsuspecting (and not playing) members of the meeting. When a player has a full column of his card marked off, he is supposed to jump up from the meeting table and yell “BS!”
Whether this game was ever widely played (or even played at all) is a debatable urban legend, but the simple concept of clicking squares to highlight them makes for a useful piece of code that we can build easily and then port to the iPhone. We are not even going to build the entire game here; we will leave extending it into a full application (possibly adding multiplayer, which is discussed in Chapter 11) for you, the reader.
The Code
Example 10-1 gives the code for our game. We’ll discuss the various functions in the next section before we move on to installing, modifying, and testing it in Xcode using PhoneGap. This version of the game will work fine on a Safari desktop browser. We will highlight the modifications necessary to port it to the iPhone in the next section.
<!doctype html>
 <html lang="en">
 <head>
    <meta charset="UTF-8">

 <title>BS Bingo</title>
 <script src="modernizr-1.6.min.js"></script>
 <script src="TextButton.js"></script>
 <script src="ConsoleLog.js"></script>
 <script type="text/javascript">

 window.addEventListener('load', eventWindowLoaded, false);
 function eventWindowLoaded() {

    canvasApp();

 }

 function canvasSupport () {
     return Modernizr.canvas;
 }

 function canvasApp(){

    if (!canvasSupport()) {
           return;
      }else{
       theCanvas = document.getElementById("canvas");
        context = theCanvas.getContext("2d");
    }

    var bingoCard = [];
    var buttons = [];

    var standardJargonList = [];
    var tempButton = {};
    var clickSound;

    function initLists(){

       standardJargonList=[
        "Actionable", "Assessment" ,"Bandwidth", "Benchmark",
        "Best\nPractices", "Bottle neck" , "Change\nManagement",  "Coach",
        "Competitive\nAdvantage", "Constraints", "Core\nCompetencies",
        "Core values", "Critical\nthinking", "Cutting\nedge",
        "Dashboard", "Deliverables", "Enterprise","Gatekeeper",
        "Individual\nContributor", "Leadership", "Matrix\norganisation",
        "Metrics", "Milestones", "Momentum", "Moving target",
        "Initiative","Partnership", "Process", "Process\nmanagement",
        "Re-engineer", "Requirements", "Rightsize", "Seat at\nthe table",
        "Tentpole", " Silo", "Standards", "State of the art",
        "Supply chain", "Synergy","Teamwork", "Thought\nleader",
        "Touchpoints", "Value\nadded", "Drink the\nKool Aid",
        "Baked In", "Champion", "Circle Back", "Dialogue", "Emerge",
        "Enhance", "Evolve", "Execute", "Facilitate" ,"Incentivise",
        "Leverage", "Partner", "Spearhead", "Strategize","Synergise",
        "Throw\na\nCurve", "Touch Base", "Outside\nthe\nBox",
        "Opportunity", "Open Door\nPolicy","Win-Win\n(Anything)",
        "Risk\n(Anything)","Proactive","Reactive","Buy-In",
        "Paradigm\nShift","Task-Oriented","Empower","Team\nPlayer",
        "Enterprise\nWide","Globalization","Localization",
        "Mission-critical", "Magic\nQuadrant","Agile\n(Anything)",
        "Waterfall","Outsourcing","Off-Shoring","Blue Sky",
        "20/20 \nindsight","Low\nHanging\nFruit","10,000\nFoot View",
        "Take\nOwnership","Ramp up", "Out of\nthe Box", "24x7",
        "Fast Track", "Out of\nthe Loop", "In the\nLoop","Touch Base",
        "Mindset", "Game Plan", "Bring to \nthe Table", "Drill Down",
        "Elevator\nSpeech", "Level the\nPlaying field",
        "Ping\n(Someone)","Pushback","Retool", "Take Away",
        "Life-Time\nValue", "Thought\nLeadership", "Up Sell"
         ];

    }

    function initButtons(){
       buttons = [
          [

          new TextButton(0,0,"Button
              0,0",85,50,gr,"#000000","#ffff00","#000000"),

          new TextButton(92,0,"Button
              0,1",85,50,gr,"#000000","#ffff00","#000000"),

          new TextButton(184,0,"Button
              0,2",85,50,gr,"#000000","#ffff00","#000000"),

          new TextButton(276,0,"Button
              0,3",85,50,gr,"#000000","#ffff00","#000000"),

          new TextButton(368,0,"Button
              0,4",85,50,gr,"#000000","#ffff00","#000000")

         ],

         [

          new TextButton(0,57,"Button
              1,0",85,50,gr,"#000000","#ffff00","#000000"),

          new TextButton(92,57,"Button
              1,1",85,50,gr,"#000000","#ffff00","#000000"),

          new TextButton(184,57,"Button
              1,2",85,50,gr,"#000000","#ffff00","#000000"),

          new TextButton(276,57,"Button
              1,3",85,50,gr,"#000000","#ffff00","#000000"),

          new TextButton(368,57,"Button
              1,4",85,50,gr,"#000000","#ffff00","#000000")

         ],

         [

          new TextButton(0,114,"Button
              2,0",85,50,gr,"#000000","#ffff00","#000000"),

          new TextButton(92,114,"Button
              2,1",85,50,gr,"#000000","#ffff00","#000000"),

          new TextButton(184,114,"Button
              2,2",85,50,gr,"#000000","#ffff00","#000000"),

          new TextButton(276,114,"Button
              2,3",85,50,gr,"#000000","#ffff00","#000000"),

          new TextButton(368,114,"Button
              2,4",85,50,gr,"#000000","#ffff00","#000000")

         ],

         [

          new TextButton(0,171,"Button
              3,0",85,50,gr,"#000000","#ffff00","#000000"),

          new TextButton(92,171,"Button
              3,1",85,50,gr,"#000000","#ffff00","#000000"),

          new TextButton(184,171,"Button
              3,2",85,50,gr,"#000000","#ffff00","#000000"),

          new TextButton(276,171,"Button
              3,3",85,50,gr,"#000000","#ffff00","#000000"),

          new TextButton(368,171,"Button
              3,4",85,50,gr,"#000000","#ffff00","#000000")

         ],

         [

          new TextButton(0,228,"Button
              4,0",85,50,gr,"#000000","#ffff00","#000000"),

          new TextButton(92,228,"Button
              4,1",85,50,gr,"#000000","#ffff00","#000000"),

          new TextButton(184,228,"Button
              4,2",85,50,gr,"#000000","#ffff00","#000000"),

          new TextButton(276,228,"Button
              4,3",85,50,gr,"#000000","#ffff00","#000000"),

          new TextButton(368,228,"Button
              4,4",85,50,gr,"#000000","#ffff00","#000000")

         ]
       ];
    }

    function initSounds(){
       clickSound = document.getElementById('clicksound');
    }

    function chooseButtonsForCard(){
       //copy jargon into temp array
       var tempArray = [];
       for (var arrayctr=0;arrayctr<standardJargonList.length;arrayctr++){
          tempArray.push(standardJargonList[arrayctr]);
       }

       for (var ctr1=0;ctr1<buttons.length;ctr1++){

          for (var ctr2=0; ctr2<buttons[ctr1].length;ctr2++){
             var randInt = Math.floor(Math.random()*tempArray.length)
             buttons[ctr1][ctr2].text = tempArray[randInt];
             tempArray.splice(randInt,1)
          }
       }

    }


    function drawScreen() {
       //ConsoleLog.log("standardAcronymList="+standardAcronymList.length);
       //ConsoleLog.log("standardJargonList="+standardJargonList.length);
       for (var ctr1=0;ctr1<buttons.length;ctr1++){
          ConsoleLog.log("ctr1="+ctr1)
          for (var ctr2=0; ctr2<buttons[ctr1].length;ctr2++){
             ConsoleLog.log("ctr2="+ctr2)
             buttons[ctr1][ctr2].draw(context);
          }
       }

    }

    function onMouseClick(e) {

       //select case through states and then the locations of
       //buttons in those states
       mouseX = e.clientX-theCanvas.offsetLeft;
       mouseY = e.clientY-theCanvas.offsetTop;
       ConsoleLog.log("click " + mouseX + "," + mouseY);
       //find the button clicked

       var col = Math.floor(mouseX/92);
       var row = Math.floor(mouseY/57);

       console.log("row",row,"col", col);
       tempButton = buttons[row][col];
       clickSound.play();
       tempButton.pressDown();
       tempButton.draw(context);

    }

    function onMouseMove(e) {
       mouseX = e.clientX-theCanvas.offsetLeft;
       mouseY = e.clientY-theCanvas.offsetTop;

       //ConsoleLog.log("move: " + mouseX + "," + mouseY);
    }

       //**** start application
   var gr = context.createLinearGradient(0, 0, 85, 50);

    // Add the color stops.
    gr.addColorStop(0,'#ffffff');
         gr.addColorStop(.5,'#bbbbbb');
    gr.addColorStop(1,'#777777');

    theCanvas.addEventListener("mousemove", onMouseMove, false);
    theCanvas.addEventListener("click", onMouseClick, false);

    initSounds();
    initButtons();
    initLists();
    chooseButtonsForCard();
    drawScreen();

 }

 </script>
 </head>
 <body>
 <div style="position: absolute; top: 0px; left: 0px;">
 <canvas id="canvas" width="570" height="418">
  Your browser does not support HTML5 Canvas.
 </canvas>
 <audio id ="clicksound"  preload="auto">
    <source src="click.mp3" type="audio/mpeg" />

 Your browser does not support the audio element.
 </audio>
 </div>
 </body>
 </html>
Name this file BSBingo.html and save it in a folder. If you are going to follow along and create the example project, you will also want to create a folder to hold the project files.
Examining the Code for BSBingo.html
Note
When designing an application for the iPhone using PhoneGap, we
are actually targeting the Safari Mobile browser. This means we can
make concessions rather than
having to target all available HTML5-compatible devices. You will notice this
especially when we discuss <audio> tag usage.
The TextButton.js file
Our BS Bingo game will be played on a grid of 25 squares. We created a class (an object prototype, actually) called TextButton.js to help us create buttons with the text, as well as a “press” state we can use to show that the button has been clicked. You will want to save this file in the project folder along with the BSBingo.html file. Here is the code for this file:
function TextButton(x,y,text, width, height, backColor, strokeColor,
 overColor, textColor){
    this.x = x;
    this.y = y;
    this.text = text;
    this.width = width;
    this.height = height;
    this.backColor = backColor;
    this.strokeColor = strokeColor;
    this.overColor = overColor;
    this.textColor = textColor;
    this.press = false;
}

TextButton.prototype.pressDown=function() {
    if (this.press==true){
        this.press = false;
    }else{
        this.press = true;
    }
}

TextButton.prototype.draw = function(context){

    context.save();
    context.setTransform(1,0,0,1,0,0); // reset to identity
    context.translate(this.x, this.y);

    context.shadowOffsetX = 3;
    context.shadowOffsetY = 3;
    context.shadowBlur = 3;
    context.shadowColor = "#222222";

    context.lineWidth = 4;
    context.lineJoin = 'round';
    context.strokeStyle = this.strokeColor;

    if (this.press==true){
        context.fillStyle = this.overColor;
    }else{
       context.fillStyle = this.backColor;
    }

    context.strokeRect(0, 0, this.width,this.height);
    context.fillRect(0, 0, this.width,this.height);

    //text
    context.shadowOffsetX = 1;
    context.shadowOffsetY = 1;
    context.shadowBlur = 1;
    context.shadowColor = "#ffffff";
    context.font = "14px serif"
    context.fillStyle = this.textColor;
    context.textAlign = "center";
    context.textBaseline = "middle";
    var metrics = context.measureText(this.text)
    var textWidth = metrics.width;
    var xPosition = this.width/2;
    var yPosition = (this.height/2);

    var splitText = this.text.split('\n');
    var verticalSpacing = 14;
    console.log("text=" + this.text)
    console.log("text split length=" + splitText.length)

    for (var ctr1=0; ctr1<splitText.length;ctr1++) {
        context.fillText  ( splitText[ctr1],  xPosition,
        yPosition+ (ctr1*verticalSpacing));
    }

    context.restore();
}
This object prototype contains functions for creating, drawing, and clicking a gray square button with black text on it. When clicked, the button will be drawn with a yellow background. We have covered all these drawing functions earlier in this book, so they will look familiar to you if you have read those chapters. If you have not, it’s especially a good idea to read Chapter 2, which covers drawing and shading objects drawn with paths.
Let’s now take a quick look at the functions we have created in BSBingo.html.
The initLists() function
The first game-related function you will encounter is initLists(). For our simple game
implementation, we have created a single list of words based on some
common business jargon. The standardJargonList application scope
variable will contain a single-dimension array of words that will be
placed randomly on the player’s bingo card. We can add more types of
lists if we would like to target other types of jargon-speak, such as
pure IT process-speak, marketing-speak, or even sports- or
geek-speak.
The initButtons() function
This function creates a grid of 25 TextButton instances, 85 pixels in width and
25 in height. These are stored in the application scope buttons two-dimensional array so they can be
accessed via the [row][column]
syntax.
The initSounds() function
The initSounds() function
needs to initialize only a single sound referenced in an HTML5
<audio> tag. Since we are
targeting the iOS platform, we need to provide only a single .mp3-formatted sound. We do not need
.ogg or .wav because we are not targeting any other
browsers. Here is the HTML5 <audio> tag:
<audio id="clicksound"  preload="auto">
    <source src="click.mp3" type="audio/mpeg" />
 Your browser does not support the audio element.
 </audio>
The chooseButtonsForCard() function
This function creates a local array called tempArray and fills it with the contents of
the standardJargonList. Next, it
randomly chooses an element from the tempArray for each of the 25 row/column
combinations on the bingo card. As it selects a word, it splices it
from the tempArray so it cannot be
selected again, leaving the card with no duplicates.
The drawScreen() function
This function loops through the buttons two-dimensional array and draws the
initial 25 buttons with text onto the canvas.
The Application Code
Once all the functions and the TextButton object prototype are created, the
actual application code is very simple. Because this is a completely
event-based application, we don’t need a main loop. We also have not put
in any other states or buttons, such as a title screen or a reset
button. This makes the app less user-friendly, but it is fine for this
simple example. It also makes the application code very
simple:
 //**** start application
    var gr = context.createLinearGradient(0, 0, 100, 100);

    // Add the color stops.
    gr.addColorStop(0,'#ffffff');
    gr.addColorStop(.5,'#bbbbbb');
    gr.addColorStop(1,'#777777');

    theCanvas.addEventListener("mousemove", onMouseMove, false);
    theCanvas.addEventListener("click", onMouseClick, false);
    initSounds();
    initButtons();
    initLists();
    chooseButtonsForCard();
    drawScreen();
First, we create a shared linear gradient that can be used by all
the TextButton instances. Next, we
add the mouse event listeners for click and move. Finally, we run
through our functions to set up the card, and then we simply wait for
the user to click a button. That’s all there is to it. We haven’t even
added a way to announce that the player has won. Extending this into a
full-fledged application would be very simple, so we leave this task up
to the reader if you have the desire to do so.
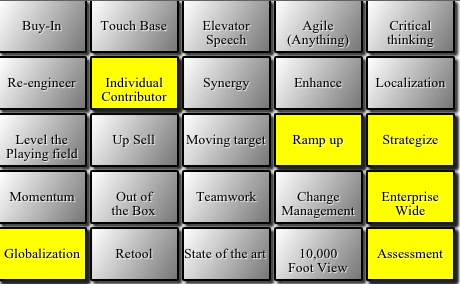
Figure 10-1 shows the screen for the finished application.
Next, we will look at how to use PhoneGap to turn this simple game into a native iOS application.
Creating the iOS Application with PhoneGap
You will need to install and set up two tools to get an iOS application up and running on your iOS device simulator: Xcode, a free application development IDE from Apple, and PhoneGap. Let’s start with Xcode.
Installing Xcode
Xcode actually comes packaged on the installable operating system DVD for Snow Leopard, but this version will not be as up-to-date as the version available on the Apple developer website.
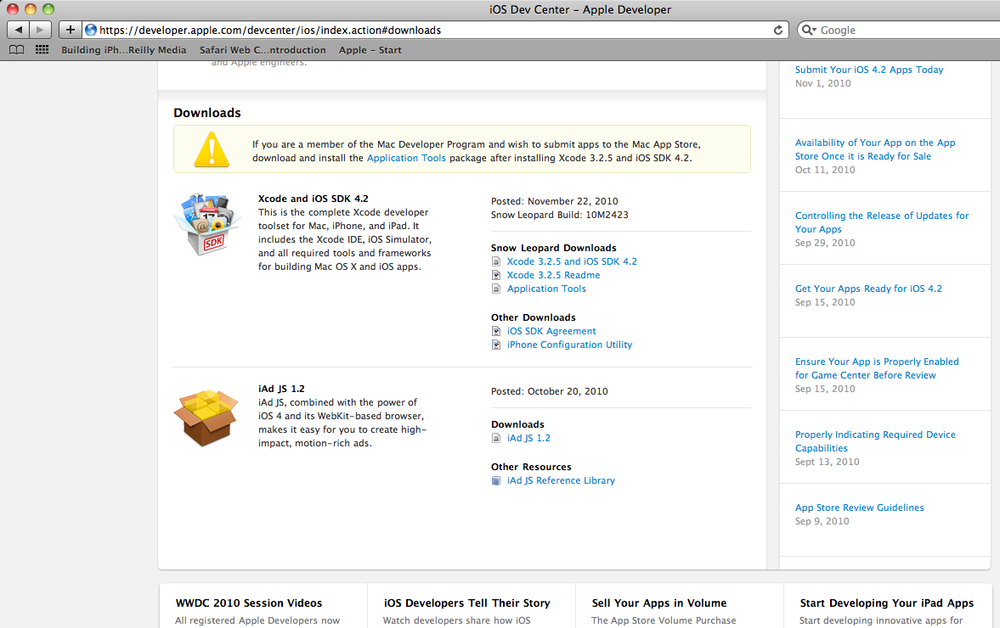
First, you will want to visit the iOS Developer Center: http://developer.apple.com/devcenter/ios/index.action. Once there, you can create a free user account, which you will need to download Xcode and the latest iOS developer SDK. You will also need to create a paid account if you would like to test or deploy on a physical device and/or sell your application in the iTunes Store. You do not need a paid account to build and test your application in the SDK and the included iOS device simulators.
Download and install the latest version of Xcode and the iOS SDK. This is a large download (3.5 GB at the time of this writing). See Figure 10-2.
Once these are downloaded (most likely to your Downloads folder), start the Xcode installer. The file will be named similar to xcode_3.2.3_and_ios_sdk_4.0.2.dmg. Run the package installer to set up Xcode and the development kit on your computer.
Note
Once installed (using the default location), Xcode can be found in the Developer folder on your main storage drive.
Installing PhoneGap
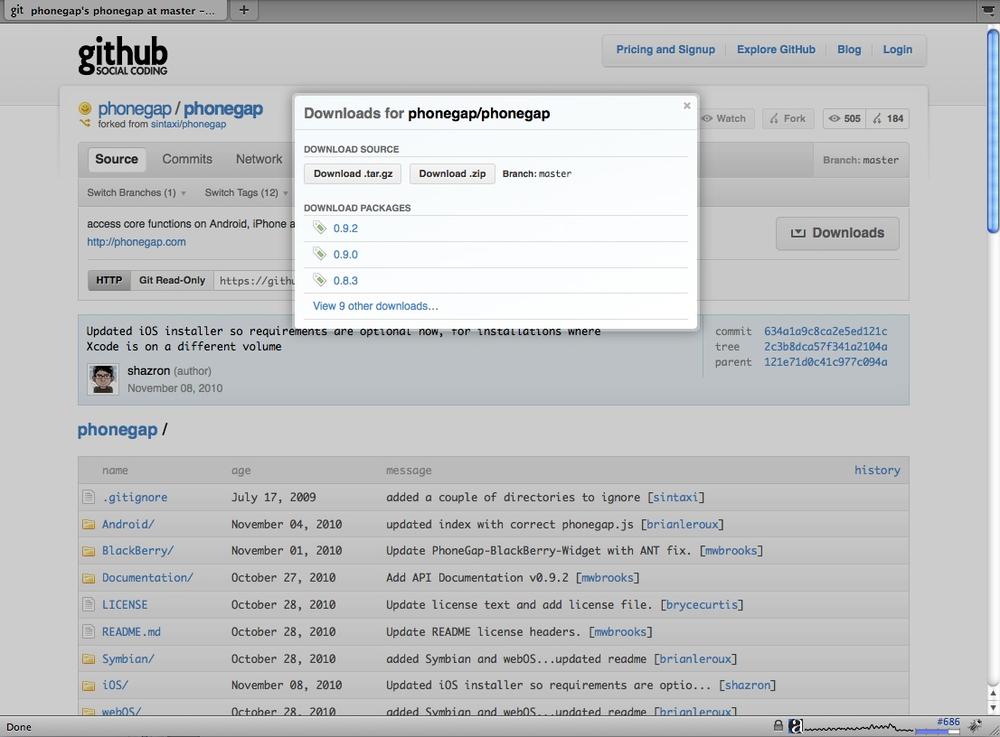
Download PhoneGap from https://github.com/phonegap/phonegap, choosing the ZIP file option, as shown in Figure 10-3.
The file will most likely be saved into your Mac Downloads folder. Unpack this ZIP file in a safe location, such as the desktop.
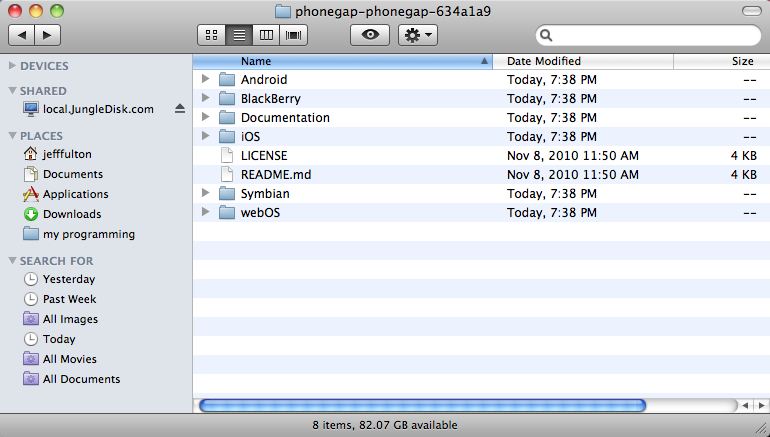
Inside the ZIP, you will find a series of folders for various devices. We are interested in the iOS folder. Figure 10-4 illustrates this folder structure.
In the iOS folder there will be an installer with a name similar to PhoneGapLibInstaller.pkg. Open this to start the install process.
After the install, you will be given the latest install notes. It is important to read them carefully as they give great information, including the latest tips for getting started with PhoneGap. For example, after this installation, the notes read as follows:
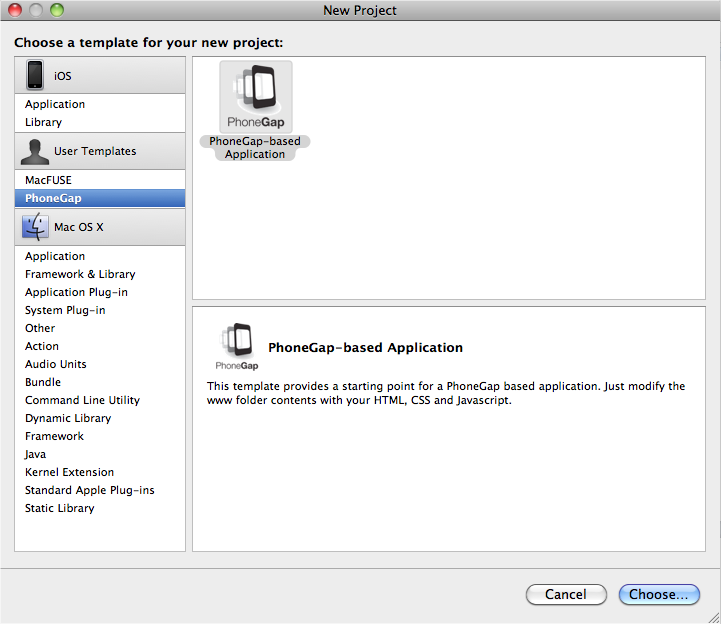
To get started creating PhoneGap projects, launch Xcode, then under the File menu, select “New Project…”.
Navigate to the section “User Templates”, select PhoneGap, then in the right pane, select “PhoneGap-based Application”.
Select the “Choose…” button, name your project and choose the location where you want the new project to be.
That’s it! Modify the contents of the “www” directory to add your HTML, CSS and JavaScript.
iPad:
Go to your project folder and launch the “[projectname]-iPad” Xcode project. You will need the 3.2 iPhone OS SDK.
In the next section, we will follow these directions closely to get BS Bingo into a PhoneGap Xcode project.
Creating the BS Bingo PhoneGap Project in Xcode
To begin, launch Xcode and create a new PhoneGap project. See Figure 10-5 for an example of the New Project screen.
Select the PhoneGap-based application and click the Choose button.
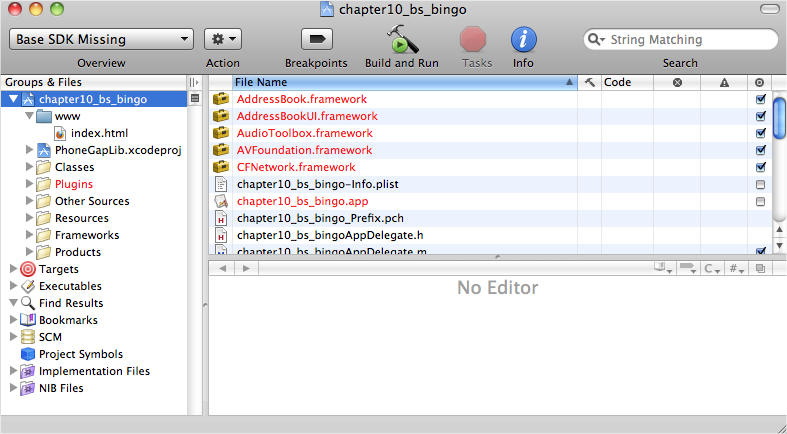
You will next be asked to save the project in a location and give it a name. We will use the name chapter10_bs_bingo.
You will be presented with a screen that resembles Figure 10-6.
On the lefthand side, you will find a folder called “www”. This is the most important folder because it is where we will place all of the files for our game. Before we do that, we need to make sure that the SDK is set to the correct version. In the top left, you might see a drop-down with the words “Base SDK Missing” (as shown in Figure 10-6). This means that we will not be able to build and compile our game until we choose an SDK.
The Base SDK Missing message simply indicates that the default SDK is not the current version installed. In the [Project] drop-down menu, you will find a menu item called Edit Project Settings. Click this and you will see a screen similar to Figure 10-7.
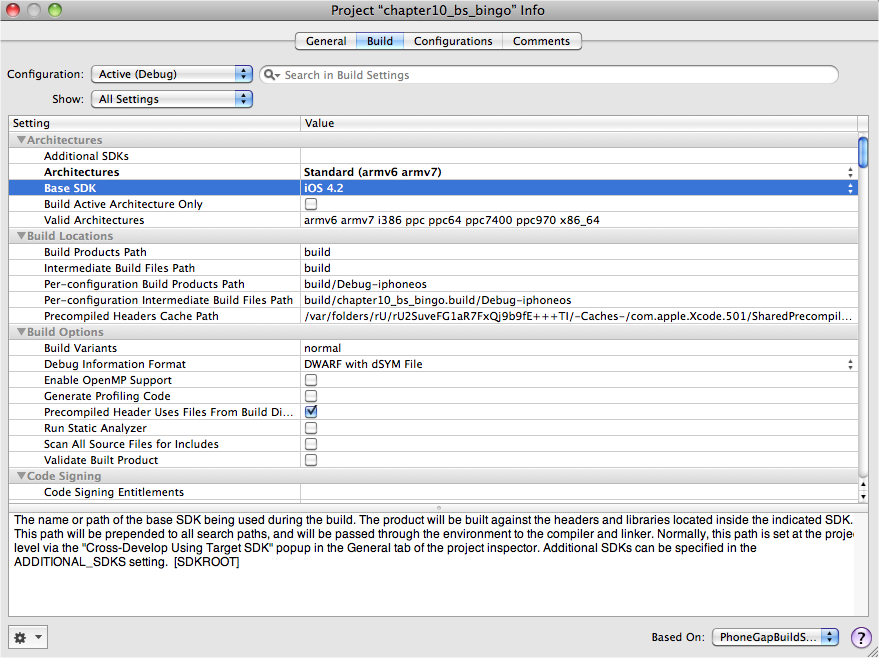
Make sure that you select an SDK that is present on your machine (4.2 is the latest as of this writing).
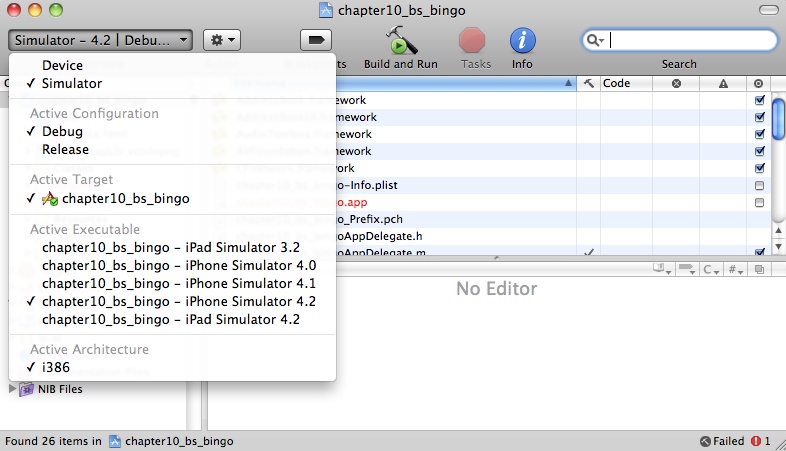
Close this window and click on the Base SDK Missing drop-down, and be sure to select the Simulator option rather than the Device option. See Figure 10-8 for an example of this screen.
Testing the New Blank Application in the Simulator
We are now ready to build our first application and see it in the simulator. We have not added any of our own code yet (though we will in the next section), so we will be testing the contents of the index.html file in the project’s www folder. Simply click the “Build and Run” button at the top of the IDE. If everything is set up properly, the simulator will come up with a blank screen, as shown in Figure 10-9.
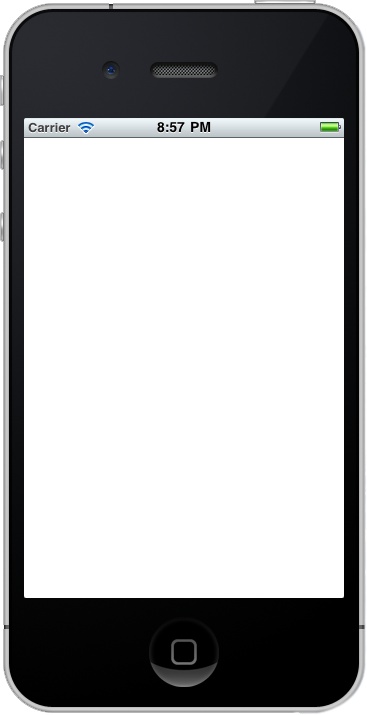
For a single second you will see the PhoneGap banner show up on the screen. We will customize this banner for our own game shortly.
Integrating BS Bingo into the Project
We are now going to copy code from the BSBingo.html file we created earlier into the index.html file in our project.
First we will copy our JavaScript include files and add them under the phonegap.js script include. We will not need the modernizer.js file, as we will assume the iOS platform can use HTML5 Canvas:
<script type="text/javascript" charset="utf-8" src="phonegap.js"></script>
<script src="TextButton.js"></script>
<script src="ConsoleLog.js"></script>
The phonegap.js file should already be included in the www folder, along with index.html. It is part of the project template and is needed for all PhoneGap iOS applications.
Next, we will need to add the call to start our application into
the deviceReady() function:
/*When this function is called, PhoneGap has been initialized and is ready to roll*/
   function onDeviceReady()
   {
      // do your thing!
      canvasApp();
   }
We can now replace the rest of the script code in the file with our code.
Warning
At this step, don’t replace from the <body> tag down to the end of the
<html>. Just add the game
code inside the <script>
tags. You can use the existing <script></script> tags; if you
do, be careful not to copy them from BSBingo.html.
Make sure that the first few lines look like this because we are removing the check for Canvas support:
function canvasApp(){

   theCanvas = document.getElementById("canvas");
   context = theCanvas.getContext("2d");
   var bingoCard = [];

   var buttons = [];

   var standardJargonList = [];

   var tempButton = {};

   var clickSound;
Notice that we have removed this set of code:
if (!canvasSupport()) {
   return;

}else{

    theCanvas = document.getElementById("canvas");

    context = theCanvas.getContext("2d");

}
We have replaced it with just the following since we no longer need to check whether the device can use the canvas (we must assume it can):
theCanvas = document.getElementById("canvas");
context = theCanvas.getContext("2d");
We have also deleted the canvasSupport() function, as it is not needed.
We will next copy the rest of the code, including our HTML, and replace
everything in the index.html file.
We need to make sure that the current opening <body> tag remains in index.html. It should look like this:
</head>
<body onload="onBodyLoad()">
The next step is to replace the rest of the file with HTML code from BSBingo.html:
<div style="position: absolute; top: 0px; left: 0px;">
<canvas id="canvas" width="570" height="418">

 Your browser does not support HTML5 Canvas.

</canvas>

<audio id ="clicksound"  preload="auto">
<source src="click.mp3" type="audio/mpeg" />

Your browser does not support the audio element.
</audio>
</div>
</body>
</html>
We now have enough code to do a preliminary test of our game in the simulator.
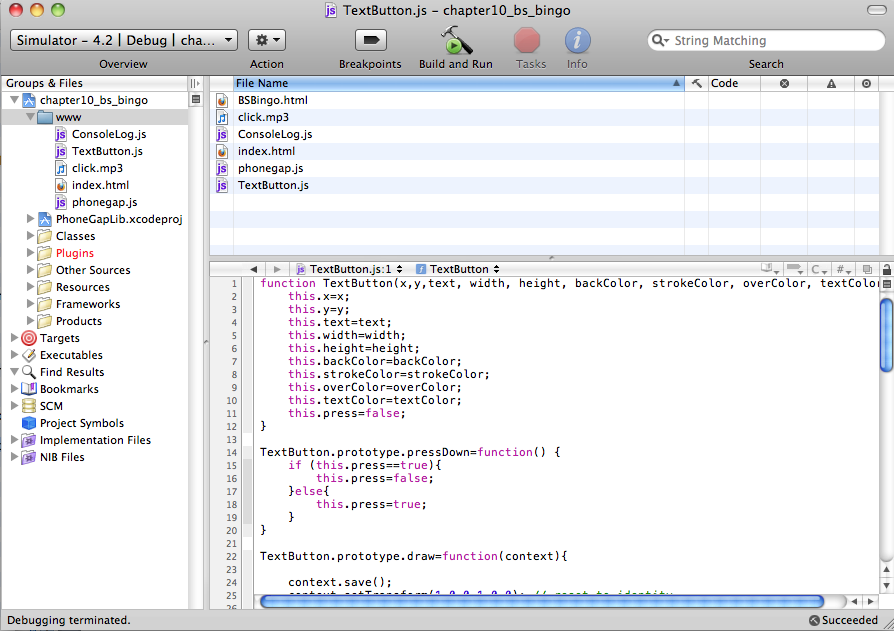
We will first need to move our files into the project folder. Take TextButton.js, ConsoleLog.js, and click.mp3 and move them to the www folder on the disk. The project in Xcode will now reflect the new files, as seen in Figure 10-10.
Note
You will see that we have added the BSBingo.html file to the www folder. This is not necessary, but it makes it easier to edit and copy code into the index.html file.
Setting the Orientation
It is important to note that Safari Mobile and iOS applications render the screen in different ways. A Safari Mobile application can be set to automatically scale to fit in the iOS device’s window, while a pure iOS application needs to be coded to fit the size of the target device. If an application targeted to the iOS platform is taller or wider than the device, the application will automatically be put into “scroll” mode.
We set the width of our application to be 570 and the height to be 418. The height will fit fine in either Landscape or Portrait orientation, but the width will only fit in Landscape (without scrolling). For this reason, we will want our application to run in Landscape mode only.
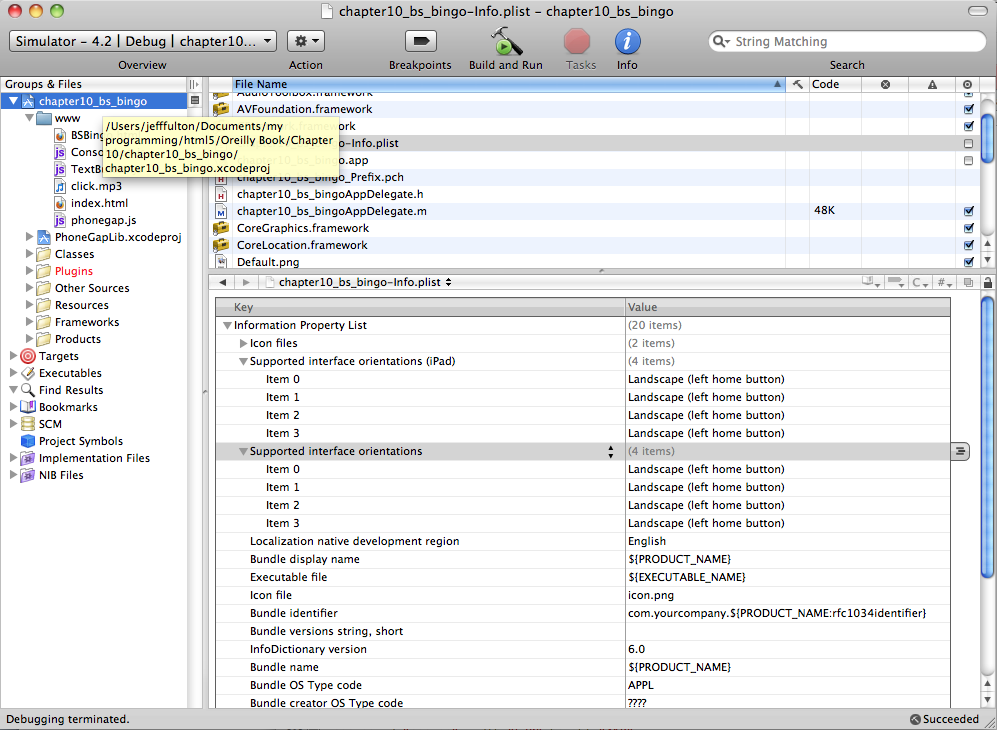
To set the application to default to Landscape and not allow Portrait, we must make some changes to a file called chapter10_bs_bingo-info.plist, which is in the root folder (the parent of the www folder) for our project.
Open this file and you will see settings called “Supported interface orientations” and “Supported interface orientations (iPad)”. You will want to be sure to have four entries in each that allow only the “Landscape (left home button)” value. See Figure 10-11 for an example.
Note
The iPad entries are only necessary if you are targeting that platform. There is a separate PhoneGap project created by the template for iPad-targeted projects.
Next, we will customize the banner and icon for our application.
Changing the Banner and Icon
We have the option of changing the startup banner and “desktop” icon for our application to customized graphics.
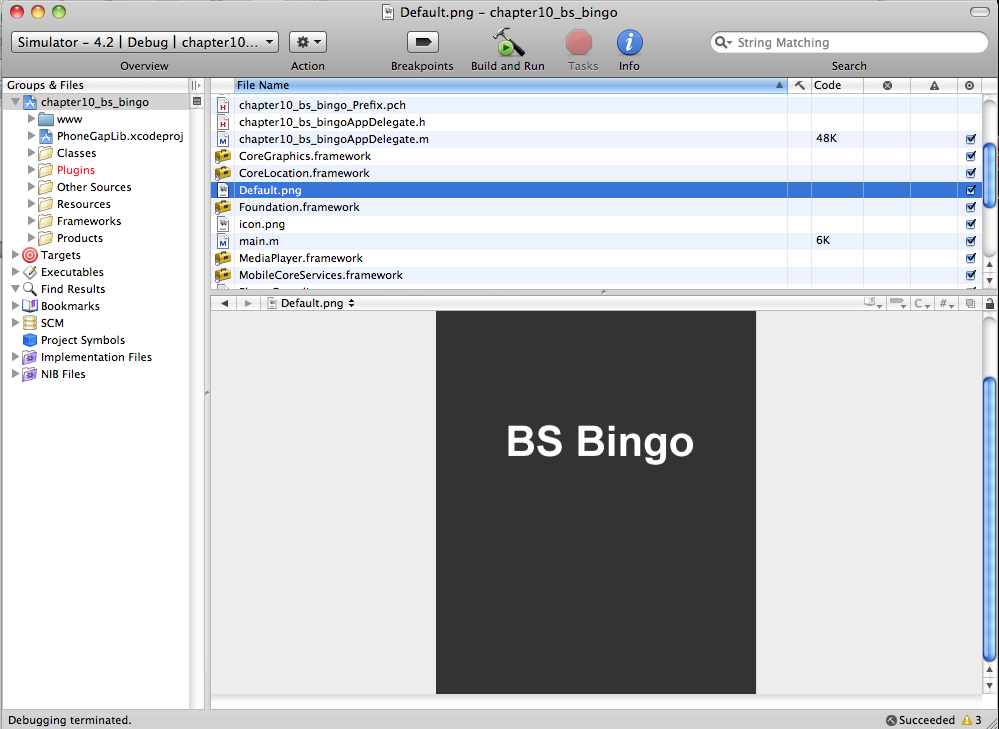
In the root folder of our project, we will customize two image files. default.png is the banner image that shows up when the application starts. icon.png is the “desktop” icon that remains on the iOS device just like any other installed application.
Our icon is a 57×75 image called bingo_icon.png (see Figure 10-12).

The startup banner is a 320×460 image, which we will name startup.png. It will look like Figure 10-13.

Now we need to replace the existing default.png and icon.png files with these new images.
Once you change these files in the project, you should be able to explore the root project folder in Xcode and see the new images. Figure 10-14 illustrates the root folder for our project.
Note
Included in the source for this chapter is the full Xcode project with all of these changes ready to be made and compiled.
We are ready to test on the iPhone simulator. If you have any problems or questions up to this point, you can always examine the source files on this book’s download site.
Testing on the Simulator
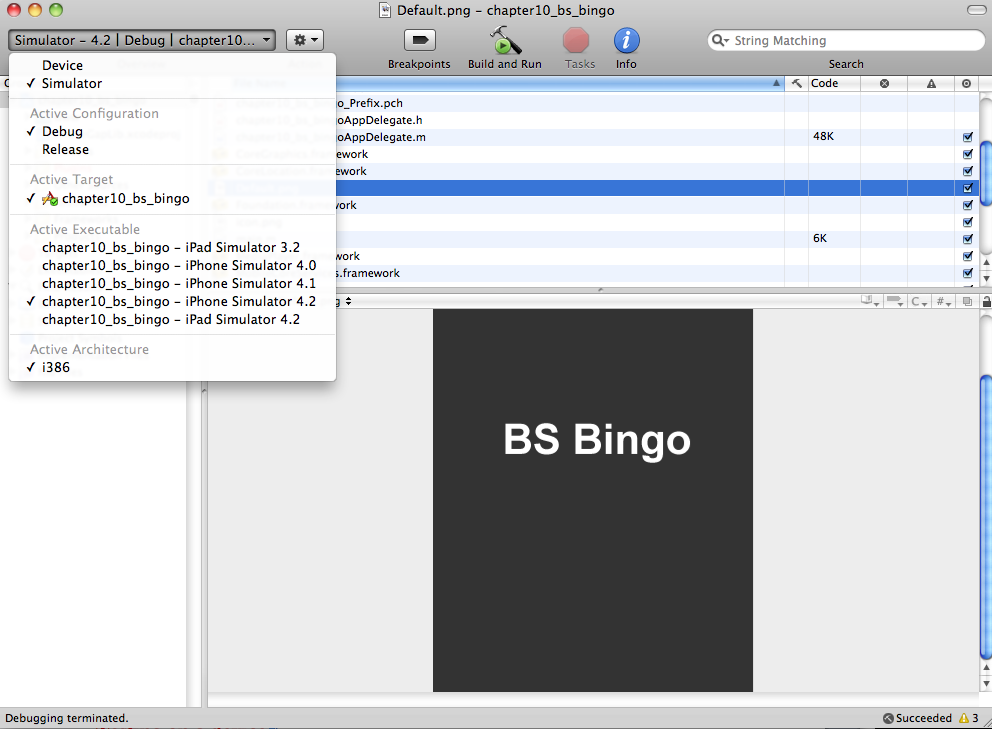
Our project is set to target the iPhone (not iPad). Before we test, we must make sure that we target that platform in the simulator. To do this, choose the iPhone simulator from the SDK drop-down menu at the top left of the Xcode screen, as shown in Figure 10-15.
Note
The PhoneGap template has created a second project file, called chapter10_bs_bingo-iPad.xcodeproj, to target the iPad.
Once this is set, click on the “Build and Run” icon at the top center of this screen.
You should see the simulator fire up, show the custom banner image oriented to Landscape mode, and present the game, as shown in Figure 10-16.
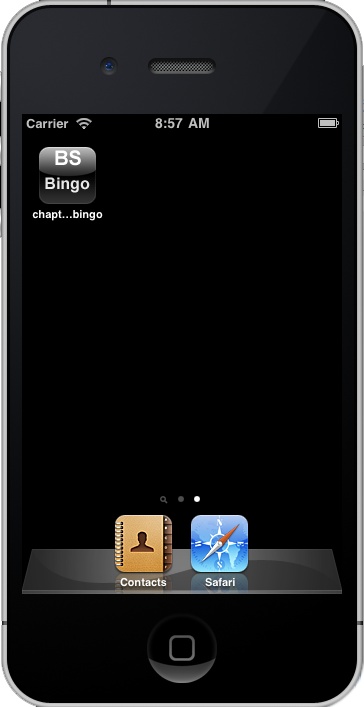
If you click on the buttons, the simulator will even play the click.mp3 file we included. When the iPhone “control button” is clicked (the big black circle on the left), the game will exit to the iOS “desktop.” On the desktop, the custom icon.png will wait to be clicked once again, as shown in Figure 10-17.

Note
You will notice that the iPhone simulator has made our plain icon look much better by adding a bevel and highlighting. There is no need for you to create anything other than a plain image, as the phone takes care of the rest.
Adding in an iPhone “Gesture”
The PhoneGap API allows us to add in control over various iOS features, such as vibrate, geolocation, and accelerometer. We will target one of these features by adding code that will wipe our board clean and create a fresh new game when the phone is shaken.
To do this, we will look for changes to the device’s physical
location in space (using JavaScript), and then simply call our existing
chooseButtonsForCard() and drawScreen() functions to refresh the
card.
First, we need to add a single line to the chooseButtonsForCard() function that will set
all the buttons instances’ press attributes to false:
function chooseButtonsForCard(){
      //copy jargon into temp array
      var tempArray = [];
      for (var arrayctr=0;arrayctr<standardJargonList.length;arrayctr++){
         tempArray.push(standardJargonList[arrayctr]);
      }

      for (var ctr1=0;ctr1<buttons.length;ctr1++){

         for (var ctr2=0; ctr2<buttons[ctr1].length;ctr2++){
            var randInt = Math.floor(Math.random()*tempArray.length)
            buttons[ctr1][ctr2].text = tempArray[randInt];
            buttons[ctr1][ctr2].press = false;
            tempArray.splice(randInt,1);
         }
      }

   }
Next, we need to add a function that will listen for the iOS “shake” event, and then refresh the card.
Apple makes it pretty easy to test for changes in the x, y, and
z coordinate spaces of an iOS device
(and PhoneGap makes it even easier), but acting on this information is a
little tricky and will require the use of an actual device for
testing.
Note
At the time of this writing, a PhoneGap Adobe AIR iPhone simulator was available that goes beyond the limited shake gestures available in the SDK simulator. If you do not have a device to test with, we recommend trying this emulator. It can be found at http://blogs.nitobi.com/yohei/2009/04/01/phonegap-air-simulator-in-development/.
Adding the Gesture Functions to index.html
Inside the canvasApp()
function, we will need to add a series of functions and a variable to
use in testing the iPhone’s accelerometer, which detects movement in our
application.
Example 10-2 shows the code necessary to do this. Notice we are placing it under the current application start code (the new code is in bold).
   theCanvas.addEventListener("mousemove", onMouseMove, false);
   theCanvas.addEventListener("click", onMouseClick, false);
   initSounds();
   initButtons();
   initLists();
   chooseButtonsForCard();
   drawScreen();

   var accelerationWatchId = null;

   startAccelerationWatch();

   function startAccelerationWatch() {

        // Update acceleration every 3 seconds
        var options = { frequency: 100 };

        accelerationWatchId = navigator.accelerometer.watchAcceleration
        (onSuccess, onError, options);
    }

    function stopAccelerationWatch() {
        if (accelerationWatchId) {
            navigator.accelerometer.clearWatch(accelerationWatchId);
            accelerationWatchIdD = null;
        }
    }

   function onSuccess(acceleration) {

        if (Math.abs(acceleration.x) > 2 || Math.abs(acceleration.y)>2
         || Math.abs(acceleration.z)>2) {
         alert('Acceleration X: ' + acceleration.x + '\n' +
             'Acceleration Y: ' + acceleration.y + '\n' +
             'Acceleration Z: ' + acceleration.z + '\n' +
             'Timestamp: '      + acceleration.timestamp + '\n');
              stopAccelerationWatch()
              chooseButtonsForCard();
              drawScreen();
              startAccelerationWatch();
        }

    }

    // onError: Failed to get the acceleration
    //
    function onError() {
        alert('onError!');
    }
The new code begins with the var
accelerationWatchId = null; variable setting. We have created
a startAccelerationWatch() function,
which will call the onSuccess()
function every 100
milliseconds.
The onSuccess() function
receives the “acceleration” values from the API, which consist of delta
changes to the x, y, and z of
the device. These values are set to 0,0,0 when the application begins.
On each 100-millisecond
interval, these values are checked. If any is 2 units greater (in either the positive or
negative direction) from the 0
beginning values, we fire off an alert and then call our functions to reset the
card. First, we call the stopAccelerationWatch() function, which acts
as a reset for the location of the device in physical space. Next, we
call the chooseButtonsForCard() and
drawScreen() functions. Finally, we
set up the watch again with startAccelerationWatch().
Note
For the most detailed and up-to-date information on integrating PhoneGap with iOS and other device features, visit the PhoneGap documentation website. Most of the information for this example is based off the explanation and examples found at http://docs.phonegap.com/phonegap_accelerometer_accelerometer.md.html.
Testing on a Device
Before we can test the application on an actual device, we need to “provision” the device. To do this, we will need the device, a paid iOS developer account, and a development Mac computer all synced up into a single provisioning profile. This necessary process is not for the faint of heart.
Step 1: Launch the Provisioning Assistant
Begin by visiting the Developer Provisioning Assistant (http://developer.apple.com/iphone) and logging in with your paid iOS developer ID. Once logged in, click on the link for the “iOS Provisioning Portal” (currently in the upper-right side menu). There should be a button called “Launch the Provisioning Assistant.” Click on this button and follow all the on-screen instructions.
Step 2: Find the device’s Unique ID
You will be asked to find the Unique ID of your physical device. This is found by plugging the device into your computer, and then looking up the ID in Xcode. In the Window→Organizer Information window, you will see a list of the attached devices. The ID will be a long alphanumeric string next to the word Identifier.
Step 3: Generate a Certificate Signing Request
When asked by the Provisioning Assistant, input this ID value. You will next be asked to “Generate a Certificate Signing Request”, which involves the Apple Keychain. Follow all the on-screen dialogs carefully because this can be a confusing process. You will need to open the Keychain Access application in the Applications→Utilities folder on your machine, and then follow the on-screen instructions from the Provisioning Assistant.
Step 4: Locate saved Certificate Signing Request File
This will save a Certificate Signing Request File to your desktop. In the next step, the Provisioning Assistant will need to find this file, so it is important to remember where you save the request.
After you find the file, the assistant will ask you to name your profile. This will generate a file that you must download and install on your Mac.
Step 5: Drag provisioning file into Xcode Organizer window
With the location of the downloaded file handy, plug in your device (if it isn’t already plugged in), and open up the Xcode Window→Organizer once again. Simply drag the .mobileProvision file into the Organizer window, and it will set up the profile in Xcode automatically.
Step 6: Set up certificates with the Keychain
Next, you will be asked to download and install development certificates that match this profile. Save the .cer file and double-click it to add it to the Keychain Access list.
You should now see both Public and Private keys paired together with your developer account name inside the Keychain Access provisioning list.
Success
Whew! That certainly was not simple, but the Provisioning Assistant is very easy to use as long as you follow each step carefully. We are now ready to test the application on a physical device.
Using Xcode to Target a Test Device
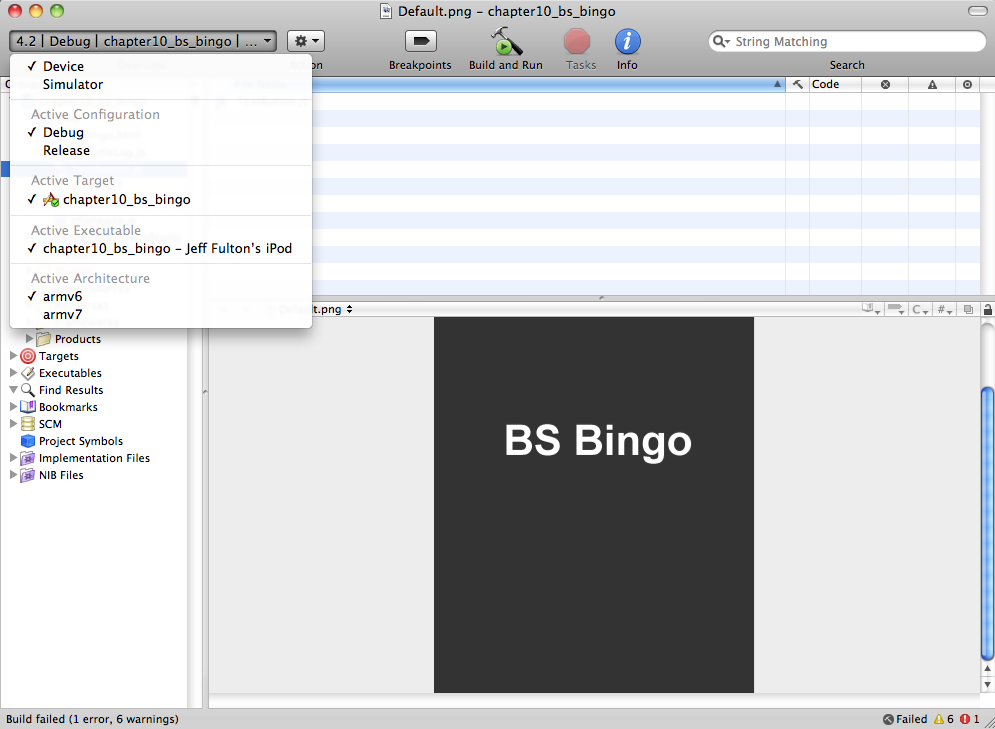
We will need to change the build profile to target the attached device rather than the simulator. To do this, we simply change the drop-down in the upper left from Simulator to Device, as shown in Figure 10-18.
After all that, now it is time to click the “Build and Run” icon.
After a few seconds, the application will initialize and show up on the device like a normal iOS application.
When running the app on a device, you will be able to click the buttons, hear the sounds, and see the buttons change color. When you want to reset the card, give the device a good shake to see the alert box with the current location offsets for the accelerometer. Click the OK button, and the card will reset.
Beyond the Canvas
A nice set of tools and frameworks are available (with more emerging every day) that can help transform the look and feel of HTML or an HTML5 application (not necessarily just on Canvas) into an iPhone-like application. These can be used in conjunction with a canvas app to provide a seamless iPhone look and feel for the user.
If you would like to explore mobile functionality further, we recommend the following technologies, which can be combined with PhoneGap to create very powerful mobile applications:
- jQTouch
jQTouch (http://www.jqtouch.com/) is a framework that makes use of jQuery to target mobile-device-specific features across platforms that use WebKit (iOS, Palm, Nexus, etc.).
- jQuery Mobile Framework
The jQuery Mobile Framework (http://jquerymobile.com/) is another jQuery-based mobile framework for building cross-platform applications. It can be used to create a unified user interface across mobile platforms.
What’s Next
As you can see, HTML5 Canvas is a powerful and easy way to target native apps across a variety of mobile devices. In this chapter, we built a small game to run in the Safari browser, and then installed PhoneGap and modified the application to run on the iPhone simulator using an Xcode project template. Once the simulation was successful, we added in a device-specific accelerometer feature, and then provisioned a physical device for testing. Finally, we were able to see our completed application running on an actual iOS device.
In Chapter 11, we will look at applying multiplayer capabilities to a canvas application using ElectroServer, and we’ll even take a small tour of 3D in Canvas.
Get HTML5 Canvas now with the O’Reilly learning platform.
O’Reilly members experience books, live events, courses curated by job role, and more from O’Reilly and nearly 200 top publishers.

