Chapter 11. Further Explorations
There are many emerging technologies and frameworks that can help take HTML5 Canvas into rarely explored areas. In this chapter, we will cover a couple of those areas: using Canvas for 3D with WebGL, and using Canvas for multiplayer applications. Both of these areas are still experimental, requiring you to either download beta/developer versions of browsers, or launch browsers using command-line switches so you can turn various technologies off and on.
This chapter is structured a bit differently. The discussions are focused on giving you some tools and information about these new and emerging areas for Canvas. While we will offer code, examples, and some explanation, it’s geared more toward getting you started on the path to learning than on teaching you how every detail works. We have structured these two topics in this way for one very simple reason: they are incomplete. With APIs, libraries, locations, browsers, names, etc., all subject to change, we are not comfortable presenting these topics as finished and ready to go. You need to approach this chapter knowing that things are bound to go wrong or change frequently.
Having said that, even though these topics are experimental, that does not mean you cannot use them right now, nor does it mean they are not useful or capable of doing very cool things. You just need to be aware of the pitfalls before treading forward.
3D with WebGL
The 2D capabilities of HTML5 Canvas are impressive, but what about 3D? There is no “production” 3D context available in the standard version of any web browser at this time. However, the best support for a 3D context will probably come in the form of WebGL.
What Is WebGL?
WebGL is a JavaScript API that gives programmers access to the 3D hardware on the user’s machine. Currently, it is only supported by the debug/development versions of Opera, Firefox, and Chrome. The API is managed by Kronos, the same organization that manages OpenGL. In fact, much of WebGL is similar to programming in OpenGL. This is both good and bad. It’s good because it’s a standard programming interface that is recognizable to many developers, but bad because it is not as easy to learn as the 2D Canvas context.
How Do I Test WebGL?
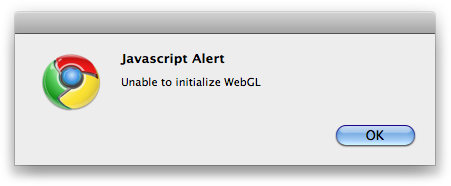
First, you need to find a web browser that supports WebGL. When trying to run a WebGL application, a browser that does not support WebGL might give a message like the one shown in Figure 11-1.
Note
Chromium, the open source version of Chrome, will display WebGL. You can download the latest development build of Chromium from http://build.chromium.org/f/chromium/continuous/.
Once you have a browser that can display WebGL, you need to write
the code to make it happen. You start that process by accessing the
WebGL context instead of the Canvas 2d context. So, instead of this code, which we
have used throughout this book:
context = theCanvas.getContext("2d");We reference the experimental-webgl context, like this:
gl = theCanvas.getContext("experimental-webgl");How Do I Learn More About WebGL?
The best place to learn about WebGL is at http://learningwebgl.com/. This site has an FAQ, a blog, and some helpful low-level lessons on how to create apps using WebGL. You can also find a ton of great content about WebGL at http://developer.mozilla.org.
One warning, though: programming WebGL is not for the uninitiated. Although WebGL is based on OpenGL, it is still a very low-level API, meaning you will need to create everything by hand. At the end of this section, we will guide you toward some higher-level libraries that should make this process a bit easier.
What Does a WebGL Application Look Like?
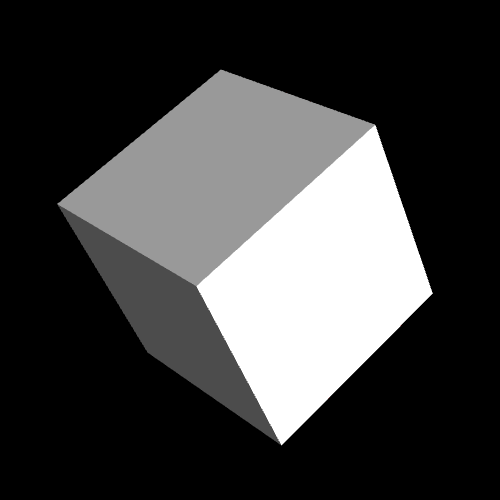
Now we are going to show you a WebGL application demo that rotates a 3D cube on Canvas (see Figure 11-2). Since we are not experts in 3D graphics, we will forgo our practice of describing every line of code in the example; instead, we will highlight interesting sections of code to help you understand what is happening.
This demo is based on Lesson 4 from Giles Thomas’s Learning WebGL website (http://learningwebgl.com/blog/?p=370). While this is only one short demo, it should give you a very good idea of how to structure and build code for a WebGL application.
Note
Much of this code has been adapted from the work of Giles Thomas with his expressed, written permission.
JavaScript libraries
First, we add some JavaScript libraries. Modernizr 1.6 includes a test for WebGL support in a web browser. This version was freshly released, but it could be updated with new features at any time (in fact, at the time of this writing, this had been updated to version 1.7). It is necessary to make sure you have the most recent versions of your libraries:
<script src="modernizr-1.6.min.js"></script>
We now need to include some JavaScript libraries to assist with our application. sylvester.js and glUtils.as are two libraries that you will find included for most apps that use WebGL. sylvester.js (http://sylvester.jcoglan.com/) is a library that helps when performing vector and matrix math calculations in JavaScript. glUtils.as is an extension for sylvester.js, specifically for helping with math related to WebGL:
<script type="text/javascript" src="sylvester.js"></script>
<script type="text/javascript" src="glUtils.js"></script>
Shaders
Shaders are pieces of code that run directly on a graphics card. They describe how a scene—how you refer to a 3D canvas when working with WebGL—should be rendered. Many of these little programs perform mathematical transformations that would otherwise run very slowly in JavaScript. In fact, we are pointing these out because they are not JavaScript; they are written in a way that WebGL can understand. These sections of code will be read in like text files and passed to the graphics hardware. Full discussions of topics like shaders are far out of scope for this little section of the book, but we will tell you a bit about each one of them to help set the tone for what comes next.
The first shader below is a fragment shader, which tells the graphics card that we will be using floating-point numbers and blended colors. The second shader is the vertex shader. It works with the vertices (defined points in 3D space used to create 3D objects) and will be used for every vertex we draw onto the Canvas 3D context:
<script id="shader-fs" type="x-shader/x-fragment">
  #ifdef GL_ES
  precision highp float;
  #endif

  varying vec4 vColor;

  void main(void) {
    gl_FragColor = vColor;
  }
</script>

<script id="shader-vs" type="x-shader/x-vertex">
  attribute vec3 aVertexPosition;
  attribute vec4 aVertexColor;

  uniform mat4 uMVMatrix;
  uniform mat4 uPMatrix;

  varying vec4 vColor;

  void main(void) {
    gl_Position = uPMatrix * uMVMatrix * vec4(aVertexPosition, 1.0);
    vColor = aVertexColor;
  }
</script>
Testing for WebGL support with Modernizr
The structure of the code in this example is much like the other
applications we have written in this book. However, it has been
modified to work with the specific needs of the 3D context. In the
canvasApp() function, we need to
test to see whether the browser has WebGL support. This is easily
accomplished by using the Modernizr.webgl static constant in Modernizr
1.6:
if ( !webglSupport()) {
   alert("Unable to initialize WebGL");
   return;
}
function webglSupport() {
   return Modernizr.webgl;
}
Initialization in canvasApp()
In canvasApp() we still get a
context, but this time it is the experimental-webgl context. Also, just like
in our other apps, we still call drawScreen() on an interval to render the
canvas:
var theCanvas = document.getElementById("canvasOne");
webGLContext = theCanvas.getContext("experimental-webgl");

setInterval(drawScreen, 33);
However, there is additional code in canvasApp() required to set up the
application to rotate the cube. A couple of the most important
initialization steps are the calls to initShaders() and initBuffers():
initShaders();
initBuffers();
The initShaders() function
itself calls a function named getShader() to load in the text of the
shader programs we have already
defined. You can see the code for these functions in the code listing
a bit later in Example 11-1.
Note
You can learn about the shaders used in this program in “Lesson 2—Adding colour” on the LearningWebGL website: http://learningwebgl.com/blog/?p=134.
Once we have loaded the shader programs, we need to create the
buffers. Buffers refer to space in the video
card’s memory that we set aside to hold the geometry describing our 3D
objects. In our case, we need to create buffers to describe the cube
we will rotate on the canvas. We do this in initBuffers().
The initBuffers() function
contains a lot of code, but we’ll discuss only a couple very
interesting sections. The first is the Vertex Position buffer, which
describes the vertices that make up the sides of the cube:
webGLContext.bindBuffer(webGLContext.ARRAY_BUFFER, cubeVertexPositionBuffer);
      vertices = [
        // Front face
        -1.0, -1.0,  1.0,
         1.0, -1.0,  1.0,
         1.0,  1.0,  1.0,
        -1.0,  1.0,  1.0,

        // Back face
        -1.0, -1.0, -1.0,
        -1.0,  1.0, -1.0,
         1.0,  1.0, -1.0,
         1.0, -1.0, -1.0,

        // Top face
        -1.0,  1.0, -1.0,
        -1.0,  1.0,  1.0,
         1.0,  1.0,  1.0,
         1.0,  1.0, -1.0,

        // Bottom face
        -1.0, -1.0, -1.0,
         1.0, -1.0, -1.0,
         1.0, -1.0,  1.0,
        -1.0, -1.0,  1.0,

        // Right face
         1.0, -1.0, -1.0,
         1.0,  1.0, -1.0,
         1.0,  1.0,  1.0,
         1.0, -1.0,  1.0,

        // Left face
        -1.0, -1.0, -1.0,
        -1.0, -1.0,  1.0,
        -1.0,  1.0,  1.0,
        -1.0,  1.0, -1.0,
      ];
The Vertex Color buffer holds information about the color that
will appear on each side of the cube. These values are set as
percentages of RBGA values (red,
green, blue, alpha):
webGLContext.bindBuffer(webGLContext.ARRAY_BUFFER, cubeVertexColorBuffer);
      var colors = [
        [1.0, 1.0, 1.0, 1.0],     // Front face
        [0.9, 0.0, 0.0, 1.0],     // Back face
        [0.6, 0.6, 0.6, 1.0],     // Top face
        [0.6, 0.0, 0.0, 1.0],     // Bottom face
        [0.3 ,0.0, 0.0, 1.0],     // Right face
        [0.3, 0.3, 0.3, 1.0],     // Left face
      ];
The Vertex Index buffer is kind of like a map that builds the object (our cube) based on the colors specified in Vertex Color (the order of these elements) and the vertices specified in the Vertex Position buffer. Each of these sets of three values represents a triangle that will be drawn onto the 3D context:
webGLContext.bindBuffer(webGLContext.ELEMENT_ARRAY_BUFFER, cubeVertexIndexBuffer);
      var cubeVertexIndices = [
        0, 1, 2,      0, 2, 3,    // Front face
        4, 5, 6,      4, 6, 7,    // Back face
        8, 9, 10,     8, 10, 11,  // Top face
        12, 13, 14,   12, 14, 15, // Bottom face
        16, 17, 18,   16, 18, 19, // Right face
        20, 21, 22,   20, 22, 23  // Left face
      ]
Again, there is more code in initBuffers() than we described here, but
start with these three sections when you want to play with the code
and make your own objects.
Animating the cube
Now that you know a bit about creating an object in WebGL, let’s
learn about animating the cube on the canvas. Similar to what we did
in the 2D context, we use the drawScreen() function to position, draw, and
animate objects in the 3D context. The first thing we do here is set
up the viewport, which defines the canvas’ view of the 3D scene. Next,
we clear the canvas and then set up the perspective. The perspective
has four parameters:
- Field of view
The angle at which we will view the 3D scene (
25degrees).- Width-to-height ratio
The radio of width to height of the current size of the canvas (
500×500).- Minimum units
The smallest unit size away from our viewport we want to display (
0.1).- Maximum units
The furthest unit size away from our viewport that we want to see (
100.0).
function drawScreen() {

   webGLContext.viewport(0, 0, webGLContext.viewportWidth,
       webGLContext.viewportHeight);
   webGLContext.clear(webGLContext.COLOR_BUFFER_BIT |
       webGLContext.DEPTH_BUFFER_BIT);

   perspective(25, (webGLContext.viewportWidth / webGLContext.viewportHeight),
                    0.1, 100.0);
Next, we move to the center of the 3D scene, calling loadIdentity() so we can start drawing. We
then call mvTranslate(), passing
the locations on the x, y, and z axes to draw the cube. To rotate the
cube, we call a function named mvPushMatrix(), and later mvPopMatrix(), which is similar to
how we called context.save() and
context.restore() when rotating
objects on the 2D canvas. The call to mvRotate() then makes the cube rotate from
the center, tilted up and to the right:
loadIdentity();

mvTranslate([0, 0.0, -10.0])

mvPushMatrix();
mvRotate(rotateCube, [0, .5, .5]);
Next, we draw the cube by binding the buffers that hold the vertices and color information that we set up earlier for the cube’s sides. We then draw each side, made up of two triangles each:
webGLContext.bindBuffer(webGLContext.ARRAY_BUFFER, cubeVertexPositionBuffer);
webGLContext.vertexAttribPointer(shaderProgram.vertexPositionAttribute,
    cubeVertexPositionBuffer.itemSize, webGLContext.FLOAT, false, 0, 0);

webGLContext.bindBuffer(webGLContext.ARRAY_BUFFER, cubeVertexColorBuffer);
webGLContext.vertexAttribPointer(shaderProgram.vertexColorAttribute,
    cubeVertexColorBuffer.itemSize, webGLContext.FLOAT, false, 0, 0);

webGLContext.bindBuffer(webGLContext.ELEMENT_ARRAY_BUFFER, cubeVertexIndexBuffer);
setMatrixUniforms();webGLContext.drawElements(webGLContext.TRIANGLES, cubeVertexIndexBuffer.numItems,
    webGLContext.UNSIGNED_SHORT, 0);

mvPopMatrix();
Finally, we increase the rotateCube variable so that the next time
drawScreen() is called, the cube
will be updated with a new angle. The code below adds 2 degrees to the rotation angle each time
drawScreen() is called:
  rotateCube += 2;

   }
Full Code Listing
Example 11-1 gives the full code listing for CH11EX1.html. Notice that many of the code styles and constructs we have used over the past 10 chapters are still in place in this application. Besides the obvious inclusion of code related directly to WebGL, this application operates essentially the same way as the other apps we discussed in this book.
<!doctype html>
<html lang="en">
<head>
<meta charset="UTF-8">
<title>CH11EX1: WebGL Test </title>
<script src="modernizr-1.6.min.js"></script>
<script type="text/javascript" src="sylvester.js"></script>
<script type="text/javascript" src="glUtils.js"></script>

<script id="shader-fs" type="x-shader/x-fragment">
   #ifdef GL_ES
   precision highp float;
   #endif

   varying vec4 vColor;

   void main(void) {
     gl_FragColor = vColor;
   }
</script>

<script id="shader-vs" type="x-shader/x-vertex">
   attribute vec3 aVertexPosition;
   attribute vec4 aVertexColor;

   uniform mat4 uMVMatrix;
   uniform mat4 uPMatrix;

   varying vec4 vColor;

   void main(void) {
     gl_Position = uPMatrix * uMVMatrix * vec4(aVertexPosition, 1.0);
     vColor = aVertexColor;
   }
</script>

<script type="text/javascript">
window.addEventListener("load", eventWindowLoaded, false);

function eventWindowLoaded () {
   canvasApp();
}

function canvasSupport () {
   return Modernizr.canvas;
}

function webglSupport() {
   return Modernizr.webgl;
}
function canvasApp () {

function drawScreen() {

      webGLContext.viewport(0, 0, webGLContext.viewportWidth,
          webGLContext.viewportHeight);
      webGLContext.clear(webGLContext.COLOR_BUFFER_BIT | webGLContext.DEPTH_BUFFER_BIT);

      perspective(25, (webGLContext.viewportWidth / webGLContext.viewportHeight),
          0.1, 100.0);
      loadIdentity();

      mvTranslate([0, 0.0, -10.0])

      mvPushMatrix();
      mvRotate(rotateCube, [0, .5, .5]);

      webGLContext.bindBuffer(webGLContext.ARRAY_BUFFER, cubeVertexPositionBuffer);
      webGLContext.vertexAttribPointer(shaderProgram.vertexPositionAttribute,
          cubeVertexPositionBuffer.itemSize, webGLContext.FLOAT, false, 0, 0);

      webGLContext.bindBuffer(webGLContext.ARRAY_BUFFER, cubeVertexColorBuffer);
      webGLContext.vertexAttribPointer(shaderProgram.vertexColorAttribute,
          cubeVertexColorBuffer.itemSize, webGLContext.FLOAT, false, 0, 0);

      webGLContext.bindBuffer(webGLContext.ELEMENT_ARRAY_BUFFER, cubeVertexIndexBuffer);
      setMatrixUniforms();
      webGLContext.drawElements(webGLContext.TRIANGLES, cubeVertexIndexBuffer.numItems,
          webGLContext.UNSIGNED_SHORT, 0);

      mvPopMatrix();
      rotateCube += 2;

      }

      if (!canvasSupport() ) {
           alert("Unable to initialize Canvas");
           return;
        }

      if ( !webglSupport()) {
          alert("Unable to initialize WebGL");
          return;
        }

      var webGLContext;
      var rotateCube = 0;

      var theCanvas = document.getElementById("canvasOne");
      webGLContext =theCanvas.getContext("experimental-webgl");
      webGLContext.viewportWidth =theCanvas.width;
      webGLContext.viewportHeight = theCanvas.height;

      initShaders()
      initBuffers();

      webGLContext.clearColor(0.0, 0.0, 0.0, 1.0);
      webGLContext.clearDepth(1.0);
      webGLContext.enable(webGLContext.DEPTH_TEST);
      webGLContext.depthFunc(webGLContext.LEQUAL);

      setInterval(drawScreen, 33);

   function getShader(webglcontext, id) {
      var shaderScript = document.getElementById(id);
      if (!shaderScript) {
        return null;
      }

      var str = "";
      var scriptChild = shaderScript.firstChild;
      while (scriptChild) {
        if (scriptChild.nodeType == 3) {
         str += scriptChild.textContent;
        }
        scriptChild = scriptChild.nextSibling;
      }

      var shader;
      if (shaderScript.type == "x-shader/x-fragment") {
        shader = webGLContext.createShader(webGLContext.FRAGMENT_SHADER);
      } else if (shaderScript.type == "x-shader/x-vertex") {
        shader = webGLContext.createShader(webGLContext.VERTEX_SHADER);
      } else {
        return null;
      }

      webGLContext.shaderSource(shader, str);
      webGLContext.compileShader(shader);

      if (!webGLContext.getShaderParameter(shader, webGLContext.COMPILE_STATUS)) {
        alert(webGLContext.getShaderInfoLog(shader));
        return null;
      }

      return shader;
     }

     var shaderProgram;
   function initShaders() {
      var fragmentShader = getShader(webGLContext, "shader-fs");
      var vertexShader = getShader(webGLContext, "shader-vs");

      shaderProgram = webGLContext.createProgram();
      webGLContext.attachShader(shaderProgram, vertexShader);
      webGLContext.attachShader(shaderProgram, fragmentShader);
      webGLContext.linkProgram(shaderProgram);

      if (!webGLContext.getProgramParameter(shaderProgram, webGLContext.LINK_STATUS)) {
        alert("Could not initialize shaders");
      }

      webGLContext.useProgram(shaderProgram);

      shaderProgram.vertexPositionAttribute = webGLContext.getAttribLocation
          (shaderProgram, "aVertexPosition");
      webGLContext.enableVertexAttribArray(shaderProgram.vertexPositionAttribute);

      shaderProgram.vertexColorAttribute = webGLContext.getAttribLocation
          (shaderProgram, "aVertexColor");
      webGLContext.enableVertexAttribArray(shaderProgram.vertexColorAttribute);

      shaderProgram.pMatrixUniform = webGLContext.getUniformLocation
          (shaderProgram, "uPMatrix");
      shaderProgram.mvMatrixUniform = webGLContext.getUniformLocation
          (shaderProgram, "uMVMatrix");
     }

     var mvMatrix;
     var mvMatrixStack = [];

   function mvPushMatrix(matrix) {
      if (matrix) {
        mvMatrixStack.push(matrix.dup());
        mvMatrix = matrix.dup();
      } else {
        mvMatrixStack.push(mvMatrix.dup());
      }
     }

   function mvPopMatrix() {
      if (mvMatrixStack.length == 0) {
        throw "Invalid popMatrix!";
      }      mvMatrix = mvMatrixStack.pop();
      return mvMatrix;
     }

   function loadIdentity() {
      mvMatrix = Matrix.I(4);
     }

   function multMatrix(matrix) {
      mvMatrix = mvMatrix.x(matrix);
     }

   function mvTranslate(vector) {
      var matrix = Matrix.Translation($V([vector[0], vector[1], vector[2]])).ensure4x4();
      multMatrix(matrix);
     }

   function mvRotate(angle, vector) {
      var radians = angle * Math.PI / 180.0;
      var matrix = Matrix.Rotation(radians, $V([vector[0],
          vector[1], vector[2]])).ensure4x4();
      multMatrix(matrix);
     }

     var pMatrix;
     function perspective(fovy, aspect, znear, zfar) {
      pMatrix = makePerspective(fovy, aspect, znear, zfar);
     }

   function setMatrixUniforms() {
      webGLContext.uniformMatrix4fv(shaderProgram.pMatrixUniform, false,
          new Float32Array(pMatrix.flatten()));
      webGLContext.uniformMatrix4fv(shaderProgram.mvMatrixUniform, false,
          new Float32Array(mvMatrix.flatten()));
     }

     var cubeVertexPositionBuffer;
     var cubeVertexColorBuffer;
     var cubeVertexIndexBuffer;
   function initBuffers() {

      cubeVertexPositionBuffer = webGLContext.createBuffer();
      webGLContext.bindBuffer(webGLContext.ARRAY_BUFFER, cubeVertexPositionBuffer);
      vertices = [
        // Front face
        -1.0, -1.0,  1.0,
         1.0, -1.0,  1.0,
         1.0,  1.0,  1.0,
        -1.0,  1.0,  1.0,

        // Back face
        -1.0, -1.0, -1.0,
        -1.0,  1.0, -1.0,
         1.0,  1.0, -1.0,
         1.0, -1.0, -1.0,

        // Top face
        -1.0,  1.0, -1.0,
        -1.0,  1.0,  1.0,
         1.0,  1.0,  1.0,
         1.0,  1.0, -1.0,

        // Bottom face
        -1.0, -1.0, -1.0,
         1.0, -1.0, -1.0,
         1.0, -1.0,  1.0,
        -1.0, -1.0,  1.0,

        // Right face
         1.0, -1.0, -1.0,
         1.0,  1.0, -1.0,
         1.0,  1.0,  1.0,
         1.0, -1.0,  1.0,

        // Left face
        -1.0, -1.0, -1.0,
        -1.0, -1.0,  1.0,
        -1.0,  1.0,  1.0,
        -1.0,  1.0, -1.0,
      ];
      webGLContext.bufferData(webGLContext.ARRAY_BUFFER, new Float32Array(vertices),
          webGLContext.STATIC_DRAW);
      cubeVertexPositionBuffer.itemSize = 3;
      cubeVertexPositionBuffer.numItems = 24;

      cubeVertexColorBuffer = webGLContext.createBuffer();
      webGLContext.bindBuffer(webGLContext.ARRAY_BUFFER, cubeVertexColorBuffer);
      var colors = [
        [1.0, 1.0, 1.0, 1.0],     // Front face
        [0.9, 0.0, 0.0, 1.0],     // Back face
        [0.6, 0.6, 0.6, 1.0],     // Top face
        [0.6, 0.0, 0.0, 1.0],     // Bottom face
        [0.3 ,0.0, 0.0, 1.0],     // Right face
        [0.3, 0.3, 0.3, 1.0],     // Left face
      ];

      var unpackedColors = []
      for (var i in colors) {
        var color = colors[i];
        for (var j=0; j < 4; j++) {
         unpackedColors = unpackedColors.concat(color);
        }
      }
      webGLContext.bufferData(webGLContext.ARRAY_BUFFER, new Float32Array(unpackedColors),
          webGLContext.STATIC_DRAW);
      cubeVertexColorBuffer.itemSize = 4;
      cubeVertexColorBuffer.numItems = 24;

      cubeVertexIndexBuffer = webGLContext.createBuffer();
      webGLContext.bindBuffer(webGLContext.ELEMENT_ARRAY_BUFFER, cubeVertexIndexBuffer);
      var cubeVertexIndices = [
        0, 1, 2,      0, 2, 3,    // Front face
        4, 5, 6,      4, 6, 7,    // Back face
        8, 9, 10,     8, 10, 11,  // Top face
        12, 13, 14,   12, 14, 15, // Bottom face
        16, 17, 18,   16, 18, 19, // Right face
        20, 21, 22,   20, 22, 23  // Left face
      ]
      webGLContext.bufferData(webGLContext.ELEMENT_ARRAY_BUFFER,
          new Uint16Array(cubeVertexIndices), webGLContext.STATIC_DRAW);
      cubeVertexIndexBuffer.itemSize = 1;
      cubeVertexIndexBuffer.numItems = 36;

     }

}

</script>
</head>
<body>
<div style="position: absolute; top: 50px; left: 50px;">
<canvas id="canvasOne" width="500" height="500">
 Your browser does not support HTML5 Canvas or WebGLContext.
</canvas>
</div>
</body>
</html>
Further Explorations with WebGL
Obviously, we cannot teach you all about WebGL in this chapter. We opted to include this demo and short discussion to introduce you to WebGL and show you what it looks like. In reality, a full discussion of WebGL, even the basic concepts, could take up an entire volume.
If you are interested in WebGL, we strongly recommend you consult http://learningwebgl.com for more examples and the latest information about this exciting yet still experimental context for HTML5 Canvas.
WebGL JavaScript Libraries
At the start of this section, we promised to show you some libraries that can be used with WebGL to make it easier to develop applications. Here are some of the more interesting libraries and projects.
Google O3D
Google’s O3D library (http://code.google.com/p/o3d/) was once a browser plug-in but has now been released as a standalone JavaScript library for WebGL. The examples of using O3D with JavaScript—including a fairly spectacular 3D pool game—are very impressive. O3D allows you to load COLLADA 3D models created with Google SketchUp (as well as other 3D packages).
The required code looks about as complex as straight WebGL code, so while this is very powerful, you might want to look at some of the other libraries here first if you are just starting out.
GLGE
“WebGL for the lazy” is the tagline for this JavaScript library (http://www.glge.org/). The author of the library, Paul Brunt, says this about GLGE:
The aim of GLGE is to mask the involved nature of WebGL from the web developer, who can then spend his/her time creating richer content for the Web.
This is a high-level API that is still in development. Just like O3D, it has the ability to load COLLADA models. Applications written with GLGE are created with a combination of XML and JavaScript. It looks very promising.
C3DL
The tagline for C3DL (http://www.c3dl.org/) is “WebGL made easy!” C3DL, or “Canvas 3D JS Library,” is similar to GLGE, but it seems to have a head start thanks to a larger API and more support. This library also appears to be slanted toward games, as a real-time strategy (RTS) and an arcade game are featured as its more prominent demos. The library supports COLLADA models, and the code also appears very straightforward to implement.
SpiderGL
“3D Graphics for Next-Generation WWW” is how SpiderGL (http://spidergl.org/) bills itself to the world. This library appears to be very similar to GLGE and C3DL, except that the demos focus more on lighting, color, and textures than on games and applications. It also supports COLLADA models.
SceneJS
SceneJS (http://scenejs.org/) is geared toward rendering 3D scenes built as COLLADA JSON models in WebGL. You can also define and manipulate 3D scenes. Loading and rendering the models is a straightforward process, and the results are quite impressive.
CopperLicht
This commercial library (http://www.ambiera.com/copperlicht/) advertises itself as the “fast WebGL JavaScript 3D Engine.” All the demos are game-oriented, and the library supports many commercial 3D formats. It has both collision detection and physics built in. The demos are fast and are fun to play. This library appears to be centered around loading and using external 3D assets, so if that is what you are looking for, this might be your best choice.
Multiplayer Applications with ElectroServer 5
The extended HTML5 specification includes an API for what is known as WebSockets. Socket communications allow a client application to remain constantly connected to a server-aide application. This type of communication can be especially useful for chat, multiplayer games, e-learning applications, and multiuser whiteboards, as well as many others. At this point, WebSockets is just a promise with very little support beyond test and development builds of web browsers. In fact, security concerns have halted some implementations and slowed others. However, this does not mean you cannot make use of socket-server applications with HTML5 Canvas.
Because Flash has built-in support for communication via sockets, its applications have had the ability to open socket communications with server-side applications for many years. HTML, on the other hand, has never had the ability to reliably communicate to a socket server without performing some sleight of hand, usually involving constant polling by the web browser for new information from the web server.
ElectroServer from Electrotank was one of the first reliable socket-server applications built to communicate with Flash clients. Over the past couple years, ElectroServer has been updated with APIs for iOS, C#, C++, and now JavaScript. This first iteration of the ElectroServer JavaScript API does not use WebSockets, but instead implements JavaScript polling. However, with the availability of ElectroServer’s simplified JavaScript API, you can still start to write multiplayer applications using HTML5 Canvas.
Note
While this portion of the chapter is specific to ElectroServer, many of the multiplayer/multiuser concepts are applicable to other technologies as well.
Installing ElectroServer
To get started with multiplayer development using HTML5 Canvas and the ElectroServer socket server, you first need to download the free, 25-user version of the software from Electrotank. You can download the appropriate version for your operating system (Windows, Mac, Linux) at http://www.electrotank.com/resources/downloads.html.
Note
There are some installation prerequisites, such as having Java version 1.6. For detailed installation instructions for every OS, visit http://www.electrotank.com/docs/es5/manual/index.html?operating_system.htm.
The install package includes the server software, client APIs, documentation, and sample applications. Once you have installed the server software, you should have a folder named something like “Electroserver_5_x_” on your computer. We used Mac OS X for this test, so this folder was created inside the Mac Applications folder. On Windows, it will be created in the location you specify upon installation.
Starting the server
Once you have the files installed, you need to start the ElectroServer socket server by finding the installation directory and executing the file Start_ElectroServer_5_0_1. (Note: the three numbers at the end of this file will change as the version is upgraded, but the concept will remain the same.)
When ElectroServer starts, you should see a screen similar to Figure 11-3.
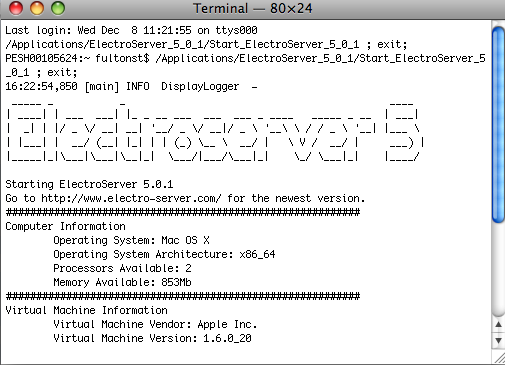
The server will run on your local machine for testing purposes. However, for any real-world application, you will need to install a production version of the software on a web server.
The ElectroServer admin tool
Because ElectroServer is a socket server, it listens on a specified port for communication from the JavaScript client using one of the supported protocols. ElectroServer supports multiple protocols, but we need to make sure we are using the BinaryHTTP protocol for the JavaScript API. The default port for BinaryHTTP in ElectroServer is 8989.
Note
When the ElectroServer JavaScript API is updated to support WebSockets, the port and protocol will likely be different.
There is a nifty admin tool for ElectroServer that allows you to view and modify all the supported protocols and ports, as well as many other cool features of the socket server. In the /admin directory of the install folder, you should find both an installer for an Adobe AIR admin tool (named something like es5-airadmin-5.0.0.air), and a /webadmin directory with an HTML file named webadmin.html. Either one will work for this exercise.
Note
In order for the admin console to display properly, the server needs to be started.
When you launch the admin tool, you will be asked to supply a
username and password. The default is administrator and password, unless you changed them upon
installation.
Once you log in, click the Server Management button on the top menu, and then the Gateways option from the side menu. You should see a screen that looks similar to Figure 11-4.
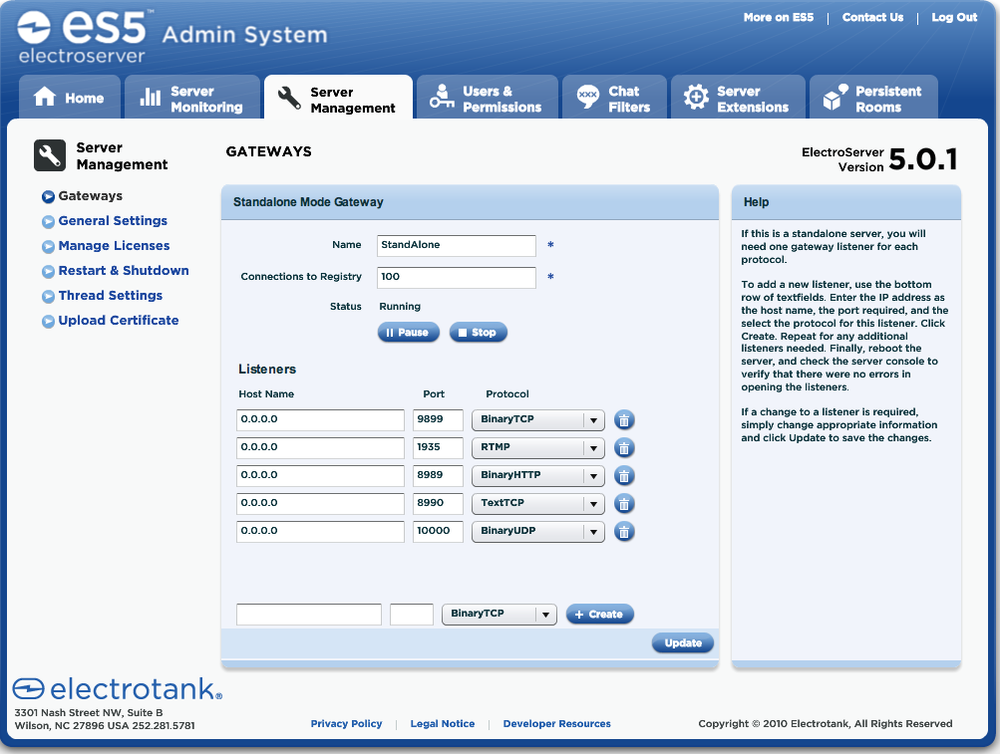
This screen shows you the port settings for each protocol that ElectroServer supports. For the JavaScript API, we are most interested in the BinaryHTTP setting, which you can see is set to port 8989.
The JavaScript API
Besides starting ElectroServer, you will also need the JavaScript API so you can begin building Canvas apps that connect to the server. You should be able to find the JavaScript API in the /apis/client/javascript directory of the folder in which you installed ElectroServer (this name might change in the final version). The API should be named ElectroServer-5-Client-JavaScript.js.
The Basic Architecture of a Socket-Server Application
Now that you have ElectroServer ready to go, and you have the JavaScript API, it is time to learn a bit about how socket-server-based multiplayer/multiuser applications are designed. Using a socket server means you are creating an application that relies on a client for input from a user, as well as relying on a server to distribute that input to other users who are connected to the first user.
A good example of this is a chat application. Most chat applications require a user to enter a room (a logical space in which people are “chatting,” i.e., exchanging messages), where that user can see the messages of other people in the same virtual space. In that room, the client is “connected” to those other users. However, it is usually not a direct connection (e.g., peer-to-peer), but instead a connection through a port to a socket server.
The socket server acts as the traffic cop for the chat messages. It listens on a port (in our case, 8989) for messages coming in from the clients. Those messages need to be formatted in a way that the server can understand so it can process them. The JavaScript API we will use performs this formatting for our client applications.
When the socket server receives a message from the client, it routes the various text messages sent by each client back out to the other clients in the room. However, it can also do much more by using server-side processing, such as hold the list of current messages, so people entering the room while the chat is ongoing can see what has been said previously, scan chat messages for swear words, award points to users for their input, or anything else you can dream up.
When the server finally processes the message and sends it back, the client then processes that message. In the case of the chat, that processing usually involves displaying the message on the canvas.
The Basic Architecture of an ElectroServer Application
ElectroServer acts very much like the socket-server application we described in the previous section. It listens on specified ports for different protocols; when messages arrive, they are routed back to the connected clients.
However, ElectroServer has some specific features that we should discuss. Some of these exist on other socket-server platforms, while some don’t. However, much of this discussion will still be applicable to other socket servers once they make JavaScript APIs available.
Client
The client for an ElectroServer application is a program written in one of the API-supported language platforms, including Flash ActionScript 2, Flash ActionScript 3, Java, Objective-C, C#/.NET, and now JavaScript. The client is the application, which the user will manipulate to send messages through the API to ElectroServer. This is usually a game, a chat room, a virtual world, or some other kind of multiuser social or communication application.
All the communication with ElectroServer is event-based. The client application uses the JavaScript API to send events, and the client defines event handlers that listen for messages from ElectroServer. All of these messages and events are communicated through the API, which in turn is communicating through port 8989 using the BinaryHTTP protocol (at least for our examples).
Zones, rooms, and games
When a user first connects to ElectroServer, she needs to join or create a zone, which is simply a collection of rooms. If the user tries to create a zone that already exists, she will be added to that zone without creating a new one.
After entering a zone, the user needs to join a room in that zone. If a user attempts to create a new room that already exists, she will be added to that room instead.
Extensions
Extensions are server-side code modules that can process data sent by clients before that data is sent back to other clients. Extensions can also process and create their own events. For many games, the extension contains much of the game logic, relying on the clients for displaying and gathering user input.
At the very minimum, an extension contains what is known as a plug-in. A plug-in is a code module written in ActionScript 1 (basically JavaScript) or Java that can be instantiated and scoped to a room. For example, if you were making a card game, you would want a card game plug-in on the server to handle things like shuffling the deck and making sure the correct player wins a hand. In this way, the server holds the true state of the game. Using an extension helps keep a game flowing and lessens the users’ ability to cheat. For the simple examples in this chapter, we will not be using any server-side extensions. However, if you delve further into ElectroServer or other socket-server applications, you should make sure to learn as much as possible about them.
Creating a Chat Application with ElectroServer
As an example, we are going to create a single chat application using the ElectroServer JavaScript API. Users will submit a chat message through an HTML form, and the displayed chat will be in HTML5 Canvas. We are also going to create and display some messages from ElectroServer so you can see the status of the connection to the server.
Establishing a connection to ElectroServer
First, a client application is written so that it includes the ElectroServer JavaScript API:
<script src="ElectroServer-5-Client-JavaScript.js"></script>
The client application makes a connection to ElectroServer
running on a server at a specific URL, listening on a specific port,
using a specific protocol. For our examples, this will be localhost, 8989, and BinaryHTTP, respectively.
We need to use these values to make a connection from the client
to the server. We do this by first creating an instance of the
ElectroServer object, and then
calling its methods. We start by creating an instance of an
ElectroServer server connection named server. We then configure a new variable
named availableConnection with the
previous properties we described, then add it to the server variable
with a call to the method addAvailableConnection(). We will create all
of this code inside our canvasApp()
function:
var server = new ElectroServer.Server("server1");
var availableConnection = new ElectroServer.AvailableConnection
    ("localhost", 8989, ElectroServer.TransportType.BinaryHTTP);
server.addAvailableConnection(availableConnection);
Now, we need to use the server variable we just configured to
establish a connection to ElectroServer. We do this by setting a new
variable, es, as an instance of the
class ElectroServer. We then call
its initialize() method and add the
server we just configured to the es
object by calling the addServer()
method of the ElectroServer server
engine property:
var es = new ElectroServer();
es.initialize();
es.engine.addServer(server);
We are almost ready to try to connect to ElectroServer. First
though, we need to create some event handlers for ElectroServer events. Remember when we told
you that all the communication
with ElectroServer is done through creating and listening for events? This is where that process
begins. We need to listen for the following events: ConnectionResponse, LoginResponse, JoinRoomEvent, JoinZoneEvent, ConnectionAttemptResponse, and PublicMessageEvent:
es.engine.addEventListener(MessageType.ConnectionResponse, onConnectionResponse);
es.engine.addEventListener(MessageType.LoginResponse, onLoginResponse);
es.engine.addEventListener(MessageType.JoinRoomEvent, onJoinRoomEvent);
es.engine.addEventListener(MessageType.JoinZoneEvent, onJoinZoneEvent);
es.engine.addEventListener(MessageType.ConnectionAttemptResponse,
    onConnectionAttemptResponse);
es.engine.addEventListener(MessageType.PublicMessageEvent, onPublicMessageEvent);
Finally, once we have everything ready, we call the connect method of the ElectroServer object, and wait for events to
be handled by the event listener functions we have just
established:
es.engine.connect();
When the ElectroServer API
object tries to connect to an ElectroServer server, a ConnectionAttemptResponse event will be
fired back to the client from the server. We handle that event with
the onConnectionAttemptResponse()
event handler. For our application, we don’t do anything with this
event, except create a status message for it that we will display. The
statusMessages variable is an array
of messages that we keep around to display back as debug information
for our chat application. We will discuss this briefly in the next
section:
function onConnectionAttemptResponse(event) {
 statusMessages.push("connection attempt response!!");
}
At this point, the client waits for a ConnectionResponse event to be sent back
from the ElectroServer server. When the client application receives a
ConnectionResponse event, it
handles it with the onConnectionResponse() event handler. Once
the connection is established, the client then attempts to log on to
the server. To make a logon attempt, we need a username. We will
create a random username, but it could come from an account on a web
server, a form field or cookie,
Facebook Connect, or any other location or service you might have
available.
After we have a username, we create a LoginRequest() object, set the userName property, and then call the
send() method of the es.engine object. This is how we will send
all messages to ElectroServer from this point forward:
function onConnectionResponse(event) {
   statusMessages.push("Connect Successful?: "+event.successful);
   var r = new LoginRequest();
   r.userName = "CanvasUser_" + Math.floor(Math.random() * 1000);
   es.engine.send(r);
 }
When ElectroServer responds from the LoginRequest, it is time to join a zone and a room. Recall that any user connected to
ElectroServer needs to belong to a room, and every room belongs to a zone. Therefore, we need to make a user
belong to one of each, which we accomplish with a CreateRoomRequest(). We set the zoneName property to TestZoneChat, and the roomName property to TestRoomChat. If either of these do not
already exist, they will be created by the server. If they do exist,
the user will be added to them. We then send the message to
ElectroServer:
function onLoginResponse(event) {
   statusMessages.push("Login Successful?: "+event.successful);

   username = event.userName;

   var crr = new CreateRoomRequest();
   crr.zoneName = "TestZoneChat";
   crr.roomName = "TestRoomChat";

   es.engine.send(crr);
}
We still need to wait for a couple responses from ElectroServer
events that come back through the API via port 8989. We know we have
to join a zone, and we handle the
event with the function onJoinZoneEvent(), but we don’t need to do
anything with it:
function onJoinZoneEvent(event) {
   statusMessages.push("joined a zone");
}
The most important event we are waiting to handle is JoinRoomEvent. When we receive this event,
we know that we have joined both a zone and a room, and the application is ready to run.
For the chat application, this means the user can start typing and
sending messages. First, we set the _room variable equal to the Room object, which was returned by the event
from ElectroServer. We will use
this variable for our further communications with ElectroServer. The other thing we do in this
function is set an HTML <div>
with the id of inputForm, which is
made visible by changing its style. The inputForm <div> is invisible when the
page loads. We do this so the user won’t send chat messages before the
connection to ElectroServer is
established. Now that everything is ready to go, we display the
inputForm <div> so chatting
can start:
function onJoinRoomEvent(event) {
            statusMessages.push("joined a room");
            _room = es.managerHelper.zoneManager.zoneById
                (event.zoneId).roomById(event.roomId);
            var formElement = document.getElementById("inputForm");
            formElement.setAttribute("style", "display:true");
         }
Creating the chat functionality
Now that we have established a connection to ElectroServer and joined a zone and a room, the chat application can start.
First, let’s talk a bit about a few more variables we have
created in our canvasApp() function, which we must scope to the rest of the
chat application. The statusMessages array will hold a set of
messages that we want to keep about the connection to ElectroServer. We will display these in a
box on the right side of the canvas. The chatMessages array holds all the messages
users have sent into the chat room. The username variable holds the name of the user
who is running the Canvas application, and _room is a reference to the room object that user has joined:
var statusMessages = new Array();
var chatMessages = new Array();
var username;
var _room;
The HTML page holds a <form> that we will use to collect the
chat messages from the user. It contains a text box for the user to
type into (the id of textBox), and
a button with the id of sendChat.
This is the same form that was invisible until we received the
JoinRoomEvent event:
<form>
<input id="textBox" placeholder="your text" />
<input type="button" id ="sendChat" value="Send"/>
</form>
In canvasApp(), we set up an
event listener for when the user clicks the sendChat button. When a click event occurs,
the function sendMessage handles
the event:
var formElement = document.getElementById("sendChat");
formElement.addEventListener('click', sendMessage, false);
The sendMessage() function is
one of the most important functions in this application. This is where
we create a couple very critical objects for communicating with
ElectroServer. The first is a PublicMessageRequest, which is one of
several types we can make to the
ElectroServer socket server. Others include a PrivateMessageRequest and a PluginMessageRequest. A
PublicMessageRequest is a message
that will be sent to everyone in the room. We send that data using an
EsObject, which is native to the
ElectroServer API. It allows you to create and access ad hoc data
elements for any type of information you want to send to other users
in the same room.
Note
For a full discussion of EsObject and ElectroServer events, see the ElectroServer documentation. It is
installed with the server on your local machine in
[your install folder]//documentation/html/index.html *.
For this simple chat example, we want to send the chat message
the user typed and submitted. To do this, we will use the setString() method of EsObject. This method takes two parameters:
the text you want to send, and an identifier you can use to access the
text. We also set another element named type, which will tell us what kind of
message we are sending. We do this because in a more complicated
application, you may send all sorts of messages and need a way to
identify what they are so you can process them.
Once we have configured our PublicMessageEvent with the roomId, the zoneId, and the EsObject, we call es.engine.send(pmr) to send it to the rest
of the room:
function sendMessage(event) {
   var formElement = document.getElementById("textBox");
   var pmr = new PublicMessageRequest();
   pmr.message = "";
   pmr.roomId = _room.id;
   pmr.zoneId = _room.zoneId;
   var esob = new ElectroServer.EsObject();
   esob.setString("message", formElement.value);
   esob.setString("type","chatmessage");
   pmr.esObject = esob;
   es.engine.send(pmr);
   statusMessages.push("message sent")
}
Notice that we did not print the user’s chat message to the
canvas when it was submitted. Instead, we will wait for the PublicMessageEvent to return from ElectroServer, and then handle it like all
the other chats. This keeps the interface clean, while preserving a
create event/handle event processing model across the entire
application.
After the socket server processes the chat message, it is
broadcast out to all the users in the room. All the users must create
an event handler for a PublicMessageEvent so they can receive and
process the message; we have created the onPublicMessageEvent handler for this
purpose. This function is very simple. It checks the type EsObject variable we set to see whether
it is a chatmessage. If so, it
pushes a string that includes the user who submitted the message
(event.userName) and the message
itself (esob.getString("message"))
into the chatMessages array. This
is what will be displayed on the canvas:
function onPublicMessageEvent(event) {

   var esob = event.esObject;
   statusMessages.push("message received")
   if (esob.getString("type") == "chatmessage") {

      chatMessages.push(event.userName + ":" + esob.getString("message"));

      }

}
Now, all that remains is to display the messages that we have
collected. We do this (where else?) in drawScreen(). For both the statusMessages and chatMessages arrays, we need to display the
“current” 22 messages (if we have
22), and start them at the y position of 15 pixels. We only display the last 22 messages so both the chat and the status
messages will appear to scroll up the screen as more chatting and
status messages are generated:
var starty = 15;
var maxMessages = 22;
If the array is larger than maxMessages, we display only the latest
22. To find those messages, we set
a new variable named starti to the
length of the statusMessages array,
subtracted by the value in maxMessages. This gives us the index into
the array of the first message we want to display. We do the exact
same thing for the chatMessages
array:
//status box
   context.strokeStyle = '#000000';
     context.strokeRect(345,  10, 145, 285);
         var starti = 0;

         if (statusMessages.length > maxMessages) {
             starti = (statusMessages.length) - maxMessages;

         }
         for (var i = starti;i< statusMessages.length;i++) {
            context.fillText  (statusMessages[i], 350, starty );
            starty+=12;
//chat box
         context.strokeStyle = '#000000';
         context.strokeRect(10,  10, 335, 285);

         starti = 0;
         lastMessage = chatMessages.length-1;
         if (chatMessages.length > maxMessages) {
             starti = (chatMessages.length) - maxMessages;
         }
         starty = 15;
         for (var i = starti;i< chatMessages.length;i++) {
            context.fillText  (chatMessages[i], 10, starty );
            starty+=12;
         }
      }
That’s it! We’ve finished developing our multiuser chat application.
Testing the Application in Google Chrome
To test the current ElectroServer JavaScript API, you need to start Google Chrome with web security disabled. The method of doing this varies by OS, but on Mac OS X, you can open a Terminal session and execute the following command (which will open Chrome if you have it in your Applications folder):
/Applications/Google\ Chrome.app/Contents/MacOS/Google\ Chrome --disable-web-security
On a Windows PC, input a command similar to this from a command prompt or from a .bat file:
"C:\Program Files (x86)\Google\Chrome\Application\chrome.exe" --disable-web-security
Note
Obviously this is not a workable solution for a production application. As Electrotank (and other companies who make similar products) continue to improve the functionality of their APIs and add support for HTML5 WebSockets, this limitation should disappear.
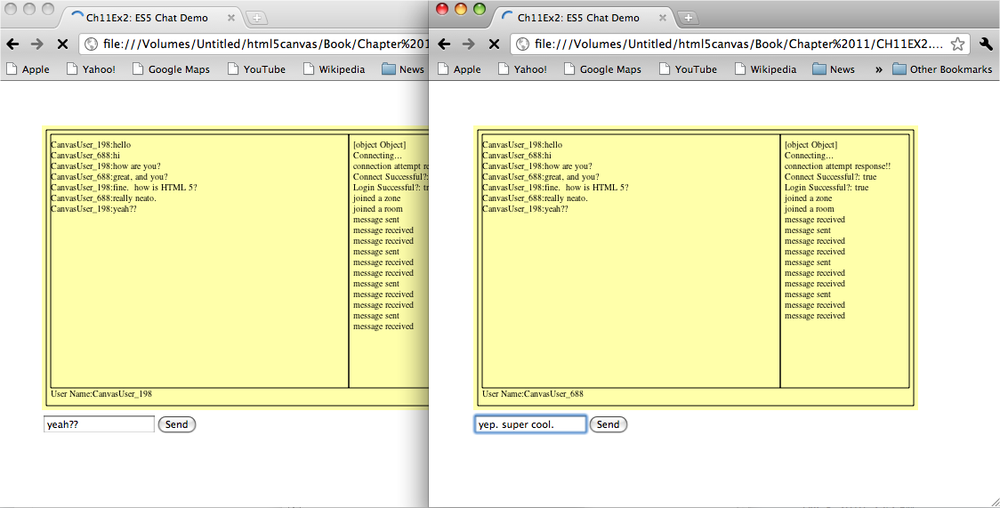
The best way to test a multiplayer application on your own development machine is to open two web browsers, or two web browser windows, at the same time. When you look at CH11EX2.html in Google Chrome using this method, you should see something that looks like Figure 11-5.
The full source code is listed in Example 11-2.
<!doctype html>
<html lang="en">
<head>
<meta charset="UTF-8">
<title>CH11EX2: ES5 Chat Demo</title>
<script src="modernizr-1.6.min.js"></script>
<script src="ElectroServer-5-Client-JavaScript.js"></script>
<script type="text/javascript">
window.addEventListener("load", eventWindowLoaded, false);

   function eventWindowLoaded () {
      canvasApp();
}

   function canvasSupport () {
       return Modernizr.canvas;
}

   function canvasApp () {

        if (!canvasSupport()) {
          return;
        }

      var theCanvas = document.getElementById("canvasOne");
      var context = theCanvas.getContext("2d");

      var formElement = document.getElementById("sendChat");
      formElement.addEventListener('click', sendMessage, false);

    function drawScreen() {
         //background
         context.fillStyle = "#ffffaa";
         context.fillRect(0, 0, 500, 320);

         context.fillStyle = "#000000";
         context.font = "10px _sans";
         context.textBaseline = "top";

         //box
         context.strokeStyle = '#000000';
         context.strokeRect(5,  5, 490, 310);

         var starty = 15;
         var maxMessages = 22;


         //status box
         context.strokeStyle = '#000000';
         context.strokeRect(345,  10, 145, 285);
         var starti = 0;

         if (statusMessages.length > maxMessages) {
               starti = (statusMessages.length) - maxMessages;

         }
         for (var i = starti;i< statusMessages.length;i++) {
            context.fillText  (statusMessages[i], 350, starty );
            starty+=12;
         }

         //chat box
         context.strokeStyle = '#000000';
         context.strokeRect(10,  10, 335, 285);

         starti = 0;
         lastMessage = chatMessages.length-1;
         if (chatMessages.length > maxMessages) {
                starti = (chatMessages.length) - maxMessages;
         }
         starty = 15;
         for (var i = starti;i< chatMessages.length;i++) {
               context.fillText  (chatMessages[i], 10, starty );
               starty+=12;
         }

         context.fillText  ("User Name:" + username, 10, 295 );

      }

         var statusMessages = new Array();
         var chatMessages = new Array();

         var server = new ElectroServer.Server("server1");

         statusMessages.push(server);

         var availableConnection = new ElectroServer.AvailableConnection
             ("localhost", 8989, ElectroServer.TransportType.BinaryHTTP);

         server.addAvailableConnection(availableConnection);

         var es = new ElectroServer();
         es.initialize();

         var username;
         var _room;

         es.engine.addServer(server);

         es.engine.addEventListener(MessageType.ConnectionResponse, onConnectionResponse);
         es.engine.addEventListener(MessageType.LoginResponse, onLoginResponse);
         es.engine.addEventListener(MessageType.JoinRoomEvent, onJoinRoomEvent);
         es.engine.addEventListener(MessageType.JoinZoneEvent, onJoinZoneEvent);
         es.engine.addEventListener(MessageType.ConnectionAttemptResponse,
             onConnectionAttemptResponse);
         es.engine.addEventListener(MessageType.PublicMessageEvent, onPublicMessageEvent);

         es.engine.connect();

         statusMessages.push("Connecting...");

         setInterval(drawScreen, 33);

      function onConnectionAttemptResponse(event) {
            statusMessages.push("connection attempt response!!");
         }

      function onJoinRoomEvent(event) {
            statusMessages.push("joined a room");
            _room = es.managerHelper.zoneManager.zoneById
                (event.zoneId).roomById(event.roomId);
            var formElement = document.getElementById("inputForm");
            formElement.setAttribute("style", "display:true");
         }

      function onJoinZoneEvent(event) {
            statusMessages.push("joined a zone");

         }

      function onConnectionResponse(event) {
            statusMessages.push("Connect Successful?: "+event.successful);
            var r = new LoginRequest();
            r.userName = "CanvasUser_" + Math.floor(Math.random() * 1000);
            es.engine.send(r);
         }

      function onLoginResponse(event) {
            statusMessages.push("Login Successful?: "+event.successful);

            username = event.userName;

            var crr = new CreateRoomRequest();
            crr.zoneName = "TestZoneChat";
            crr.roomName = "TestRoomChat";

            es.engine.send(crr);
         }

      function sendMessage(event) {
            var formElement = document.getElementById("textBox");
            var pmr = new PublicMessageRequest();
            pmr.message = "";
            pmr.roomId = _room.id;
            pmr.zoneId = _room.zoneId;
            var esob = new ElectroServer.EsObject();
            esob.setString("message", formElement.value);
            esob.setString("type","chatmessage");
            pmr.esObject = esob;
            es.engine.send(pmr);
            statusMessages.push("message sent")

         }

      function onPublicMessageEvent(event) {

         var esob = event.esObject;
         statusMessages.push("message received")
         if (esob.getString("type") == "chatmessage") {

            chatMessages.push(event.userName + ":" + esob.getString("message"));

         }

      }

}

</script>
</head>
<body>
<div style="position: absolute; top: 50px; left: 50px;">
<canvas id="canvasOne" width="500" height="320">
 Your browser does not support HTML5 Canvas.
</canvas>
<div id="inputForm"  style="display:none;">
<form>
<input id="textBox" placeholder="your text" />
<input type="button" id ="sendChat" value="Send"/>
</form>
</div>

</div>
</body>
</html>
Further Explorations with ElectroServer
Displaying text on HTML5 Canvas is interesting, but as we have shown you in this book, you can do much more. Let’s add some graphics to the previous demo. We have added a second application for you to peruse, named CH11EX3.html. This application adds the bouncing ball demo app from Chapter 5 to the chat application we just created. It allows chatters to “send” bouncing balls to each other by clicking on the canvas.
The heart of the app is simply another use of the EsObject from the chat application, which is
created when the user clicks on the canvas. This EsObject adds information about a ball that one user created for the others in
the room:
function eventMouseUp(event) {
   var mouseX;
   var mouseY;
   if (event.layerX ||  event.layerX == 0) { // Firefox
      mouseX = event.layerX ;
      mouseY = event.layerY;
   } else if (event.offsetX || event.offsetX == 0) { // Opera
      mouseX = event.offsetX;
      mouseY = event.offsetY;
   }
   ballcounter++;
   var maxSize = 8;
   var minSize = 5;
   var maxSpeed = maxSize+5;
   var tempRadius = Math.floor(Math.random()*maxSize)+minSize;
   var tempX = mouseX;
   var tempY = mouseY;
   var tempSpeed = maxSpeed-tempRadius;
   var tempAngle = Math.floor(Math.random()*360);
   var tempRadians = tempAngle * Math.PI/ 180;
   var tempvelocityx = Math.cos(tempRadians) * tempSpeed;
   var tempvelocityy = Math.sin(tempRadians) * tempSpeed;
   var pmr = new PublicMessageRequest();
   pmr.message = "";
   pmr.roomId = _room.id;
   pmr.zoneId = _room.zoneId;
   var esob = new ElectroServer.EsObject();
   esob.setFloat("tempX",tempX );
   esob.setFloat("tempY",tempY );
   esob.setFloat("tempRadius",tempRadius );
   esob.setFloat("tempSpeed",tempSpeed );
   esob.setFloat("tempAngle",tempAngle );
   esob.setFloat("velocityx",tempvelocityx );
   esob.setFloat("velocityy",tempvelocityy );
   esob.setString("usercolor",usercolor );
   esob.setString("ballname",username+ballcounter);
   esob.setString("type", "newball");
   pmr.esObject = esob;
   es.engine.send(pmr);
   statusMessages.push("send ball");

   }
When a user connected in the same room receives this public
message, we handle the newball event in a similar manner to how we
handled the chat text, by using the onPublicMessageEvent() function. When the
function sees an event with the type newball, it calls createNetBall(). The createNetBall() function creates ball objects
to bounce around the canvas, much like the ones we created in Chapter 5:
function onPublicMessageEvent(event) {
statusMessages.push("message received")
var esob = event.esObject;
if (esob.getString("type") == "chatmessage") {
chatMessages.push(event.userName + ":" + esob.getString("message"));
} else if (esob.getString("type") == "newball") {
statusMessages.push("create ball")
createNetBall(esob.getFloat("tempX"),esob.getFloat("tempY"),
esob.getFloat("tempSpeed"),esob.getFloat("tempAngle"),
esob.getFloat("tempRadius"),esob.getFloat("velocityx"),
esob.getFloat("velocityy"),event.userName,esob.getString("usercolor"),
esob.getString("ballname") );
}
}
function createNetBall(tempX,tempY,tempSpeed,tempAngle,tempRadius,tempvelocityx,
tempvelocityy, user, usercolor, ballname) {
tempBall = {x:tempX,y:tempY,radius:tempRadius, speed:tempSpeed, angle:tempAngle,
velocityx:tempvelocityx, velocityy:tempvelocityy,nextx:tempX, nexty:tempY,
mass:tempRadius, usercolor:usercolor, ballname:ballname}
balls.push(tempBall);
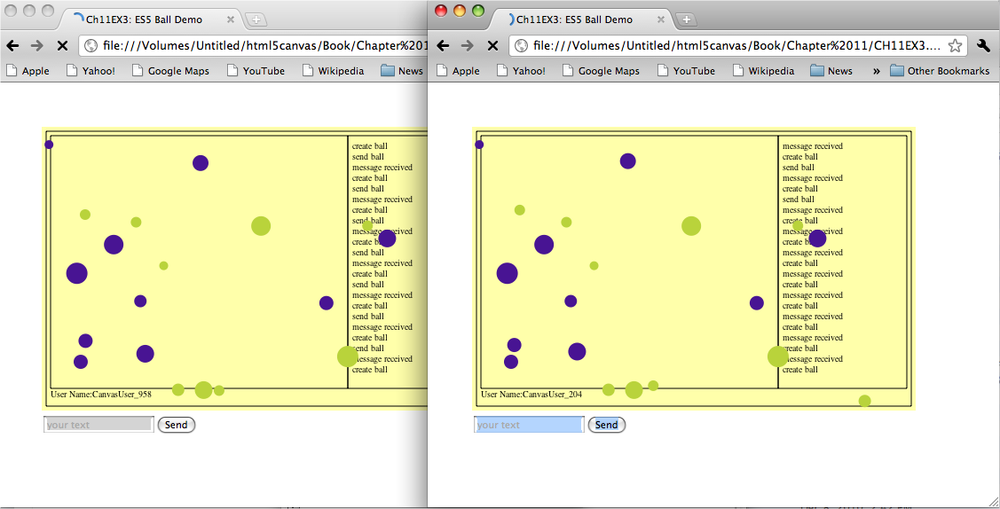
}Figure 11-6 shows what this demo looks like when users click the mouse button to send balls to other users. The colors of the balls are assigned randomly.
Example 11-3 gives the full set of code for CH11EX3.html.
<!doctype html>
<html lang="en">
<head>
<meta charset="UTF-8">
<title>CH11EX3: ES5 Ball Demo</title>
<script src="modernizr-1.6.min.js"></script>
<script src="ElectroServer-5-Client-JavaScript.js"></script>
<script type="text/javascript">
window.addEventListener("load", eventWindowLoaded, false);

function eventWindowLoaded () {
   canvasApp();
}

function canvasSupport () {
     return Modernizr.canvas;
}

function canvasApp () {

      if (!canvasSupport()) {
        return;
      }

      var theCanvas = document.getElementById("canvasOne");
      var context = theCanvas.getContext("2d");

      var formElement = document.getElementById("sendChat");
      formElement.addEventListener('click', sendMessage, false);

        function drawScreen() {
         //background
         context.fillStyle = "#ffffaa";
         context.fillRect(0, 0, 500, 320);

         context.fillStyle = "#000000";
         context.font = "10px _sans";
         context.textBaseline = "top";

         //box
         context.strokeStyle = '#000000';
         context.strokeRect(5,  5, 490, 310);

         var starty = 15;
         var maxMessages = 22;

         //status box
         context.strokeStyle = '#000000';
         context.strokeRect(345,  10, 145, 285);
         var starti = 0;

         if (statusMessages.length > maxMessages) {
             starti = (statusMessages.length) - maxMessages;

         }
         for (var i = starti;i< statusMessages.length;i++) {
            context.fillText  (statusMessages[i], 350, starty );
            starty+=12;
         }

         //chat box
         context.strokeStyle = '#000000';
         context.strokeRect(10,  10, 335, 285);

         starti = 0;
         lastMessage = chatMessages.length-1;
         if (chatMessages.length > maxMessages) {
             starti = (chatMessages.length) - maxMessages;
         }
         starty = 15;
         for (var i = starti;i< chatMessages.length;i++) {
            context.fillText  (chatMessages[i], 10, starty );
            starty+=12;
         }

         context.fillText  ("User Name:" + username, 10, 295 );

         update();
         testWalls();
         render();

      }

          function updateBall(ball) {
            ball.radians = ball.angle * Math.PI/ 180;
            ball.velocityx = Math.cos(ball.radians) * ball.speed;
            ball.velocityy = Math.sin(ball.radians) * ball.speed;

         }

         var statusMessages = new Array();
         var chatMessages = new Array();

         var server = new ElectroServer.Server("server1");

         statusMessages.push(server);

         var availableConnection = new ElectroServer.AvailableConnection
             ("localhost", 8989, ElectroServer.TransportType.BinaryHTTP);

         server.addAvailableConnection(availableConnection);

         var es = new ElectroServer();
         es.initialize();

         var username;
         var usercolor;
         var _room;
         var ballcounter = 0;

         es.engine.addServer(server);

         es.engine.addEventListener(MessageType.ConnectionResponse, onConnectionResponse);
         es.engine.addEventListener(MessageType.LoginResponse, onLoginResponse);
         es.engine.addEventListener(MessageType.JoinRoomEvent, onJoinRoomEvent);
         es.engine.addEventListener(MessageType.JoinZoneEvent, onJoinZoneEvent);
         es.engine.addEventListener(MessageType.ConnectionAttemptResponse,
             onConnectionAttemptResponse);
         es.engine.addEventListener(MessageType.PublicMessageEvent, onPublicMessageEvent);

         es.engine.connect();


         statusMessages.push("Connecting...");


         var balls = new Array();

         theCanvas.addEventListener("mouseup",eventMouseUp, false);

         var friction = 0;

         setInterval(drawScreen, 33);

         function eventMouseUp(event) {
            var mouseX;
            var mouseY;
            if ( event.layerX ||  event.layerX == 0) { // Firefox
               mouseX = event.layerX ;
               mouseY = event.layerY;
            } else if (event.offsetX || event.offsetX == 0) { // Opera
               mouseX = event.offsetX;
               mouseY = event.offsetY;
            }
            ballcounter++;
            var maxSize = 8;
            var minSize = 5;
            var maxSpeed = maxSize+5;
            var tempRadius = Math.floor(Math.random()*maxSize)+minSize;
            var tempX = mouseX;
            var tempY = mouseY;
            var tempSpeed = maxSpeed-tempRadius;
            var tempAngle = Math.floor(Math.random()*360);
            var tempRadians = tempAngle * Math.PI/ 180;
            var tempvelocityx = Math.cos(tempRadians) * tempSpeed;
            var tempvelocityy = Math.sin(tempRadians) * tempSpeed;
            var pmr = new PublicMessageRequest();
            pmr.message = "";
            pmr.roomId = _room.id;
             pmr.zoneId = _room.zoneId;
            var esob = new ElectroServer.EsObject();
            esob.setFloat("tempX",tempX );
            esob.setFloat("tempY",tempY );
            esob.setFloat("tempRadius",tempRadius );
            esob.setFloat("tempSpeed",tempSpeed );
            esob.setFloat("tempAngle",tempAngle );
            esob.setFloat("velocityx",tempvelocityx );
            esob.setFloat("velocityy",tempvelocityy );
            esob.setString("usercolor",usercolor );
            esob.setString("ballname",username+ballcounter);
            esob.setString("type", "newball");
            pmr.esObject = esob;
            es.engine.send(pmr);
            statusMessages.push("send ball");

         }

         function createNetBall(tempX,tempY,tempSpeed,tempAngle,tempRadius,tempvelocityx,
                                tempvelocityy, user, usercolor, ballname) {

            tempBall = {x:tempX,y:tempY,radius:tempRadius, speed:tempSpeed,
                angle:tempAngle, velocityx:tempvelocityx, velocityy:tempvelocityy,
                nextx:tempX, nexty:tempY, mass:tempRadius, usercolor:usercolor,
                ballname:ballname}
            balls.push(tempBall);
         }

         function onConnectionAttemptResponse(event) {
            statusMessages.push("connection attempt response!!");
         }

         function onJoinRoomEvent(event) {
            statusMessages.push("joined a room");
            _room = es.managerHelper.zoneManager.zoneById
                (event.zoneId).roomById(event.roomId);
            var formElement = document.getElementById("inputForm");
            formElement.setAttribute("style", "display:true");
         }

         function onJoinZoneEvent(event) {
            statusMessages.push("joined a zone");

         }

         function onConnectionResponse(event) {
            statusMessages.push("Connect Successful?: "+event.successful);
            var r = new LoginRequest();
            r.userName = "CanvasUser_" + Math.floor(Math.random() * 1000);
            es.engine.send(r);
         }

         function onLoginResponse(event) {
            statusMessages.push("Login Successful?: "+event.successful);

            username = event.userName;
            usercolor = "#"+(Math.random()*0xFFFFFF<<0).toString(16);

            var crr = new CreateRoomRequest();
            crr.zoneName = "TestZoneCuesors";
            crr.roomName = "TestRoomCursors";

            es.engine.send(crr);

         }

         function sendMessage(event) {
               var formElement = document.getElementById("textBox");
                var pmr = new PublicMessageRequest();
               pmr.message = "";
               pmr.roomId = _room.id;
                pmr.zoneId = _room.zoneId;
               var esob = new ElectroServer.EsObject();
               esob.setString("message", formElement.value);
               esob.setString("type","chatmessage");
               pmr.esObject = esob;
               es.engine.send(pmr);
               statusMessages.push("message sent")

         }

         function onPublicMessageEvent(event) {
            statusMessages.push("message received")
            var esob = event.esObject;

            if (esob.getString("type") == "chatmessage") {

               chatMessages.push(event.userName + ":" + esob.getString("message"));

            } else if (esob.getString("type") == "newball") {
               statusMessages.push("create ball")
               createNetBall(esob.getFloat("tempX"),esob.getFloat("tempY"),
                   esob.getFloat("tempSpeed"),esob.getFloat("tempAngle"),
                   esob.getFloat("tempRadius"),esob.getFloat("velocityx"),
                   esob.getFloat("velocityy"),event.userName,esob.getString("usercolor"),
                   esob.getString("ballname") );
            }

         }


          function update() {
            for (var i =0; i <balls.length; i++) {
               ball = balls[i];
               //Friction
               ball.velocityx = ball.velocityx - ( ball.velocityx*friction);
               ball.velocityy = ball.velocityy - ( ball.velocityy*friction);

               ball.nextx = (ball.x += ball.velocityx);
               ball.nexty = (ball.y += ball.velocityy);
            }

         }

         function testWalls() {
            var ball;
            var testBall;

            for (var i = 0; i <balls.length; i++) {
               ball = balls[i];

               if (ball.nextx+ball.radius > theCanvas.width) {
                  ball.velocityx = ball.velocityx*-1;
                  ball.nextx = theCanvas.width - ball.radius;

               } else if (ball.nextx-ball.radius < 0 ) {
                  ball.velocityx = ball.velocityx*-1;
                  ball.nextx = ball.radius;

               } else if (ball.nexty+ball.radius > theCanvas.height ) {
                  ball.velocityy = ball.velocityy*-1;
                  ball.nexty = theCanvas.height - ball.radius;

               } else if(ball.nexty-ball.radius < 0) {
                  ball.velocityy = ball.velocityy*−1;
                  ball.nexty = ball.radius;
               }

            }

         }

         function render() {
            var ball;

            for (var i =0; i <balls.length; i++) {

               ball = balls[i];
               ball.x = ball.nextx;
               ball.y = ball.nexty;
               context.fillStyle = ball.usercolor;
               context.beginPath();
               context.arc(ball.x,ball.y,ball.radius,0,Math.PI*2,true);
               context.closePath();
               context.fill();
            }

         }

}


</script>
</head>
<body>
<div style="position: absolute; top: 50px; left: 50px;">
<canvas id="canvasOne" width="500" height="320">
 Your browser does not support HTML5 Canvas.
</canvas>
<div id="inputForm"  style="display:none;">
<form>
<input id="textBox" placeholder="your text" />
<input type="button" id ="sendChat" value="Send"/>
</form>
</div>

</div>
</body>
</html>
This Is Just the Tip of the Iceberg
There is much more you can do with ElectroServer than what we
showed you in this chapter. Sending and receiving PublicMessage events can only get you so far
when designing multiuser/multiplayer applications.
To start designing multiplayer applications seriously, you will need to delve into the extension and plug-in architecture of ElectroServer, as well as explore plug-in events, which are used to communicate to the server portion of an application. We suggest you check out http://www.electrotank.com/es5.html for more information about the socket server. You can also read ActionScript for Multiplayer Games and Virtual Worlds by Jobe Makar (New Riders). Even though it centers on Flash and an earlier version of ElectroServer, the architectural information about designing apps for a socket server is well worth your time.
At the same time, ElectroServer can be used with technologies other than Canvas (Flash, iOS, etc.), so Canvas will be able to communicate with other socket servers via JavaScript and WebSockets. We chose to base this example on ElectroServer because it allowed us to create a full application for you to test and work through. Other libraries and tools are bound to appear very soon that can work with canvas; for example, the SmartFoxServer Ajax API. Still in beta, this API uses the Google Web Toolkit to connect to the SmartFox socket server through an Ajax connection in JavaScript. This library requires the SmartFoxServer BlueBox add-on module. In theory, this means SmartFoxServer could be used in conjunction with Canvas right now.
Conclusion
Over the past 11 chapters, you have been immersed in the world of HTML5 Canvas. We have given you dozens of examples and applications to work from and through so you can start building your own creations. From simple text displays to high-performance games, we have showed you many ways to bring some of the magic of previous RIA (Rich Internet Application) technologies into the plug-in-less browser experience.
We offered many strategies for integrating Canvas with other HTML5 technologies, as well as techniques for handling text, displaying graphics, scrolling bitmaps, creating animation, detecting multiple types of collisions, embedding and manipulating video, playing music, handling sound effects, creating user interfaces, optimizing code, and preparing apps for mobile platforms. We even introduced you to the future of 3D and multiuser applications directly in the web browser.
The true future, though, is up to you. HTML5 and Canvas are dynamic topics that are still in a rapid state of change and adoption. While this book is a good starting point, you will need to keep abreast of new changes to the technology. Visit our website, http://www.8bitrocket.com, for news and updates on HTML5 Canvas.
O’Reilly also has several books that you might find useful, including:
HTML5: Up and Running by Mark Pilgrim
Supercharged JavaScript Graphics by Raffaele Cecco
If you are interested in learning how some of the game-development techniques described in this book (as well as many others) can be applied to Flash, check out our other most recent book, The Essential Guide to Flash Games (friendsofED).
There is a real paradigm shift occurring right now on the Web. For most of the first decade of the 21st century, Java, Flash, Silverlight, and other plug-in RIA technologies dominated application development and design. At the time, there appeared to be no better solution for the development of rich applications in a web browser than to bolt on technology that was not native to the browser.
The emergence of the “connected apps” culture is changing this. Every platform—from phones to TVs, e-readers to tablets, wireless printers to desktop PCs—is targeted for web-enabled applications sold or distributed through an app store. In many ways, these apps are replacing RIA applications, or at the very least offering a compelling new platform for their development and distribution.
Where RIA technologies of the past—like Java, Flash, and Silverlight—could target nearly all web browsers and PCs, they are having trouble finding a true foothold in the area of connected apps (especially on platforms where they are restricted from running, like iOS). This is where HTML5 Canvas can really make a difference. With true cross-platform execution, applications run in the web browser (or compiled with technologies like PhoneGap) can be made available to the widest audience possible. Soon these applications will be enhanced with 3D graphics and have the ability to communicate with one another via technologies like the ElectroServer socket server. One can envision a day in the near future where technology platforms fade away, and the web-connected app world simply works, regardless of screen or location. This is the promise of HTML5—especially HTML5 Canvas. So, now that you have the tools to begin, what do you plan to build?
Get HTML5 Canvas now with the O’Reilly learning platform.
O’Reilly members experience books, live events, courses curated by job role, and more from O’Reilly and nearly 200 top publishers.

