Every DVD project you work on will flow in a fairly standard way. Although you'll certainly encounter projects in which you must add a new clip at the last minute or delete a bonus item that wasn't ready to be included, most of your projects will follow the five basic steps shown in Figure 1-14.
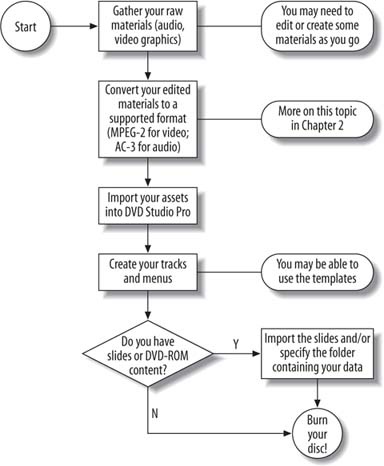
We'll work through these five steps in the following sections, using the sample media from the projects/ch01 folder on the accompanying DVD. Again, you should feel free to skip this project if you're already familiar with DVDSP. If you're just starting out or want to play with the new version, dive on in!
The first step is, of course, gathering your raw materials. You need to collect your movie clips, audio to accompany the movies, and images (or more movies) to use for the menus. Chapter 2 details the specific formats that DVDSP supports. However, the big thing to realize/remember here is that you usually do all of this work outside of DVDSP. DVDSP is the last application along the path to getting video onto a DVD. For the earlier steps, Apple's Final Cut Pro and Adobe's Photoshop are particularly well suited to producing the right type of media.
Final Cut Pro enables you to edit your movie and add fancy things such as titles and special effects. Once you have your movie in good shape, you can export it to MPEG-2. Figure 1-15 shows the export dialog for Final Cut Pro.
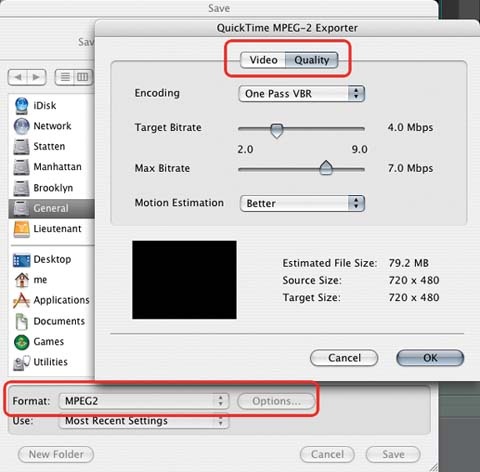
The export will create two files: a movie file (.m2v) and an audio file (.aif ). You'll need both files once you're inside DVDSP. We actually converted the audio file to the AC3 format to save a bit of space, but more on that in Chapter 2.
Note
DVDSP 3 does enable you to import other types of audio/video files that QuickTime understands, such as Digital Video streams. But before you burn your disc, you'll have to encode those files to MPEG-2. In other words, DVDSP 3 will transcode it for you. The downside to this approach is that it takes a lot longer to build the project.
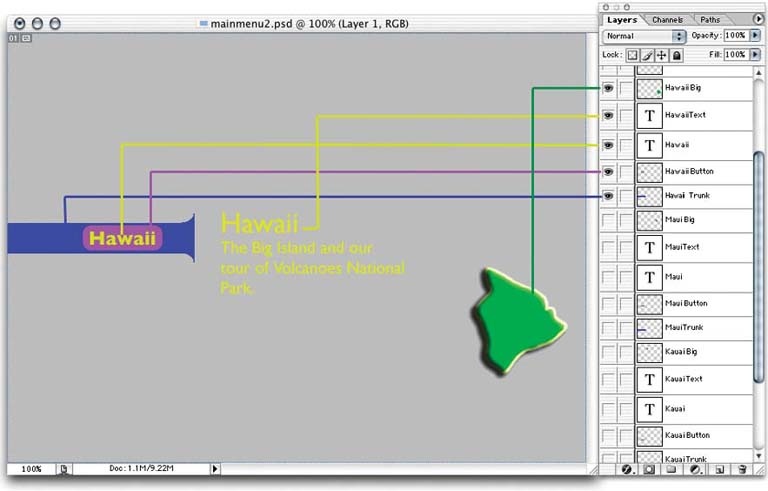
Adobe Photoshop enables you to create extremely intricate menus using its Layers feature. The layers form the various buttons and screens available in your menus, as shown in Figure 1-16. Layered Photoshop images are best saved in Photoshop's native PSD format, so you don't need to export them into a non-native format. You also can use your favorite editing software to create still images for simple menus. Chapters 2 and 3 provide more details on this.
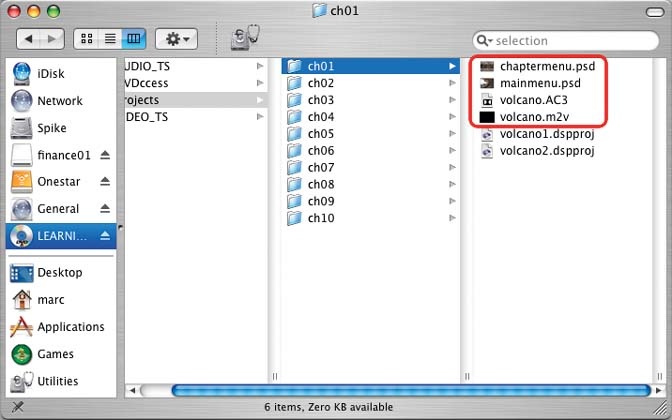
You can see the various files for another volcano-related project in Figure 1-17.
From DVDSP's File menu, you can import files by selecting Import â Asset⦠(or just pressing Shift-
I). Select all the files you want to load and click the Import button. Your imported files should show up in the Assets tab.
For our first project, go ahead and import the following files from the Chapter 1 folder on the companion DVD:
volcano.m2v
volcano.aif
For the moment, we'll rely on the graphics built into the templates for all the menu images. Templates make quick work of simple projects! (But more on templates in Chapter 10.)
First things first: let's switch to a simpler interface configuration for this project. Press the F1 key or select the Basic configuration in the Window â Configurations menu to set up the two key windows you need to get started. You should have the Main layout window and the Palette open, as shown in Figure 1-18.
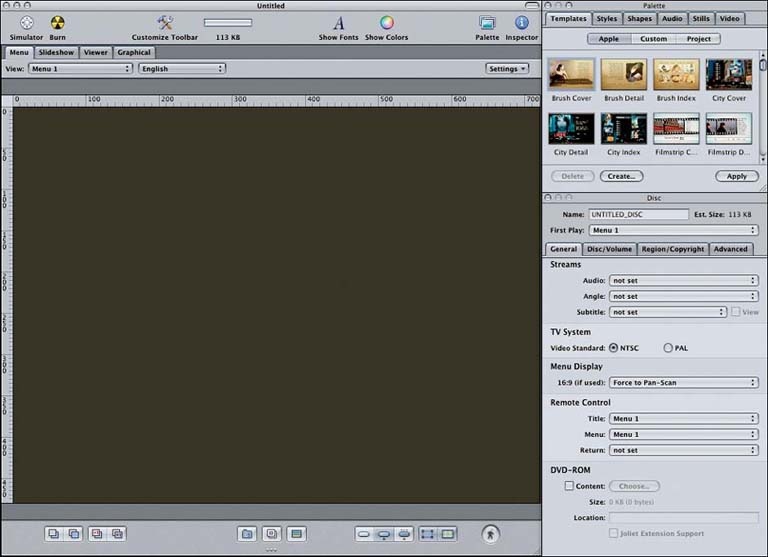
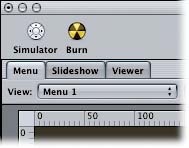
In the Main window on the left, you should have four tabs: Menu, Slideshow, Viewer, and Graphical. Click the Menu tab so that it is raised and highlighted (if it isn't already), as shown in Figure 1-19. You'll be rewarded with a drab, blank gray canvas! Don't worry, we're about to change that.
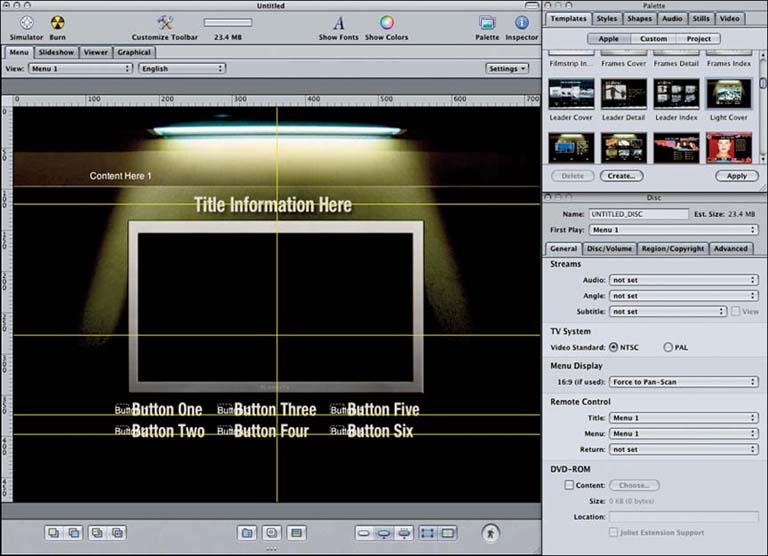
In the Palette, select the Templates tab. Scroll down to find the Light Cover template. Double-click that icon. It should transform that blank gray canvas into a spiffy, nearly completed menu. Check out Figure 1-20 to see the results.
We say nearly completed because you've still got some work to do. First you want to fill in that big box in the middle with something a bit more interesting. For that, you need your assets, so grab the Assets tab by pressing
1 or selecting Window â Assets. Drag the volcano.m2v asset over the box, as in Figure 1-21, and pause for a moment. You should see a set of options magically appear.
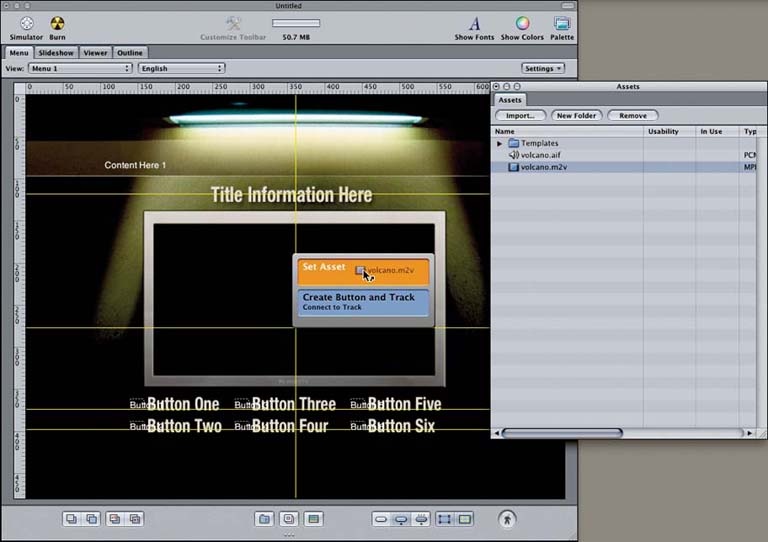
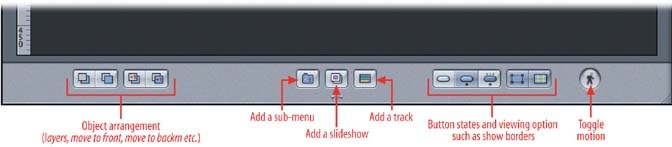
You'll want to choose the Set Asset option. It shows you the first frame of the videoâwhich in this case is all black. You can check that the drop really worked by clicking the Toggle Motion button, which is represented by the little walking person at the bottom of the Main window shown in Figure 1-22.
You'll also want to change the default text; "Title Information Here" just doesn't seem very interesting. Give your project a nice title (we used "Volcano Flight") by double-clicking the default text and then typing your new title. Be careful, as DVDSP 3 can be a bit twitchy when you're editing text. Words to the wise: make sure you have a blinking cursor before editing the text.
Note
Using motion backgrounds can be a great way to create eye-popping menus. You'll get to see more details on using video for menus in Chapter 4. We just want to warn you that turning on motion with that Toggle Motion button can tax your system. It's great for quick previews, but it is not meant to be left on indefinitely. Of course, with each evolution of Mac hardware making leaps and bounds, this warning might not apply for long!
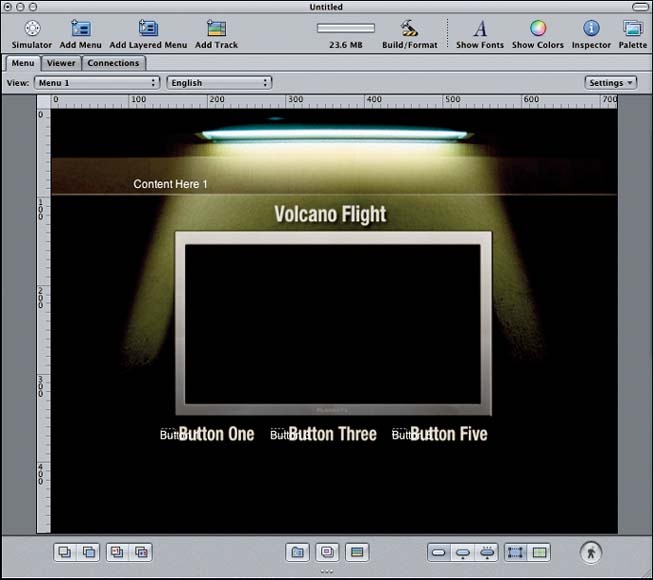
Next, delete the lower three buttons (Button Two, Button Four, and Button Six). You select a button by clicking inside its dashed border. To delete it, press the Delete key. We'll deal with the upper three buttons in a few minutes, but for now, your project should look like Figure 1-23.
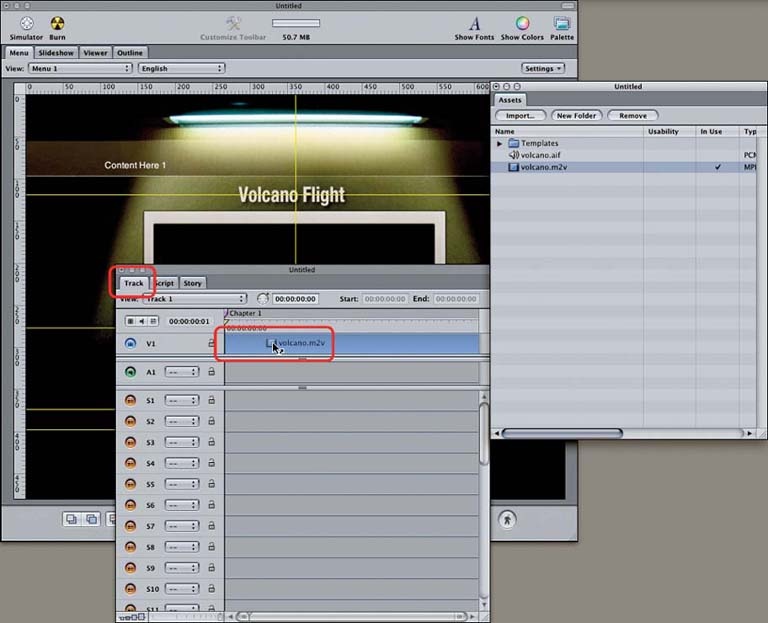
Next, you need to add a new track for the video itself. Click the Add a Track button at the bottom of the Main window. You should see the Track tab pop up. You need that Assets tab again, so go ahead and raise it (
1). Then, drag the volcano.m2v file from the Assets window to the Track window, as shown in Figure 1-24. Be sure you use the Track tab and not the Menu tab; otherwise you'll end up with an extra button on your menu!
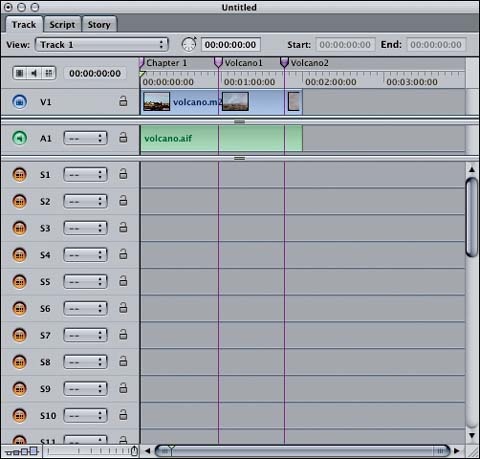
Notice in Figure 1-25 that the audio file was added automatically, along with the video. You won't always want that, but it's perfect for what we're trying to do this time around. You might be wondering about those purple lines running down the track listing. Those are actually the chapter markers we set inside Final Cut Pro. You also can set new markers here if you need to, but we'll talk about that later.
That's actually all there is to the video track. You'll have to go back and link your menu to the video, but for now you can go ahead and close the Track window.
Setting up your buttons is easy with templates. For each button, you should Control-click (or right-click if you have a three-button mouse) the button and set the target. Figure 1-26 shows the pop-up menus you should see.
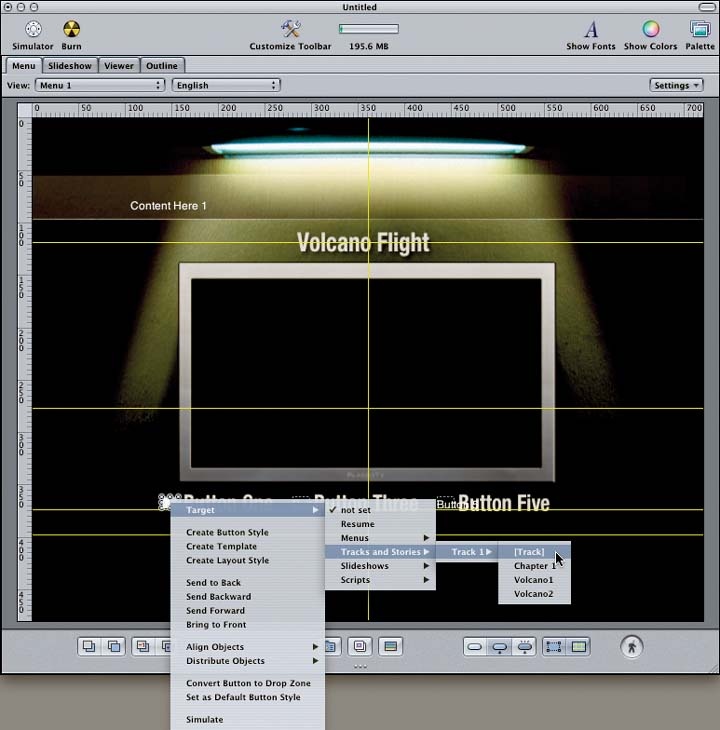
You'll also want to double-click the text to the right of the button and change it to match the actual video content. Table 1-1 shows the targets and text we used for the buttons.
That should be it! Make sure you save your project before moving on. Once you do, you should be able to launch the Simulator and check out your project. The Simulator is easy to launch from the toolbar, as shown in Figure 1-27.
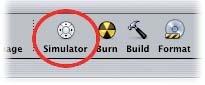
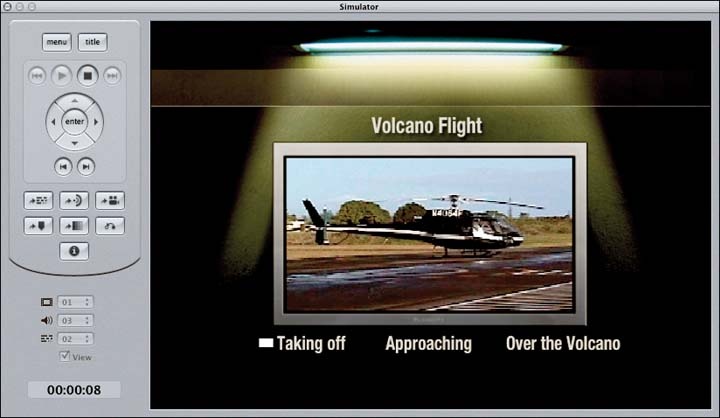
Figure 1-28 shows our current project in the Simulator. If you're happy with how the project works in the Simulator, you're set. All you have left to do is to burn the disc. But we'll save that for the grand finale of the chapter. (If you can't wait, skip to the section "Burning the disc," later in this chapter.)
In our next project we'll re-create much of what we've done here, but this time from scratch. Although templates work great in many situations, you'll find some projects demand more. You can deliver on those needs with DVDSP; you just need to do a bit more of the legwork yourself.
Get DVD Studio Pro 3: In the Studio now with the O’Reilly learning platform.
O’Reilly members experience books, live events, courses curated by job role, and more from O’Reilly and nearly 200 top publishers.

