To further verify that your app resonates with your customers and to reduce software issues in your app, you are going to want to install it onto your device and your customers’ devices before Apple even sees it.
In this chapter, you’ll explore:
Installing the app on your device
Understanding “beta” and working with your beta testers
Performing quality assurance by collecting feedback
Working with your developer to resolve bugs
Testing your app before it reaches the App Store will likely be one of the most difficult and frustrating tasks you’ll encounter. It will also be one of the most important things you’ll do.
The difficulty of this process is that Apple wants your app in its store and not “in the wild.” So, although Apple provides a means for distributing your app directly to customers, it’s tedious and limiting. The tedious part is that you need to grab some unique information from each customer’s device, called a UDID (unique device identifier); the limiting part is that Apple only provides 100 testing slots per year in the standard developer program (which is probably what you initially signed up for during registration).
Note
Although registering for the iOS Developer Program is covered in the Appendix, it is worth noting here that Apple also has an iOS Developer Enterprise Program, which costs $299 instead of $99. Though you will still need to register for the standard program to distribute applications on the App Store, the enterprise program streamlines internal distribution and allows unlimited slots to test applications in-house. To qualify for this program, you need to verify to Apple that your company has at least 500 employees. More information is available at http://developer.apple.com/programs/iphone/enterprise/.
To have your app installed onto your and your customers’ devices, you’ll collect UDIDs, register them with Apple, subsequently download a mobile provisioning file, and then use that file along with your app to get it working on the device. This process probably appears confusing, so I’ll walk you through each step.
“UDID” stands for “unique device identifier.” A UDID is a 40-character alphanumeric identification number that’s unique to every single iPhone, iPad, and iPod touch. You and your testers need the UDID of each device onto which you plan to install your app for testing.
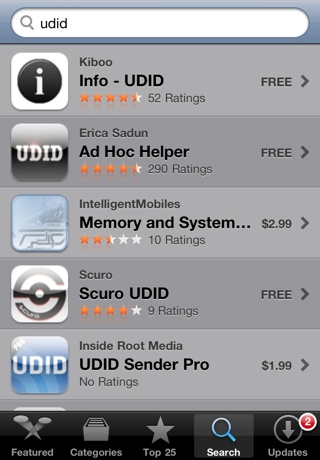
There are several ways to collect the UDID, and I’ll cover two now. The simplest method is to use one of the dozens of apps on the App Store that will both pull the UDID from the device and quickly send it to you via email. Simply search for UDID in the App Store. The apps that appear at the top of the resultant list are your best options (see Figure 6-1). Some apps, such as Info – UDID, provide other device information, including OS version and device features.
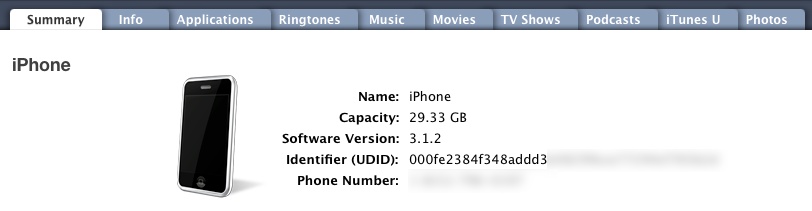
Another method for obtaining the UDID is through iTunes. Plug in your device, select it in iTunes, and visit the Summary tab. Click the words “Serial Number” in the top section (they won’t appear clickable), and they will transform to “Identifier (UDID).” Select Edit from the menu and choose Copy (see Figure 6-2). The UDID will then be placed on the clipboard.
Note
Before you read this section, keep in mind that I won’t be dissecting Apple’s iOS Provisioning Portal (http://developer.apple.com/ios/manage/overview/index.action), which is part of the iOS Dev Center (http://developer.apple.com/ios/). The reasons are to protect you from being overwhelmed and to continue to equip you with only what you need to know to get your job done.
This section assumes that your developer has set up your App ID and iOS Distribution Certificate, and that you have the appropriate permissions to register devices into the iOS Provisioning Portal (http://developer.apple.com/membercenter/help.action?programType=iphone).
You may deem what I’m about to detail for you as too technical. The truth is, you really never have to visit the iOS Provisioning Portal and can pass this task to your developer. But if you want to free yourself from always relying on your developer and help keep him focused on more important and less logistical tasks, keep reading.
The iOS Provisioning Portal is a critical part of the iOS Dev Center that provides you the resources to distribute your application both outside and on the App Store. You are currently in the “outside” state, which Apple calls ad hoc distribution, and to use this method of distribution you need to register the UDID of any devices that will run the current version of your app.
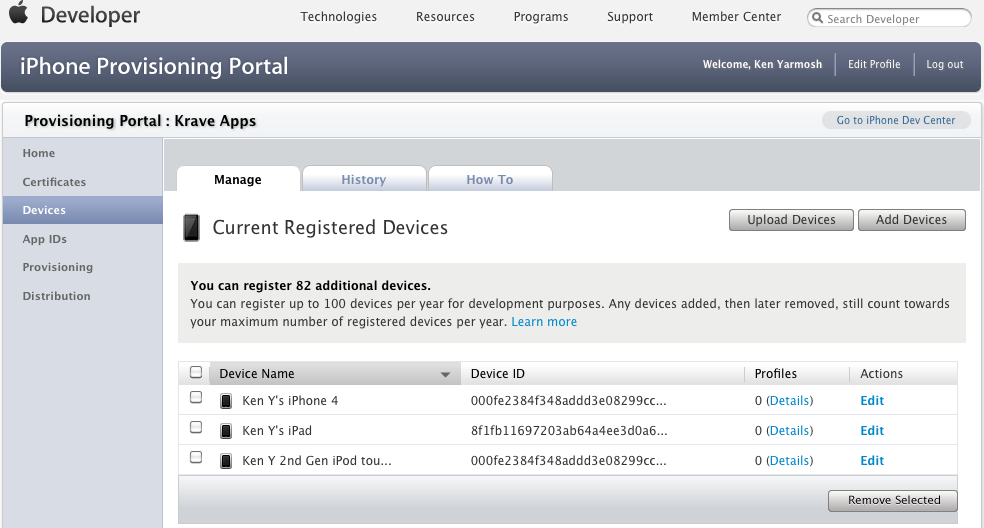
Once you have those UDIDs, browse to the iOS Provisioning Portal and visit the Manage tab of the Devices section (http://developer.apple.com/ios/manage/devices/index.action). This area is where you’ll be submitting the UDIDs to Apple. You can add each UDID individually or upload them all in a .txt or .deviceids file via the Add Devices or Upload Devices button. Each UDID must be accompanied by a Device Name, which helps you distinguish the UDIDs from each other. More significantly, the Device Name will replace the use of the UDID (which is a long alphanumeric string) and become the main way to reference a device. For these reasons, make this name descriptive (such as “First-name Last-initial Device-type”). For example, aside from my iPhone 4, I have a 3G and 3GS iPhone, second-generation iPod touch, and 3G iPad. So, I’d name them “Ken Y iPhone 3G,” “Ken Y iPhone 3GS,” “Ken Y iPod touch 2nd Gen,” and “Ken Y 3G iPad,” respectively.
Be careful and somewhat selective with the UDIDs that are added. Even if you remove one of the devices and then add it back later, it will still count toward the 100-devices-per-year regulation that Apple stipulates. Apple does this so that you don’t try to use this method as a permanent alternative to the App Store.
Once you add one or more UDIDs, you’ll see them added as registered devices. Notice that they will show as “0” in the Profiles column (see Figure 6-3). That will change once you complete the next step.
To install an app outside the App Store through ad hoc distribution, Apple requires that a provisioning profile be present on the device. There’s more to a provisioning profile than what I’ll discuss here, but for now just note that it essentially informs a device that an app not approved by Apple can be installed.
Click down to the Provisioning section of the iOS Provisioning Portal and select the Distribution tab to associate the devices added in the previous section to the provisioning profile for your app. Although this step depends on how your developer set up the provisioning profile, it will probably be specific to your app and the type of distribution you’ll be doing. Although there are compelling reasons to have one profile per distribution type (including requiring that you and your testers install only one provisioning file for all your apps), you’ll probably want to have a quick chat with your developer if you see a generic provisioning profile name that doesn’t inform you of its contents (e.g., “mobile provision” versus “App Name Ad Hoc”).
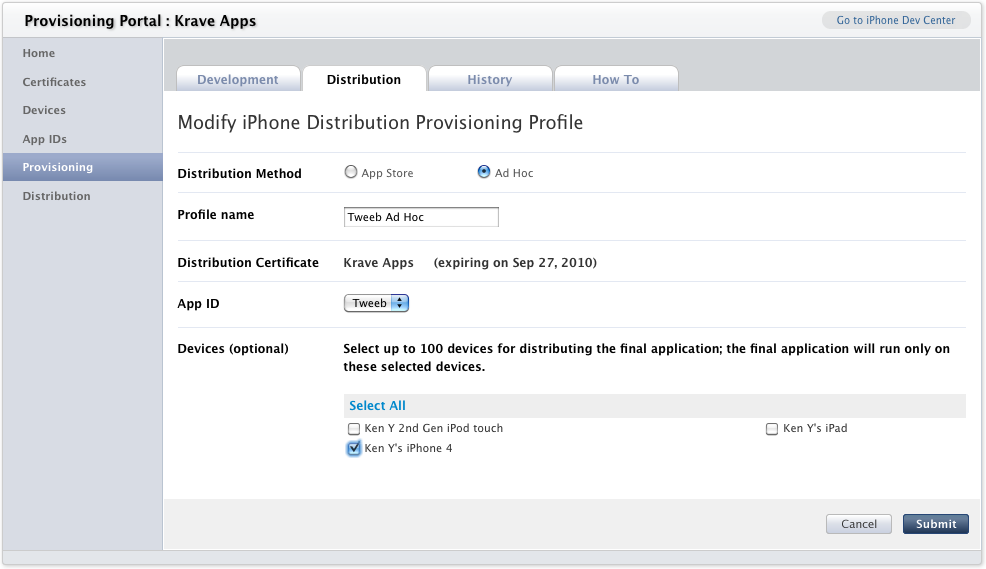
To associate device names with the appropriate provisioning profile, click the Edit link in the last column. You’ll then be brought to the Modify iOS Distribution Provisioning Profile page, where you’ll see the distribution method of the profile, along with some other developer-centric information such as the App ID. Since the distribution method in this case is Ad Hoc, the bottom section is where you’ll be able to select the devices you want to run your app. Choose Select All if you’re adding all the device names, or use the checkboxes to select a subset of them (see Figure 6-4).
The madness is almost done. Click the Submit button when you’ve added all the appropriate devices. You’ll find yourself back on the Distribution Provisioning Profile page, with the Status of the provisioning profile (the one you just added devices to) changed to Pending. Refresh the page and it will soon read Active again. Click the Download button to finally receive your prized mobile provisioning file (which will be named according to the provisioning profile and will end with .mobileprovision). Put this file in a safe place. You and your customers will use the provisioning profile, along with your actual app, to install the app onto your device.
Note
Anytime you add a new device for testing, you’ll need to add it to the provisioning profile and subsequently download this file again.
Up to now, you’ve likely only seen your app run in the iPhone Simulator. With all the work you’ve just done, you are close to finally seeing it on your device.
The last ingredient you need in order to install your app is the “ad hoc distribution” development version of it. Your developer should provide this file to you, which will end with .app or .ipa. If your developer doesn’t name the file descriptively enough, you may want to add the version number or date to it (e.g., “App-Dev-v091.app”). As you continue the testing process, you might need to revert to one particular version, and a standard naming convention will help you locate the right one.
Take both the mobile provisioning and app files and drag them into iTunes under the Library area. You don’t need to drag them into any particular category; iTunes will know what to do with them. Connect your device, select it, and then go to the Applications tab. You should see your application available under Sync Applications. Select it and then click the Sync button.
In theory, the development version of your app should now be installed. From my experience, however, installing an ad hoc app through iTunes almost never works properly the first time a sync occurs, even if everything was done correctly.
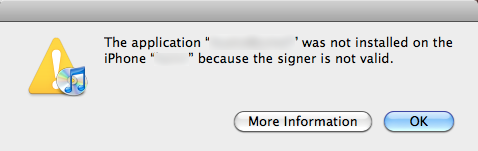
The most common error for the app not being installed relates to a “signer not valid” error (see Figure 6-5). This message usually occurs when the developer’s credentials were not configured properly in building the app for distribution. Try syncing again first. If the same message reappears, your developer will need to send you a new mobile provision, new app, or new versions of both files.
During development, it’s a good practice for you to completely remove the app from your device before installing the next version of it. So, if you tested one part of the app’s functionality and then a new feature is completed and available to test, delete the app from your device and remove the existing app in iTunes (go to the Applications section under the Library area, find the app, right-click it, and select Delete; then select Move to Trash when prompted). A good practice—although definitely playing it safe—is to sync your device at that point to make sure both the device and iTunes agree that the app is gone. You should then drag the latest version of the app back into the Library and follow the aforementioned steps to install it.
Note
Although not as conservative or thorough, you may also just want to ask your developer to update the build number, which should prompt the ad hoc app to “upgrade,” rather than following the process described in this section.
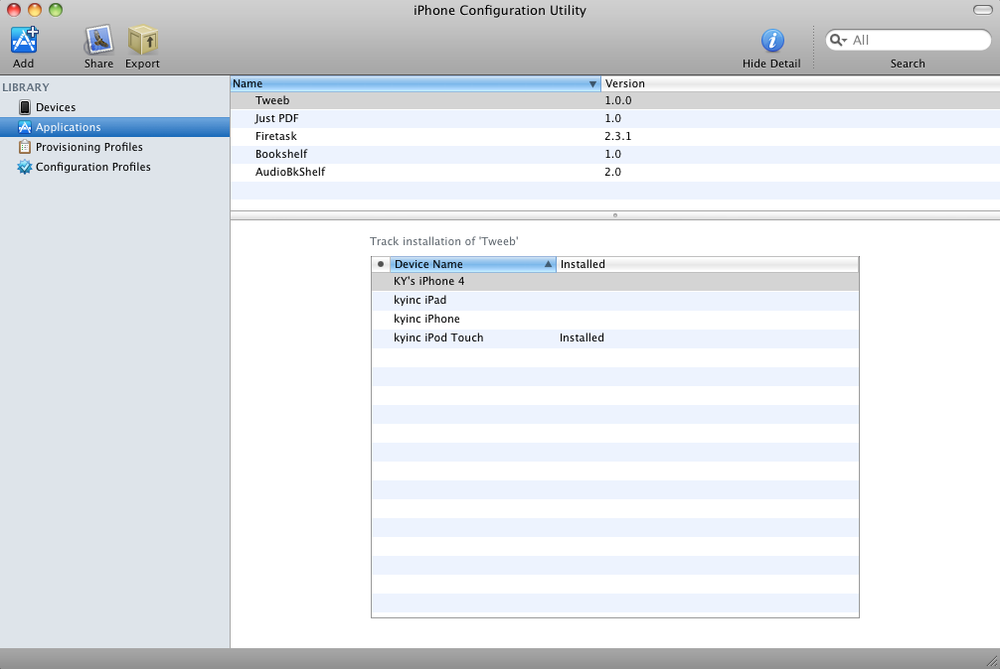
You’ll quickly find that using iTunes to manage your app is slow and frustrating. One of my favorite tools, which speeds up the installation considerably, is the iPhone Configuration Utility (http://support.apple.com/kb/DL851, shown in Figure 6-6). This tool does not require syncing and will allow you to install the profile and the app directly onto your device.
Drop the provisioning profile and application under the Library area. Then, attach and select your device and install the appropriate provisioning profile in the Provisioning Profiles tab. Once those steps are completed, you can install the app under the Applications tab.
More generally, as you become comfortable with this process, you may not want to wait for your developer to send you versions of your app to test. If you are willing to get more into the technical details, have your developer set you up so that you can build your app directly onto your device through Xcode. This setup will allow you to access the latest version of your app without your developer’s assistance. You’ll start by accessing your app’s repository, as described in Chapter 5. If you’d like to learn more, check out Building onto a device in this book’s Appendix.
Get App Savvy now with the O’Reilly learning platform.
O’Reilly members experience books, live events, courses curated by job role, and more from O’Reilly and nearly 200 top publishers.

