Name
Insert → Picture → AutoShapes
Synopsis
Choose Insert → Picture → AutoShapes to display the AutoShapes toolbar (Figure 7-29), which offers six different categories of geometric shapes, callouts, and lines.
Figure 7-29. Choosing an AutoShape
To draw a shape, select one of the categories by clicking the Lines, Basic Shapes, Block Arrows, Flowchart, Stars and Banners, or Callouts button. From the resulting palette, click a line or shape and move the pointer onto the page. When your pointer turns into a cross, click and drag to draw the shape. Figure 7-30 shows an AutoShape in progress.
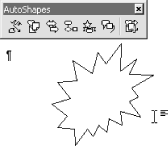
Figure 7-30. Drawing an AutoShape
Once the AutoShape is drawn, move it by dragging or resize it by selecting the object and dragging the handles that appear. Use the Drawing toolbar’s buttons to change the rotation, fill color, outline color, and to apply shadows or 3D effects.
Access the same group of AutoShape palettes from the Drawing toolbar’s AutoShapes menu. Click the menu and select a group, and from that group click a shape or line to draw. Once the shape is drawn, change its appearance, position, and relationship to surrounding text by right-clicking the shape or line and choosing Format AutoShape from the context menu.
Get Word 2000 in a Nutshell now with the O’Reilly learning platform.
O’Reilly members experience books, live events, courses curated by job role, and more from O’Reilly and nearly 200 top publishers.

