Managing and Updating Your Content
Uploading content is only half the battle of content management in Moodle. You’ll need to ensure your uploaded content is current, and you’ll occasionally want to replace or delete files. Fortunately, Moodle has some useful features to help you manage your content once it’s on the server.
File Area Tools
Once you’ve uploaded your files, they are stored in the Files area. When you create a link to a file, you store the file in the Files area and create a link for your students to access it.
To access the Files area, click the Files link in the Administration block, as shown in Figure 3-10.
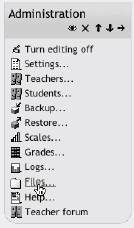
Figure 3-10. Files link in the Administration area
Each uploaded file and file folder has a checkbox beside it. You can select one or more files and then move or archive them using the tools in the dropdown menu on the lower-left side of the file list. By default, it reads “With chosen files....” If you click on the menu, you’ll see three things you can do with your chosen files:
- Move to another folder
To move uploaded content to another folder in the Files area:
Select the file(s) you want to move.
Select “Move to another folder.”
Navigate to the folder where you want to move the selected files.
You’ll see a new button at the bottom of the screen that says “Move Files here.” Click the button, and the files will move to the new location.
- Delete completely
This will remove all ...
Get Using Moodle now with the O’Reilly learning platform.
O’Reilly members experience books, live events, courses curated by job role, and more from O’Reilly and nearly 200 top publishers.

