One of the most important things to do on any computer is to configure the network settings properly. On a server, this is even more important than on client computers, which often pull their network connections dynamically, making them somewhat of a zero configuration affair. On a server, the settings need to be static, and so before you start installing the server, you need to define them.
Mac OS X 10.6 and below had a different operating system for the server product than for the client product. The installer was different, you booted to optical media or an image to run the installation, and during the setup process for the server, you had to type in the IP address and other network information. In Lion Server, you run Lion before installing Lion Server. Therefore, this information has presumably been provided as part of the OS X configuration.
But you should still configure these items before installing the Lion Server software from the App Store. The first step is to obtain the IP address, subnet mask, and gateway settings before you install anything.
The various network settings installed on a server come from the network environment. If you have an AirPort, Linksys, or other device guarding your network and splitting your IP address so others can use it, then you likely have full control over what settings you use on the network. If you are installing OS X Server into a much larger environment, then you likely do not have control and need to obtain the correct settings to use from a network administrator.
If you have control over the network devices, then the most important aspect of choosing an IP address is that it is not in the DHCP pool. DHCP, or Dynamic Host Control Protocol, is how computers receive IP addresses automatically when they are configured to do so. In smaller networks, the DHCP pool is often defined and IP addresses allocated by the router. There are a number of options for routers, but weâll just look at the Apple AirPort in this example. However, the concepts apply to any router you may be using.
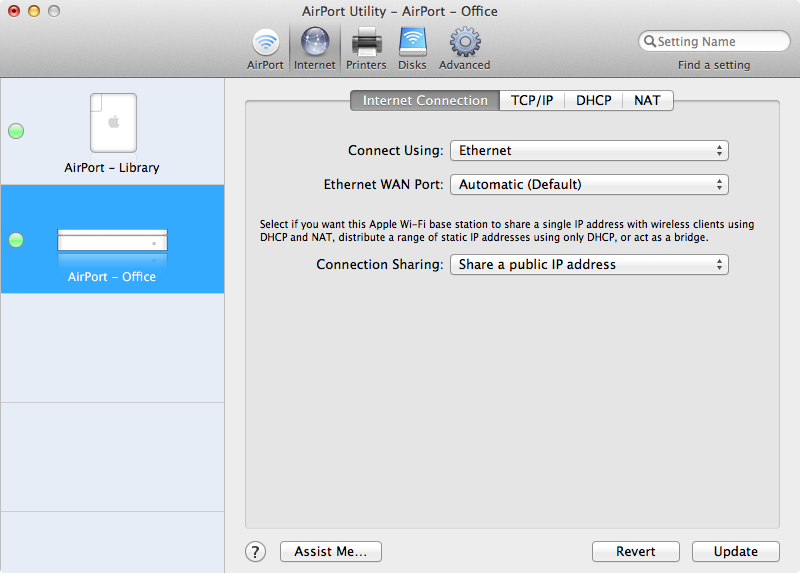
To look at the DHCP settings on an Apple AirPort, first open AirPort Utility from /Applications/Utilities. Then click on Manual Setup and then on the Internet button in the AirPort Utility toolbar. Next, click on the Internet Connection tab and verify that the Connection Sharing field is set to âShare a public IP address,â as shown in Figure 1-1. This means that DHCP is automatically enabled.
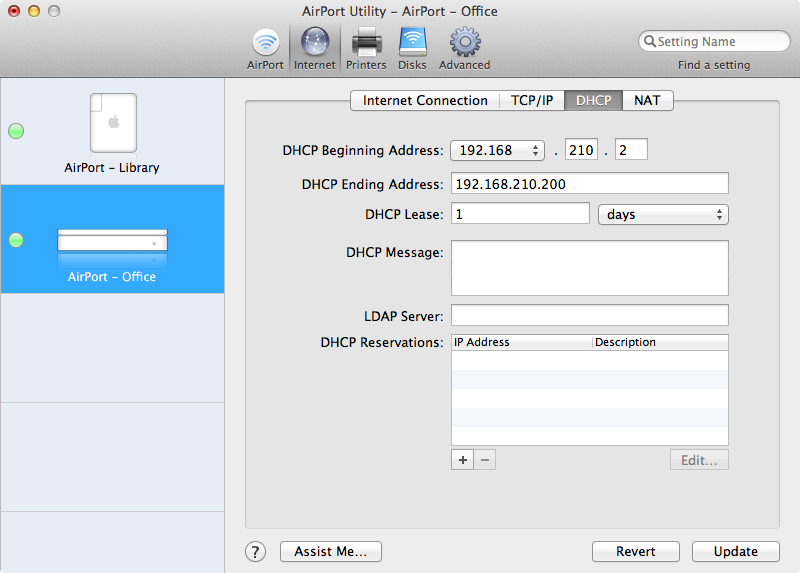
To then see the DHCP settings, click on the DHCP tab. Here, the beginning and ending IP addresses are defined. The IP address you choose for your server should not be one of these. IP addresses range from .1 on the network to .254. Given that the gateway, or router, is typically one of these, the server is often best set to .2 through .253. For example, if your gateway is 192.168.210.1, then the server can easily be set to 192.168.210.2. You would then change the DHCP Beginning Address from 192.168.210.2 to 192.168.210.3 (as in Figure 1-2) so that the scope of your DHCP addresses does not include the IP address you are using for the server. Keeping the IP address low in this fashion helps you to remember which IP address the server is using, although for the most part the goal will be to access the server by a name (e.g., home.krypted.com) rather than accessing the server by an IP address.
The IP address is a unique address used to access the server and should not be used by any other devices on that network. The subnet mask, gateway, and DNS servers will also need to be configured in order to access the server, have it route traffic to the Internet, and access other computers by name (respectively).
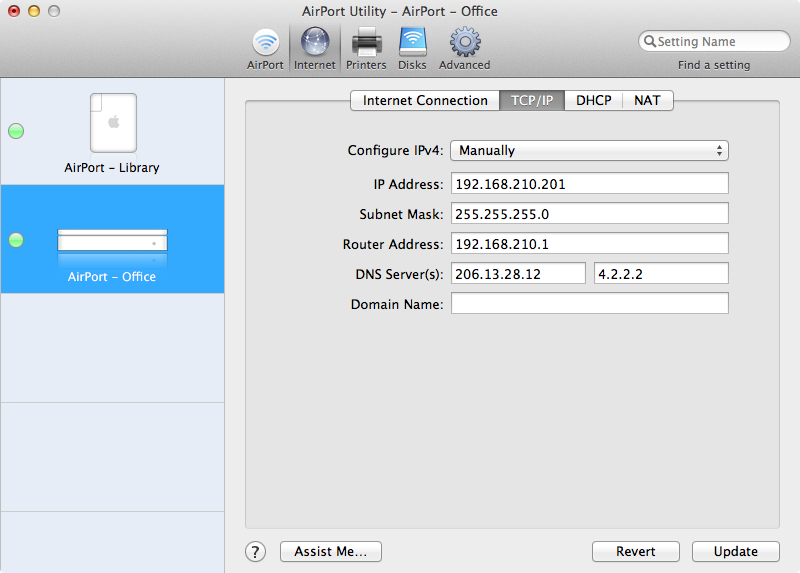
The subnet mask defines the size of the network. By default, the subnet mask is configured as 255.255.255.0 on an Apple AirPort and most other consumer-level routers. The setting that is used on an Apple AirPort can be found by opening AirPort Utility from /Applications/Utilities and clicking on the Internet button in the AirPort Utility toolbar. From here, click on the TCP/IP tab and the Subnet Mask field will show the setting that you will most likely use on the server (whether the server is wired or runs wirelessly).
The IP address and subnet mask is required to configure TCP/IP in Mac OS X. Although most environments will still use a gateway and DNS settings, they are not required. The IP address and subnet mask have been fairly straightforward to determine thus far. The gateway can be a slightly more complicated affair because the wireless access point can act as the gateway, but isnât always. If the AirPort is the gateway, then you can use the IP address from Figure 1-3. Otherwise, you will most likely use the gateway that is listed in AirPort Utility. A router, which in this context is synonymous with a gateway, connects two networks.
A router can also translate a single IP address into a network using Network Address Translation, a protocol used for placing a number of devices behind a single IP. This IP would often be a routable IP address, or one that can be used to access resources from outside the network. Isolating an improperly configured gateway setting is a straightforward affair. If you can connect client computers to the server from inside the network but cannot connect remotely (and can access other computers internally but not access external resources), then you more than likely have an improperly configured gateway setting. This test pertains to IP address-based communications only.
Get Using Mac OS X Lion Server now with the O’Reilly learning platform.
O’Reilly members experience books, live events, courses curated by job role, and more from O’Reilly and nearly 200 top publishers.

