Chapter 6. Writing and Editing Your Blog Posts
In This Chapter
Writing a blog post
Managing how your post looks
Categorizing your content
Managing and editing existing posts
Differentiating between posts and pages
It's the reason you started a blog in the first place, most likely: You have a story to tell, either in words or pictures, and you'd like a place to tell it. You've signed up for a TypePad account, and you're beginning to grasp the functionalities of the Dashboard. You have your first blog set up just the way you want it. Those are all important preliminary steps, but guess what? Now it's time for the fun part: writing a post.
In this chapter, we show you not only how to write a new post in the Compose editor, including how you can tweak the font with different colors and sizes, but also how to categorize and edit existing posts. We also walk you through the simple steps of inserting images into your posts.
Composing Your First Blog Post
At the heart of the TypePad Dashboard is the Compose editor. The Compose editor is where you write and edit new posts (and edit older posts).
Finding the Compose editor couldn't be simpler. On the Dashboard, look at your list of blogs (or blog, if you have only one) on the right side of the screen. Determine which blog you want to post to, and look to the right of its name for the Compose link (see Figure 6-1).
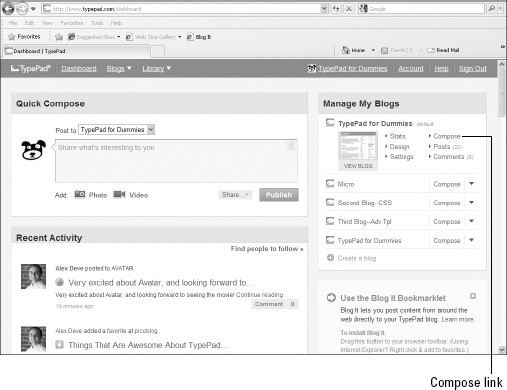
Figure 6.1. The Compose link next to ...
Get TypePad® for Dummies® now with the O’Reilly learning platform.
O’Reilly members experience books, live events, courses curated by job role, and more from O’Reilly and nearly 200 top publishers.

