Chapter 4. Web Servers
It’s probably safe to say that these days, most new software is being developed in the form of web applications. People spend an increasingly large part of their day in their web browser, not just reading HTML pages but sending email, managing calendars, entering records into databases, updating Wiki pages, and writing weblog posts.
Even if you’re not writing an application strictly for the Web, a web interface is often the easiest way to provide a cross-platform UI for things like administration and reporting. The ability to include a lightweight web server inside your app without introducing any additional dependencies is one of the great things about developing with Twisted. This chapter shows you how to run a web server using Twisted, and introduces you to some building blocks for creating web applications. It also offers an example of a custom HTTP proxy server.
Tip
This chapter provides some introductory information about the HTTP protocol used by web servers and web clients. There are many additional details of HTTP that you should know if you’re serious about building web applications. In fact, there’s enough information to write an entire book on the subject, such as HTTP: The Definitive Guide by David Gourley and Brian Totty (O’Reilly). There’s also no substitute for reading the HTTP spec, RFC 2616 (http://www.faqs.org/rfcs/rfc2616.html).
Responding to HTTP Requests
HTTP is, on its surface, a simple protocol. A client sends a request, the server
sends a response, the connection closes. You can experiment with HTTP by writing your
own Protocol that accepts a connection, reads the
request, and sends back an HTTP-formatted response.
How Do I Do That?
Every HTTP request starts with a single line containing the HTTP method, a partial Uniform Resource Identifier (URI), and the HTTP version. Following this line are an arbitrary number of header lines. A blank line indicates the end of the headers. The header section is optionally followed by additional data called the body of the request, such as data being posted from an HTML form.
Here’s an example of a minimal HTTP request. This request
asks the server to perform the method GET on the
resource www.example.com/index.html, preferably using HTTP version
1.1:
    GET /index.html HTTP/1.1
    Host: www.example.com
The first line of the server’s response tells the client the HTTP version being used for the response and the HTTP status code. Like the request, the response also contains header lines followed by a blank line and the message body. Here’s a minimal HTTP response:
    HTTP/1.1 200 OK
    Content-Type: text/plain
    Content-Length: 17
    Connection: Close

    Hello HTTP world!
To
set up a very basic HTTP server, write a Protocol
that accepts input from the client. Look for the blank line that identifies the end
of the headers. Then send an HTTP response. Example 4-1 shows a simple HTTP implementation that echoes each request
back to the client.
from twisted.protocols import basic
from twisted.internet import protocol, reactor
class HttpEchoProtocol(basic.LineReceiver):
def _ _init_ _(self):
self.lines = []
self.gotRequest = False
def lineReceived(self, line):
self.lines.append(line)
if not line and not self.gotRequest:
self.sendResponse()
self.gotRequest = True
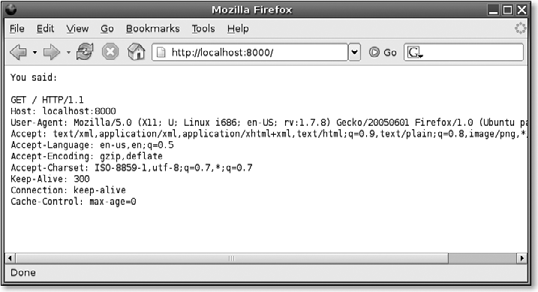
def sendResponse(self):
responseBody = "You said:\r\n\r\n" + "\r\n".join(self.lines)
self.sendLine("HTTP
/1.0 200 OK")
self.sendLine("Content-Type: text/plain")
self.sendLine("Content-Length: %i" % len(responseBody))
self.sendLine("")
self.transport.write(responseBody)
self.transport.loseConnection()
f = protocol.ServerFactory()
f.protocol = HttpEchoProtocol
reactor.listenTCP(8000, f)
reactor.run()Run webecho.py to start the server. You can see the server in action by pointing your web browser to http://localhost:8000. You’ll get a response echoing the request your browser sends to the server, as shown in Figure 4-1.
How Does That Work?
HTTPEchoProtocol understands just enough about
HTTP to return a response to each request. As data is received from the client, it
appends each incoming line to self.lines. When it
sees a blank line, it knows that it has come to the end of the headers. It then sends
back an HTTP response. The first line contains the HTTP version and status code; in
this case, 200 for OK (the string “OK” is a
human-readable version of the status code; it could just as easily be another phrase
with the same meaning, like “No problem!”). The next couple of lines are the Content-Type and Content-Length headers, which tell the client the format and length of
the body. HTTPEchoProtocol sends a blank line to
indicate the end of the headers, and then the body itself, which in this case is just
an echo of the request sent by the client.
Parsing HTTP Requests
The HTTPEchoProtocol class in Example 4-1 provides an interesting glimpse
into HTTP in action, but it’s a long way from being ready for use in a real web server.
It doesn’t even parse the request to figure out what resource the client is trying to
access, or what HTTP method she’s using. Before you try to build a real web application,
you need a better way to parse and respond to requests. This lab shows you how.
How Do I Do That?
Write a subclass of twisted.web.http.Request
with a process method that processes the current
request. The Request object will already contain
all the important information about an HTTP request when process is called, so all you have to do is decide how to respond.
Example 4-2 demonstrates how to run
an HTTP server based on a subclass of http.Request.
from twisted.web import http
class MyRequestHandler(http.Request):
pages = {
'/': '<h1>Home</h1>Home page',
'/test': '<h1>Test</h1>Test page',
}
def process(self):
if self.pages.has_key(self.path):
self.write(self.pages[self.path])
else:
self.setResponseCode(http.NOT_FOUND)
self.write("<h1>Not Found</h1>Sorry, no such page.")
self.finish()
class MyHttp(http.HTTPChannel):
requestFactory = MyRequestHandler
class MyHttpFactory(http.HTTPFactory):
protocol = MyHttp
if __name__ == "_ _main_ _":
from twisted.internet import reactor
reactor.listenTCP(8000, MyHttpFactory())
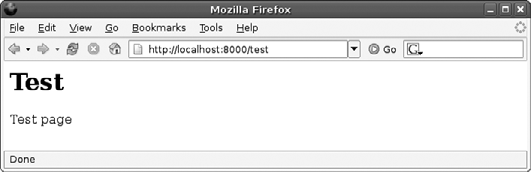
reactor.run()Run requesthandler.py and it will
start up a web server on port 8000. You should be able to view both the home page
(http://localhost:8000/) and
the page /test (http://localhost:8000/test) in your browser. Figure 4-2 shows you how the page /test will look in your browser.
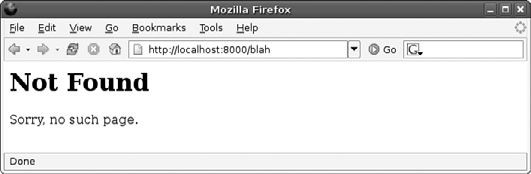
If you attempt to load any other page, you should get an error message, as shown in Figure 4-3.
How Does That Work?
The http.Request class parses an incoming HTTP
request and provides an interface for working with the request and generating a
response. In Example 4-2, MyRequestHandler is a subclass of http.Request that provides a custom process method. The process method will be called after the request has been completely
received. It is responsible for generating a response and then calling self.finish() to indicate that the response is complete.
MyRequestHandler uses the path property to find out which path is being requested,
and attempts to find a matching path in the pages
dictionary. If a matching page is found, MyRequestHandler uses the write
method to send back the text of the page as the response.
Note that
write is used only to write the body portion of
the response, not to generate the raw HTTP response itself. The setResponseCode method can be used to change the HTTP
status code. The twisted.web.http module provides
constants for all the status codes defined by HTTP, so you can write http.NOT_FOUND instead of 404.
Tip
Request.setResponseCode takes an optional
second argument, a human-readable status message. You can feel free to leave this
out—the twisted.web.http module includes a
built-in list of descriptions for common status codes, which it will use by
default.
The Request class also provides a
setHeader method for adding headers to the
response. For example, you can use setHeader to
add a Content-Type header indicating the type of
content in the response body. setHeader('Content-Type',
'text/plain') would generate the HTTP header Content-Type: text/plain,
telling the browser that the response is plain text. If you don’t manually set a
Content-Type header, the Request class will default to sending the
Content-Type for HTML documents, text/html (as it does when you
run Example 4-2).
The twisted.web.http module provides two additional classes
that you’ll need to turn your subclass of Request
into a functioning web server. The HTTPChannel
class is a Protocol that creates Request objects for each connection. To make the
HTTPChannel use your subclass of Request, override the requestFactory class attribute. HTTPFactory is a ServerFactory that
adds some extra features, including a log method that takes a Request object and generates a log message in the
standard Combined log format used by Apache and other web servers.
Working with POST Data from HTML Forms
The previous lab showed how to take a request from a client and return a response containing static HTML. This lab shows how you could write code to control how each response is generated, and act on data submitted from an HTML form.
How Do I Do That?
Write functions that take a Request object and
work with it to generate a response. Set up a dictionary to map each available path
in your web site to a function that will handle requests for that path. Use the
Request.args dictionary to access data
submitted from an HTML form. Example 4-3
shows a web server that generates one page containing an HTML form, and another page
that processes the form and displays the results.
from twisted.web import http
def renderHomePage(request):
colors = 'red', 'blue', 'green'
flavors = 'vanilla', 'chocolate', 'strawberry', 'coffee'
request.write("""
<html>
<head>
<title>Form Test</title
</head>
<body>
<form action='posthandler' method='post'>
Your name:
<p>
<input type='text' name='name'>
</p>
What's your favorite color?
<p>
""")
for color in colors:
request.write(
"<input type='radio' name='color' value='%s'>%s<br />" % (
color, color.capitalize()))
request.write("""
</p>
What kinds of ice cream do you like?
<p>
""")
for flavor in flavors:
request.write(
"<input type='checkbox' name='flavor' value='%s'>%s<br />" % (
flavor, flavor.capitalize()))
request.write("""
</p>
<input type='submit' />
</form>
</body>
</html>
""")
request.finish()
def handlePost(request):
request.write("""
<html>
<head>
<title>Posted Form Datagg</title>
</head>
<body>
<h1>Form Data</h1>
""")
for key, values in request.args.items():
request.write("<h2>%s</h2>" % key)
request.write("<ul>")
for value in values:
request.write("<li>%s</li>" % value)
request.write("</ul>")
request.write("""
</body>
</html>
""")
request.finish()
class FunctionHandledRequest(http.Request):
pageHandlers = {
'/': renderHomePage,
'/posthandler': handlePost,
}
def process(self):
self.setHeader('Content-Type', 'text/html')
if self.pageHandlers.has_key(self.path):
handler = self.pageHandlers[self.path]
handler(self)
else:
self.setResponseCode(http.NOT_FOUND)
self.write("<h1>Not Found</h1>Sorry, no such page.")
self.finish()
class MyHttp(http.HTTPChannel):
requestFactory = FunctionHandledRequest
class MyHttpFactory(http.HTTPFactory):
protocol = MyHttp
if __name__ == "_ _main_ _":
from twisted.internet import reactor
reactor.listenTCP(8000, MyHttpFactory())
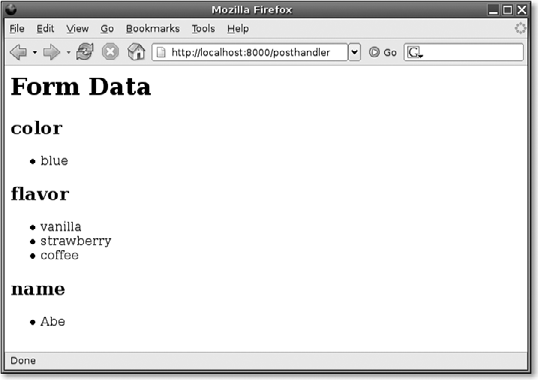
reactor.run()Run formhandler.py. It will start a web server on port 8000. Go to http://localhost:8000/ and fill out the form on the home page. Figure 4-4 shows the home page with some fields already filled in.
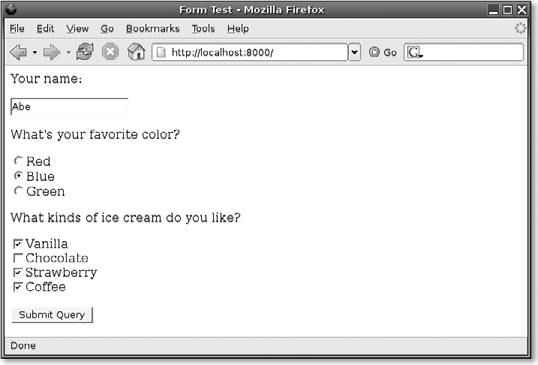
When you click the Submit button, your browser will send the form data to the page
posthandler using an HTTP POST request. When it receives the form data, posthandler will show you the fields and values that
were submitted, as shown in Figure
4-5.
How Does That Work?
Example 4-3 defines two different
functions for handling requests, renderHomePage
and handlePost. FunctionHandledRequest is a subclass of Request with an attribute called pageHandlers that maps paths to functions. The process method looks at the path this particular request is using and
tries to find a matching path in pageHandlers. If
a match is found, the FunctionHandledRequest
passes itself to the matching function, which is free to process the request however
it likes; if no match is found, it generates a 404 "Not
Found" response.
The renderHomePage function is set as the handler for /, the root page of the site. It generates an HTML form
that will submit data to the page /posthandler.
The handler function for /posthandler is
handlePost, which responds with a page listing
the posted data. handlePost iterates through the
keys and values in Request args, which is a
dictionary representing all the form data sent with the request.
Tip
In this case, the form data is sent as the body of an HTTP POST request. When a
request is sent using HTTP GET, Request.args
will contain values taken from the query portion of the request URI. You can
verify this behavior by changing the method
attribute of the form generated by renderHomePage from post to
get, restarting the server, and resubmitting
the form.
An HTML form can have multiple fields with the same name. For example, the
form in Example 4-3 lets you check off
multiple checkboxes, all which have the name of a flavor. Unlike many other web frameworks, http.Request doesn’t hide this from you: instead of a mapping each
field name to a string, Request.args maps each
field name to a list. If you know there’s going to be one value
for a particular field, just grab the first value from the
list.
Managing a Hierarchy of Resources
The paths in a web application usually imply a hierarchy of resources. For example, look at these URIs:
    http://example.com/people
    http://example.com/people/charles
    http://example.com/people/charles/contact
It’s easy to see the hierarchy here. The page /people/charles is a child of /people, and the page /people/charles/contact is a child of /people/charles. Each page in the hierarchy is more specific: /people/charles is one specific person, and /people/charles/contact is one specific type of data (in this case, contact information) related to charles.
The default behavior for most web servers is to map request paths to a hierarchy of files and folders on disk. Each time a client requests the resource at a certain path, the web server tries to find a file at the corresponding path on disk, and responds with either the content of the file itself or (as in the case of a CGI script) the output created by executing the file. But in web applications, it can be artificially constraining to have to have a file on disk for every path that might be requested. For example, the data in your application might not be stored on disk, but in a relational database in another server. Or you might want to create resources on demand when they are requested. In cases like this, it’s useful to be able to write your own logic for navigating a hierarchy of resources.
Writing your own logic for managing resources can also help you to manage security. Rather than opening up an entire directory to web access, you can selectively control which files are made available.
How Do I Do That?
The twisted.web.resource, twisted.web.static, and twisted.web.server modules provide classes for working with requests at
a higher level than twisted.web.http.Request,
which you can use to set up a web server that combines several different kinds of
resources into a logical hierarchy. Example
4-4 uses these classes to build an application for testing hexadecimal
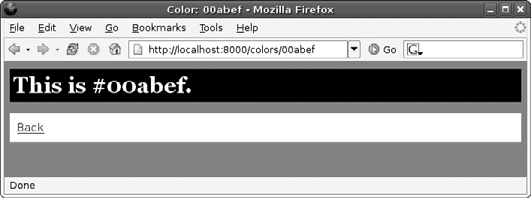
color codes. Request the resource /colors/hex,
where hex is a hexadecimal color code, and
you’ll get a page with the background color #hex. Rather
than trying to generate a page for every possible color in advance, this server
creates resources on demand.
from twisted.web import resource, static, server

class ColorPage(resource.Resource):
    def _ _init_ _(self, color):
        self.color = color

    def render(self, request):
        return """
        <html>
        <head>
          <title>Color: %s</title>
          <link type='text/css' href='/styles.css' rel='Stylesheet' />
        </head>
        <body style='background-color: #%s'>
          <h1>This is #%s.</h1>
          <p style='background-color: white'>
          <a href='/color/'>Back</a>
          </p>
        </body>
        </html>
        """ % (self.color, self.color, self.color)

class ColorRoot(resource.Resource):
    def _ _init_ _(self):
        resource.Resource._ _init_ _(self)
        self.requestedColors = []
        self.putChild('', ColorIndexPage(self.requestedColors))

    def render(self, request):
        # redirect /color -> /colors/
        request.redirect(request.path + '/')
        return "Please use /colors/ instead."

    def getChild(self, path, request):
        if path not in self.requestedColors:
            self.requestedColors.append(path)
        return ColorPage(path)

class ColorIndexPage(resource.Resource):
    def _ _init_ _(self, requestedColorsList):
        resource.Resource._ _init_ _(self)
        self.requestedColors = requestedColorsList

    def render(self, request):
        request.write("""
        <html>
        <head>
          <title>Colors</title>
          <link type='text/css' href='/styles.css' rel='Stylesheet' />
        </head>
        <body>
        <h1>Colors</h1>
        To see a color, enter a url like
        <a href='/color/ff0000'>/colors/ff0000</a>. <br />
        Colors viewed so far:
        <ul>""")
        for color in self.requestedColors:
            request.write(
                "<li><a href='%s' style='color: #%s'>%s</a></li>" % (
                color, color, color))
        request.write("""
        </ul>
        </body>
        </html>
        """)
        return ""

class HomePage(resource.Resource):
    def render(self, request):
        return """
        <html>
        <head>
          <title>Colors</title>
          <link type='text/css' href='/styles.css' rel='Stylesheet' />
        </head>
        <body>
        <h1>Colors Demo</h1>
        What's here:
        <ul>
          <li><a href='/colors/'>Color viewer</a></li>
        </ul>
        </body>
        </html>
        """

if __name__ == "_ _main_ _":
    from twisted.internet import reactor
    root = resource.Resource()
    root.putChild('', HomePage())
    root.putChild('color', ColorRoot())
    root.putChild('styles.css', static.File('styles.css'))
    site = server.Site(root)
    reactor.listenTCP(8000, site)
    reactor.run()
Example 4-4 requires one static file, a CSS stylesheet. Create a file in the same directory as resourcetree.py called styles.css, with the content shown in Example 4-5.
body {
  font-family: Georgia, Times, serif;
  font-size: 11pt;
}

h1 {
  margin: 10px 0;
  padding: 5px;
  background-color: black;
  color: white;
}

a {
  font-family: monospace;
}

p {
  padding: 10px;
}
Run resourcetree.py to start a web server on port 8000. Here’s a complete list of resources that the server provides:
|
/ |
Home page |
|
/styles.css |
The static file styles.css |
|
/colors/ |
Index of colors people have viewed so far |
|
/colors/hexcolor |
A page with the background color #hexcolor |
Try going to the URI http://localhost:8000/colors/00abef, and you’ll see the page in
Figure 4-6 with the background color
#00abef (which may not look like much printed
in monochrome, but in real life is a bright shade of blue).
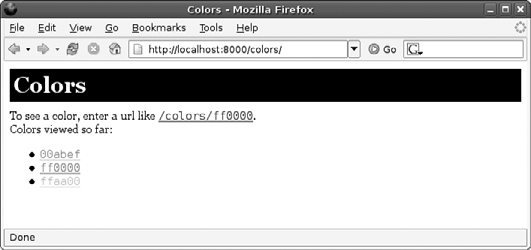
Feel free to try other colors as well. You can also go to the page http://localhost:8000/colors/, shown in Figure 4-7, to see a list of the colors you’ve viewed so far.
How Does That Work?
Example 4-4 introduces several new
classes from the twisted.web package: resource.Resource, static.File, and server.Site. Each
resource.Resource object does two things.
First, it defines how requests for that resource should be handled. Second, it
defines which Resource objects should be used for
requests for child resources — resources whose path puts them below this resource in
the hierarchy.
For example, take a look at the class ColorRoot in Example 4-4. An instance of this class will later be inserted into the
resource hierarchy at the path /colors. When
initialized, ColorRoot uses the putChild method to insert a ColorIndexPage Resource as the child resource ''. What does that mean? It means that requests for /colors/ (the path of ColorRoot plus a trailing slash) should be handled by the ColorIndexPage object.
Tip
You might think of them as being equivalent, but the URIs http://example.com/stuff and http://example.com/stuff/ (note the trailing slash) are not the same. They are different URIs identifying different resources. Browsers will expand relative links differently depending on whether the trailing slash is part of the URI. In the first example, a link to "otherpage" will expand to http://example.com/otherpage; in the second example, it will expand to http://example.com/stuff/otherpage.
If you’re not explicit in your server code, this problem can come back to bite
you. It’s a good idea to decide whether you want to have trailing
slashes in your URIs, and redirect requests from one form to the other. The
Resource class makes this easy to do. If you
set the attribute addSlash to True, a Resource
will automatically add a trailing slash to any requests that don’t already have
them and redirect those requests to the updated URI.
The render method defines what happens
after a Resource has been found that matches the
path of a request. Resource.render works basically
the same way as the request handler methods in Example 4-3: it takes a Request object
as its only argument, and is responsible for handing the request and sending a
response to the client. Resource.render has a few
caveats that you’ll need to keep in mind, however. First, it expects you to return a
string. This is a useful shortcut in many cases: you can just return the data you
want to send as the body of the response, and the Resource will send it to the client and end the response. But even when
you choose to use request.write to write the
response body yourself, render still expects you
to return a string. You can return an empty string to make it happy without adding
anything to the response.
At times, you might want to start a deferred
operation inside a render method. In this case,
you won’t be ready to write the response until your Deferred calls back. You might wonder, “Can I just return a Deferred that calls back with a string?” Well, sadly,
you can’t. (This is one of many deficiencies in the Resource object; see the note at the end of this lab for a discussion
of why you shouldn’t use the classes discussed here for major web development
projects.) Instead, you return the magic value twisted.web.server.NOT_DONE_YET, which tells the Resource that you’ve started something asynchronous and
aren’t done with this request yet, so it shouldn’t call request.finish(). Then you can call request.finish() yourself later after you’re done writing the response.
(See Example 4-6 for an example of this
technique.)
The ColorRoot Resource
will be used to render requests for the path /colors. In reality, though, ColorRoot is just a container for child resources. ColorRoot.render calls request.redirect, a helper function that sets the HTTP status code of
the response to 302 (“Moved Temporarily”) and
writes a Location: header directing the client to
request a page from another location, in this case /colors/ (with a trailing slash). Note that even though it’s told the
client to go somewhere else, render still has to
return a string.
Tip
Resource offers an alternative to the render method. You can write separate methods to
handle different HTTP methods: render_GET,
render_POST, and so on. This approach is
discussed in detail in Example 5-1 in
Chapter 5.
ColorRoot has one more method, getChild. Here the possibilities for doing interesting
things with resource hierarchies start to expand. The getChild method is designed for dynamically managing child resources. A
Resource’s getChild method is called when the client has sent a request for a path
beneath the Resource in the hierarchy, and no
matching path has been registered using putChild.
By default, getChild will send a 404 (“Not Found”) response. But you can override it, as
ColorRoot does. ColorRoot’s getChild method takes
the child path and uses it to initialize a ColorPage object. The ColorPage can
then respond to the request, using the last part of the path as a hexadecimal color
code.
The static.File class is a
subclass of Resource that serves the contents of a
file or directory on disk. Initialize a static.File object with a filename as an argument. Using static.File is better than loading files from disk
yourself because static.File is smart about
handling large files: it won’t take up too much memory, and it won’t cause your
entire server process to become unresponsive while it reads data from disk. If you
initialize a static.File with the path of a
directory, it will serve all the files and subdirectories under that
directory.
Tip
Even if you’re not using server.Site and a
tree of Resource objects to manage your web
server, you can still use a static.File object
to handle a request. You can use a temporary static.File to push the contents of a file as the response to a
request like this:
static.File('file.txt').render(request)You can change the MIME type static.File
uses when serving files by making changes to the contentTypes attribute. That attribute functions as a dictionary for
the purpose of mapping file extensions (such as .png) to MIME
types.
The server.Site class is a Factory that you initialize with a Resource object. It will handle HTTP requests by
splitting the requested path into segments and then walking the tree of Resource objects to find the Resource that it should use to handle the
request.
Storing Web Data in an SQL Database
Lots of web applications use an SQL backend for data storage. With a Twisted
application, though, you wouldn’t want to use a regular Python SQL library. Standard SQL
libraries have blocking function calls: every time you run a query, the query function
will pause your application until the server returns a result. This can take a long
time, especially if the query requires a lot of processing, or if the network connection
to the server is slow. To use an SQL database with Twisted, you need a way to run
queries using Deferreds, allowing your app to
continue doing other things while it’s waiting for the results.
Twisted
provides such an SQL library in the twisted.enterprise package. twisted.enterprise doesn’t actually include SQL drivers; it would be far
too much work to support every database you might potentially want to use. Instead,
twisted.enterprise provides an asynchronous API on
top of the standard DB-API interface used by many Python database modules. When
necessary, it uses threads to prevent database queries from blocking. You can use
twisted.enterprise to work with any SQL database,
as long as you have a DB-API compatible Python module for that database
installed.
How Do I Do That?
First, make sure you have a DB-API compatible Python module installed for your
particular database. Then create a twisted.enterprise.adbapi.ConnectionPool object using your database
driver and connection information. Example
4-6 uses the MySQLdb module (which you
can download from http://sourceforge.net/projects/mysql-python) to connect to a MySQL
database. It runs a minimal weblog application that stores posts in a database
table.
from twisted.web import resource, static, server, http
from twisted.enterprise import adbapi, util as dbutil

DB_DRIVER = "MySQLdb"
DB_ARGS = {
    'db': 'test',
    'user': 'your_user_here',
    'passwd': 'your_pass_here',
    }


class HomePage(resource.Resource):
    def _ _init_ _(self, dbConnection):
        self.db = dbConnection
        resource.Resource._ _init_ _(self)

    def render(self, request):
        query = "select title, body from posts order by post_id desc"
        self.db.runQuery(query).addCallback(
            self._gotPosts, request).addErrback(
            self._dbError, request)
        return server.NOT_DONE_YET

    def _gotPosts(self, results, request):
        request.write("""
        <html>
        <head><title>MicroBlog</title></head>
        <body>
          <h1>MicroBlog</h1>
          <i>Like a blog, but less useful</i>
          <p><a href='/new'>New Post</a></p>
        """)

        for title, body in results:
            request.write("<h2>%s</h2>" % title)
            request.write(body)

        request.write("""
        </body>
        </html>
        """)
        request.finish()

    def _dbError(self, failure, request):
        request.setResponseCode(http.INTERNAL_SERVER_ERROR)
        request.write("Error fetching posts: %s" % failure.getErrorMessage())
        request.finish()

class NewPage(resource.Resource):
    def render(self, request):
        return """
        <html>
        <head><title>New Post</title></head>
        <body>
          <h1>New Post</h1>
          <form action='save' method='post'>
          Title: <input type='text' name='title' /> <br />
          Body: <br />
          <textarea cols='70' name='body'></textarea> <br />
          <input type='submit' value='Save' />
          </form>
        </body>
        </html>
        """

class SavePage(resource.Resource):
    def _ _init_ _(self, dbConnection):
        self.db = dbConnection
        resource.Resource._ _init_ _(self)

    def render(self, request):
        title = request.args['title'][0]
        body = request.args['body'][0]
        query = "Insert into posts (title, body) values (%s, %s)"
        Insert into posts (title, body) values (%s, %s)
        self.db.runOperation(query).addCallback(
            self._saved, request).addErrback(
            self._saveFailed, request)
        return server.NOT_DONE_YET

    def _saved(self, result, request):
        request.redirect("/")
        request.finish()

    def _saveFailed(self, failure, request):
        request.setResponseCode(http.INTERNAL_SERVER_ERROR)
        request.write("Error saving record: %s" % (
            failure.getErrorMessage()))
        request.finish()

class RootResource(resource.Resource):
    def _ _init_ _(self, dbConnection):
        resource.Resource._ _init_ _(self)
        self.putChild('', HomePage(dbConnection))
        self.putChild('new', NewPage())
        self.putChild('save', SavePage(dbConnection))

if __name__ == "_ _main_ _":
    from twisted.internet import reactor
    dbConnection = adbapi.ConnectionPool(DB_DRIVER, **DB_ARGS)
    f = server.Site(RootResource(dbConnection))
    reactor.listenTCP(8000, f)
    reactor.run()
Example 4-6’s code uses a simple SQL
table called posts. You can create it by running
the following SQL statement in a MySQL
database:
CREATE TABLE posts (
post_id int NOT NULL auto_increment,
title varchar(255) NOT NULL,
body text,
PRIMARY KEY (post_id)
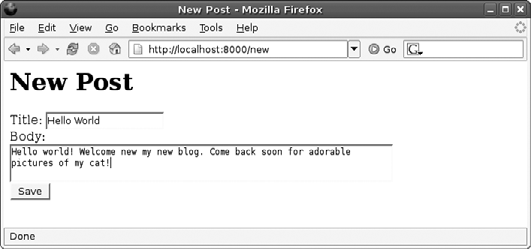
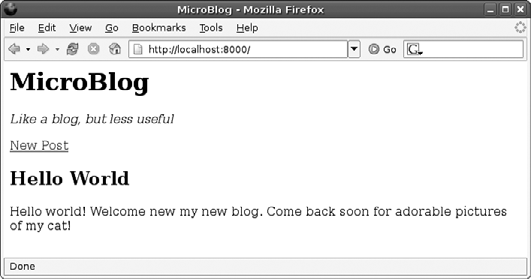
)Then run databaseblog.py to start the server on port 8000. You should be able to view the home page in your browser. If you get this far without any errors, the database connection is working correctly. Try clicking the New Post link and composing a blog entry, as shown in Figure 4-8.
Submit the form, and you’ll be taken back to the main page. You should see your post, which is now saved in the database. See Figure 4-9.
How Does That Work?
Example 4-6 uses three Resource classes: HomePage, NewPage, and SavePage. HomePage
connects to the database and displays the current posts in reverse order. NewPage provides a form for entering new posts. SavePage processes the form and inserts a new record in
the database.
First, the databaseblog.py script
creates a twisted.enterprise.adbapi.ConnectionPool
object. A ConnectionPool represents a managed
group of one or more database connections that you can use to send queries to an SQL
database. Initialize a ConnectionPool with the
name of the database driver module as the first argument. Any additional arguments or
keyword arguments will be passed along to the driver when it is
initialized.
After the ConnectionPool
object in Example 4-6 is created, it
gets passed to the HomePage and SavePage classes so that they can run database queries.
In order to run these queries, HomePage and
SavePage have to process requests
asynchronously. They start by using the ConnectionPool.runQuery method to run a database query. This returns a
Deferred. Example 4-6 shows how to set up callback and errback handlers for the
Deferred so that a response is sent to the
client once each query is complete. In each case, the render method returns the special value server.NOT_DONE_YET to indicate that the response is being processed
asynchronously.
Running an HTTP Proxy Server
Besides HTTP servers and clients, twisted.web
includes support for writing HTTP proxies. A proxy is a client and
server in one: it accepts requests from clients (acting as a server) and forwards them
to servers (acting as a client). Then it sends the response back to the client who
originally sent the request. HTTP proxies are useful mostly for the additional services
they can provide, such as caching, filtering, and usage reporting. This lab shows how to
build an HTTP proxy using Twisted.
How Do I Do That?
The twisted.web package includes twisted.web.proxy, a module with classes for building
HTTP proxies. Example 4-7 shows how easy
it is to set up a basic proxy.
from twisted.web import proxy, http
from twisted.internet import reactor
from twisted.python import log
import sys
log.startLogging(sys.stdout)

class ProxyFactory(http.HTTPFactory):
    protocol = proxy.Proxy

reactor.listenTCP(8001, ProxyFactory())
reactor.run()
Run simpleproxy.py from the command
line and you’ll have an HTTP proxy running on localhost port 8001. Set up a web browser to use this
proxy and try surfing some web pages. The call to log.startLogging prints all HTTP log messages to stdout so you can
watch the proxy at
work:
    $ python simpleproxy.py
    2005/06/13 00:22 EDT [-] Log opened.
    2005/06/13 00:22 EDT [-] _ _main_ _.ProxyFactory starting on 8001
    2005/06/13 00:22 EDT [-] Starting factory <_ _main_ _.ProxyFactory instance
    at 0xb7d9d10c>
    2005/06/13 00:23 EDT [Proxy,0,127.0.0.1] Starting factory <twisted.web.proxy.
    ProxyClientFactory instance at 0xb78a99ac>
    2005/06/13 00:23 EDT [-] Enabling Multithreading.
    2005/06/13 00:23 EDT [Proxy,1,127.0.0.1] Starting factory <twisted.web.proxy.
    ProxyClientFactory instance at 0xb781ee8c>
    2005/06/13 00:23 EDT [Proxy,2,127.0.0.1] Starting factory <twisted.web.proxy.
    ProxyClientFactory instance at 0xb782534c>
    ...
That
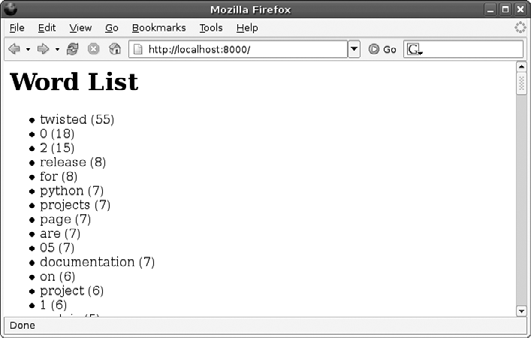
gives you a working proxy, but not one that does anything useful. Example 4-8 dives deeper into the twisted.web.proxy module to build a proxy that keeps
track of the most frequently used words in the HTML documents being
browsed.
import sgmllib, re
from twisted.web import proxy, http
import sys
from twisted.python import log
log.startLogging(sys.stdout)

WEB_PORT = 8000
PROXY_PORT = 8001

class WordParser(sgmllib.SGMLParser):
    def _ _init_ _(self):
        sgmllib.SGMLParser._ _init_ _(self)
        self.chardata = []
        self.inBody = False

    def start_body(self, attrs):
        self.inBody = True

    def end_body(self):
        self.inBody = False

    def handle_data(self, data):
        if self.inBody:
            self.chardata.append(data)

    def getWords(self):
        # extract words
        wordFinder = re.compile(r'\w*')
        words = wordFinder.findall("".join(self.chardata))
        words = filter(lambda word: word.strip(), words)
        print "WORDS ARE", words
        return words

class WordCounter(object):
    ignoredWords = "the a of in from to this that and or but is was be can could i you
they we at".split()

    def _ _init_ _(self):
        self.words = {}

    def addWords(self, words):
        for word in words:
            word = word.lower()
            if not word in self.ignoredWords:
                currentCount = self.words.get(word, 0)
                self.words[word] = currentCount + 1

class WordCountProxyClient(proxy.ProxyClient):
    def handleHeader(self, key, value):
        proxy.ProxyClient.handleHeader(self, key, value)
        if key.lower() == "content-type":
            if value.split(';')[0] == 'text/html':
                self.parser = WordParser()


    def handleResponsePart(self, data):
        proxy.ProxyClient.handleResponsePart(self, data)
        if hasattr(self, 'parser'): self.parser.feed(data)


    def handleResponseEnd(self):
        proxy.ProxyClient.handleResponseEnd(self)
        if hasattr(self, 'parser'):
            self.parser.close()
            self.father.wordCounter.addWords(self.parser.getWords())
            del(self.parser)

class WordCountProxyClientFactory(proxy.ProxyClientFactory):
    def buildProtocol(self, addr):
        client = proxy.ProxyClientFactory.buildProtocol(self, addr)
        # upgrade proxy.proxyClient object to WordCountProxyClient
        client._ _class_ _ = WordCountProxyClient
        return client

class WordCountProxyRequest(proxy.ProxyRequest):
    protocols = {'http': WordCountProxyClientFactory}

    def _ _init_ _(self, wordCounter, *args):
        self.wordCounter = wordCounter
        proxy.ProxyRequest._ _init_ _(self, *args)

class WordCountProxy(proxy.Proxy):
    def _ _init_ _(self, wordCounter):
        self.wordCounter = wordCounter
        proxy.Proxy._ _init_ _(self)

    def requestFactory(self, *args):
        return WordCountProxyRequest(self.wordCounter, *args)

class WordCountProxyFactory(http.HTTPFactory):
    def _ _init_ _(self, wordCounter):
        self.wordCounter = wordCounter
        http.HTTPFactory._ _init_ _(self)

    def buildProtocol(self, addr):
        protocol = WordCountProxy(self.wordCounter)
        return protocol

# classes for web reporting interface
class WebReportRequest(http.Request):
    def _ _init_ _(self, wordCounter, *args):
        self.wordCounter = wordCounter
        http.Request._ _init_ _(self, *args)

    def process(self):
        self.setHeader("Content-Type", "text/html")
        words = self.wordCounter.words.items()
        words.sort(lambda (w1, c1), (w2, c2): cmp(c2, c1))
        for word, count in words:
            self.write("<li>%s %s</li>" % (word, count))
        self.finish()

class WebReportChannel(http.HTTPChannel):
    def _ _init_ _(self, wordCounter):
        self.wordCounter = wordCounter
        http.HTTPChannel._ _init_ _(self)

    def requestFactory(self, *args):
        return WebReportRequest(self.wordCounter, *args)

class WebReportFactory(http.HTTPFactory):
    def _ _init_ _(self, wordCounter):
        self.wordCounter = wordCounter
        http.HTTPFactory._ _init_ _(self)

    def buildProtocol(self, addr):
        return WebReportChannel(self.wordCounter)

if __name__ == "_ _main_ _":
    from twisted.internet import reactor
    counter = WordCounter()
    prox = WordCountProxyFactory(counter)
    reactor.listenTCP(PROXY_PORT, prox)
    reactor.listenTCP(WEB_PORT, WebReportFactory(counter))
    reactor.run()
Run wordcountproxy.py and set your
browser to use the proxy server localhost port 8001. Browse to a couple of sites to
test the proxy. Then go to http://localhost:8000/ to see a report of word frequency in the
sites you’ve visited. Figure 4-10
shows what your browser might look like after visiting http://www.twistedmatrix.com.
How Does That Work?
There are a lot of classes in Example
4-8, but the majority of them are just glue. Only a few are doing real
work. The first two classes, WordParser and
WordCounter, do the work of extracting words
from the text of HTML documents and counting their frequency. The third class,
WordCountProxyClient, contains the code that looks for HTML
documents and runs them through a WordParser as it
comes back from the server. That’s it for code specific to the problem of counting
words.
Because a proxy acts as both a client and server, it uses a lot of
classes. There’s a ProxyClientFactory and ProxyClient, which provide the Factory/Protocol pair for client
connections to other servers. To accept connections from clients, the proxy module
provides the class ProxyRequest, a subclass of
http.Request, and Proxy, a subclass of http.HTTPChannel. These are used the same way as they would be in a
regular HTTP server: an HTTPFactory uses Proxy for its Protocol, and the Proxy HTTPChannel
uses ProxyRequest as its RequestFactory. Here’s the sequence of events when a client sends a
request for a web page:
The client establishes a connection to the proxy server. This connection is handled by the
HTTPFactory.The
HTTPFactory.buildProtocolcreates aProxyobject to send and receive data over the client connection.When the client sends a request over the connection, the
Proxycreates aProxyRequestto handle it.The
ProxyRequestlooks at the request to see what server the client is trying to connect to. It creates aProxyClientFactoryand callsreactor.connectTCPto connect the factory to the server.Once the
ProxyClientFactoryis connected to the server, it creates aProxyClient Protocolobject to send and receive data over the connection.ProxyClientsends the original request to the server. As it receives the reply, it sends it back to the client that sent the request. This is done by callingself.father.transport.write:self.fatheris theProxyobject that is managing the client’s connection.
With such a long chain of classes, it becomes a lot of work to pass
an object from one end of the chain to the other. But it is possible, as Example 4-8 demonstrates. By creating a
subclass of each class provided by the proxy
module, you can have complete control over every step of the process.
At
only one step in Example 4-8 is it
necessary to resort to a bit of a hack. The ProxyClientFactory class has a buildProtocol method that’s hardcoded to use ProxyClient as the protocol. It doesn’t give you any easy way to
substitute your own subclass of ProxyClient
instead. The solution is to use the special Python _ _class_
_ attribute to do an in-place upgrade of the ProxyClient object returned by ProxyClientFactory.buildProtocol, which changes the object from a
ProxyClient to a WordCountProxyClient.
In addition to the proxy server, Example 4-8 runs a regular web server on port 8000, which displays the current word count data from the proxy server. The ability to include a lightweight embedded HTTP server in your application is extremely handy, and can be used in any Twisted application where you want to provide a way to view status information remotely.
Get Twisted Network Programming Essentials now with the O’Reilly learning platform.
O’Reilly members experience books, live events, courses curated by job role, and more from O’Reilly and nearly 200 top publishers.

