Customizing the Kicker Panel
Throughout this book, you've been making extensive use of the kicker panel at the bottom of your screen, but I haven't told you much about how you can customize it. Well, you shouldn't be surprised to find out that there is quite a lot you can do with this little panel, so prepare to be amazed. Figure 8-5 shows how I like to configure my kicker. As we explore the options below, I'll point out which ones I used to make my screen look like this.
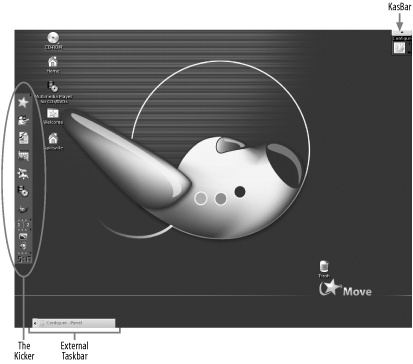
Figure 8-5. My desktop after customizations to the kicker panel, taskbar, and KasBar
Location, Location, Location
You can move the kicker panel anywhere you want along the edge of the screen. To do this, just click in the taskbar area and hold down the left mouse button while you move your cursor to another edge of the screen. Once you see an outline of the panel appear on the new edge, release the mouse button, and the kicker will appear in the new location. My preference is to put the kicker along the left side of the screen. I think it has to do with reading things left to right, so I consider the left side of the screen the location where I start new things, like launching a program.
On the edge of the kicker, near the clock, you'll see a small rectangle with a triangle in its center. When you click this, the whole panel slides away and hides. Click the button again to bring it back. The speed at which the panel ...
Get Test Driving Linux now with the O’Reilly learning platform.
O’Reilly members experience books, live events, courses curated by job role, and more from O’Reilly and nearly 200 top publishers.

