Executing the Example
To execute the examples in this book, you will need to do one of two
things—either create a
runner class
or include a main( )
method in each example.
How do I do that?
The first
approach is to create a simple class
called Runner, shown in Example 2-2.
Example 2-2. A Runner class to execute examples
public class Runner {

    public static void main(String[] args){
        SimpleShell ss = new SimpleShell( );
    }
}
Each time you change the class name of the example you wish to run,
you must change the name of the class that’s being
instantiated in your Runner class (which is a bit
of a pain, admittedly).
The second approach is to embed a main()
method in each example class you
create, like this:
import org.eclipse.swt.widgets.*;

public class SimpleShell {

     // Class body from previous lab
    public static void main(String [] args)
    {
        SimpleShell ss = new SimpleShell( );
    }
}
In this book, I will use the Runner class method
so that I can keep the example code clean of code not directly
related to the technique being demonstrated.
Note
If you embed a main( ) method in each class, you have to go through the process of creating a Run Configuration for each one. What a mess that is.
In Eclipse, to execute a class that
contains a main( ) method you must create a
Run Configuration. To do this, select
Run Run from the Eclipse menu. This invokes the dialog shown in Figure 2-2.
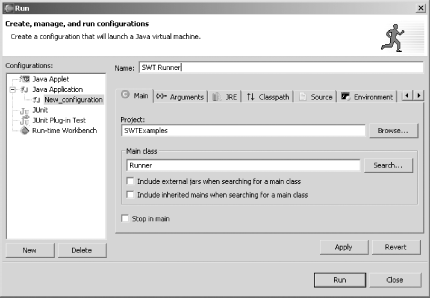
Figure 2-2. The Eclipse ...
Get SWT: A Developer's Notebook now with the O’Reilly learning platform.
O’Reilly members experience books, live events, courses curated by job role, and more from O’Reilly and nearly 200 top publishers.

