Data Entry
Creating user screens with Visual Studio LightSwitch is about as easy as it gets. For this example, weâre going to create a simple data entry application attached to the SharePoint Tasks list. This will allow us to quickly enter, display, and edit information about all existing tasks.
The first thing we have to do is create a new solution and connect to the Task list using the same process shown at the beginning of this chapter. When thatâs complete, you should have a screen that looks something like Figure 3-14. Visual Studio LightSwitch will bring over the types for each element from SharePoint, but you can change how they are presented should you so choose. For this application, weâll change the Start Date and Due Date fields to a type of date rather than date-time. This is more appropriate for entry and will simplify the screen as well.
For the final screen display, we donât really need all the fields from the Task list. To clean things up, I removed Content Type plus everything after Due Date.
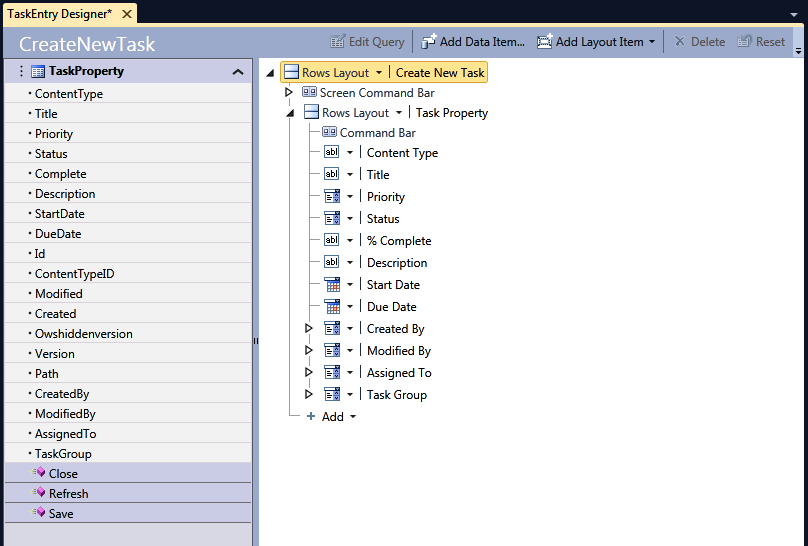
Figure 3-14. Task list fields and default screen
Now we need to build the actual data entry screen. This is a good place to talk about a few features in Visual Studio LightSwitch that help make building this type of application simple. The first feature weâll look at is field validation. There are a number of predefined field types, such as phone, e-mail, social security ...
Get SharePoint Apps with LightSwitch now with the O’Reilly learning platform.
O’Reilly members experience books, live events, courses curated by job role, and more from O’Reilly and nearly 200 top publishers.

