Image your web server as a gladiator about to go into battle. If it's going to have any chance of survival it must be battle ready. Basically, you want something more like Russell Crowe and less like Mel Brooks.
Additionally, the server should be hardened as though there were no firewall on the network. Firewalls, such as in the case of port 80, are not a silver bullet. Servers behind firewalls can still be compromised. So, each server needs to look after and take care of itself.
In the following section I am going to build a secure server using a distribution of Linux called Ubuntu Server Edition. However, most, if not all, of these concepts can be applied equally to other operating systems.
Ubuntu comes from an African word, meaning humanity to others. The Ubuntu distribution of Linux brings the spirit of Ubuntu to the software world.
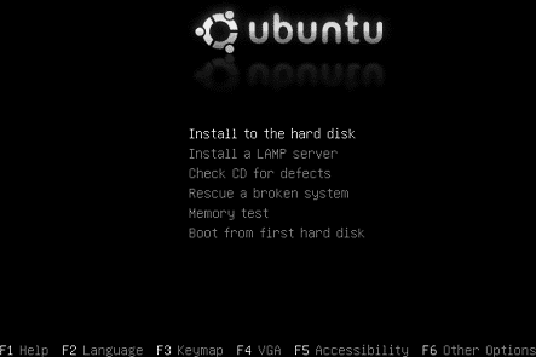
Built on a branch of the Debian distribution of Linux—known for its robust server installations and glacial release cycle—the Ubuntu Server has a strong heritage for reliable performance and predictable evolution. The first Ubuntu release with a separate server edition was 5.10, in October 2005. Figure 4-2 shows the bootup screen for the Ubuntu server installation disk.
A key lesson from the Debian heritage is that of security by default. The Ubuntu Server has no open ports after installation and contains only the essential software needed to build a secure server. This makes for an ideal place to start when thinking about building a web server.
Additionally, in about 15 minutes, the time it takes to install Ubuntu Server Edition, you can have a LAMP (Linux, Apache, MySQL, and PHP) server up and ready to go.
When booting off the Ubuntu installation disk you are presented with the option to install a LAMP server. This option saves all the time and trouble associated with integrating Linux, Apache, MySQL, and PHP. Ubuntu integrates these things for you with security and ease of deployment in mind.
Tip
If you want to follow along with me, you may download and install the Ubuntu Server Edition from http://www.ubuntu.com. There is also an excellent tutorial available online at http://www.howtoforge.com/perfect_setup_ubuntu_6.06.
Hardening a server's operating system is not a trivial task—especially when it is your goal to make the server available on the Internet. Therefore extra precautions need to be taken, and every facet of the OS needs to be examined. Most modern operating systems are designed to be flexible and often configure things by default that can be potential security risks.
Tip
Mick Bauer's book, Linux Server Security (O'Reilly) is one of the best guides for installing and securing everything Linux, and creating real solid bastion servers. If you're serious about wanting a secure bastionized server, I highly recommend you read this book.
I am starting with a completely clean system. I went out to the Ubuntu web site, downloaded the newest version of the Ubuntu Server, and accepted all the default installation options.
Also—because it's so cool—I chose the LAMP option to get the as advertised quick build of Apache installed, secured, and configured. Now, the installer has left me with a clean Linux build with no open ports, an administrator, and a disabled root account.
Figure 4-3 shows the screen after the Ubuntu installation is complete.
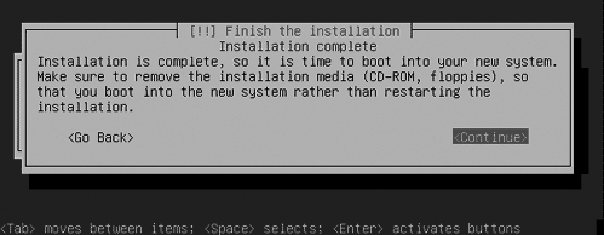
By default, the root account has been disabled for login. Ubuntu is one of the few Linux distributions to enforce this recommended security policy by default. Don't worry, you still can perform administration tasks using superuser do (sudo).
I am going to log in to the system using the administration account I declared as part of the install process and then type:
sudo -i
This command provides an interactive (root) shell using sudo, so I don't have to type sudo in front of every command.
Remember, we're not building an ordinary laptop or desktop; we're building a secure server. Very few people—only administrators—should be able to log in. Therefore, we must strictly control who and what is going to have access to this machine.
This starts by identifying all users. On my fresh Ubuntu install, and most other versions of Linux or Unix, you simply list the contents of the /etc/passwd file to reveal the system's users.
The format of the passwd file is as follows:
Username:coded-password:UID:GID:user information:home-directory:shellExample 4-1 shows the contents of my /etc/passwd file after my fresh installation.
Example 4-1. The/etc/passwd file
root:x:0:0:root:/root:/bin/bash
daemon:x:1:1:daemon:/usr/sbin:/bin/sh
bin:x:2:2:bin:/bin:/bin/sh
sys:x:3:3:sys:/dev:/bin/sh
sync:x:4:65534:sync:/bin:/bin/sync
games:x:5:60:games:/usr/games:/bin/sh
man:x:6:12:man:/var/cache/man:/bin/sh
lp:x:7:7:lp:/var/spool/lpd:/bin/sh
mail:x:8:8:mail:/var/mail:/bin/sh
news:x:9:9:news:/var/spool/news:/bin/sh
uucp:x:10:10:uucp:/var/spool/uucp:/bin/sh
proxy:x:13:13:proxy:/bin:/bin/sh
www-data:x:33:33:www-data:/var/www:/bin/sh
backup:x:34:34:backup:/var/backups:/bin/sh
list:x:38:38:Mailing List Manager:/var/list:/bin/sh
irc:x:39:39:ircd:/var/run/ircd:/bin/sh
gnats:x:41:41:Gnats Bug-Reporting System (admin):/var/lib/gnats:/bin/sh
nobody:x:65534:65534:nobody:/nonexistent:/bin/sh
syslog:x:101:102::/home/syslog:/bin/false
klog:x:102:103::/home/klog:/bin/false
mysql:x:103:104:MySQL Server,,,:/var/lib/mysql:/bin/false
myadmin:x:1000:1000:Administrator,,,:/home/myadmin:/bin/bash
Look at that; 24 accounts were created on a fresh install! Most people don't even know for what these accounts are used. Several of these accounts are not necessary for a web server, so I will disable them by assigning a shell that cannot log in (/bin/false):
root:x:0:0:root:/root:/bin/bash
daemon:x:1:1:daemon:/usr/sbin:/bin/sh
bin:x:2:2:bin:/bin:/bin/sh
sys:x:3:3:sys:/dev:/bin/sh
sync:x:4:65534:sync:/bin:/bin/sync
games:x:5:60:games:/usr/games:/bin/false
man:x:6:12:man:/var/cache/man:/bin/sh
lp:x:7:7:lp:/var/spool/lpd:/bin/false
mail:x:8:8:mail:/var/mail:/bin/false
news:x:9:9:news:/var/spool/news:/bin/false
uucp:x:10:10:uucp:/var/spool/uucp:/bin/false
proxy:x:13:13:proxy:/bin:/bin/sh
www-data:x:33:33:www-data:/var/www:/bin/sh
backup:x:34:34:backup:/var/backups:/bin/sh
list:x:38:38:Mailing List Manager:/var/list:/bin/false
irc:x:39:39:ircd:/var/run/ircd:/bin/false
gnats:x:41:41:Gnats Bug-Reporting System (admin):/var/lib/gnats:/bin/false
nobody:x:65534:65534:nobody:/nonexistent:/bin/false
syslog:x:101:102::/home/syslog:/bin/false
klog:x:102:103::/home/klog:/bin/false
mysql:x:103:104:MySQL Server,,,:/var/lib/mysql:/bin/false
myadmin:x:1000:1000:Administrator,,,:/home/myadmin:/bin/bash
Assigning a shell of /bin/false prevents a real person from being able to log in to the system via that account. After some time has passed, you may want to remove these accounts entirely.
Tip
On a Windows machine you can do this by right-clicking on My Computer and selecting Manage → System Tools → Local Users and Groups → Users.
For what are these accounts used, and why do I need to have them enabled? Excellent questions. For a program to run as a process, make connection, or read and write from the file system it has to "run as" a user. The user accounts are for programs and processes that are part of the core install. If you can determine that a service is not necessary for your machine, you can disable the service and delete the corresponding account.
Finally, the security principle of least privilege should also apply to users. No user, application, or process should have more privileges than it needs to perform its functions. A common way for an attacker to gain higher operating privileges is to cause a buffer overflow in a program already running with superuser privileges. Software defects that allow a user to execute with superuser privileges are a huge security issue, and the fixing of such software is a major part of maintaining a secure system.
In the case of a bastion web server sitting out on the Internet we want to be running as little as possible, and certainly not running any services that open up connections other than the web server itself.
Here is a list of the default services installed on my fresh Ubuntu system:
Sysklogd - the system logger
klogd - the kernel logging facility
mysql - the mysql database
mysql-ndb-mgm - supporting mysql service
makedev - create the devices in /dev used to interface with drivers in the kernel
mysql-ndb - supporting mysql service
rsync - facility for remote syncing of files
atd - at daemon for running commands at a specified time
cron - cron daemon for running commands on a periodic table
apache2 - the apache2 web server
rmnologin - remove /etc/nologin. allow users to login to your machine
Tip
On a Windows machine you can do this by right-clicking on My Computer and selecting Manage → Services and Applications → Services.
Start by looking through the list of running services and identify them. A modern operating system has many services, too many. For each one ask yourself whether the service is something that should be running on a web server.
In the case of this list, I plan on using everything listed. Your mileage may vary. For example, I chose Ubuntu's LAMP install, which installed the MySql database services. If I didn't want to run the database, I would disable it.
After you identify all the running services, make sure you know what each service is and what it does. The goal is to turn off as much as possible.
Some commands run with a special bit set that instructs the OS to run the command as a privileged user.
The idea is that some commands or daemon processes need to run
with higher permissions than that of the user. Take for example the
passwd command. If a user wants
to change his password he executes the passwd command, but the user does not
normally have permission to write to the /etc/passwd file. With the SUID bit set,
the command can perform its function with superuser
privileges.
This is obviously a security concern. It is critical that any command or process that has this bit set be something that is necessary and make sense given the system that we are creating. The best way to find these sorts of files is to issue a command that looks like this:
find / -perm +4000 -user root -type f -print
This command finds all the SUIDs for the root account. Examine the list and remove
or disable any unnecessary items you find.
A critical factor to a web server's security is its logging. If there is an attack, often the most critical evidence will be found in the logs. Therefore, it is vital that the logs and logging mechanisms be securely implemented.
Syslog is the default logging facility on most Unix/Linux-based systems. It records events coming from the kernel (via klogd, a system daemon that intercepts and logs Linux kernel messages) and from any program or process running on the system. It can even record remote messages sent from other network devices and servers.
Syslog categorizes its messages by facility. Facilities are system-named buckets for reporting syslog messages. Supported facilities on most Linux/Unix systems are:
- auth
- auth-priv
- cron
- daemon
- kern
- lpr
- mark
- news
- syslog
More messages generated by syslog
- User
- Uucp
- local(0–7)
Unlike facilities, priorities are hierarchical levels designed to indicate the urgency of the message being logged. The following is a list of priorities listed by urgency:
- Debug
- Info
- Notice
- Warning
Something bad may have or could happen
- Err
- Crit
- Alert
- Emerg
Syslog comes preconfigured on most distributions of Linux including my fresh Ubuntu install. The default location for log files is located at /var/log.
Although the default configuration is acceptable, the /etc/syslog.conf file is still worth exploring, as you'll see in Example 4-2.
Example 4-2. The /etc/syslog.conf file
#  /etc/syslog.conf     Configuration file for syslogd.
#
#                       For more information see syslog.conf(5)
#                       manpage.

#
# First some standard logfiles.  Log by facility.
#

auth.info,authpriv.*                 /var/log/auth.log
*.*;auth,authpriv.none          -/var/log/syslog
#cron.*                         /var/log/cron.log
daemon.*                        -/var/log/daemon.log
kern.*                          -/var/log/kern.log
lpr.*                           -/var/log/lpr.log
mail.*                          -/var/log/mail.log
user.*                          -/var/log/user.log
uucp.*                          /var/log/uucp.log

#
# Logging for the mail system.  Split it up so that
# it is easy to write scripts to parse these files.
#
mail.info                       -/var/log/mail.info
mail.warn                       -/var/log/mail.warn
mail.err                        /var/log/mail.err

# Logging for INN news system
#
news.crit                       /var/log/news/news.crit
news.err                        /var/log/news/news.err
news.notice                     -/var/log/news/news.notice

#
# Some `catch-all' logfiles.
#
*.=debug;\
        auth,authpriv.none;\
        news.none;mail.none     -/var/log/debug
*.=info;*.=notice;*.=warn;\
        auth,authpriv.none;\
        cron,daemon.none;\
        mail,news.none          -/var/log/messages

#
# Emergencies are sent to everybody logged in.
#
*.emerg                         *

#
# I like to have messages displayed on the console, but only
#on a virtual console that I usually leave idle.
#
#daemon,mail.*;\
#       news.=crit;news.=err;news.=notice;\
#       *.=debug;*.=info;\
#       *.=notice;*.=warn       /dev/tty8

# The named pipe /dev/xconsole is for the `xconsole' utility.  To
#use it, you must invoke `xconsole' with the `-file' option:
#
#    $ xconsole -file /dev/xconsole [...]
#
# NOTE: adjust the list below, or you'll go crazy if you have
a reasonably
#      busy site..
#
daemon.*;mail.*;\
        news.crit;news.err;news.notice;\
        *.=debug;*.=info;\
        *.=notice;*.=warn       |/dev/xconsole
At the very least, the auth facility should have a priority of info or higher:
auth.info /var/log/auth.log
Disk space is cheap, so capturing everything is not completely out of the question:
*.* /var/log/all_messages
Decide what is important to you and run with it.
Warning
Logs mean nothing unless you do something with them. They must be processed, monitored, and reviewed. Sometimes logs are all that you have after an attack—if you're lucky, and the attacker didn't destroy or alter them.
With that in mind, decide for what things it is worth interrupting dinner, and which ones can go unnoticed.
After syslog is configured, you should also enable
process accounting. Process accounting is good
for recording all commands users execute on the system. On my Ubuntu
install I use apt-get to install
the base process accounting (acct)
package.
apt-get install acct

Selecting previously deselected package acct.
(Reading database ... 16507 files and directories currently installed.)
Unpacking acct (from .../acct_6.3.99+6.4pre1-4ubuntu1_i386.deb) ...
Setting up acct (6.3.99+6.4pre1-4ubuntu1) ...
Starting process accounting: Turning on process accounting, file set to
'/var/log/account/pacct'.
After downloading and installing acct, you need to create an accounting database.
touch /var/log/account/pacct
chown root /var/account/pacct
chmod 0644 /var/log/account/pacct
The acct database is stored in binary as a single file /var/log/account/pacct, so it is not easily editable. This forces an attacker to delete the whole file to cover her tracks. The deletion of the file, however, by itself confirms that something suspicious happened.
Now, if you ever want to audit what a particular user has done, you can do so by running:
lastcomm [user-name]Many have complained about Windows and how it handles logs. The complaints stem from the fact that most logging is disabled by default, and that the locations for the log files can be problematic for some situations. Even with these limitations, some prudent steps can be taken to help ensure that the system retains some valuable log information.
You should enable security auditing. Windows does not enable security auditing by default. To do so, two configuration changes are required.
On Windows you can enable audit logging by changing the policy settings located at Start → Settings → Control Panel → Administrative Tools → Local Security Policy.
Minimally, you should enable auditing for the following events:
Logon and logoff
User and group management
Security policy changes
Restart, shutdown, and system
You can also enable auditing of any file or directory structure by setting its properties (Security → Advanced Settings → Auditing).
The best idea is to dedicate a server on your network, harden it, and send log messages to it from all your other machines. This way, the logs do not get compromised when the server does.
Having a centralized, hardened, logging server is ideal for log management. You can harden the server to allow only logging from specific IP addresses and to lock down all the listening ports except for the one for syslog. Having the logs stored in a different location than the web server means an attacker may be able to add false messages, but he won't be able to destroy any logged messages.
Syslogd will accept logging messages remotely if it is
instructed to do so on startup with the -r (for remote) startup option.
Now that the server is locked down with a minimal set of accounts and services, it is important to patch everything to make sure that everything is up-to-date. There are several update managers for Linux; the Advanced Packaging Tool (APT) comes with Ubuntu.
Keeping up-to-date is critical to the security of a web server. It used to be that there was a lag of months (30–120 days) between when vulnerability was discovered and seeing it successfully exploited on a system. Today, that time has been reduced to hours instead of days.
The sources for APT reside in its configuration file /etc/apt/sources.list. You can edit this file to include other repositories on the Internet.
To update the system, basically, it's as simple as:
apt-get update

Ign cdrom://Ubuntu-Server 6.10 _Edgy Eft_ - Release i386 (20061025.1) edgy/main
Translation-en_US
Ign cdrom://Ubuntu-Server 6.10 _Edgy Eft_ - Release i386 (20061025.1)
edgy/restricted Translation-en_US
Get:1 http://us.archive.ubuntu.com edgy Release.gpg [191B]
Ign http://us.archive.ubuntu.com edgy/main Translation-en_US
Get:2 http://security.ubuntu.com edgy-security Release.gpg [191B]
Ign http://security.ubuntu.com edgy-security/main Translation-en_US
Ign http://us.archive.ubuntu.com edgy/restricted Translation-en_US
Ign http://security.ubuntu.com edgy-security/restricted Translation-en_US
Hit http://security.ubuntu.com edgy-security Release
Get:3 http://us.archive.ubuntu.com edgy-updates Release.gpg [191B]
Ign http://us.archive.ubuntu.com edgy-updates/main Translation-en_US
Ign http://us.archive.ubuntu.com edgy-updates/restricted Translation-en_US
Get:4 http://us.archive.ubuntu.com edgy-backports Release.gpg [191B]
Ign http://us.archive.ubuntu.com edgy-backports/main Translation-en_US
Ign http://us.archive.ubuntu.com edgy-backports/restricted Translation-en_US
Hit http://us.archive.ubuntu.com edgy Release
Hit http://security.ubuntu.com edgy-security/main Packages
Get:5 http://us.archive.ubuntu.com edgy-updates Release [23.3kB]
Hit http://security.ubuntu.com edgy-security/restricted Packages
Hit http://security.ubuntu.com edgy-security/main Sources
Hit http://security.ubuntu.com edgy-security/restricted Sources
Hit http://us.archive.ubuntu.com edgy-backports Release
Hit http://us.archive.ubuntu.com edgy/main Packages
Hit http://us.archive.ubuntu.com edgy/restricted Packages
Hit http://us.archive.ubuntu.com edgy/main Sources
Hit http://us.archive.ubuntu.com edgy/restricted Sources
Get:6 http://us.archive.ubuntu.com edgy-updates/main Packages [53.8kB]
Get:7 http://us.archive.ubuntu.com edgy-updates/restricted Packages [14B]
Get:8 http://us.archive.ubuntu.com edgy-updates/main Sources [16.3kB]
Get:9 http://us.archive.ubuntu.com edgy-updates/restricted Sources [14B]
Hit http://us.archive.ubuntu.com edgy-backports/main Packages
Hit http://us.archive.ubuntu.com edgy-backports/restricted Packages
Hit http://us.archive.ubuntu.com edgy-backports/main Sources
Hit http://us.archive.ubuntu.com edgy-backports/restricted Sources
Fetched 93.6kB in 9s (9939B/s)
Reading package lists... Done
APT keeps an inventory of what you have installed and cross-checks it against a central repository on the Internet. If there is an update for a package, AP automatically goes out to the Internet and downloads it. Then you can control when the updates get applied using the Upgrade option.
After APT has retrieved any updates for your installed packages, you can apply the updates with:
apt-get upgrade
For all others in the world, there is of course Windows update. Microsoft tends to release monthly patches every first Tuesday of the month. So, on those Tuesdays, if you are running a Windows server, I would skip my dinner plans, kick off the download process, and order a pizza.
All the major operating systems have a vehicle for distributing patches. Figure out which one is right for you, and implement a procedure for checking for updates regularly.
Remember, I said that this machine needs to act like there is no firewall or other device protecting it from unsavory network traffic. Most Linux systems, including my Ubuntu system, come with a firewall built-in. It's called iptables—or ipchains if you are using a kernel of version 2.2 or older.
This is some black magic, but well worth it. On my Ubuntu system, iptables comes installed and enabled, but it is configured to let all network traffic through.
Because this machine must defend itself, we should alter this default configuration with some basic firewall rules locally. Example 4-3 shows an iptables script for a bastion server running HTTP.
Example 4-3. A sample IPTables script
#!/bin/sh
#
# IPTables Local Firewall Script for bastion web servers.
#
# Adapted from bastion script found in:
# Bauer, Michael, Linux Server Security, second edition (O'Reilly)
#
###

# Please enter the name of your server
MYSERVER=MyServer

# Your server's IP Address
IPADDRESS=192.168.1.101

# IPTABLES Location
IPTABLES=/usr/sbin/iptables
test -x $IPTABLES || exit 5

case "$1" in
start)
echo -n "Loading $MYSERVER's ($IPADDRESS) Packet Filters..."

# Load kernel modules first
modprobe ip_tables
modprobe ip_conntrack_ftp

# Flush old custom tables
$IPTABLES —flush
$IPTABLES —delete-chain

# Set default-deny policies for all three default chains
$IPTABLES -P INPUT DROP
$IPTABLES -P FORWARD DROP
$IPTABLES -P OUTPUT DROP

# Exempt Loopback address
$IPTABLES -A INPUT  -i lo -j ACCEPT
$IPTABLES -A OUTPUT -o lo -j ACCEPT

# Spoofing this host?
$IPTABLES -A INPUT -s $IPADDRESS -j LOG —log-prefix "Spoofed $MYSERVER's
($IPADDRESS)!"
$IPTABLES -A INPUT -s $IPADDRESS -j DROP

# Add some generic Anti-spoofing rules
$IPTABLES -A INPUT -s 255.0.0.0/8 -j LOG  —log-prefix "Spoofed source IP!"
$IPTABLES -A INPUT -s 255.0.0.0/8 -j DROP
$IPTABLES -A INPUT -s 0.0.0.0/8 -j LOG  —log-prefix "Spoofed source IP!"
$IPTABLES -A INPUT -s 0.0.0.0/8 -j DROP
$IPTABLES -A INPUT -s 127.0.0.0/8 -j LOG  —log-prefix "Spoofed source IP!"
$IPTABLES -A INPUT -s 127.0.0.0/8 -j DROP
$IPTABLES -A INPUT -s 172.16.0.0/12 -j LOG  —log-prefix "Spoofed source IP!"
$IPTABLES -A INPUT -s 172.16.0.0/12 -j DROP
$IPTABLES -A INPUT -s 10.0.0.0/8 -j LOG  —log-prefix "Spoofed source IP!"
$IPTABLES -A INPUT -s 10.0.0.0/8 -j DROP

# Too Popular?
$IPTABLES -A INPUT -s www.slashdot.org -j LOG —log-prefix "Slashdotted!"
$IPTABLES -A INPUT -s www.slashdot.org -j DROP
$IPTABLES -A INPUT -s www.digg.com -j LOG —log-prefix "Dugg!"
$IPTABLES -A INPUT -s www.digg.org -j DROP

# INBOUND POLICY ————————————

# Accept inbound packets that are part of previosly-OK'ed sessions
$IPTABLES -A INPUT -m state —state RELATED,ESTABLISHED -j ACCEPT

# Accept inbound packets that initiate HTTP sessions
$IPTABLES -A INPUT -p tcp -j ACCEPT —dport 80 -m state —state NEW

# Accept inbound packets that initiate Secure HTTP sessions
$IPTABLES -A INPUT -p tcp -j ACCEPT —dport 443 -m state —state NEW

# Allow outbound SSH (23)
#$IPTABLES -A INPUT -p tcp —dport 22 -m state —state NEW -j ACCEPT

# OUTBOUND POLICY ————————————

# If it's part of an approved connection, let it out
$IPTABLES -I OUTPUT 1 -m state —state RELATED,ESTABLISHED -j ACCEPT

# Allow outbound DNS queries
$IPTABLES -A OUTPUT -p udp —dport 53 -m state —state NEW -j ACCEPT

# Allow outbound HTTP (80) for web services?
$IPTABLES -A OUTPUT -p tcp —dport 80 -m state —state NEW -j ACCEPT

# Allow outbound ping (debug)
#$IPTABLES -A OUTPUT -p icmp -j ACCEPT —icmp-type echo-request

# Allow outbound SMTP (25) for notifications
#$IPTABLES -A OUTPUT -p tcp —dport 25 -m state —state NEW -j ACCEPT

# Allow outbound SSH (23)
#$IPTABLES -A OUTPUT -p tcp —dport 22 -m state —state NEW -j ACCEPT

# Allow outbound NTP (123) for time sync?
#$IPTABLES -A OUTPUT -p tcp —dport 123 -m state —state NEW -j ACCEPT

# Log everything that gets rejected/DROP'd
$IPTABLES -A OUTPUT -j LOG —log-prefix "Packet dropped by default
(OUTPUT): "

;;

wide-open)
echo -n "*** WARNING ***"
echo -n "Unloading $MYSERVER's ($IPADDRESS) Packet Filters!"
# Flush current table
$IPTABLES —flush
# Open up the gates.
$IPTABLES -P INPUT ACCEPT
$IPTABLES -P FORWARD ACCEPT
$IPTABLES -P OUTPUT ACCEPT
;;

stop)
echo "Shutting down packet filtering..."
$IPTABLES —flush
;;
status)
echo "$MYSERVER Firewall (IPTables) running status:"
$IPTABLES —line-numbers -v —list
;;

*)
echo "Usage: $0 {start|stop|wide_open|status}"
exit 1
;;
esac
Running this script is a good place to start. It sets up the basics. I really can't get into an in-depth discussion about iptables here, but if you are interested in more information on the subject, I again urge you to read Linux Server Security (O'Reilly) or read any number of online resources to learn this powerful yet complicated packet filtering system.
It's a big bad Internet, and many curious people all over the world are interested in seeing what you have. If you put a server on the Internet it will be attacked; the question is whether you will know it.
Sometimes it is obvious. If all the pictures of people have been replaced with monkeys then you might suspect there has been an incident. But not all attacks are so obvious. Sometimes the goal for the attacker was merely to log in, or to place some code on your server to help her out later on. If you want to detect intruders, there are some standard places to start.
It's late, you're having a hard time getting to sleep, so you fire up vi and start reading through your logs. You get about a third of the way into the http_access.log and notice several odd http requests. These could be attacks. The fact that they are still here may indicate that the server was attacked but not compromised.
One way to make sure nothing has been altered on the system is to compare the existing file system to that of a stored snapshot. This can be done by using file integrity checkers that keep a database of all the files on the system, their sizes, and other relevant information and use that data to compare against the current running system. If something changes, notifications can be sent to the appropriate people.
One of the more popular of these programs is called Tripwire. Tripwire is a host-based intrusion detection system available for free at http://sourceforge.net/projects/tripwire. It keeps track of a system's current file state and reports any changes. If an intruder adds, deletes, or modifies files on the file system, Tripwire can detect and report on the changes.
Tip
Tripwire can also serve many other purposes, such as integrity assurance, change management, policy compliance, and more.
Another way to detect attacks is to inspect the network traffic directly and see if there is anything nefarious going on. Again, we don't have to reinvent the wheel. Good network inspection programs are available, too.
Snort is perhaps the most popular network monitoring tool. Snort is also available for free on the Internet (http://www.snort.org). Snort is a network intrusion detection application that can inspect network traffic and react to suspicious activity. Snort acts in realtime, analyzing each packet of data on the wire and can inspect for content matching, probe signatures, OS fingerprinting attempts, buffer overflow attempts, and many other types of behavior.
Snort can be used with other software, such as SnortSnarf, OSSIM, sguil, and Snort's graphical user interface, the Basic Analysis and Security Engine (BASE).
Whew! That was a lot of work. Now, quick! Before you do anything else go and make a copy of everything. If you ever want to do this again, it would be easier to make a copy of what you just built than to do it all over again, don't you think? After the server is fully up to date you should make an image of the entire operating system to serve as a template for future systems.
Partimage is a Ubuntu (Universe) package that will copy the entire contents of a Linux partition to a backup file. Creating an image file is great for:
A very good tutorial on how to back up an Ubuntu partition with Partimage is located at http://www.psychocats.net/ubuntu/partimage.
dd_rescue is a total system recovery utility designed to copy, byte by byte, the entire contents of a partition.
dd_rescue /dev/hda1 /dev/sda1
This will overwrite the contents of /dev/sda1 with a copy of /dev/hda1. If you do not want to destroy the contents of /dev/sda1 and have enough space you can write it to a file:
dd_rescue /dev/hda1 /dev/sda1/hda1backup.img
Recovery then looks something like this:
sudo mkdir /recovery sudo mount /dev/sda1/hda1backup.img /recovery
Incidents can and do happen. Security is a weakest link problem, and as long as you're plugged into the Internet you have to be aware of the dangers and what can happen. So, if an incident does happen you need to be prepared for it. By being prepared you can minimize the damage of an attack and act swiftly instead of wondering what to do next.
So, why would anyone attack you? The answer could be as simple as because they can. However, usually attackers have a reason: there is something they want on your machine. Common attacks against Internet servers include:
Attacks against the server itself (to gain access)
Attacks against the content (defacement)
Attacks against the entity (theft, data, information gathering, defacement, slander)
Knowing which one of these attacks is more likely to happen to your server will help in preparing possible recovery actions and responses.
Sometimes you have to plan for the worst. Right now, you should stop and think about what you would do if you machine got attacked. Imagine the types of attacks that could happen. What is the worst thing that could happen? Scary, huh? Now imagine how you would respond. What would you do? Who would you call?
By identifying assets, visualizing the types of attack, and thinking of possible outcomes you can come up with a disaster recovery plan that can be executed in the event of an incident:
- Identify your assets
What assets do you need to protect? What is on the server that should not fall in to the hands of an attacker? How is that information being protected?
- Visualize an attack path
How would it happen? What is the worst that could happen? Knowing everything you know about the server, how would you try to break in?
- Evaluate the risk of that asset being compromised
What is the risk?
- Formulate a response
What's the best course of action to take if the asset is compromised? Who needs to know; what needs to be done?
- Take a reference snapshot of the file system and store it on removable media
In the event of an incident, this will be useful in identifying the extent of the damage.
- Create a forensics disk that has known versions of programs, so you know it's safe to use
A good set of common tools has already been assembled as part of a source forge project called Live View: http://liveview.sourceforge.net.
- Document all your findings
Create a procedure for each potential event and a contacts list.
- Report the incident
Contact all the people on the contacts list and notify them of the incident.
Don't panic. Take a deep breath. Everything is going to be OK. Do you have a plan? If you do, now is the time to execute it. If you don't, we need to try to contain what happened. To do this, we need to retake control of the system using reliable tools:
Create a forensics toolkit CD complete with all the executables you will need to assess the system—such as Live View (http://liveview.sourceforge.net).
Before you unplug anything, create an image of the current state of the system to preserve any evidence.
Use the forensics toolkit CD.
Check the file system for commands that may have been tampered with—such as
ps,ls,netstat. Do a file integrity scan and perform a file system audit. Check all running processes, and make sure that a root kit or a Trojan is not running. Inspect the logs for evidence.Report the incident to the proper authorities.
The main goal is to try to determine the source of the attack. Once that is discovered, you can alter firewall rules and do a more solid job of locking down.
Get Securing Ajax Applications now with the O’Reilly learning platform.
O’Reilly members experience books, live events, courses curated by job role, and more from O’Reilly and nearly 200 top publishers.

