Effects
By representing atmospheric properties, enhancing textures, and creating focus, effects are used to add another layer of realism to renderings.
Haze
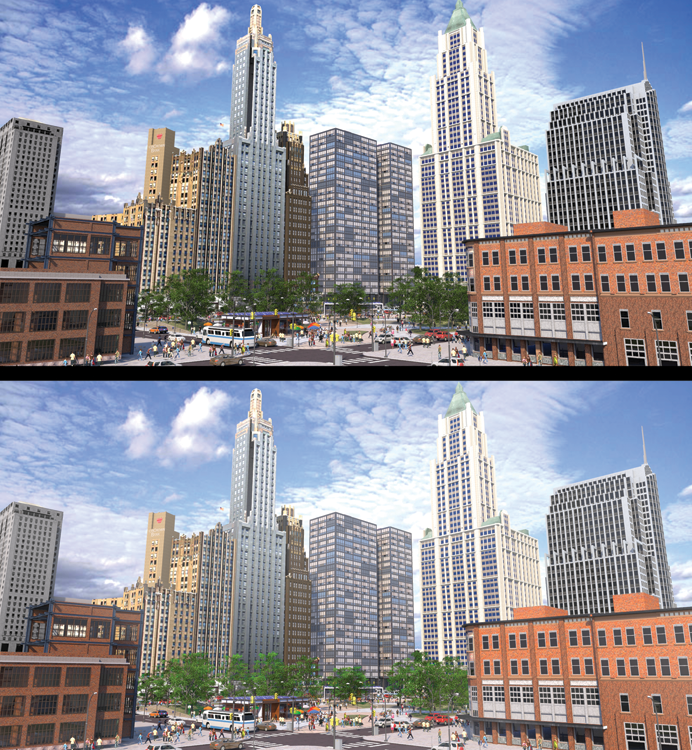
Haze is an excellent addition to exterior renders. You should include or add a sky to the background of a render prior to adding haze. Creating haze requires masking an additional layer to create a mist/fog/vapor effect over the image (Fig. 31.27).
Fig. 31.27: The completed preproduction rendering (top); haze added to soften up the image and create more depth (bottom)

To create haze, follow these steps:
Get Rendering in SketchUp: From Modeling to Presentation for Architecture, Landscape Architecture and Interior Design now with the O’Reilly learning platform.
O’Reilly members experience books, live events, courses curated by job role, and more from O’Reilly and nearly 200 top publishers.

