Light Editor
The Shaderlight Light Editor is activated from the Shaderlight main menu (Fig. 29.11). You can select the various lighting options from the Type pull-down menu. Once you’ve picked a lighting option, the SketchUp cursor turns into a lightbulb, allowing you place the light emitter.
Fig. 29.11: The Shaderlight main menu and Lighting menu
The Light Editor has three functions:
- To select and place a lighting option
- To set light strength
- To set light color
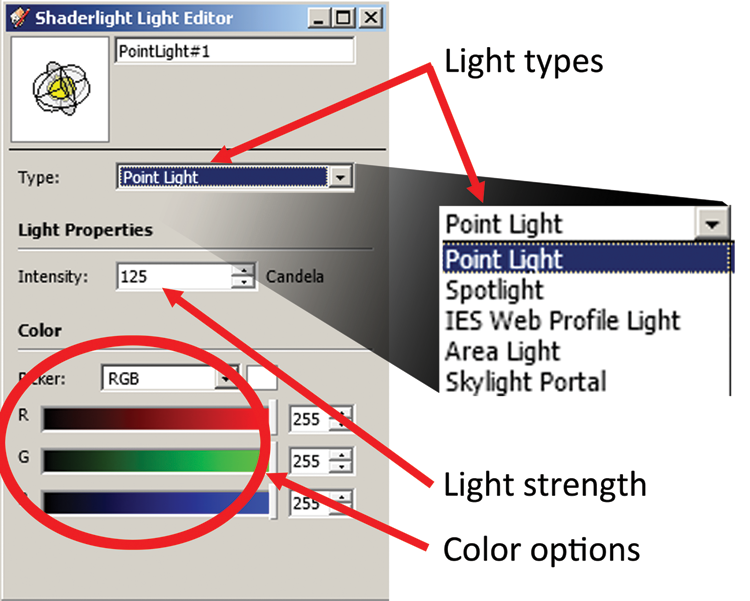
Light Strength
The strength of an emitter is measured by Shaderlight in candelas (Fig. 29.12). Candelas represent units of luminous intensity. For example, a single Shaderlight candle is equal to one real-world candela (hence the name). One candela is equivalent to 1.2 watts. In Shaderlight, the default Candela setting for lights is 125. This is equivalent to a 100-watt lightbulb. However, exposure plays a big part in lighting up a scene, working in tandem with the Candela setting. Some specific candela strengths and Exposure settings are provided in the following sections to help you get started with lighting.
Fig. 29.12: The Shaderlight Candela menu option

Before you place an emitter, and after you select a light Type, enter the desired candela value to set the light strength. The settings provided are initial baseline ...
Get Rendering in SketchUp: From Modeling to Presentation for Architecture, Landscape Architecture and Interior Design now with the O’Reilly learning platform.
O’Reilly members experience books, live events, courses curated by job role, and more from O’Reilly and nearly 200 top publishers.

