Linking the Texture Library
To insert and swap textures with ease, you will want to link your Texture Library to SketchUp’s Paint Bucket file browser and texture options. Doing this allows for a simple and easy workflow when applying and editing textures. Swapping textures to a linked Texture Library is reviewed in Chapter 8 and Chapter 9. Please note, this process differs for Mac’s. See the next chapter about Mac Texture tools.
To link the library:
Fig. 7.15: Select Window ⇒ Preferences ⇒ Files to link SketchUp to the Texture Library.
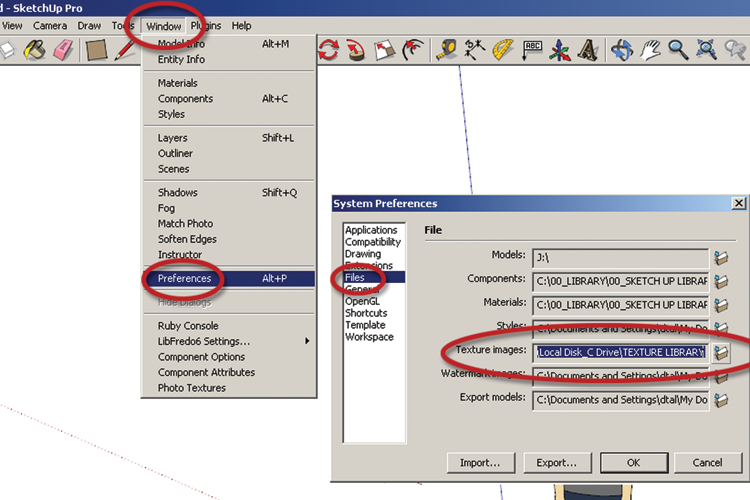
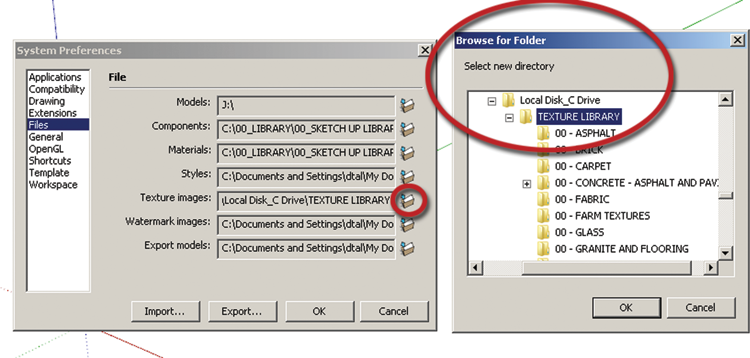
Fig. 7.16: Linking SketchUp to the Texture Library folder
Get Rendering in SketchUp: From Modeling to Presentation for Architecture, Landscape Architecture and Interior Design now with the O’Reilly learning platform.
O’Reilly members experience books, live events, courses curated by job role, and more from O’Reilly and nearly 200 top publishers.

