Create Data-Entry Forms
Entering data in a worksheet is straightforward, but there’s nothing preventing users from entering values in the wrong cells, entering invalid data, or leaving required fields blank. To address those problems, Excel provides data forms, validation tools, and lists. You can use those tools together to create a fairly sophisticated data-entry process.
To see how data forms work:
Create a new worksheet.
Enter three column headings—Item, Quantity, and Price—on the first row.
Select those cells.
Choose Data → Form. Excel displays a data form with fields for each of the column headings.
Enter data in each field, pressing Return after each. Excel adds a record to the list after you press Enter on the last field, as shown in Figure 20-1.
The data form doesn’t check whether the data is valid; it merely displays a form with blank fields for each column in the list. To add validation rules :
Select the first cell (A2) and choose Data → Validation. Excel displays the Data Validation dialog box.
Enter the values shown in Figure 20-2. Click OK when done.
Repeat Steps 1 and 2 for the Quantity and Price columns using the settings in Table 20-2.
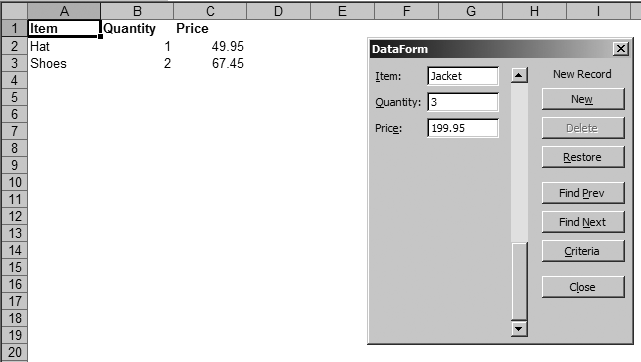
Figure 20-1. Using a data form to enter values
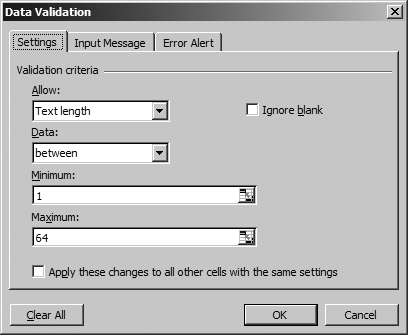
Figure 20-2. Entering validation rules
Table 20-2. Sample validation settings
|
List column ... |
|---|
Get Programming Excel with VBA and .NET now with the O’Reilly learning platform.
O’Reilly members experience books, live events, courses curated by job role, and more from O’Reilly and nearly 200 top publishers.

