Creating Spot Color
Removing almost all the color from a photo but leaving one or two objects in vivid tones, called spot color, is a very effective artistic device that's long been popular in the print industry. Figure 9-17 shows an example of spot color.
With Elements, creating this kind of effect is as easy as selecting an object. There are all sorts of ways to go about doing this. This section walks you through three of the easiest methods. You can erase your way back to color, use the Remove Color command in conjunction with a selection, or use an Adjustment layer. In learning to use the last method, you'll also learn how to edit the layer mask of an Adjustment layer so that you can change the area the adjustment affects.
The end result looks the same no matter which of these methods you choose. Just select the one you find easiest for the particular photo you want to change.
Erasing Colors from a Duplicate Layer
The simplest way to remove colors from your image is to use the Eraser tool. (See page 291 for more about the different Erasers.) When you use this method, you place a color-free layer over your colored original and erase bits of the top layer to let the color below show through.
Make a duplicate layer.
Press Ctrl+J (â-J) or go to Layer â Duplicate layer. This is the layer that is going to be black and white.
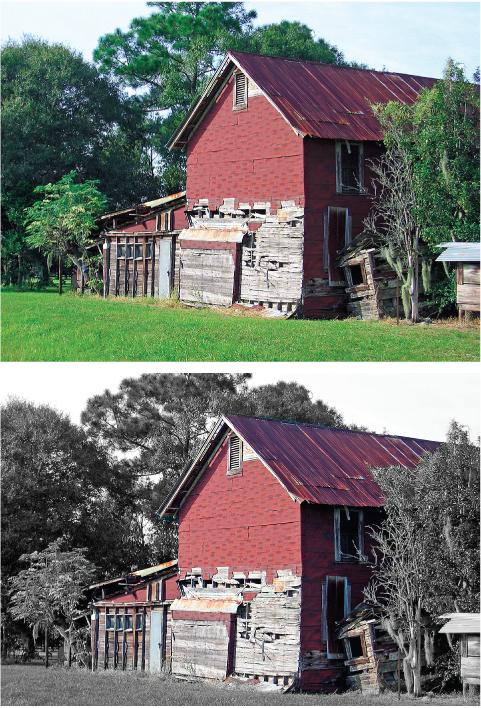
Figure 9-17. With Elements, you can easily remove the color ...
Get Photoshop Elements 3: The Missing Manual now with the O’Reilly learning platform.
O’Reilly members experience books, live events, courses curated by job role, and more from O’Reilly and nearly 200 top publishers.

