Changing the Color of an Object
In Chapter 4, you saw one way to change the color of an objectâselect it and use the Hue/Saturation sliders in Quick Fix. Elements also gives you some other ways to do this: you can use an Adjustment layer, the Replace Color command, or the Color Replacement tool.
The method you choose depends to some extent on your photo and to some extent on your own preference. Using an Adjustment layer gives you the most flexibility if you want to make other changes later on. Replace Color is the fastest way to change one color that's widely scattered throughout your whole image, and the Color Replacement tool lets you quickly brush a replacement color over the color you want to change. Whichever method you choose, Figure 9-12 shows the kind of complex color change you can make in a jiffy using any one of these methods.
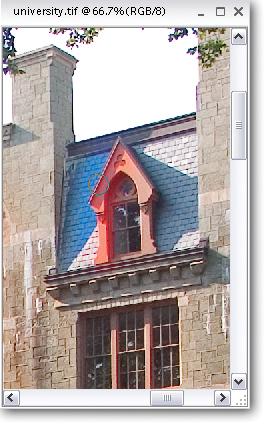
Figure 9-11. Here, the Sponge tool has been applied to the left side of the window frame and the roof beside it, increasing the color saturation in those areas. Approach the Sponge tool with some caution. It doesn't take much to cause degradation in your image, especially if you have made many previous adjustments to it. If you start to see noise (page 313), undo your sponging and try it again at a reduced setting.
Using an Adjustment Layer
You can use a Hue/Saturation Adjustment layer to make the same kind of changes to the color that you saw in ...
Get Photoshop Elements 3: The Missing Manual now with the O’Reilly learning platform.
O’Reilly members experience books, live events, courses curated by job role, and more from O’Reilly and nearly 200 top publishers.

