Printing in 3D
Want to create 3D objects in the real world, not just in Photoshop? No problem! 3D printers are now a reality. Instead of spraying ink like an inkjet printer, a 3D printer creates a stack of extremely thin layers—one on top of the other—of liquid plastic, metal, glass, gold, silver, or even a granular, resin-type substance to create the final object. Depending on the material, the layers either dry instantly, or a laser beam is used to heat and solidify each layer. Neat, huh?
Industry experts predict that by 2016, high-quality 3D printers will be available for less than $2,000. Meanwhile, there are 3D-printing companies that will create a 3D object from your exported 3D file. Happily, Photoshop CC 2014 lets you print directly to a 3D printer (if you have one) or send the file off to a company such as Shapeways (www.shapeways.com) or Sculpteo (www.sculpteo.com) for them to print.
Once you’ve perfected your 3D object and rendered it, choose 3D→3D Print Settings. Photoshop places your object inside a box with a grid on the bottom to give you an idea of what the printed object will look like, as shown in Figure 21-13. And in the Properties panel, you see the 3D Print Settings visible in Figure 21-13.
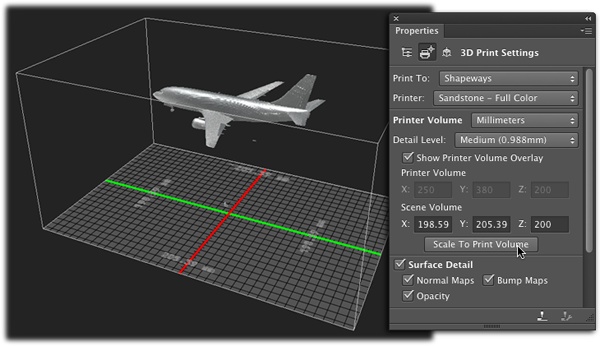
Figure 21-13. Here you see both the 3D print preview and the Properties panel’s 3D Print Settings. The cube around the object represents the maximum size the printer can print. ...
Get Photoshop CC: The Missing Manual, 2nd Edition now with the O’Reilly learning platform.
O’Reilly members experience books, live events, courses curated by job role, and more from O’Reilly and nearly 200 top publishers.

