Installing a Power Supply
Standard power supplies are secured with four screws. To remove a power supply, disconnect the AC supply cord, the motherboard power cable(s), and all device power cables. Use one hand to hold the power supply in place while removing the four screws that secure it, and then lift it straight out. Some power supplies use a locking tab and slot arrangement, so you may have to slide the power supply a short distance to clear the tab before lifting it out. To install a power supply, reverse that process. Slide the power supply into place, as shown in Figure 26-5, making sure that the locking tab, if present, mates with the slot.
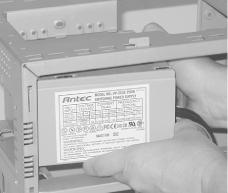
Figure 26-5. Slide the power supply into position
Once the power supply is in place, align the screw holes and insert the screws, as shown in Figure 26-6. If necessary, support the power supply with one hand while you insert screws with the other. Most good cases (like the Antec KS-288 shown) have a tray that supports the power supply, while other cases simply leave the power supply hanging in mid-air, secured only by the screws. In the latter situation, you may want to get someone to volunteer a second pair of hands to hold the power supply while you insert the screws, particularly if you’re working in an awkward position. We’ve seen at least one motherboard damaged by a dropped power supply, which ripped the processor, heatsink/fan, ...
Get PC Hardware in a Nutshell, Second Edition now with the O’Reilly learning platform.
O’Reilly members experience books, live events, courses curated by job role, and more from O’Reilly and nearly 200 top publishers.

