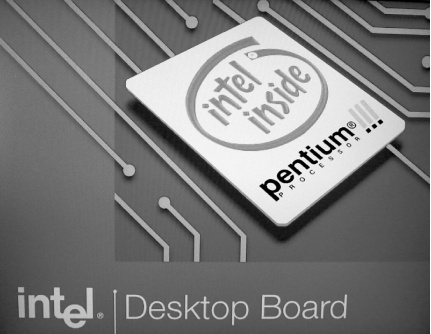
Many computers will display a graphic at boot time. Make it one of your own.
Intel and most of the PC OEMs want to remind you who made the system, so they have built in a boot-time graphic as seen in Figure 1-6. Boot-time graphics are an alternative to the technical bits and bytes that have traditionally appeared on PC boot screens. Displaying the graphic takes extra time in order to load up the graphic image stored in the BIOS memory chip and configure the video to display graphics. As techies are interested in faster performance, product logos are not of much interest.
If your system BIOS is stored in FLASH RAM (instead of a conventional old-style EPROM), it may be possible to load your own graphic into the BIOS chip. To perform this hack you need a BIOS that supports boot-time graphics and the appropriate software programs to make the changes and write them into your BIOS FLASH ROM chip. Most implementations of Award BIOS Versions 4.5 and up support boot-time graphics display. You will need a couple of software programs, as follows:
A graphics program to either create a new graphics file or convert an existing one to a 64048016-color uncompressed BMP graphic file for display at bootup (I didn't say it would or had to be an impressive graphic, just a graphic file)
The appropriate AWDFLASH.EXE program for your system board (from the manufacturer's web site)
A program to add the graphics file to your BIOSâeither the CBROM program from http://www.stormpages.com/crazyape/cbrom.html or AwardMod through http://sourceforge.net/projects/awardmod/.
With these tools available, proceed through the following steps to use CBROM to modify your BIOS file:
Make or obtain a bootable DOS or Windows 95-Me startup diskette.
On a blank diskette, copy the AWDFLASH.EXE program (approximately 28 KB), the CBROM program (78 KB) and your graphics file (approximately 16 KB), with enough room for two copies of your BIOS (256 KB each).
Boot up with the diskette from Step 1. When you finally get a DOS prompt, change diskettes so the diskette of Step 2 is in the diskette drive.
Run the AWDFLASH program and follow the instructions to make a copy of your BIOS file on the diskette. Exit the AWDFLASH program back to the DOS prompt.
Make a copy of the BIOS file you just saved so you'll have two copiesâone to tinker with and one as a backup file.
Run the CBROM program to merge the graphic file into the BIOS file, substituting the appropriate filenames in a single command line as follows:
cbrom yourbios.awd /logo yourlogo.bmp [Enter]
Run the AWDFLASH program and follow the instructions to load your new BIOS file into the BIOS FLASH ROM.
Remove the diskette from the drive and restart the system to enjoy your new boot-up look.
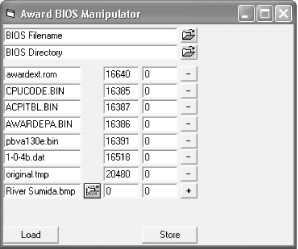
If you choose to use the AwardMod program, which runs in Windows, follow Steps 1-5 above, skip the rest, and then follow these steps:
Restart your system to Windows and run the AwardMod program, shown in Figure 1-7.
Select the BIOS filename and directory (on the diskette), and then click the Load button to begin working with the BIOS file.
At the bottom of the listing you'll see an open file folder icon. Click this icon and browse to find and open your logo BMP file. The filename will appear in the listing.
Click the Store button to merge the logo into a new BIOS file and save it, then exit the program. Make sure the new BIOS file is on the diskette.
Replace the diskette with a bootable diskette, and then reboot the system to DOS.
Switch to the diskette with the FLASH program and new BIOS file.
Run the AWDFLASH program and follow the instructions to load your new BIOS file into the BIOS FLASH ROM.
Remove the diskette from the drive and restart the system to enjoy your new boot-up look.
Warning
The logo-replacement process involves rewriting a major portion of the data stored in the FLASH ROM containing your BIOS. Replacing the original startup graphic with your own certainly adds a bit of class to your system and identifies you as the "creator" of your PC, but it is not without risks.
Make sure you use a stable AC process power source with an Uninterruptible Power Supply (UPS) and that nothing disturbs the system during the FLASH process or your BIOS will be destroyed [Hack #10] .
Be sure to make a backup of your BIOS using the appropriate FLASH ROM tools provided by your system board maker before hacking into logo land. You'll need the backup file to load the original BIOS back into the system if you make a mistake.
Get PC Hacks now with the O’Reilly learning platform.
O’Reilly members experience books, live events, courses curated by job role, and more from O’Reilly and nearly 200 top publishers.

