Performing a Local HotSync
If you’ve configured the hardware and software correctly, here’s what happens when you press the button on the HotSync cradle: First, the PalmPilot turns itself on, accompanied by the soon-to-be-familiar musical chirp shown in Figure 6.5.

Figure 6-5. The three-note chime shown here in the first measure begins a HotSync; the second three-note lick is the Palm wakeup call, announcing that the HotSync has successfully completed.
The PalmPilot begins sending its “HotSync now commencing!” signal to your PC, as shown in Figure 6.6; if there’s no response from your computer, the PalmPilot will tell you so (also shown in Figure 6.6). Retrace your steps, making sure the cable is plugged into your computer and the HotSync software is installed and “listening.”
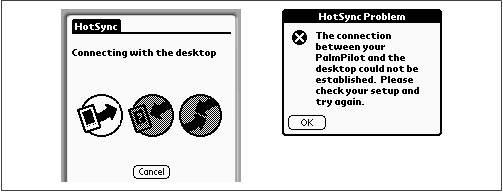
Figure 6-6. If all goes well, you’ll see the HotSync logos light up one at a time on the PalmPilot screen, as shown at left. If there’s a cabling or software problem, you’ll get the message shown at right.
The first time you HotSync after installing Palm Desktop, you’ll be shown a list like the one in Figure 6.7; select the name you chose for your own PalmPilot when you installed Palm Desktop. Thereafter, whenever you HotSync, the PalmPilot’s software will assume that it’s your PalmPilot it’s synchronizing. (If ...
Get PalmPilot: The Ultimate Guide, Second Edition now with the O’Reilly learning platform.
O’Reilly members experience books, live events, courses curated by job role, and more from O’Reilly and nearly 200 top publishers.

