Chapter 4. Querying
This chapter looks at querying in detail. The main areas covered are as follows:
You can perform ad hoc queries on the database using the
findorfindOnefunctions and a query document.You can query for ranges, set inclusion, inequalities, and more by using
$-conditionals.Queries return a database cursor, which lazily returns batches of documents as you need them.
There are a lot of metaoperations you can perform on a cursor, including skipping a certain number of results, limiting the number of results returned, and sorting results.
Introduction to find
The find method is used to
perform queries in MongoDB. Querying returns a subset of documents in a
collection, from no documents at all to the entire collection. Which
documents get returned is determined by the first argument to find, which is a document specifying the query
criteria.
An empty query document (i.e., {}) matches everything in the collection. If
find isn’t given a query document, it
defaults to {}. For example, the
following:
>db.c.find()
matches every document in the collection c (and returns these documents in batches).
When we start adding key/value pairs to the query document, we begin
restricting our search. This works in a straightforward way for most
types: numbers match numbers, booleans match booleans, and strings match
strings. Querying for a simple type is as easy as specifying the value
that you are looking for. For example, to find all documents where the
value for "age" is 27, we can add that
key/value pair to the query document:
>db.users.find({"age":27})
If we have a string we want to match, such as a "username" key with the value "joe", we use that key/value pair
instead:
>db.users.find({"username":"joe"})
Multiple conditions can be strung together by adding more key/value
pairs to the query document, which gets interpreted as
“condition1 AND
condition2 AND … AND conditionN.” For
instance, to get all users who are 27-year-olds with the username “joe,”
we can query for the following:
>db.users.find({"username":"joe","age":27})
Specifying Which Keys to Return
Sometimes you do not need all of the key/value pairs in a document
returned. If this is the case, you can pass a second argument to
find (or findOne) specifying the keys you want. This
reduces both the amount of data sent over the wire and the time and
memory used to decode documents on the client side.
For example, if you have a user collection and you are interested
only in the "username" and "email" keys, you could return just those keys
with the following query:
>db.users.find({},{"username":1,"email":1}){"_id":ObjectId("4ba0f0dfd22aa494fd523620"),"username":"joe","email":"joe@example.com"}
As you can see from the previous output, the "_id" key is returned by default, even if it
isn’t specifically requested.
You can also use this second parameter to exclude specific
key/value pairs from the results of a query. For instance, you may have
documents with a variety of keys, and the only thing you know is that
you never want to return the "fatal_weakness" key:
>db.users.find({},{"fatal_weakness":0})
This can also prevent "_id"
from being returned:
>db.users.find({},{"username":1,"_id":0}){"username":"joe",}
Limitations
There are some restrictions on queries. The value of a query
document must be a constant as far as the database is concerned. (It can
be a normal variable in your own code.) That is, it cannot refer to the
value of another key in the document. For example, if we were keeping
inventory and we had both "in_stock"
and "num_sold" keys, we couldn’t
compare their values by querying the following:
>db.stock.find({"in_stock":"this.num_sold"})// doesn't work
There are ways to do this (see $where Queries),
but you will usually get better performance by restructuring your
document slightly, such that a “normal” query will suffice. In this
example, we could instead use the keys "initial_stock" and "in_stock". Then, every time someone buys an
item, we decrement the value of the "in_stock" key by one. Finally, we can do a
simple query to check which items are out of stock:
>db.stock.find({"in_stock":0})
Query Criteria
Queries can go beyond the exact matching described in the previous section; they can match more complex criteria, such as ranges, OR-clauses, and negation.
Query Conditionals
"$lt", "$lte", "$gt", and "$gte" are all comparison operators,
corresponding to <, <=, >, and >=, respectively. They can be
combined to look for a range of values. For example, to look for users
who are between the ages of 18 and 30, we can do this:
>db.users.find({"age":{"$gte":18,"$lte":30}})
This would find all documents where the "age" field was greater than or equal to 18 AND
less than or equal to 30.
These types of range queries are often useful for dates. For example, to find people who registered before January 1, 2007, we can do this:
>start=newDate("01/01/2007")>db.users.find({"registered":{"$lt":start}})
An exact match on a date is less useful, since dates are only stored with millisecond precision. Often you want a whole day, week, or month, making a range query necessary.
To query for documents where a key’s value is not equal to a
certain value, you must use another conditional operator, "$ne", which stands for “not equal.” If you
want to find all users who do not have the username “joe,” you can query
for them using this:
>db.users.find({"username":{"$ne":"joe"}})
"$ne" can be used with any
type.
OR Queries
There are two ways to do an OR query in MongoDB. "$in" can be used to query for a variety of
values for a single key. "$or" is
more general; it can be used to query for any of the given values across
multiple keys.
If you have more than one possible value to match for a single
key, use an array of criteria with "$in". For instance, suppose we were running a
raffle and the winning ticket numbers were 725, 542, and 390. To find
all three of these documents, we can construct the following
query:
>db.raffle.find({"ticket_no":{"$in":[725,542,390]}})
"$in" is very flexible and
allows you to specify criteria of different types as well as values. For
example, if we are gradually migrating our schema to use usernames
instead of user ID numbers, we can query for either by using
this:
>db.users.find({"user_id":{"$in":[12345,"joe"]})
This matches documents with a "user_id" equal to 12345, and documents with a
"user_id" equal to "joe".
If "$in" is given an array with
a single value, it behaves the same as directly matching the value. For
instance, {ticket_no : {$in : [725]}}
matches the same documents as {ticket_no :
725}.
The opposite of "$in" is
"$nin", which returns documents that
don’t match any of the criteria in the array. If we want to return all
of the people who didn’t win anything in the raffle, we can query for
them with this:
>db.raffle.find({"ticket_no":{"$nin":[725,542,390]}})
This query returns everyone who did not have tickets with those numbers.
"$in" gives you an OR query for
a single key, but what if we need to find documents where "ticket_no" is 725 or "winner" is true? For this type of query, we’ll need to
use the "$or" conditional. "$or" takes an array of possible criteria. In
the raffle case, using "$or" would
look like this:
>db.raffle.find({"$or":[{"ticket_no":725},{"winner":true}]})
"$or" can contain other
conditionals. If, for example, we want to match any of the three
"ticket_no" values or the "winner" key, we can use this:
>db.raffle.find({"$or":[{"ticket_no":{"$in":[725,542,390]}},{"winner":true}]})
With a normal AND-type query, you want to narrow down your results as far as possible in as few arguments as possible. OR-type queries are the opposite: they are most efficient if the first arguments match as many documents as possible.
While "$or" will always work,
use "$in" whenever possible as the
query optimizer handles it more efficiently.
$not
"$not" is a metaconditional: it
can be applied on top of any other criteria. As an example, let’s
consider the modulus operator, "$mod". "$mod" queries for keys whose values, when
divided by the first value given, have a remainder of the second
value:
>db.users.find({"id_num":{"$mod":[5,1]}})
The previous query returns users with "id_num"s of 1, 6, 11, 16, and so on. If we
want, instead, to return users with "id_num"s of 2, 3, 4, 5, 7, 8, 9, 10, 12,
etc., we can use "$not":
>db.users.find({"id_num":{"$not":{"$mod":[5,1]}}})
"$not" can be particularly
useful in conjunction with regular expressions to find all documents
that don’t match a given pattern (regular expression usage is described
in the section Regular Expressions).
Conditional Semantics
If you look at the update modifiers in the previous chapter and
previous query documents, you’ll notice that the $-prefixed keys are in
different positions. In the query, "$lt" is in the inner document; in the update,
"$inc" is the key for the outer
document. This generally holds true: conditionals are an inner document
key, and modifiers are always a key in the outer document.
Multiple conditions can be put on a single key. For example, to
find all users between the ages of 20 and 30, we can query for both
"$gt" and "$lt" on the "age" key:
>db.users.find({"age":{"$lt":30,"$gt":20}})
Any number of conditionals can be used with a single key. Multiple
update modifiers cannot be used on a single key,
however. For example, you cannot have a modifier document such as
{"$inc" : {"age" : 1}, "$set" : {age :
      40}}
because it modifies "age" twice. With query conditionals,
no such rule applies.
There are a few “meta-operators” that go in the outer document:
"$and“, "$or“, and "$nor“. They all have a similar form:
>db.users.find({"$and":[{"x":{"$lt":1}},{"x":4}]})
This query would match documents with an "x" field both less than 1 and equal to 4.
Although these seem like contradictory conditions, it is possible to
fulfill if the "x" field is an array:
{"x" : [0, 4]} would match. Note that
the query optimizer does not optimize "$and" as well as other operators. This query
would be more efficient to structure as:
>db.users.find({"x":{"$lt":1,"$in":[4]}})
Type-Specific Queries
As covered in Chapter 2, MongoDB has a wide variety of types that can be used in a document. Some of these types have special behavior when querying.
null
null behaves a bit strangely.
It does match itself, so if we have a collection with the following
documents:
>db.c.find(){"_id":ObjectId("4ba0f0dfd22aa494fd523621"),"y":null}{"_id":ObjectId("4ba0f0dfd22aa494fd523622"),"y":1}{"_id":ObjectId("4ba0f148d22aa494fd523623"),"y":2}
we can query for documents whose "y" key is null in the expected way:
>db.c.find({"y":null}){"_id":ObjectId("4ba0f0dfd22aa494fd523621"),"y":null}
However, null not only matches
itself but also matches “does not exist.” Thus, querying for a key with
the value null will return all
documents lacking that key:
>db.c.find({"z":null}){"_id":ObjectId("4ba0f0dfd22aa494fd523621"),"y":null}{"_id":ObjectId("4ba0f0dfd22aa494fd523622"),"y":1}{"_id":ObjectId("4ba0f148d22aa494fd523623"),"y":2}
If we only want to find keys whose value is null, we can check that the key is null and exists using the "$exists" conditional:
>db.c.find({"z":{"$in":[null],"$exists":true}})
Unfortunately, there is no "$eq" operator, which makes this a little
awkward, but "$in" with one element
is equivalent.
Regular Expressions
Regular expressions are useful for flexible string matching. For example, if we want to find all users with the name Joe or joe, we can use a regular expression to do case-insensitive matching:
>db.users.find({"name":/joe/i})
Regular expression flags (for example, i) are allowed but not required. If we want to
match not only various capitalizations of joe, but also joey, we can
continue to improve our regular expression:
>db.users.find({"name":/joey?/i})
MongoDB uses the Perl Compatible Regular Expression (PCRE) library to match regular expressions; any regular expression syntax allowed by PCRE is allowed in MongoDB. It is a good idea to check your syntax with the JavaScript shell before using it in a query to make sure it matches what you think it matches.
Note
MongoDB can leverage an index for queries on prefix regular
expressions (e.g., /^joey/).
Indexes cannot be used for case-insensitive
searches (/^joey/i).
Regular expressions can also match themselves. Very few people insert regular expressions into the database, but if you insert one, you can match it with itself:
>db.foo.insert({"bar":/baz/})>db.foo.find({"bar":/baz/}){"_id":ObjectId("4b23c3ca7525f35f94b60a2d"),"bar":/baz/}
Querying Arrays
Querying for elements of an array is designed to behave the way querying for scalars does. For example, if the array is a list of fruits, like this:
>db.food.insert({"fruit":["apple","banana","peach"]})
the following query:
>db.food.find({"fruit":"banana"})
will successfully match the document. We can query for it in much
the same way as we would if we had a document that looked like the
(illegal) document: {"fruit" : "apple", "fruit"
: "banana", "fruit" : "peach"}.
$all
If you need to match arrays by more than one element, you can
use "$all". This allows you to
match a list of elements. For example, suppose we created a collection
with three elements:
>db.food.insert({"_id":1,"fruit":["apple","banana","peach"]})>db.food.insert({"_id":2,"fruit":["apple","kumquat","orange"]})>db.food.insert({"_id":3,"fruit":["cherry","banana","apple"]})
Then we can find all documents with both "apple" and "banana" elements by querying with "$all":
>db.food.find({fruit:{$all:["apple","banana"]}}){"_id":1,"fruit":["apple","banana","peach"]}{"_id":3,"fruit":["cherry","banana","apple"]}
Order does not matter. Notice "banana" comes before "apple" in the second result. Using a
one-element array with "$all" is
equivalent to not using "$all". For
instance, {fruit : {$all :
['apple']} will match the same documents as {fruit : 'apple'}.
You can also query by exact match using the entire array. However, exact match will not match a document if any elements are missing or superfluous. For example, this will match the first document above:
>db.food.find({"fruit":["apple","banana","peach"]})
But this will not:
>db.food.find({"fruit":["apple","banana"]})
and neither will this:
>db.food.find({"fruit":["banana","apple","peach"]})
If you want to query for a specific element of an array, you can
specify an index using the syntax
key.index:
>db.food.find({"fruit.2":"peach"})
Arrays are always 0-indexed, so this would match the third array
element against the string "peach".
$size
A useful conditional for querying arrays is "$size", which allows you to query for
arrays of a given size. Here’s an example:
>db.food.find({"fruit":{"$size":3}})
One common query is to get a range of sizes. "$size" cannot be combined with another $
conditional (in this example, "$gt"), but this query can be accomplished
by adding a "size" key to the
document. Then, every time you add an element to the array, increment
the value of "size". If the
original update looked like this:
>db.food.update(criteria,{"$push":{"fruit":"strawberry"}})
it can simply be changed to this:
>db.food.update(criteria,...{"$push":{"fruit":"strawberry"},"$inc":{"size":1}})
Incrementing is extremely fast, so any performance penalty is negligible. Storing documents like this allows you to do queries such as this:
>db.food.find({"size":{"$gt":3}})
Unfortunately, this technique doesn’t work as well with the
"$addToSet" operator.
The $slice operator
As mentioned earlier in this chapter, the optional second
argument to find specifies the
keys to be returned. The special "$slice" operator can be used to return a
subset of elements for an array key.
For example, suppose we had a blog post document and we wanted to return the first 10 comments:
>db.blog.posts.findOne(criteria,{"comments":{"$slice":10}})
Alternatively, if we wanted the last 10 comments, we could use −10:
>db.blog.posts.findOne(criteria,{"comments":{"$slice":-10}})
"$slice" can also return
pages in the middle of the results by taking an offset and the number
of elements to return:
>db.blog.posts.findOne(criteria,{"comments":{"$slice":[23,10]}})
This would skip the first 23 elements and return the 24th through 33th. If there were fewer than 33 elements in the array, it would return as many as possible.
Unless otherwise specified, all keys in a document are returned
when "$slice" is used. This is
unlike the other key specifiers, which suppress unmentioned keys from
being returned. For instance, if we had a blog post document that
looked like this:
{"_id":ObjectId("4b2d75476cc613d5ee930164"),"title":"A blog post","content":"...","comments":[{"name":"joe","email":"joe@example.com","content":"nice post."},{"name":"bob","email":"bob@example.com","content":"good post."}]}
and we did a "$slice" to get
the last comment, we’d get this:
>db.blog.posts.findOne(criteria,{"comments":{"$slice":-1}}){"_id":ObjectId("4b2d75476cc613d5ee930164"),"title":"A blog post","content":"...","comments":[{"name":"bob","email":"bob@example.com","content":"good post."}]}
Both "title" and "content" are still returned, even though
they weren’t explicitly included in the key specifier.
Returning a matching array element
"$slice" is helpful when you
know the index of the element, but sometimes you want whichever array
element matched your criteria. You can return the matching element
with the $-operator. Given the blog
example above, you could get Bob’s comment back with:
>db.blog.posts.find({"comments.name":"bob"},{"comments.$":1}){"_id":ObjectId("4b2d75476cc613d5ee930164"),"comments":[{"name":"bob","email":"bob@example.com","content":"good post."}]}
Note that this only returns the first match for each document:
if Bob had left multiple comments on this post, only the first one in
the "comments" array would be
returned.
Array and range query interactions
Scalars (non-array elements) in documents must match each clause
of a query’s criteria. For example, if you queried for {"x" : {"$gt" : 10, "$lt" : 20}}, "x" would have to be both greater than 10 and
less than 20. However, if a document’s "x" field is an array, the document matches
if there is an element of "x" that
matches each part of the criteria but each query clause can
match a different array element.
The best way to understand this behavior is to see an example. Suppose we have the following documents:
{"x":5}{"x":15}{"x":25}{"x":[5,25]}
If we wanted to find all documents where "x" is between 10 and 20, one might naively
structure a query as db.test.find({"x" :
{"$gt" : 10, "$lt" : 20}}) and expect to get back one
document: {"x" : 15}. However,
running this, we get two:
>db.test.find({"x":{"$gt":10,"$lt":20}}){"x":15}{"x":[5,25]}
Neither 5 nor 25 is between 10 and 20, but the document is returned because 25 matches the first clause (it is greater than 10) and 5 matches the second clause (it is less than 20).
This makes range queries against arrays essentially useless: a range will match any multi-element array. There are a couple of ways to get the expected behavior.
First, you can use "$elemMatch" to force MongoDB to compare both
clauses with a single array element. However, the catch is that
"$elemMatch" won’t match non-array
elements:
>db.test.find({"x":{"$elemMatch":{"$gt":10,"$lt":20}})>// no results
The document {"x" : 15} no
longer matches the query, because the "x" field is not an array.
If you have an index over the field that you’re querying on (see
Chapter 5), you can use min() and max() to limit the index range traversed by
the query to your "$gt" and
"$lt" values:
>db.test.find({"x":{"$gt":10,"$lt":20}).min({"x":10}).max({"x":20}){"x":15}
Now this will only traverse the index from 10 to 20, missing the
5 and 25 entries. You can only use min() and max() when you have an index on the field
you are querying for, though, and you must pass all fields of the
index to min() and max().
Using min() and max() when querying for ranges over
documents that may include arrays is generally a good idea: if you
look at the index bounds for a "$gt“/”$lt" query over an array, you can see that
it’s horribly inefficient. It basically accepts any value, so it will
search every index entry, not just those in the range.
Querying on Embedded Documents
There are two ways of querying for an embedded document: querying for the whole document or querying for its individual key/value pairs.
Querying for an entire embedded document works identically to a normal query. For example, if we have a document that looks like this:
{"name":{"first":"Joe","last":"Schmoe"},"age":45}
we can query for someone named Joe Schmoe with the following:
>db.people.find({"name":{"first":"Joe","last":"Schmoe"}})
However, a query for a full subdocument must exactly match the
subdocument. If Joe decides to add a middle name field, suddenly this
query won’t work anymore; it doesn’t match the entire embedded document!
This type of query is also order-sensitive: {"last" : "Schmoe", "first" : "Joe"} would not
be a match.
If possible, it’s usually a good idea to query for just a specific key or keys of an embedded document. Then, if your schema changes, all of your queries won’t suddenly break because they’re no longer exact matches. You can query for embedded keys using dot-notation:
>db.people.find({"name.first":"Joe","name.last":"Schmoe"})
Now, if Joe adds more keys, this query will still match his first and last names.
This dot notation is the main difference between query documents and other document types. Query documents can contain dots, which mean “reach into an embedded document.” Dot notation is also the reason that documents to be inserted cannot contain the . character. Oftentimes people run into this limitation when trying to save URLs as keys. One way to get around it is to always perform a global replace before inserting or after retrieving, substituting a character that isn’t legal in URLs for the dot character.
Embedded document matches can get a little tricky as the document structure gets more complicated. For example, suppose we are storing blog posts and we want to find comments by Joe that were scored at least a 5. We could model the post as follows:
>db.blog.find(){"content":"...","comments":[{"author":"joe","score":3,"comment":"nice post"},{"author":"mary","score":6,"comment":"terrible post"}]}
Now, we can’t query using db.blog.find({"comments" : {"author" : "joe", "score" :
{"$gte" : 5}}}). Embedded document matches have to match the
whole document, and this doesn’t match the "comment" key. It also wouldn’t work to do
db.blog.find({"comments.author" : "joe",
      "comments.score" : {"$gte" : 5}})
, because the author criteria could match a
different comment than the score criteria. That is, it would return the
document shown above: it would match "author" :
"joe" in the first comment and "score" : 6 in the second comment.
To correctly group criteria without needing to specify every key,
use "$elemMatch". This vaguely-named
conditional allows you to partially specify criteria to match a single
embedded document in an array. The correct query looks like
this:
>db.blog.find({"comments":{"$elemMatch":{"author":"joe","score":{"$gte":5}}}})
"$elemMatch" allows us to
“group” our criteria. As such, it’s only needed when you have more than
one key you want to match on in an embedded document.
$where Queries
Key/value pairs are a fairly expressive way to query, but there are
some queries that they cannot represent. For queries that cannot be done
any other way, there are "$where"
clauses, which allow you to execute arbitrary JavaScript as part of your
query. This allows you to do (almost) anything within a query. For
security, use of "$where" clauses
should be highly restricted or eliminated. End users should never be
allowed to execute arbitrary "$where"
clauses.
The most common case for using "$where" is to compare the values for two keys in
a document. For instance, suppose we have documents that look like
this:
>db.foo.insert({"apple":1,"banana":6,"peach":3})>db.foo.insert({"apple":8,"spinach":4,"watermelon":4})
We’d like to return documents where any two of the fields are equal.
For example, in the second document, "spinach" and "watermelon" have the same value, so we’d like
that document returned. It’s unlikely MongoDB will ever have a
$-conditional for this, so we can use a "$where" clause to do it with JavaScript:
>db.foo.find({"$where":function(){...for(varcurrentinthis){...for(varotherinthis){...if(current!=other&&this[current]==this[other]){...returntrue;...}...}...}...returnfalse;...}});
If the function returns true, the
document will be part of the result set; if it returns false, it won’t be.
"$where" queries should not be
used unless strictly necessary: they are much slower than regular queries.
Each document has to be converted from BSON to a JavaScript object and
then run through the "$where"
expression. Indexes cannot be used to satisfy a "$where", either. Hence, you should use "$where" only when there is no other way of
doing the query. You can cut down on the penalty by using other query
filters in combination with "$where".
If possible, an index will be used to filter based on the non-$where clauses; the "$where" expression will be used only to
fine-tune the results.
Another way of doing complex queries is to use one of the aggregation tools, which are covered in Chapter 7.
Server-Side Scripting
You must be very careful with security when executing JavaScript
on the server. If done incorrectly, server-side JavaScript is
susceptible to injection attacks similar to those that occur in a
relational database. However, by following certain rules around
accepting input, you can use JavaScript safely. Alternatively, you can
turn off JavaScript execution altogether by running mongod with the
--noscripting option.
The security issues with JavaScript are all related to executing
user-provided programs on the server. You want to avoid doing that, so
make sure you aren’t accepting user input and passing it directly to
mongod. For example, suppose you
want to print “Hello, name!”, where
name is provided by the user. A naive approach might
be to write a JavaScript function such as the following:
>func="function() { print('Hello, "+name+"!'); }"
If name is a user-defined variable, it could be
the string "'); db.dropDatabase();
print('", which would turn the code into this:
>func="function() { print('Hello, '); db.dropDatabase(); print('!'); }"
Now, if you run this code, your entire database will be dropped!
To prevent this, you should use a scope to pass in the name. In Python, for example, this looks like this:
func=pymongo.code.Code("function() { print('Hello, '+username+'!'); }",{"username":name})
Now the database will harmlessly print this:
Hello,'); db.dropDatabase(); print('!
Most drivers have a special type for sending code to the database,
since code can actually be a composite of a string and a
scope. A scope is a document that maps variable
names to values. This mapping becomes a local scope for the JavaScript
function being executed. Thus, in
the example above, the function would have access to a variable called
username, whose value would be the
string that the user gave.
Note
The shell does not have a code type that includes scope; you can only use strings or JavaScript functions with it.
Cursors
The database returns results from find using a cursor. The
client-side implementations of cursors generally allow you to control a
great deal about the eventual output of a query. You can limit the number
of results, skip over some number of results, sort results by any
combination of keys in any direction, and perform a number of other
powerful operations.
To create a cursor with the shell, put some documents into a
collection, do a query on them, and assign the results to a local variable
(variables defined with "var" are
local). Here, we create a very simple collection and query it, storing the
results in the cursor variable:
>for(i=0;i<100;i++){...db.collection.insert({x:i});...}>varcursor=db.collection.find();
The advantage of doing this is that you can look at one result at a time. If you store the results in a global variable or no variable at all, the MongoDB shell will automatically iterate through and display the first couple of documents. This is what we’ve been seeing up until this point, and it is often the behavior you want for seeing what’s in a collection but not for doing actual programming with the shell.
To iterate through the results, you can use the next method on the cursor. You can use
hasNext to check whether there is
another result. A typical loop through results looks like the
following:
>while(cursor.hasNext()){...obj=cursor.next();...// do stuff...}
cursor.hasNext() checks that the
next result exists, and cursor.next()
fetches it.
The cursor class also implements
JavaScript’s iterator interface, so you can use it in a forEach loop:
>varcursor=db.people.find();>cursor.forEach(function(x){...(x.name);...});adammattzak
When you call find, the shell
does not query the database immediately. It waits until you start
requesting results to send the query, which allows you to chain additional
options onto a query before it is performed. Almost every method on a
cursor object returns the cursor itself so that you can chain options in
any order. For instance, all of the following are equivalent:
>varcursor=db.foo.find().sort({"x":1}).limit(1).skip(10);>varcursor=db.foo.find().limit(1).sort({"x":1}).skip(10);>varcursor=db.foo.find().skip(10).limit(1).sort({"x":1});
At this point, the query has not been executed yet. All of these functions merely build the query. Now, suppose we call the following:
>cursor.hasNext()
At this point, the query will be sent to the server. The shell
fetches the first 100 results or first 4 MB of results (whichever is
smaller) at once so that the next calls to next or hasNext will not have to make trips to the
server. After the client has run through the first set of results, the
shell will again contact the database and ask for more results with a
getMore request. getMore requests basically contain
an identifier for the query and ask the database if there are any more
results, returning the next batch if there are. This process continues
until the cursor is exhausted and all results have been returned.
Limits, Skips, and Sorts
The most common query options are limiting the number of results returned, skipping a number of results, and sorting. All these options must be added before a query is sent to the database.
To set a limit, chain the limit function onto your call to find. For example, to only return three
results, use this:
>db.c.find().limit(3)
If there are fewer than three documents matching your query in the
collection, only the number of matching documents will be returned;
limit sets an upper limit, not a
lower limit.
skip works similarly to
limit:
>db.c.find().skip(3)
This will skip the first three matching documents and return the rest of the matches. If there are fewer than three documents in your collection, it will not return any documents.
sort takes an object: a set
of key/value pairs where the keys are key names and the values are the
sort directions. Sort direction can be 1 (ascending) or −1 (descending).
If multiple keys are given, the results will be sorted in that order.
For instance, to sort the results by "username" ascending and "age" descending, we do the
following:
>db.c.find().sort({username:1,age:-1})
These three methods can be combined. This is often handy for pagination. For example, suppose that you are running an online store and someone searches for mp3. If you want 50 results per page sorted by price from high to low, you can do the following:
>db.stock.find({"desc":"mp3"}).limit(50).sort({"price":-1})
If that person clicks Next Page to see more results, you can simply add a skip to the query, which will skip over the first 50 matches (which the user already saw on page 1):
>db.stock.find({"desc":"mp3"}).limit(50).skip(50).sort({"price":-1})
However, large skips are not very performant; there are suggestions for how to avoid them in the next section.
Comparison order
MongoDB has a hierarchy as to how types compare. Sometimes you will have a single key with multiple types: for instance, integers and booleans, or strings and nulls. If you do a sort on a key with a mix of types, there is a predefined order that they will be sorted in. From least to greatest value, this ordering is as follows:
Minimum value
nullNumbers (integers, longs, doubles)
Strings
Object/document
Array
Binary data
Object ID
Boolean
Date
Timestamp
Regular expression
Maximum value
Avoiding Large Skips
Using skip for a small number
of documents is fine. For a large number of results, skip can be slow, since it has to find and
then discard all the skipped results. Most databases keep more metadata
in the index to help with skips, but MongoDB does not yet support this,
so large skips should be avoided. Often you can calculate the next query
based on the result from the previous one.
Paginating results without skip
The easiest way to do pagination is to return the first page of results using limit and then return each subsequent page as an offset from the beginning:
>// do not use: slow for large skips>varpage1=db.foo.find(criteria).limit(100)>varpage2=db.foo.find(criteria).skip(100).limit(100)>varpage3=db.foo.find(criteria).skip(200).limit(100)...
However, depending on your query, you can usually find a way to
paginate without skips. For
example, suppose we want to display documents in descending order
based on "date". We can get the
first page of results with the following:
>varpage1=db.foo.find().sort({"date":-1}).limit(100)
Then, assuming the date is unique, we can use the "date" value of the last document as the
criteria for fetching the next page:
varlatest=null;// display first pagewhile(page1.hasNext()){latest=page1.next();display(latest);}// get next pagevarpage2=db.foo.find({"date":{"$lt":latest.date}});page2.sort({"date":-1}).limit(100);
Now the query does not need to include a skip.
Finding a random document
One fairly common problem is how to get a random document from a
collection. The naive (and slow) solution is to count the number of
documents and then do a find,
skipping a random number of documents between 0 and the size of the
collection:
>// do not use>vartotal=db.foo.count()>varrandom=Math.floor(Math.random()*total)>db.foo.find().skip(random).limit(1)
It is actually highly inefficient to get a random element this way: you have to do a count (which can be expensive if you are using criteria), and skipping large numbers of elements can be time-consuming.
It takes a little forethought, but if you know you’ll be looking
up a random element on a collection, there’s a much more efficient way
to do so. The trick is to add an extra random key to each document
when it is inserted. For instance, if we’re using the shell, we could
use the Math.random() function
(which creates a random number between 0 and 1):
>db.people.insert({"name":"joe","random":Math.random()})>db.people.insert({"name":"john","random":Math.random()})>db.people.insert({"name":"jim","random":Math.random()})
Now, when we want to find a random document from the collection,
we can calculate a random number and use that as query criteria,
instead of doing a skip:
>varrandom=Math.random()>result=db.foo.findOne({"random":{"$gt":random}})
There is a slight chance that random will be
greater than any of the "random"
values in the collection, and no results will be returned. We can
guard against this by simply returning a document in the other
direction:
>if(result==null){...result=db.foo.findOne({"random":{"$lte":random}})...}
If there aren’t any documents in the collection, this technique
will end up returning null, which
makes sense.
This technique can be used with arbitrarily complex queries;
just make sure to have an index that includes the random key. For
example, if we want to find a random plumber in California, we can
create an index on "profession",
"state", and "random":
>db.people.ensureIndex({"profession":1,"state":1,"random":1})
This allows us to quickly find a random result (see Chapter 5 for more information on indexing).
Advanced Query Options
There are two types of queries: wrapped and plain. A plain query is something like this:
>varcursor=db.foo.find({"foo":"bar"})
There are a couple options that “wrap” the query. For example, suppose we perform a sort:
>varcursor=db.foo.find({"foo":"bar"}).sort({"x":1})
Instead of sending {"foo" :
"bar"} to the database as the query, the query gets wrapped in
a larger document. The shell converts the query from {"foo" : "bar"} to {"$query" : {"foo" : "bar"}, "$orderby" : {"x" :
1}}.
Most drivers provide helpers for adding arbitrary options to queries. Other helpful options include the following:
$maxScan :integerSpecify the maximum number of documents that should be scanned for the query.
>db.foo.find(criteria)._addSpecial("$maxScan",20)This can be useful if you want a query to not take too long but are not sure how much of a collection will need to be scanned. This will limit your results to whatever was found in the part of the collection that was scanned (i.e., you may miss other documents that match).
$min :documentStart criteria for querying.
documentThis is used internally and you should generally use
"$gt"instead of"$min". You can use"$min"to force the lower bound on an index scan, which may be helpful for complex queries.$max :documentEnd criteria for querying.
documentIf this is used internally, you should generally use
"$lt"instead of"$max". You can use"$max"to force bounds on an index scan, which may be helpful for complex queries.$showDiskLoc : trueAdds a "
$diskLoc" field to the results that shows where on disk that particular result lives. For example:>db.foo.find()._addSpecial('$showDiskLoc',true){"_id":0,"$diskLoc":{"file":2,"offset":154812592}}{"_id":1,"$diskLoc":{"file":2,"offset":154812628}}The file number shows which file the document is in. In this case, if we’re using the test database, the document is in test.2. The second field gives the byte offset of each document within the file.
Getting Consistent Results
A fairly common way of processing data is to pull it out of MongoDB, change it in some way, and then save it again:
cursor=db.foo.find();while(cursor.hasNext()){vardoc=cursor.next();doc=process(doc);db.foo.save(doc);}
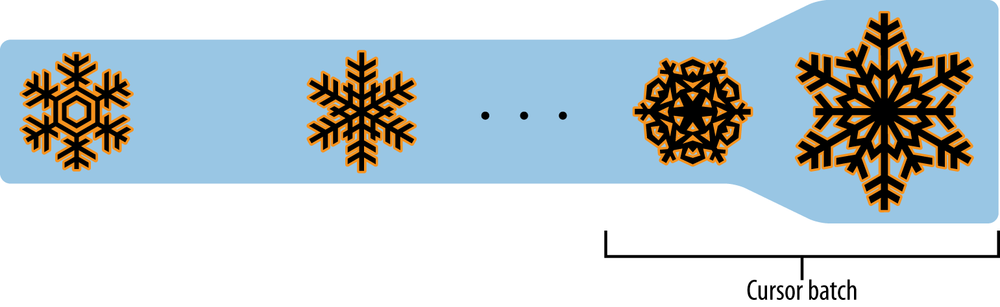
This is fine for a small number of results, but MongoDB can return the same result multiple times for a large result set. To see why, imagine how the documents are being stored. You can picture a collection as a list of documents that looks something like Figure 4-1. Snowflakes represent documents, since every document is beautiful and unique.

Now, when we do a find, the
cursor starts returning results from the beginning of the collection and
moves right. Your program grabs the first 100 documents and processes
them. When you save them back to the database, if a document does not
have the padding available to grow to its new size, like in Figure 4-2, it needs to be relocated. Usually, a
document will be relocated to the end of a collection (Figure 4-3).


Now our program continues to fetch batches of documents. When it gets toward the end, it will return the relocated documents again (Figure 4-4)!
The solution to this problem is to snapshot
your query. If you add the option, the query will be run by traversing
the "_id" index, which guarantees
that you’ll only return each document once. For example, instead of
db.foo.find(), you’d run:
>db.foo.find().snapshot()
Snapshotting makes queries slower, so only use snapshotted queries when necessary. For example, mongodump (a backup utility covered in Chapter 22) uses snapshotted queries by default.
All queries that return a single batch of results are effectively snapshotted. Inconsistencies arise only when the collection changes under a cursor while it is waiting to get another batch of results.
Immortal Cursors
There are two sides to a cursor: the client-facing cursor and the database cursor that the client-side one represents. We have been talking about the client-side one up until now, but we are going to take a brief look at what’s happening on the server.
On the server side, a cursor takes up memory and resources. Once a cursor runs out of results or the client sends a message telling it to die, the database can free the resources it was using. Freeing these resources lets the database use them for other things, which is good, so we want to make sure that cursors can be freed quickly (within reason).
There are a couple of conditions that can cause the death (and subsequent cleanup) of a cursor. First, when a cursor finishes iterating through the matching results, it will clean itself up. Another way is that, when a cursor goes out of scope on the client side, the drivers send the database a special message to let it know that it can kill that cursor. Finally, even if the user hasn’t iterated through all the results and the cursor is still in scope, after 10 minutes of inactivity, a database cursor will automatically “die.” This way, if a client crashes or is buggy, MongoDB will not be left with thousands of open cursors.
This “death by timeout” is usually the desired behavior: very few
applications expect their users to sit around for minutes at a time
waiting for results. However, sometimes you might know that you need a
cursor to last for a long time. In that case, many drivers have
implemented a function called immortal, or a similar mechanism, which tells
the database not to time out the cursor. If you turn off a cursor’s
timeout, you must iterate through all of its results or kill it to make
sure it gets closed. Otherwise, it will sit around in the database
hogging resources until the server is restarted.
Database Commands
There is one very special type of query called a database command. We’ve covered creating, updating, deleting, and finding documents. Database commands do “everything else,” from administrative tasks like shutting down the server and cloning databases to counting documents in a collection and performing aggregations.
Commands are mentioned throughout this text, as they are useful for
data manipulation, administration, and monitoring. For example, dropping a
collection is done via the "drop"
database command:
>db.runCommand({"drop":"test"});{"nIndexesWas":1,"msg":"indexes dropped for collection","ns":"test.test","ok":true}
You might be more familiar with the shell helper, which wraps the command and provides a simpler interface:
>db.test.drop()
Often you can just use the shell helpers, but knowing the underlying
commands can be helpful if you’re stuck on a box with an old version of
the shell and connected to a new version of the database: the shell might
not have the wrappers for new database commands, but you can still run
them with runCommand().
We’ve already seen a couple of commands in the previous chapters;
for instance, we used the getLastError
command in Chapter 3 to check the number of documents
affected by an update:
>db.count.update({x:1},{$inc:{x:1}},false,true)>db.runCommand({getLastError:1}){"err":null,"updatedExisting":true,"n":5,"ok":true}
In this section, we’ll take a closer look at commands to see exactly
what they are and how they’re implemented. We’ll also describe some of the
most useful commands that are supported by MongoDB. You can see all
commands by running the db.listCommands() command.
How Commands Work
A database command always returns a document containing the key
"ok". If "ok" is a true value (1, 1.0, or
true), the command was successful; if it is false, then the command failed for some
reason.
If "ok" is 0
then an additional key will be present, "errmsg". The value of "errmsg" is a string explaining why the
command failed. As an example, let’s try running the drop command again, on the collection that was
dropped in the previous section:
>db.runCommand({"drop":"test"});{"errmsg":"ns not found","ok":false}
Commands in MongoDB are implemented as a special type of query
that gets performed on the $cmd collection.
runCommand just takes a command
document and performs the equivalent query, so our drop call becomes the
following:
db.$cmd.findOne({"drop":"test"});
When the MongoDB server gets a query on the
$cmd collection, it handles it using special logic,
rather than the normal code for handling queries. Almost all MongoDB
drivers provide a helper method like runCommand for running commands, but commands
can always be run using a simple query.
Some commands require administrator access and must be run on the
admin database. If such a command is run on any
other database, it will return an "access denied"
error. If you’re working on another database and you need to run an
admin command, you can use the adminCommand function, instead of runCommand:
>usetempswitchedtodbtemp>db.runCommand({shutdown:1}){"errmsg":"access denied; use admin db","ok":0}>db.adminCommand({"shutdown":1})
Commands are one of the few places that are field-order-sensitive:
the command name must always be the first field in the command. Thus,
{"getLastError" : 1, "w" : 2} will
work, but {"w" : 2, "getLastError" :
1} will not.
Get MongoDB: The Definitive Guide, 2nd Edition now with the O’Reilly learning platform.
O’Reilly members experience books, live events, courses curated by job role, and more from O’Reilly and nearly 200 top publishers.

