When we slip by their early warning systems in their own shuttle and destroy Autobot City, the Autobots will be vanquished forever!
—Megatron The Transformers: The Movie
Whether the obligation for maintaining a system has just fallen into your lap, or you’ve recently completed building a system, your job as a security-minded system administrator has only just begun. A system built, configured, and hardened today cannot be called “secure” forever. At best, you can claim it is fully patched and hardened such that it has no known exploitable vulnerabilities. A few months from now, without your intervention, that statement will probably no longer hold true. System modifications may result in an even more vulnerable system given too much administration coupled with too little care. Even if nobody has logged into the system since deployment, recently discovered programming errors or new tools and techniques will have given rise to exploitable vulnerabilities.
Given that a server you build is liable to be used for at least a few years, careful and well thought out system administration will save you and your organization headaches. To some people, maintenance is an ugly word. Who wants to spend time maintaining a system when building new systems is more fun? This attitude often leads to lazy or sloppy administration, which will eventually lead to a compromised system. Dealing with cleaning up a compromised system or network usually involves careful analysis, lots of overtime, and being at the wrong end of the accusatory finger. This is a lot less fun than regular and careful maintenance.
In this chapter, we look at security administration practices and decisions over the long term. We begin by looking at access control. Carefully controlling who can do what to your systems helps you maintain a known, secure, configuration. We then turn our attention to handling maintenance necessities in a secure fashion: performing software installations, upgrading the system, and mitigating vulnerabilities through patching. Because FreeBSD and OpenBSD systems are often used as some kind of service provider to the rest of the network, we examine the associated risks of some common services and, of course, how we can mitigate those risks. Finally we turn our attention to system health as a means of establishing known behavior and observing deviations.
Throughout this chapter, we approach standard system administration tasks with a security focus. Doing so allows us to evaluate our actions from a security standpoint and ensure that our actions will not reduce the overall security of the system.
Granting users and administrators rights on the system is a deceptively easy task, and one of the most basic facing the system administrator. Controlling system access, begins with basic Unix accounts, group membership, and file permissions. Recent additions such as ACLs and mandatory access controls in FreeBSD can make managing access quite complicated. Take a little time to think about the design of your access control systems to ensure you have granted the access needed, without sacrificing security.
Users fall into several categories, depending on the system involved. Generally, only administrators have accounts on infrastructure systems—and in higher security environments, only administrators responsible for the service that system provides. Add developers to the list of allowed users and you have a workgroup system.
Traditionally, local user accounts represent two classes of users: those who have shell accounts on the system, and service users. Service users don’t usually need a valid shell (they do not log in) but do have an associated group. The user and group named on an OpenBSD system (BIND in FreeBSD), for example, allows the DNS server to run as someone other than root. In this case there is no human being associated with the user and it should stay this way. Do not set a password and shell for system users or use the account as an administrative one. It is permissible, however, to add DNS administrators to the named group for the purposes of administering nameserver configuration files without needing privileged access.
Warning
Be careful in OpenBSD that you do not add ordinary users to the staff group. This is an administrative group and has fewer restrictions based on the predefined login classes on OpenBSD systems. See login.conf(5) for more information.
Infrastructure systems should provide shell access only to administrators; therefore these systems require few user accounts and groups beyond the system defaults. Workgroup systems, however, benefit from careful user and group planning before the creation of the first user account.
Most Unix users are familiar with the user/group/other permissions model found in most Unix operating systems. OpenBSD and FreeBSD continue to provide this basic access control functionality by user and group membership. Granting access by group is fairly flexible in that you are able to control access by moving users into and out of groups instead of changing the permissions of files and directories. Thus group permissions are often used more than user permissions for controlling access to data. As such, how you allocate users to primary groups is a very important decision. There are three typical approaches: using a catch-all primary group, using project-based primary groups, and using per-user groups. We favor the last approach, as you’ll see.
One way to organize users into groups involves creating one group for all users (e.g. users) and placing all users into this group. Create additional groups on a per-project or role basis and assign users to these secondary groups for finer grain access control. This paradigm suffers one conceptual drawback: the users group is almost equivalent to world permissions because this group contains all users. In addition, files created by users will be group-owned by the users group and, depending on the user’s umask, may be group readable by default.
The key difference between world permissions and a catchall users group is that system users like nobody, sshd, and so on will not be in the users group you create. This is a good thing. User accounts used by system daemons should be granted minimal access to files and directories on the system.
Project-based or role-based groups as primary groups also allow for effective access control. This method, like the method described above, fails to cover one scenario. There is no way to add users without automatically giving them access to some subset of data already present on the system. In environments where contractors or guest users are periodically given user accounts, this can pose a problem.
Per-user groups are one way around this drawback, and this solution fits in well with the least-privilege paradigm. In this scenario, you create a new group every time you create a new user; thus there is a one-to-one mapping of users to groups. Following this strategy, users do not automatically have access to any data when they first log in. Only if they are subsequently added to another group will they have any group-based access. This effectively nullifies group permissions by default for all users, allows for more granular access control, and may therefore be your ideal choice for managing users and groups. The only drawback to this approach is the small administrative inconvenience of creating new groups when you create new users.
With a system to manage users and groups in place, you can turn your attention to putting in place resource limits, environment variables, and session accounting on a per-user or per-group basis. Login classes provide an effective means of doing this. As you create groups for the users of your systems, reevaluate the preexisting limits imposed in /etc/login.conf and see if additional restrictions may be appropriate for the group you are creating.
The user file-creation mask
(umask) is of fundamental importance in any
discussion about access control. Setting a umask
affects the default permissions on all newly created files. Most
administrators and users expect files they create to be readable for
everyone (user, group, and other) but only writable for themselves.
Likewise when directories are created, they expect that anyone should
be able to change into the directory and list contents (user, group,
and other read/execute), but only the creator should be able to write
files.
FreeBSD and
OpenBSD set a default umask of
022 for users. It is this setting that creates the
behavior described above. For users, this may be acceptable. For the
root user, a more restrictive umask is preferable.
A more appropriate umask would enforce full user
rights but no group or world permission upon file, a
umask of 077. You may adjust
the default umask on your system by modifying
/etc/login.conf appropriately. Be advised that
users can freely overwrite the default umask by
using the shell-builtin command
umask either on the command line or in their shell
startup configuration file (.[t]cshrc for
[t]csh, .profile for
[ba]sh, etc.).
User and group permissions used to be all there was to worry about on BSD systems. Now, however, FreeBSD 5.x offers support for filesystem access control lists (ACLs). With these discretionary access controls, it is now possible to grant much more fine-grained permissions based on arbitrary collections of users instead of granting permission by preexisting groups. With this increased flexibility comes the need for more careful administration. Arbitrary and haphazard assignment of permissions can make it extremely difficult to determine who has access to what and manage permissions in general. In some cases, it may be preferable to administer your system using standard Unix permissions.
On the other hand, it can be frustrating to see carefully crafted group-based permissions changed by users to a world-readable or, heaven forbid, a world-writable state. In many cases, users see this as a convenience and prefer it over tracking down the administrator with a change request. Whichever paradigm you choose, understand the risks involved in either approach and make a conscious decision instead of “going with the flow.”
If you decide discretionary access controls are not appropriate in your environment, perhaps mandatory access controls are for you. The mandatory access control (MAC) framework was introduced with FreeBSD 5.x and allows the administrator to assign security-relevant labels to data. This type of access control imposes limits based on data classification and user rights, both of which are controlled by the administrator.
Perhaps even more important than
controlling the access users have on your systems is limiting and
auditing administrator access. On systems with multiple
administrators or service operators who need certain administrative
rights, don’t provide access by passing around the
root password during lunch. Infrastructure systems generally provide
one or two major services and you may be able to grant rights by
making key files group-writable. On some systems, the only privilege
certain administrative users may need is the ability to restart key
service. Allowing some non-root users to do this is easy using
sudo. Even on systems where multiple
administrators operate at the same system-wide level, it is important
to carefully audit what administrators do to enforce accountability.
The rest of this section outlines some of the approaches you should
take to grant administrator access while limiting and auditing the
use of escalated privileges.
The first place to look for ways
to mitigate the risks administrators pose is in their access method.
telnet(1), rsh(1),
rlogin(1), etc. are clear-text protocols. Your
username, password, and every bit of data displayed or typed into a
session is easily readable by anyone else on the local network.
Administrators should never use clear-text protocols. This should be
a done deal, as the default on both FreeBSD and OpenBSD systems is to
have these clear-text protocols disabled.
Both OpenBSD and FreeBSD provide
secure shell (ssh(1)) services as part of the base
installation. Leave telnet disabled and use
ssh. Configure sshd(8) to
accept remote connections based on public/private key cryptography
instead of the weaker password-based authentication. Ensure all
administrators accessing your servers are generating
ssh keys using the
ssh-keygen(1) utility. The public half of their
keys may then be placed in their
~/.ssh/authorized_keys file on every system to
which they require access. See the Section 3.6
section of Chapter 3 or the
sshd_config(5) manpage to learn how to disable
password authentication altogether.
Tip
Password authentication is a form of single-factor authentication. This means the user merely needs to know something to gain access. Public key authentication requires that you not only know a passphrase, but also that you have the private key. This is known as two-factor authentication and is stronger than single-factor authentication.
When the number of systems
involved reaches hundreds, thousands, or tens of thousands, managing
ssh keys scattered across machines can become a
nightmare: both for distribution and removal. In this case,
ssh using public key authentication might not be
an option, so consider deploying a Kerberos infrastructure which
provides for secure, centralized authentication and kerberized
ssh. Kerberos eliminates the need for distributing
ssh keys while still providing encrypted access.
Without additional software, however, Kerberos reduces the
authentication from two-factor back to
one.
Administrators gain root-level access to a system in one of three ways:
They place their public keys in ~root/.ssh/authorized_keys (or list their Kerberos principals in ~root/.k5login) and
sshdirectly into the root account from remote systems.They use a nonprivileged account to
sshinto the system and thensuto gain a root shell.They use a nonprivileged account to
sshinto the system and then usesudo(8)to execute privileged commands.
The first option requires that you allow root logins via
ssh and no human being can be directly tied to
login events. This is far from ideal. The second option allows you to
disable root logins, but after the administrator gains a root shell,
she is unlikely to relinquish it and subsequent commands are not
audited. The third option provides accountability, enables auditing
for every action, and is generally considered the most secure way to
gain privileged access.
Once administrators are using an encrypted means of access to the system, and not logging in as root, you may turn your attention to the execution of privileged commands. This is, after all, what sets the administrator apart from the user.
sudo is available with the
base operating system in OpenBSD and may be installed out of
FreeBSD’s ports from
ports/security/sudo or during the install
process. It allows the users of the system (or other administrators)
to execute commands as other, often more privileged, users. It also
allows for the dissemination of granular administrative rights with
comprehensive auditing (by logging every command run through
sudo) instead of “keys to the
kingdom” without any accountability. In a nutshell,
sudo operates by accepting entire commands as
arguments to itself, consulting the sudoers(5)
configuration file to authorize the user attempting to run the
command, and then executing the command in an alternate user
context.
Creating a customized
sudoers file is one of the first steps the
security-minded system administrator takes on a newly installed
system. Like it’s counterpart
vipw(8) for the passwd files,
visudo locks the sudoers file
and provides some syntax checking after editing. Since the
sudoers file defines how users can execute
privileged commands, errors in the file can be very dangerous. Always
use visudo.
sudo
configuration is fairly straightforward. You define aliases for
commands, hosts (useful if you distribute a single
sudoers file to multiple hosts), users who
should be allowed to run privileged commands, and user accounts under
whose context certain commands should be executed
(sudo can run commands as non-root users with
-u). Aliases, found at the bottom of the
sudoers file, specify which
users are allowed to execute what commands,
where (which host), and potentially, as
whom. We do not go into any more detail about
general sudo configuration, as configuration is
extremely well documented in the sudoers(5)
manpage. Instead we turn our attention to secure configuration
guidelines and pitfalls.
Be extraordinarily careful about the
binaries to which you grant access. Be aware that many binaries (like
vi(1)) let you spawn a shell. When
vi is executed with super-user privileges, any
commands it runs (such as a shell, or grep, or
awk) will be too! Likewise,
less(1) (which is the opposite of
more(1)) on FreeBSD and OpenBSD can invoke the
editor defined by the VISUAL or
EDITOR environment variable when you press
v while paging through a file—if this
variable is set to vi, a root shell is just a few
keystrokes away. To allow users to view certain sensitive files,
allow privileged execution of the cat(1) binary;
more can run in the user’s
context. In Example 4-1, the first command runs
more as root, the second runs
more in the user context and
cat as root.
Example 4-1. Viewing files with sudo
%sudo more /root/private_file%sudo cat /root/private_file | more
There are innumerable commands that can gain
unrestricted elevated privileges when provided certain keyboard
input, file input, or environment variables. Some examples include
find(1), chown(8),
chgrp(1), chmod(1),
rm(1), mv(1),
cp(1), crontab(1),
tar(1), gzip(1), and
gunzip(1). As it turns out, configuring
sudo without “giving away the
barn” is no easy task!
Remember that liberal sudo rights should only be
assigned to administrators who would otherwise have root. Otherwise,
allow only very specific privileged commands by following the
guidelines in the rest of this section.
Explicitly providing a path ensures that
identically named binaries elsewhere in the path are never executed
with elevated privileges. While there are ways to control how the
PATH is used in sudo, including
the ignore_dot and env_reset
flags, the safest and most foolproof way is to always use explicit
paths to binaries.
As mentioned previously, several system
commands can be used to gain elevated privileges when combined with
sudo. To combat this, be very specific about not
only allowed commands but also the allowed arguments, as shown in
Example 4-2.
Example 4-2. Commands with arguments
Cmnd_Alias WEB = /usr/local/sbin/apachectl, \
                 /usr/bin/chgrp [-R] www-devel /web/*
In this case, the alias WEB is created as a set of
commands for the administrators of the web server. They have
unrestricted use to the Apache control script
apachectl(1), and may change group ownership of
any files in /web/ to
www-devel, while optionally providing the
recursive argument to chgrp.
A useful feature of
sudo is the ability to allow certain users to run
commands without having to provide a password. If users ask for this
functionality, you should feel comfortably within your rights as an
administrator to deny their request. Forcing a password prompt sends
a message (both literally and figuratively) to users that they are
about to run a command in root’s context and they
should be careful and responsible.
In some cases, service accounts need to run privileged commands, and
there may not be a human being around to enter a password at the
time. In these cases, it becomes acceptable to use the
NOPASSWD option as shown in Example 4-3.
Example 4-3. Service account using NOPASSWD
nagios localhost = NOPASSWD : /usr/local/etc/rc.d/nagios.sh restart
In this case, the nagios service account under which some daemon or
script runs is able to run the nagios.sh startup
script with the restart argument. Since this daemon is running
without user intervention, should the need arise to restart
nagios, it will be able to do so without needing
to provide a password.
The
BSD operating systems favor sudo over
su. We take a moment here to outline some of the
advantages and disadvantages of both approaches. We have tried to
capture the salient differences in Table 4-1.
Table 4-1. Security related characteristics of sudo and su
|
Characteristics |
sudo |
su |
|---|---|---|
|
Advantages | ||
|
Single password required for root access |
| |
|
Logging of executed privileged commands |
| |
|
Fine-grained administrator privileges |
| |
|
Simple revocation of privileges |
| |
|
Distributable configuration of access rights |
|
|
|
Disadvantages | ||
|
Can accidentally grant root access |
| |
|
Elevates importance of administrator’s password |
|
|
|
Encourages laziness |
|
|
Bear in mind that the satisfaction of the named characteristics may be affected by the number of administrators on the system in question.
- Single password required for root access
One major advantage the default configuration for
suhas oversudois that only one authentication token (root’s password) can grant a user root access. On a system with multiple administrators andsudoconfigured to grantALLrights to users in some administrative group, several username/password combinations can lead to root access.Tip
On a system with only one administrator, root’s account may be locked and the administrator’s password may be the only root-capable password. Bear in mind this relies on the fact that
sudoprompts for a password, which may be overridden in sudoers. In the event of a system crash, all filesystems will need to be checked beforesudomay be used. If your system has been configured to prompt for root’s password in single user mode, a BSD bootable CD will be necessary to gain root access.This must be mitigated on systems with
sudoby a password policy that documents guidelines for exceptionally strong passwords for all administrators.
- Logging of executed privileged commands
All commands passed as arguments to
sudoare logged by default tosyslog’slocal2facility. Successful authentication and subsequent execution of a privileged command are logged at prioritynotice, and authentication failures result in a log entry of priorityalert. In addition to what one might expect in the log forsudo, you will find the full path of the command executed, which can alert you to potentially unsafe or malicious executables. Oncesuis run, however, no subsequent commands are reliably auditable.Tip
For more information about configuring logging, see Chapter 10.
Accountability is one of the most vital parts of system security. Having a history of all privileged commands executed on a system is invaluable. This is one of the greatest benefits of
sudo.Many administrators choose to group administrators who should have full root access into the wheel or other administrative group. They may subsequently configure
sudoso that these administrators have full root access by using a configuration line similar to the following:%
groupnameALL=(ALL) ALLRemember that this grants administrators the right to run shells as an argument to
sudoor throughsudo-s, which invokes the command specified in theSHELLenvironment variable. In both of these cases, auditing will cease.- Fine-grained administrator privileges
Unlike
su,sudoenables the administrator to allow only very specific commands. This may be ideal in environments where users should have administrative rights over key applications under their respective jurisdictions.- Simple revocation of privileges
Removing a user’s ability to execute privileged commands is trivial with
sudo: simply remove the user from the sudoers file. Ifsuis your only means of administrator access control, the departure of an administrator will require changing the root passwords on all systems for which that administrator knew the root password.- Distributable configuration of access rights
The only access right “distributable” with
suis full-fledged root access. To grant users the ability tosu, you would need to add them to the wheel group. To centrally control access, you would need to either have consistent group files everywhere, build a system to push files, or use YP/NIS. The fine-grain control possible withsudomay, however, be distributed to systems using a variety of automated mechanisms for simple centralized administration likersync(1)andrdist(1).- Can accidentally grant root access
It is difficult to accidentally tell someone a complex root password. Simple mistakes in the sudoers file, however, can lead to less-than-desirable effects. Take extreme care when working within the sudoers file to ensure you are not granting users the ability to gain escalated privileges.
- Elevates importance of administrator’s password
Administrators treat root passwords with great sensitivity. Unfortunately, they are not always as careful with their own. Novice administrators sometimes utilize the same password in administering systems as they do for local intranet sites. In the former case, the password is being transmitted over an encrypted tunnel. In the latter case, it may not be.
When restricted to using
su, knowing an administrator’s password will allow you to log into an account in the wheel group. This may result in privilege escalation through abuse of group-level permissions or by cracking the root password by brute force. When usingsudo, knowing an administrator’s password is equivalent to knowing the root password, if the administrator has the ability to invoke a root shell in some way.- Encourages laziness
Certain activities become a little cumbersome with
sudo:Redirection of command output into a directory or file not writable by the caller
Chained commands (e.g.,
sudotimeconsuming_command&& sudoquick_command) may only partially execute due to password timeoutsRepeatedly having to type in
sudoWorking with directory hierarchies not executable by you
In these cases and with
suin general, the temptation exists to stay in a root shell once you’re there, for the sake of convenience. An errant space-asterisk-space in a quickly typedrmcommand may suddenly lead to hours of recovery time. This can be avoided. Stay in a root shell for as short a period of time as possible.
Even
when you have configured sudo to grant
fine-grained permissions, the root account, of course, still exists.
This account represents “keys to the
kingdom” and is a goal of many attackers. This
account must have a strong password that is known by few, and
protected well, or it should be locked.
When administrators are supposed to have full-fledged root access but
choose, or are required by policy, to use sudo,
the root account may be safely locked. In this case, administrators
invoke a shell through sudo to gain root-level
access. Remember, however, that whenever shell access is provided,
every administrator’s password is as important as
the root password would be since it effectively grants the same
privileges.
Root passwords should be stored in a secure location available to a non-administrator in the event of an emergency. This is most often accomplished in at least two ways for redundancy.
The most common and straightforward way to be able to securely recover root passwords is very nontechnical. Write the passwords down on paper and store the sheet offsite with other system configuration documentation. Be sure to clearly define who has access to these documents.
The root password may also be encrypted by a combined key such that multiple people are required for decryption. For instance, if none of the administrators to whom the file has been encrypted are able to perform root functions (e.g., due to vacation, illness, or death), passwords should be recoverable only by the combined efforts of some collection of relevant supervisors, IT managers, and/or executives.
Protecting the root password in these ways is more important when no other individuals are able to gain physical access to the system. Where physical access exists, someone should be able to boot the system from removable media and change root’s password from the console. Nevertheless, an alternate means of root password access should be possible to save time in the event of an emergency.
Even with the careful assignment of rights to administrators, system security needs to be in the forefront of every administrator’s mind as the system ages. A carefully built system can start off pretty secure—and then you put it online and start installing software. After that, you might add accounts or configure the system so that it can be accessed anonymously. The following section in the chapter focuses on software installations and updates that may have an impact on the security of your system.
Installing software on your OpenBSD or FreeBSD system is accomplished using packages or the ports system. Individuals who have taken on the responsibility of being a port or package maintainer try to ensure that the latest or best version of the software will build correctly on the operating system and will install according to the operating system’s scheme. They don’t necessarily audit the software for software vulnerabilities.
Installing a port is often as simple as typing in
make with a few command-line arguments based
on your functionality requirements. Package installs are even easier.
Dependencies can be automatically installed. Downloading source
tarballs and configuring them yourself is certainly also possible but
more cumbersome. You run the risk of not having applied the latest
patches and you will have to install dependencies first, manually.
The ports system is one of the most obvious differentiators between the BSD systems and other free and commercial Unix platforms. All platforms offer “binary packages,” but only the BSDs offer the flexibility of ports. From a security perspective, there are few strong reasons for choosing one paradigm over the other. Some argue that it is easier to verify file signatures for one precompiled package than for several .tgz files used by a port.
Tip
For more information about file signatures, see Section 3.1.3 in Chapter 3.
Most administrators who are aware and diligent about verifying file integrity will go no farther than checking to see that the signature matches the one provided by the same site from which they obtained the package. As it turns out, this trivial check is conducted by the ports system every time a file is downloaded. Few administrators take the time to check the signature of a package at all, much less cross-reference it with the site that originally provided the package. In an ideal world, administrators would cross-reference signatures with several mirror sites and the main distribution site to verify file integrity. Few administrators have the inclination or the time.
The greatest advantage of a port is that it offers complete
flexibility in configuring your ported applications. Packages can be
compiled to support no related software,
some related software, or
all related software, and you may not always
find the exact combination that you seek. Ports, on the other hand,
offer options for linking with specific pieces of software to provide
additional functionality. In FreeBSD, this is often accomplished with
a small menu during the configuration of a port or the definition of
some environment variables. OpenBSD allows administrators to set a
FLAVOR for a port before installation. You will
see examples of both throughout this book.
If the goal is to have compiled binaries, why not just install precompiled software and be done with it? This is, in fact, the main argument against using the ports system. Ports require more system resources than packages. Not only must source code be downloaded and extracted, it must also be compiled and linked to produce binaries, which are finally installed. In many cases, this proves to be a compelling argument, but when flexibility is needed, ports are often the answer.
Tip
The OpenBSD ports system actually compiles a port and installs it
into a fake root from which it builds a
package using the -B option of
pkg_create(1). This has certain advantages for the
administrator including not having to install dependent ports that
are only required during build time.
Most of the examples in this book will describe the ports style of installation, as the package may be either not available or trivial to install. Nevertheless, there are two things to watch out for when working with the ports system.
The ports
hierarchy usually lives in /usr/ports. Because
only root can write to /usr, administrators
often install the ports hierarchy from CD or via
cvs as root. Unfortunately, this means that
whenever the administrator needs to build a package, she must do so
as root (via sudo, for instance). This is not a
safe practice. Small errors in Makefiles can
result in very interesting behavior during a make.
Malicious Makefiles have also been known to
exist.
This presents a valuable opportunity for the separation of responsibilities. Before updating your ports tree, ensure /usr/ports is writable by someone other than root. Make this directory group-writable if a group of people install software, or change the ownership to the user responsible for installing software.
Tip
FreeBSD administrators who use cvsup to update
their ports tree will also need to create a
/var/db/sup directory that has similar
permissions.
You may now update your ports tree and
build software as an ordinary user. When your
make or make install
needs to do something as root, you will be prompted for the root
password. To adjust this behavior somewhat, set
SU_CMD=sudo in the file
/etc/make.conf. Now while installing ports,
sudo will be used instead of
su.
Tip
This mostly works. There are some cases in which the authors have observed problems using this non-root-owned methodology in building ports. We hope these problems are ironed out of the ports system soon.
FreeBSD
administrators who use the portupgrade utility to
manage ports will want to provide the -s or flag.
This makes portupgrade use sudo
when it needs to perform actions as root.
OpenBSD
administrators should set SUDO=sudo in
/etc/mk.conf. Makefiles
know when certain commands need to be run by root and will
automatically run these commands as arguments to the program
specified by $SUDO.
In FreeBSD, some software in the ports
system has already been installed with the base system. Prime
examples are BIND, ssh, and various shells. The
version in ports is often more recent than the version in the base
distribution, and you may decide that you want to overwrite the base
version. Newer is not always better, however. The version included as
part of the base distribution is likely older, but will have all
relevant security patches applied to it and will have undergone more
widespread scrutiny longer. The version in ports will include
functionality that has probably not yet been extensively tested. Use
the version from ports when you need additional functionality, but
stick with the base for reliability and security.
Ensure that if you install the version from
ports, it either completely overwrites the base installation or you
manually eradicate all traces of the base version to avoid confusion.
The method to do this will vary based on the package. The
Makefile for BIND9 on FreeBSD systems
understands a PORT_REPLACES_BASE_BIND9 flag, which
will overwrite the base install for you (this is described in detail
in Chapter 5). The
Makefile for the FreeBSD
openssh-portable port looks for an
OPENSSH_OVERWRITE_BASE flag, which does about the
same thing. Other ports may require that you manually search for
installed binaries, libraries, and documents and remove
them.
OpenBSD includes applications such as Apache, BIND, OpenSSH, and sudo in the base distribution and does not provide a means to track this software through ports. After all, the installed applications have gone through rigorous security review. If you want, for instance, to use Apache Version 2 or a different version of BIND, you must fetch, compile, and install the package manually. Otherwise, updates to software within the OpenBSD base distribution may be installed by tracking the stable branch as described later in this chapter.
If you do choose to manage your installed software using ports instead of with your base, you may run into version problems. Let’s say you installed Version 1.0 of port foo. After installation, you modified some of the files that were installed with the port in /usr/local/etc and used foo for several months. When you learn of a security vulnerability in foo, you decide to upgrade to Version 1.1, but instead of uninstalling the old version first, you install v1.1 on top of the old version. The package database now lists two versions of foo installed, but that is not really the case.
The installation of v1.1 does not clobber your configuration files in /usr/local/etc because they were modified since the install of v1.0, but it does replace binaries, libraries, shared/default configuration files, and so on, provided they were not modified since the installation of v1.0. So far, so good. The new version of the port is in fact properly installed and may be used, though you might have had to update the configuration files.
You may choose at some point to uninstall foo v1.0. All installed files that match the MD5 checksums of the files distributed with v1.0 will be removed. Any shared/default configuration files that were identical in Version 1.1 will also be removed, resulting in a broken foo v1.1. You will need to reinstall v1.1 to replace these files.
The same kind of situation may arise if foo v1.0 depended on libbar v2.0 but v1.1 of foo depended on libbar v2.1. While uninstalling foo v1.0 before installing the new version would avoid problems down the road for that port, libbar may be in trouble. As you can see, the ports system’s tracking of dependencies is handy, but it only goes so far.
Tip
You can find the recursive list of dependencies of a port by running
make pretty-print-build-depends-list and
make pretty-print-run-depends-list from the
port’s directory. For more information about working
with the ports tree in general, see the manpage for ports(7).
To avoid
these situations, ensure you uninstall installed ports before
installing new ones, or, better yet, use the
portupgrade port to manage upgrades of software
installed from the ports tree. This handy utility will make these
dependency problems moot and save you time and headache upgrading
ports. portupgrade is well documented in its
manpage and should be considered mandatory for any system with more
than a few ports
installed.
Software gets installed. Software gets upgraded. All this administration is important but must be audited in some way so that other administrators and managers can answer questions like:
What recent change caused this new (or broken) behavior?
Was the system or application patched, or was a workaround put in place to protect against a given vulnerability?
Detailed change control procedures are generally designed around organizational priorities and therefore are beyond the scope of this book. Nevertheless, change control is an important aspect of system administration. As you build your FreeBSD or OpenBSD systems, ensure you have a written list of requirements (both security-related and functional) to which your system must conform. As you build your system, document the steps you’ve taken to achieve these requirements. These documents will form the basis of your configuration management doctrine and will help you rebuild the system in the event of a system failure and transfer ownership of the system to another administrator should the need arise.
As time goes on, you will find a need to change your system configuration or upgrade installed software. If you have a test environment in which you can put these changes into effect, so much the better. Carefully document the steps you take to accomplish these upgrades and configuration changes. When you’re done, you will be able to test your system to ensure it continues to meet the requirements you already have documented. Should problems arise, you will likely be able to quickly isolate the change that gave rise to these problems.
Although describing complete change control procedures is out of scope, FreeBSD and OpenBSD do provide tools to help administrators carry out change control policies on system configuration files.
FreeBSD and OpenBSD are large software projects with developers scattered around the world. Building an operating system without keeping a close eye on changes is impossible. From a user perspective, we see software version numbers that continually increase, but in the background, developers are regularly “checking out” files from some development repository, modifying them, and checking them back in. All of these files also have version numbers, which continually increment as they are modified. For example, examine the following snippet from /etc/rc.conf on an OpenBSD system:
# $OpenBSD: rc.conf,v 1.95 2004/03/05 23:54:47 henning Exp $
This string indicates that this file’s version number is 1.95. It was last modified at late on the fifth of March by user henning.
Both FreeBSD and OpenBSD development teams have chosen to use the Concurrent Versions System (CVS) to manage file versions and ensure changes are closely tracked. CVS uses the basic functionality of the Revision Control System (RCS) to track changes to individual files and adds functionality to manage collections of files locally or over a network. This may seem a little far afield for system administration, but tracking changes is as important to developers as it is to system administrators.
Imagine if every configuration file you touched were managed in this same way—you could know what changes were made to any given file, by whom, and when. You would also be able to get a log of comments of all changes as entered by those who made modifications. Best of all, you could trivially roll back to a previous configuration file without having to pull data off of a tape. In cases where multiple modifications are made in a day, that kind of information will likely not be found on a tape.
As it turns out, setting up a CVS repository is fairly straightforward.
Tip
If you do not already have a firm grasp of the version control
concept, consult the manpages for cvs(1) and
rcsintro(1).
Before creating your repository, you should create a CVS
administrative user and corresponding primary group, which will own
the files in the repository on some tightly secured central
administration host that has very limited shell access.
We’ll call both the user and group
admincvs. Ensure this account is locked. The
home directory can be set to /nonexistent (this
is a service account, not meant for users), and shell can be
/sbin/nologin. Once this is done, initialize the
repository as shown in Example 4-4. This example
assumes the user under which you are operating can run the commands
listed via sudo.
Tip
You will note that this user can run mkdir,
chmod, and chown. Being able to
run these commands can result easily in privilege escalation, so the
only users allowed to run these commands should be those who have
full root access anyway.
Example 4-4. Initializing a CVS repository
%sudo mkdir/path/to/repository %sudo chmodg+w /path/to/repository %sudo chown admincvs:admincvs/path/to/repository %sudo -u admincvs /usr/bin/cvs -d/path/to/repository init %sudo chmod -R o-wrx/path/to/repository
At this point, you must configure your
CVSROOT. This environment variable lets the CVS
program know where the repository is. If you will be working with a
CVS repository on the local system, you may set the
CVSROOT to be the full path to that directory.
Otherwise set your CVSROOT to
username@hostname:/path/to/repository.
If you choose to access the
repository from a remote FreeBSD or OpenBSD system, your
cvs client will attempt to contact the server
using ssh. Thus, CVS may cause
ssh to ask for your password, passphrase, or just
use your Kerberos ticket, depending on how you have
ssh configured.
Whether the repository is local or remote, your access will map to some account on the target system. In order to be able to check items in and out of CVS, you (and everyone else who needs to use this CVS repository) must be a member of the admincvs group. If you have not already done so, add yourself to this group. You are then ready to perform your first checkout of the repository, as shown in Example 4-5.
Example 4-5. First checkout of a CVS repository
%mkdir local_repos_copy && cd local_repos_copy%cvs checkout .cvs server: Updating . cvs server: Updating CVSROOT U CVSROOT/checkoutlist U CVSROOT/commitinfo U CVSROOT/config U CVSROOT/cvswrappers U CVSROOT/editinfo U CVSROOT/loginfo U CVSROOT/modules U CVSROOT/notify U CVSROOT/rcsinfo U CVSROOT/taginfo U CVSROOT/verifymsg
Finally,
you’re ready to add projects into the repository.
Simply make any directories you would like under your local copy of
the repository (local_repos_copy in our example)
and add them using cvs add
directory_name. Files may be created
within these directories as needed and added to the repository via
the same cvs add mechanism. In order for files
to actually be copied into the repository, and subsequently whenever
you make modifications to the file, you will need to issue a
cvs commit
filename. If you have made widespread
modifications, you may simply run cvs
commit from a higher level directory, and all
modified files under that directory will be found and committed en
masse.
Once your CVS repository is created, you are left with two problems.
How do you organize the contents of your CVS hierarchy?
How do you take configuration files from within CVS and put them on target hosts?
Unfortunately, both of these topics are beyond the scope of this book. We can provide a few tips, however.
The more sensitive the files in your repository, the more careful you must be in providing remote access and configuring local filesystem permission.
Everyone who has access to this repository is in the admincvs group, so you shouldn’t put any non-administrator content in this repository.
sshcan be used to copy files to target hosts. If you have disabledPermitRootLoginin the CVS server’ssshdconfiguration, you will need to copy files as another user into a remote staging area and have another root-owned process periodically check this location for new files to install.Tip
We go into more detail about the general problem of secure file distribution in the Section 4.5 section later in this chapter.
Every file you copy to a target system should include a header describing where the master file is in CVS, when it was last modified, who copied the file to the system, and when. This will help prevent other administrators (or you, if you forget) from making modifications to configuration files directly on target systems. You could automatically prepend such a header instead of storing the headers within the files themselves.
If security requirements in your
organization prevent you from using CVS in this way to track changes
to documents or copy them to target systems, you may also opt to
track changes directly on the system. You could create CVS
repositories on every system, perhaps in some consistent location,
precluding the need for configuration file transfer. You may also use
RCS—a far less fully featured revision control system, which
merely tracks changes to a given file in ./RCS
(RCS creates subdirectories in every directory that contain
RCS-controlled files). If you choose this route, you may want to
evaluate tools like rcsedit and
rcs.mgr, which turn up quickly in a web search.
After you have solved these problems, you will be in a much better position to handle changes to system configuration than you were before. You will then be better prepared to turn your attention to more significant system changes like patching and upgrading.
Data backup and recovery typically serves several purposes:
- Disaster recovery
When a system is completely ruined, perhaps due to a hard drive crash or similar event, it needs to be restored to service.
- Data recovery
Sometimes a user or an administrator makes a mistake and needs to restore an old version of important files or directories. This might include restoring a few user data files, the firewall configuration, or an older version of a program.
- Forensics
If you are pursuing an intruder who has been on your system for more than a day or two, you may find evidence of his activities in your backups. Incriminating files that he eventually deleted may have been backed up before he deleted them.
- Legal compliance
If your organization is involved in a legal matter, your boss (or law enforcement personnel) may come to you with a subpoena requiring the organization to turn over a lot of data. Common examples include email, memoranda, or perhaps internal documents related to the subject of the case. Very often you will have to resort to your backups in order to fulfill the demands of the subpoena.
FreeBSD and
OpenBSD administrators typically turn to one of two pieces of open
source software for performing data backups:
dump(8) or the Advanced Maryland Network Disk
Archiver (Amanda). For the most basic jobs, dump
is probably adequate. It gives you the ability to record a complete
snapshot of a filesystem at a given point in time. Amanda is largely
an automation suite built on top of tools like
dump and tar(1). If you need a
complex tape rotation or want to automate the use of a multi-tape
library, Amanda can save you a lot of work.
When it comes
time to read data off your backup tapes, however, the tools of the
trade are restore(8) and tar.
Of course tar is
tar’s own complement as it
supports both creation of tape archives with -c
and extraction with -x. The
restore program is the complement to
dump, and it reads the data format that
dump writes. Amanda uses dump,
so restore will be the tool you use to retrieve
data from tapes whether you use dump directly or
use Amanda.
If you want to
be able to restore your complete system from a hard drive crash, it
is critical that you use dump to make your backup.
Other techniques like tar(1) and
cpio(1) will fail to capture critical filesystem
information that you will want when you restore. Although they both
capture symbolic links and can work with device files, their support
is problematic in some corner cases.
For example, for compatibility
across platforms, tar’s datafile
format uses some fixed-sized fields. FreeBSD uses device numbers that
cannot be accommodated in tar’s
format. Thus, if you use tar to backup your root
partition, the devices in /dev will not be
stored correctly. Although it is easy to fix them during a
restoration, it is a detail worth considering. You might think that
FreeBSD’s use of devfs (a
filesystem that automatically creates devices in
/dev based on your system’s
hardware) means that you have few, if any, device files to back up.
However, if you have followed the guidelines in this book, you have
probably created jails and/or chroot environments for various
mission-critical services. You will have created device files in
those environments that are not automatically created by
devfs and are not correctly backed up using
tar. Similarly, “hard
linked” files, which share a common
inode (as opposed to
“symbolically linked” files), are
stored twice in a tar or cpio
backup, instead of once in a dump backup.
If you have a dedicated server that only runs one critical service,
such as DNS, you may find complete system dumps more work than they
are worth. If you have all your service-specific data backed up
(e.g., the whole /var/named directory and
configuration files from /etc), you might be
able to recover from a disaster simply by installing fresh from the
CD. You reinstall the service, restore your
service-specific data, and reboot. If you plan to perform
restorations this way, you will have to write much of the backup and
restoration procedures yourself, although they may not be very
elaborate.
Your backup data is a snapshot of all the
data that is in your filesystem. It probably contains a variety of
critical files that should not be disclosed to anyone. Most backup
files, however, can be read by anyone who has access to the media.
Unless you go out of your way to add encryption to your backup scheme
(neither dump nor tar have
innate support for this), your data is easily readable from a medium
that has no concept of permissions or privileges. Thus, if you store
your backup tapes somewhere without strict physical access control,
unauthorized people may be able to walk off with all of your data.
Barring physical theft of data, however, there are still confidentiality concerns related to how you manage your backups. If you use Amanda to back up over the network, it will spool the data up on a local hard drive as part of the process. Although this improves your tape drive’s performance by allowing it to stream at its maximum data rate, it means all your confidential data will temporarily exist on the tape server, until it gets written to tape. If the tape should jam or fail to write, this file will remain on the hard disk until it is successfully flushed to tape by an administrator. If you assign backups to a junior administrator because they are tedious (what senior administrator does not do this?), remember that the junior administrator may effectively gain read access to all the data that the backup server sees. This may not be what you want.
If your organization does not have a data retention policy that governs the storage of backup tapes, you might want to consider establishing one before an external event forces the issue. If your organization is not involved in any sensitive activities, perhaps you do not need to worry as much. Most organizations, however, are surprised to realize how much they care about old data. If the CEO, chairman, or other leader of the organization deletes a sensitive file, she probably thinks it is gone for good. However, you know that it lives on your backups for some amount of time, and you can retrieve it if you are compelled to.
On a
typical server (either OpenBSD or FreeBSD), the raw disk devices are
owned by root, but the group operator has access to read them. This
allows the operator group to bypass the filesystem and its
permissions and read raw data blocks from the disk. This is how
dump is able to take a near image of a disk
device. If you rebuild a filesystem with newfs(8)
and then restore your files, the files will be
restored almost exactly, down the inode numbers
in many cases. The operator group is especially designed for backups
this way. If you look in /dev, you will find
that operator has read access to almost all significant raw data
devices: floppy disks, hard drives, CD drives, RAID controller
devices, backup tape drive devices, etc. Furthermore, the operator
user’s account is locked down in a way that the user
cannot log in. If you run backups, either by custom scripts or by
Amanda, you should use the operator user and/or group. The default
Amanda configuration will do just that.
Generally we assume that you will have a small number of servers that have tape drives installed (possibly just one) and data will traverse the network from clients to these servers. This transfer happens via either a push or a pull paradigm. Since the tape host knows how many tape drives it has and whether or not they are busy, most systems favor having the tape host pull data from data hosts.
Amanda and other methods of remotely collecting data will send the contents of your filesystems in the clear over the network. Regardless of where your backup server is in relation to the backup clients, your data may be observable while in transit. This is clearly a problem, and you should establish some means of protecting the data in transit, either through a VPN, SSH tunnel, or some other form of encryption.
One of
the most powerful ways of restricting (and encrypting) backup
connections is by using ssh. It is possible to use
ssh keys that have been configured on the client
side to only allow connections from the backup server, not provide a
pty, and run only one command (e.g., some form
of dump). This is accomplished by creating a
specially crafted authorized_keys file as shown
in Example 4-6.
Example 4-6. The operator’s ssh key in ~operator/.ssh/authorized_keys
from="backupserver.mexicanfood.net",no-pty,command="/sbin/dump -0uan -f - /" ssh-dssbase64-ssh-keyOPERATOR
If a
backup client is configured in this way, the backup server needs only
to ssh to the client and pipe output from the
ssh command as follows:
% ssh operator@backupclient | dd of=/dev/nrst0Of course, the target command could be a script, which, based on the
day, would perform a different level dump.
It is also
possible to perform secure backups initiated by the backup client by
setting the RSH variable to /usr/bin/ssh and
subsequently running dump as follows:
% /sbin/dump -0uan -f operator@backupserver.mexicanfood.net:/dev/nrst0
If
you choose to use the operator account for
ssh-enabled backups, not only will you need to
create a home directory for this user, you will also need to change
the login shell from nologin to
/usr/bin/false.
Of course, other levels of protection are available to protect access including creating a specific interface used for backup traffic, configuring a local firewall, or using intervening firewalls.
Tip
Some organizations use an administrative secondary network interface exclusively for backups. If you’re in this boat, be very aware of exactly what other devices could be listening on this interface. Push for encryption regardless.
It is also
possible to use the primitive rdump command to
backup data across a network. Unfortunately this tool relies on the
use of ~/.rhosts files and programs like
rcmd and ruserok. There are
severe security implications to using these tools and providing
reasonable security is more trouble than it is worth. Given the ease
with which Amanda and dump can be used securely,
there is little need to use rdump.
At some point, you will likely want to upgrade your OpenBSD or FreeBSD server. If you followed the guidelines set forth in Chapter 3 for your operating system installation, you have already performed a trivial upgrade. As you allow your system to remain in operation from a few months to a year or more, upgrades become more challenging. Consider putting in place regular upgrade procedures that ensure you are capturing all security and reliability related updates. In some cases, your regular upgrade schedule may be accelerated by a released security advisory. This section of the chapter covers the steps you take to keep your system secure by patching and upgrading.
One school of thought for upgrading systems can be summarized by “if it ain’t broke, don’t fix it.” Many system administrators adhere to this paradigm and upgrade or configure workarounds only when they run into a problem. Strictly adhering to this approach may have a variety of negative consequences:
Systems are often in an unknown state, especially if you have been intermittently patching individual binaries as security advisories have been released without documenting all changes.
It can be tempting to put off the installation of less-critical locally exploitable vulnerabilities when the affected host only provides shell accounts to administrators. These omissions may linger longer than desired.
Increased care is required in performing an upgrade on an older system—the more workarounds that have been configured, the more painstaking it will be to account for them all during a full system upgrade.
The OpenBSD and FreeBSD security teams release security advisories with source code patches to address issues on a regular basis. As discussed previously, installing patches to mitigate the risks presented by security vulnerabilities is a key component to secure systems administration. However, following a patch-only philosophy, a few months or years down the road you or another administrator may find it difficult to conclusively determine if your system is free of all known vulnerabilities. While patching is vital for rapid response and risk mitigation, regular upgrades are necessary, too.
Both operating systems provide a patch branch, which includes only security and critical reliability fixes to a given release of the operating system. This branch offers the highest level of stability by introducing only the most critical security and reliability fixes. The administrator can expect that while tracking this branch, the fewest number of changes have been introduced into her system and only the most significant issues have been addressed.
Warning
Despite how few changes are made to these production-quality branches, always perform system upgrades in a test environment before upgrading production systems.
Tracking this branch accommodates the “if it ain’t broke, don’t fix it” philosophy, while at the same time updating the system’s configuration to reflect a certain patched state. This allows other administrators to determine whether the system is up to date in an instant.
Determining when to upgrade your BSD system can be tricky. Several factors will play into your chosen paradigm for longer term system maintenance. In more structured environments, your organization’s security policy should describe the exact schedule for system patching and upgrades based on your security and availability requirements. The considerations for upgrading your system will depend on the operating system, so we must consider each in turn.
OpenBSD calls their production-quality branch the stable branch or the patch branch. This is the appropriate choice for most, if not all, of your systems infrastructure. These stable branches are created at every OpenBSD release and are maintained for two releases. Because new versions of OpenBSD are released approximately every six months, you can avoid upgrading for about a year—but you had better not wait any longer than that. Note also that the official upgrade path with OpenBSD does not allow skipping versions. Do not attempt to install 3.6 over 3.4. Upgrade to 3.5 first. Upgrades are most safely accomplished through the construction of a parallel system and subsequent data and configuration migration.
If you do not have the resources and time to dedicate to this process, a binary upgrade is your best bet. That is, you are less likely to run into problems while performing a binary upgrade than while performing a source upgrade. This was especially true between Versions 3.3 and 3.4, which included a change in the format of system binaries from a.out to elf. Bear in mind you may need to rebuild applications installed from ports (after updating your ports tree) when you perform a binary upgrade of your system.
On infrastructure systems with very specific purposes like firewalls, nameservers, mail relays, etc., you may find there are few security advisories that expose exploitable conditions for your system. In these cases, frequent operating system upgrades may be overkill. In all other cases, updating your system to the latest stable on a monthly or bi-monthly basis is recommended.
FreeBSD calls their production-quality branch the security or release branch. This is an ideal choice for most, if not all of your critical production systems. This branch is typically officially maintained for a little over a year.
New minor releases of FreeBSD are
shipped every four months or so. The -STABLE
branch will track through various changes in the source tree,
eventually culminating in a code freeze. During this period of time,
release candidates are tested and the only changes made to the
-STABLE branch are critical fixes—much like
in the security branch. At the end of the code freeze is the next
FreeBSD release. Directly tracking -STABLE is only
recommended for less important systems, and ideally in a test
environment first.
To keep up to date, FreeBSD administrators will generally want to track the security branch for one or two releases. Once a later release has reached maturity (after the release candidates, and perhaps even a month or two after that), it is appropriate to upgrade to this later release and track this new release’s security branch. This is a fairly straightforward process described as a post-installation hardening task in Chapter 3.
Finally, new major revisions of FreeBSD come around every few years.
Migration to these platforms should never be done for critical
systems until the x.2 or x.3
release and the introduction of a
-STABLE branch for that version. If possible,
building parallel systems and performing a data and configuration
migration is the way to go.
Tip
You need not go through an entire make world
process on all of your FreeBSD systems. Pick an internal host and
build binaries there. You may then burn the contents of
/usr/obj to a CD and subsequently mount this CD
on /usr/obj on other systems and perform the
install.
Although you
may be thinking that the -STABLE branch is
production-quality, FreeBSD includes performance enhancements,
noncritical bug fixes, and sometimes even small features into this
branch of code. This is generally more change than you look for on
critical systems infrastructure. While these have been carefully
tested and should work in most environments, traffic on the
freebsd-stable mailing lists provides evidence
that users do experience problems tracking this branch from time to
time. Nevertheless, if you are able to test upgrades to the latest
-STABLE system to ensure compatibility with your
hardware and software, this may be a viable option for all but the
most vital of your infrastructure servers.
System maintenance periods are typically thought of by users as “the time when IT is working on the system.” What are the administrators working on, exactly? Maintenance may involve the introduction of new functionality, attempted resolution of a problem, or hardware replacements and additions. Most users tend not to guess that the administrator is working on patching the system to mitigate the risks of a recently announced security issue, yet it is with this important aspect of system maintenance that we are concerned in this section of the chapter.
Warning
Although we focus on the mitigation of risks described in security advisories, remember that the addition of functionality or even hardware can affect the overall security of your system. The security-minded system administrator would do well to always ask himself, “How does what I am doing right now affect the security of my system?”
Without a list of software you care about, how can you possibly know what to patch and when to patch it? Take inventory and document the systems under your jurisdiction. Note the operating systems and applications installed across your organization. With this information you’re well equipped to start subscribing to the relevant mailing lists.
- FreeBSD lists
FreeBSD offers a variety of lists that are a great asset to system administrators. Of utmost importance is freebsd-security-notifications to which all security advisories are posted. Typically these advisories are also cross-posted to the freebsd-announce list, which broadcasts other important FreeBSD related events. Both of these lists are low volume, and subscription should be considered mandatory for any FreeBSD administrator. For a description of all the FreeBSD lists available, see Appendix C of the FreeBSD Handbook.
- OpenBSD lists
As with the FreeBSD lists, the OpenBSD team offers a security-announce list that should be considered of paramount importance to all OpenBSD administrators. The OpenBSD announce list should also be considered for news about the OpenBSD project (items are not necessarily cross-posted from security-announce). Both of these lists are low volume, and subscription should be considered mandatory for any OpenBSD administrator. For more information about the available OpenBSD lists, see the Mailing Lists section of the OpenBSD.org web site at http://www.openbsd.org/mail.html.
- SecurityFocus lists
SecurityFocus offers a variety of security-related mailing lists that are operating system specific (Linux, BSD, Solaris, etc.), topical (IDS, Firewall, Secure Shell, etc.), and more general in nature (Security Basics, Bugtraq). In years past, Bugtraq was seen as the authoritative source for security advisories. In recent times, however, the signal-to-noise ratio has increased, rendering this list more difficult to use effectively. It may be worthwhile to subscribe to the vuln-dev (Vulnerability Development) list to get a heads up to potential problems before formal advisories can be released. New security administrators should strongly consider the security basics list.
- Application Specific lists
Most application vendors provide separate mailing lists for users, developers, and those interested in security advisories. Consult your application vendor’s web site for more information about the lists provided. There should, at the very least, be a low-volume announce-only list, which should be considered mandatory reading if the application is present in your organization. Throughout this book you will be pointed to mailing lists for the applications we cover.
- FreshPorts (FreeBSD only)
FreshPorts (http://www.freshports.org) is an excellent resource for administrators to find out when port maintainers have updated the ports tree. Create a FreshPorts account, select the ports you wish to monitor (or upload the output of
pkg_info -qoa), and specify how often you’d like announcements. FreshPorts will notify you whenever the ports on your “watch list” are updated and will include the port maintainer’s comments.
After subscribing to the necessary mailing lists, you should have a flow of information into your mailbox. The next challenge is in knowing how to react to advisories you receive.
After you determine that a security advisory actually pertains to software installed on your systems, you must take action. Your response to a security advisory can be broken down into four distinct tasks: categorization, severity assessment, response planning, and execution.
Terms like buffer overflow, race condition, and format string vulnerability should quickly become familiar as you start reading advisories. Understanding what these issues are, how they can be exploited, and what attacks become possible as a result of the exploit will require a little bit of work on your part. Read the advisory carefully and consult Google if you don’t understand any of the terminology. After you’ve developed at least a basic understanding of the vulnerability, you should be able to informally categorize it according to the kind of security breach it represents and the connectivity required for the exploit.
There are several kinds of security breaches for which advisories are issued: arbitrary code execution, privilege escalation, denial of service, information disclosure, and so on. Some require local access for a successful exploit, whereas others may be exploited remotely. The severity of each of these kinds of breaches will vary according to your environment and the system in question, thus categorizing the advisory will help in assessing the potential impact.
The most important factor in determining the severity of an advisory is understanding how the security breach described by the exploit will affect your organization. Not only does this vary by organization, but also by the type of breach.
Higher visibility companies, financial institutions, and security firms suffer immensely when security breaches that involve information disclosure occur. Organizations that rely on income from transactions or provide critical services to other organizations can lose money when faced with a denial of service (DOS) attack. Smaller organizations often feel that security is less important because they are neither highly visible nor do they provide critical services. These companies do not suffer immediately when their systems are compromised, instead they discover later that their systems were used to attack other more highly visible companies (or a government) and must deal with that situation instead.
Nevertheless, there are cases where immediate service-interrupting response is overkill. If the potential exploit is only able to provide an alternate means of access to data that is already public, the vulnerability may be considered less severe. If a denial of service attack becomes possible against your web server, but your web site availability is not of importance to your organization, patching can wait. Still, do not succumb to neverending procrastination. The vulnerability may have more far-reaching consequences than either you or the writers of the advisory have determined.
Finally, once the exploit has been evaluated to determine its potential effect on the organization, you must determine the likelihood that the breach will occur. If the exploit requires local access on a system to which only you have an account—the risk is minimal. If the attack requires local access on a system that provides anonymous FTP services, there is a greater cause for concern. While you may be tempted to disregard a remotely exploitable vulnerability because you feel there is little value in attacking the organization, bear in mind that exploit toolkits do not differentiate between companies, they merely scan IP ranges for vulnerable systems.
When it comes time for mitigation, your job as the system administrator is to solve the problem with a minimum of disruption. How you go about this will vary greatly based on the severity of the vulnerability and the availability of a fix. In general there are six ways to respond to an advisory:
- Do nothing
If the output of your severity assessment is that the vulnerability cannot be exploited in your organization, lack of response may be appropriate.
- Upgrade at next maintenance
Organizations often have structured maintenance windows during which systems personnel may perform maintenance. Some organizations lack the structure but nevertheless can schedule a maintenance window for some time in the not-too-distant future so as to minimally impact the business of the organization.
- Upgrade tonight
More potentially damaging exploits may need quicker response. In these cases, waiting for a maintenance window poses too much risk and a more rapid response is warranted.
- Upgrade now
In rare cases, an advisory is released that describes a vulnerability that is potentially catastrophic if exploited and trivial to exploit. In these cases, immediate response may be necessary.
- Mitigate and upgrade later
In some cases, an upgrade is warranted, but a mitigation exists that can yield an immediate, albeit temporary, solution. Mitigation is useful to allow for more time in planning an upgrade, in order to postpone the upgrade until a scheduled maintenance window, or in the event that an upgrade path has not yet been laid down.
- Turn it off
In the event that an advisory is released that has no upgrade path and no mitigation strategy, your only option might be to disable the affected service.
The most potentially devastating exploits should certainly evoke rapid response. Be careful not to overreact, however, and cause more damage than the attackers. Plan and test your response before executing. Less critical services and advisories may evoke a more lazy response. While this response may not be inappropriate in all cases, be careful to follow through with your plan at your earliest opportunity. Vulnerabilities left unchecked are quickly forgotten.
Most advisories released by the FreeBSD and OpenBSD security teams are accompanied by instructions for various mitigation strategies. These often include updating to the latest revision of the software, applying a patch to the source code and reinstalling, or even changing a configuration option to disable a vulnerable component. In severe cases where the vulnerability, if exploited, would cripple your organization, reaction to the advisory must be immediate. This does not necessarily mean you unplug the system from the network. It may be possible to mitigate the issue by adjusting your firewall rules, rate limiting connections, or adjusting the configuration of the application. In the worst cases, you will need to disable the service until the problem can be resolved. This should provide you with enough breathing room to carefully plan and test a response that eliminates the vulnerability.
Remember that security advisories are often released for third-party software several days before the ports tree has been updated to reflect the availability of the patched version of that piece of software. It is also not uncommon for source code patches to become available before the new versions of the files have been checked in to the CVS repositories. In these cases, you may need to take immediate action by patching the source code and reinstalling. When the ports tree is updated, you may overwrite your patched binaries by installing the new version of the software.
In rare cases, such as the potentially exploitable buffer management issues with OpenSSH in September of 2003, you will hear rumors of exploit code already in existence long before patches (or even an advisory!) become available. In these cases, you may need to disable the service until the situation becomes clear. If this isn’t possible, consider restricting the service in some way to mitigate the risk..
FreeBSD and OpenBSD systems can provide an extensive list of services. While Chapter 5 through Chapter 9 of this book provide detailed information about some of the most common and complex network services, you may find a wealth of more basic services are also useful on your network. The second half of this chapter discusses some of these services, what they provide, how to provide them securely, and in some cases, why you should do so.
The Internet daemon
(inetd(8)) is a network service super-server. It
comes with a bit of a stigma—and this is no surprise since most
texts on securing hosts contain a step where you disable
inetd, yet few describe enabling or even securing
it. inetd is not evil, and it can be used safely.
The services inetd is often configured to provide,
however, should sound like a list of security nightmares:
telnetd, ftpd,
rlogind, fingerd, etc. All of
these services pose unnecessary risk to infrastructure systems,
especially when much of the functionality can be provided by
ssh.
Again,
inetd is not to blame. As most administrators
know, the inetd process reads configuration
information from /etc/inetd.conf and listens on
the appropriate TCP and UDP ports for incoming connections. As
connections are made, inetd spawns the appropriate
daemon. Unfortunately, there are not a great many daemons
traditionally run through inetd that are safe to
use in today’s unsafe network environments.
Nevertheless, should you find yourself in a position to provide
services through inetd, you should know three
things.
First, on FreeBSD and OpenBSD systems, inetd will
limit the number of incoming connections to no more than 256 per
second. Unless you legitimately receive this many requests, you may
want to lower this threshold by using the -R
rate command-line argument.
Second, use tcpwrappers. The manpage for hosts_access(5) describes how tcpwrappers may be configured using /etc/hosts.allow and /etc/hosts.deny to restrict connections based on originating hostname and/or address specification. We briefly examine a hosts.allow file in Example 4-7.
Example 4-7. Sample hosts.allow file
ALL : 1.2.3.4 : allow

# SHORT CIRCUIT RFC931 ABOVE THIS LINE
ALL : PARANOID : RFC931 20 : deny
ALL : localhost 127.0.0.1 : allow

sshd : mexicanfood.net peruvianfood.net: allow

proftpd : dip.t-dialin.net : deny
proftpd : localhost .com .net .org .edu .us : allow
ALL : ALL \
        : severity auth.info \
        : twist /bin/echo "You are not welcome to use %d from %h."
In this example, all connections are
allowed from 1.2.3.4. The PARANOID directive in
the next line performs some basic hostname and address checking to
ensure the hostnames and IP addresses match up. The second part of
that stanza utilizes the IDENT protocol to verify
that the source host did in fact send the request, provided the
source host is running identd.
The latter lines are fairly
straightforward. All connections are allowed from
localhost. Connections via
sshd are permitted from both
mexicanfood.net and
peruvianfood.net. FTP access from
dip.t-dialin.net is explicitly denied access
(presumably the administrator noticed a lot of attacks from this
network and has no users there) while access from
.com, .net,
.org, .edu, and
.us networks are allowed.
Finally, if the connection was not explicitly permitted or denied before the last line, the user is informed that she is not allowed to use a given service from the source host, and the rejection is logged via syslog to the auth.info facility and level.
FreeBSD systems support tcpwrappers compiled into the
inetd binary. This means that by using the
-W and -w flags to
inetd (these flags are on by default—see
/etc/defaults/rc.conf), your
inetd-based services will automatically be
wrapped.
To
use tcpwrappers on OpenBSD systems, use tcpd(8).
Example 4-8 lists two lines in
/etc/inetd.conf that demonstrate the difference
between using tcpwrappers for eklogin and not
using it for kshell.
Example 4-8. Using tcpwrappers in OpenBSD
eklogin stream tcp nowait root /usr/libexec/tcpd rlogind -k -x
kshell stream tcp nowait root  /usr/libexec/rshd rshd -k
Tip
Enabling tcpwrappers for eklogin but not
kshell is done here for demonstrative purposes
only. If possible, use tcpwrappers for all services run through
inetd.
The server program field changes to /usr/libexec/tcpd (the tcpwrappers access control facility daemon), which takes the actual service and its arguments as arguments to itself.
Finally,
inetd spawns other programs using a
fork(2)
exec(3) paradigm.
Programmers are very familiar with this, as it is the way a process
spawns a child process. There is nothing particularly wrong with this
approach, but you must be aware that loading a program in this way is
not a lightweight operation. For instance, sshd
could run out of inetd easily enough, but since
sshd generates a server key on startup (which
takes some time), the latency would be intolerable for users.
Therefore, when supporting a high rate of connections is a
requirement, inetd might not be the best
solution.
Tip
Remember that a variety of daemons utilize tcpwrappers even when they
do not run out of inetd. To determine if this is
the case, read the manpage for the service. You may also be able to
tell by running ldd(1) against the binary. If you
see something called libwrap, then tcpwrapper
support is available. If the binary is statically linked, of course,
your test will be inconclusive.
Centralized storage through the use of shared filesystems is a common goal of many administrators. OpenBSD and FreeBSD systems natively support the Network File System (NFS) Version 3. While this service is often used and considered vital in many networks, there are inherent security risks in sharing a filesystem across a network of potentially untrusted systems.
NFS should be avoided if at all possible. We present this section not to describe how you might secure NFS, but instead to illustrate why a secure installation is not possible. If you must have a shared network filesystem, consider more secure NFS alternatives such as the Andrew File System (AFS), Matt Blaze’s Cryptographic File System (CFS), or the Self-Certifying File System (SFS).
The greatest security concern in
deploying NFS is the minimal amount of
“authentication” required to access
files on a shared filesystem. By default, when exporting an NFS
filesystem, user IDs on the server (except root) map to user IDs on
the client. For example, a process on the client running with UID
1000 will be able to read and write to all files and directories on
the server that are owned by UID 1000. Yet UID 1000 on the client may
not be the same user as UID 1000 on the server. The administrator of
the client system could trivially su to any user
on that system and be able to access all user-readable files on the
shared filesystem. This danger extends to the root user if the
-maproot option is specified for the shared
filesystem in /etc/exports.
This danger may be mitigated by forcibly mapping all remote users to a single effective UID for the client. This essentially provides only guest access to the filesystem. If writing to the filesystem is permitted in this case, it will become impossible to enforce user-based permissions as all users essentially become the same user.
Some administrators have made it possible to tunnel NFS over SSH. This ensures all NFS traffic is encrypted. However, this has limited value as it does not eliminate the implicit UID and GID trust issue described here.
NFS is configured by exports(5). That is, what filesystem is exported under what conditions to which systems? This allows for fairly fine-grained control of exports. With the application of the principle of least privilege, you would export filesystems with as many security options enabled as possible. Consider the following examples.
/home/users devbox, buildbox, sharedbox
This configuration will export home directories to the three systems specified, all of which are under the control of an administrator that ensures users are not able to access other users’ home directories.
/scratch -mapall=neato: userbox1, userbox2, userbox3
This scratch area for project neato is shared to all systems, but users from all clients are mapped to user neato. This allows only the specified NFS clients to work with this temporary storage area.
/archives -ro
These archives are shared for all users to read, but no users may write to the filesystem. For more information about restricting exports, see the manual page for exports(5). You should now begin to realize that deploying NFS in anything resembling a secure manner will require that you remove much of the functionality that you would have liked to retain.
Warning
If you find yourself reading this section, you may be suffering from a mandate to run NFS. We again urge you to consider some of the shared filesystem alternatives mentioned previously.
On the network level, there is an additional set of restrictions
about which the administrator should be aware. By default,
mountd(8), which services mount requests for NFS,
accepts connections only on reserved ports. This ensures that only
the root user on remote systems may mount shared filesystems. If the
-n argument is specified to
mountd, requests from all ports will be honored.
This allows any user of any system to mount network drives. Do not
enable this option unless you have a specific need to do so—the
manual page for mountd mentions that servicing
Legacy Windows clients may be a motivation.
The ports that NFS needs are managed by
the portmapper, now called
rpcbind(8) (Sun remote procedure call [RPC]
implementation) in FreeBSD 5.X and portmap(8) in
OpenBSD. In OpenBSD, portmap will by default run
as the _portmap user and given the
-s flag in FreeBSD, rpcbind
will run as the daemon user. In both cases, these
services may be reinforced with the use of tcpwrappers so that only
given systems or networks can communicate with these applications and
hence, use NFS. Since RPC negotiates ports dynamically, NFS is a very
difficult service to firewall.
With or without a firewall, it should be clear that NFS, while it may be useful, lacks any real security. Avoid using it if at all possible.
What was originally Yellow Pages (yp) was renamed to Network Information Services (NIS) as a result of trademark issues. Thus, many of the programs related to NIS begin with the letters “yp.” NIS, like NFS, is RPC-based but provides centrally managed configuration files for all systems in a NIS domain. Although the configuration details of NIS are beyond the scope of this book, there are significant security implications in running NIS on your network, the least of which is the unencrypted dissemination of NIS maps, such as your password file.
NIS should be avoided if at all possible. We present this section not to describe how you might secure NIS, but instead why you cannot. If centralized authentication and authorization is your goal, consider authenticating using Kerberos and providing authorization via LDAP. Unfortunately this is an extensive topic and would require a book dedicated to it. A more straightforward approach may be to safely distribute password files from a trusted administration host. We describe this latter procedure in the next section.
If you have NIS clients that only understand weaker DES passwords (pre-Solaris 9, update 2 for example), your NIS maps will have to contain only DES encrypted passwords. This may be accomplished by ensuring that users make password changes on systems that understand only DES passwords, or by reconfiguring your system to generate DES encrypted passwords by default. Neither of these are good solutions.
The master.passwd file, which contains encrypted passwords for all your users, is easily readable by others on your network when you use NIS. Although the requests clients make for the master.passwd.byname and master.passwd.byuid maps must come from a privileged port, this is not a significant increase in security. If any users on your network have a root account on any Unix system on your network (or can quickly build a system and plug it in), this restriction becomes irrelevant.
It
gets worse. NIS is frequently used in heterogeneous environments and,
as described above, passwords may need to be stored using the much
weaker DES encryption rather than the default
md5 or blowfish encryption
of FreeBSD and OpenBSD respectively. As if this
weren’t bad enough, some older operating systems
will not support the concept of shadow passwords. In this case, NIS
must be run in UNSECURE mode (specified in the
appropriate Makefile in
/var/yp). With this configuration, encrypted
passwords are exposed in the passwd.byname and
passwd.byuid maps. Perhaps not so terrible
because the security involved in the
“low-port-only” concept was weak to
begin with.
At the heart of NIS is the
ypserv(8), the NIS database server. It is this
daemon that accepts RPC and dutifully provides database contents upon
request. Host and network specification in
/var/yp/securenets can be used to limit the
exposure of your password maps through RPC. The
ypserv daemon will read the contents of this file
and provide maps only to the listed hosts and networks. Given a
network of any meaningful size, you may configure an entire network
range in this file for which RPC should be answered. With
securenets configured in this way it is trivial
to bypass by merely connecting to the network in question. Specifying
only a handful of hosts in this file, however, could effectively
provide NIS maps to a group of servers while limiting
“public”
access.
If you have
chosen to lock NIS down to a handful of servers,
ypbind(8) can use some attention. This daemon
searches for a NIS server to which it should bind and facilitates
subsequent NIS information requests. All systems running NIS should
have statically configured NIS domain names and servers, so that
instead of attempting to find a server by broadcast,
ypbind immediately binds to a known NIS server.
This prevents malicious users from setting up alternate NIS servers
and perhaps providing password-free passwd maps.
If all systems involved in the NIS
domain support shadow passwords and can understand
md5/blowfish encrypted
passwords, some of the risk associated with NIS is mitigated. If NIS
is being provided only to a handful of closely administered servers
via securenets, the risk is further mitigated.
However, NIS still relies on the difficult-to-protect RPC and operates without encryption. Avoid NIS altogether if you are working with heterogeneous or not completely trusted networks. Instead, develop another, more secure, way to distribute user, group, or configuration files.
One alternative to NIS is file
distribution over ssh. In fact, this paradigm will
work not only for password and group files but also for other
arbitrary configuration files. The secure copy
(scp(1)) program is included as part of the
ssh program suite and is included in the base
distributions of both OpenBSD and FreeBSD. Secure copy, as the name
implies, copies files between networked systems and guarantees data
integrity and confidentiality during the transfer. Authentication for
scp is the same as for ssh.
In order to put in place secure file distribution, you will need a management station to house all files that are distributed to other hosts as shown in Figure 4-1. This host should be exceptionally well protected and access should be restricted to only the administrators responsible for managing file distribution, in line with our principle of least privilege. Transferring configuration files to remote systems is a three-stage process:
Put the files in staging area on the management station.
Distribute the files to systems.
Move the files from the staging area on target systems into production.
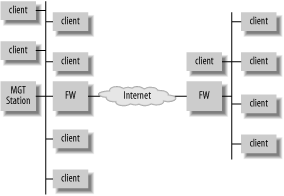
Initial setup will vary depending on the environment. The following steps provide one example of preparing for secure file distribution. Your requirements may dictate changes to the approach presented below.
Create
sshkeys for authentication.First, create a pair of
sshkeys for copying files over the network on the management station. For the purposes of this discussion, we will name these keys autobackup and autobackup.pub and place them in /root/.ssh. These keys should be generated usingssh-keygen(1)and may be with or without a passphrase. For pros and cons of these two approaches, keep reading.Create a staging area from which files will be copied.
Next, if servers to which files are being transferred have differing configuration requirements, it becomes necessary to gather files into a staging area before the transfer. In most cases, workgroup servers and infrastructure servers to which you are copying files will permit login from different sets of users. You may need to write simple scripts to extract a subset of accounts from your master.passwd and group file instead of copying the entire contents.
Tip
If you are copying a master.passwd file from the management station to remote systems, bear in mind the root password on the remote systems will become the same as that of the management station. In most cases, this is not desirable, and the root account should be stripped from master.passwd using a program like
sedorgrepbefore transmission.Also note that the master.passwd and group files may not be /etc/master.passwd and /etc/group. You may keep syntactically correct organization-wide master files anywhere on your system. In fact, this is preferable since you do not want to grant everyone in the organization access to your management station.
This staging area may be anywhere on the management station. Simply declare a directory as a staging area, and begin writing scripts to collect configuration files.
Write scripts to gather files.
Once the staging area has been assigned, you must write the necessary scripts to gather configuration files from the system. In the case of master.passwd, you may need to customize the contents by extracting only a subset of users. A script to create the necessary files might look something like Example 4-9.
Example 4-9. Script to gather configuration files into a staging area
#!/bin/sh # This ensures the nested for loop iterates through # lines, not whitespace OIFS="$IFS" IFS=" " # This is where we keep the maps, our "staging area" # This variable is just a template for various "level" dirs level_dir=/home/users/netcopy/level # Make sure our 3 level directories exist and clear them out # before continuing with the script. for level in 1 2 3; do mkdir -p ${level_dir}{$level} rm -rf ${level_dir}${level}/* done # Let's make sure /etc and /usr/local/etc exist # within the staging area for level in 1 2 3; do for dir in /etc /usr/local/etc; do mkdir -p ${level_dir}${level}/${dir} done done # We're going to be writing the contents of master.passwd # Let's make sure the file's got the right permissions first for level in 1 2 3; do touch ${level_dir}${level}/etc/master.passwd chown root:wheel ${level_dir}${level}/etc/master.passwd chmod 600 ${level_dir}${level}/etc/master.passwd done # Here we grab users from the master.passwd and group for line in `grep -v '^#'/some/master.passwd | sort -t : -k3n`; do IFS=$OLDIFS set -- $line uid=$2 gid=$3 # If the uid is betweeen 1000 and 4999, it's a level 1 user if ([ $uid -ge 1000 ] && [ $uid -lt 5000 ]); then echo $line >> ${level_dir}1/etc/master.passwd fi # If the uid is betweeen 5000 and 9999, it's a level 2 user if ([ $uid -ge 5000 ] && [ $uid -lt 10000 ]); then echo $line >> ${level_dir}2/etc/master.passwd fi # If the group is 101 (dev), it's a level 3 user if ([ $gid -eq 101 ]); then echo $line >> ${level_dir}3/etc/master.passwd fi IFS=" " done # Copy additional configuration files for level in 1 2 3; do tar -cf - \ /etc/group \ /etc/resolv.conf \ /etc/hosts \ /etc/aliases \/usr/local/etc/myprogram.conf \| tar -xf - -C ${level_dir}${level} # Additional files may be listed above the previous line cd ${level_dir}${level} && tar -czpf config.tgz etc usr/local/etc rm -rf etc usr doneNote that this script copies users based on user ID and group ID. In most cases, a subset of accounts is more easily garnered when distinguishable by group as opposed to user ID range. For ease of administration, pick whichever approach works best in your environment and stick with it. Finally, bear in mind that this script must execute as root and will be working with sensitive files. Be very sure the staging directories and files are well protected.
Prepare remote systems.
After scripts have been written to gather the necessary files for transmission, prepare the remote systems to receive files. Create a designated account to receive the transferred files. In this example, we will call this account netcopy. Create a ~netcopy/.ssh/authorized_keys with the contents of autobackup.pub from the management station.
Tip
You might be thinking that this is a lot of trouble and it would be easier to merely copy files over as the root user. However, we advise that you disable root logins via
sshin /etc/ssh/sshd_config and log in under your user account. Permitting remote root logins makes accountability much more difficult.The remote systems will also need scripts to move files from the staging area into the appropriate place on the system. Given the gathering script in Example 4-9, a trivial
tarextraction from the root of the filesystem on the remote system will place all configuration files in the correct places with the correct permissions. This script must also execute as root and should be placed in root’s crontab.
As discussed previously, for increased
security, the ssh daemon should be configured to
accept only key-based authentication, as opposed to password
authentication. Because scp uses the same
authentication as ssh, however, requiring keys and
passphrases can be difficult to automate.
However, automation is not always necessary. Even when using NIS, you
must issue a make(1) in the
/var/yp directory to push the maps to remote
systems. To provide the same functionality, you can (this should
sound familiar) write a script to accomplish the push while requiring
password entry only one time with the help of
ssh-agent(1). Example 4-10 shows
how this might be accomplished.
Example 4-10. Script to copy files using an ssh key
#!/bin/sh

level1_dir=/home/users/netcopy/level1
level2_dir=/home/users/netcopy/level2

level1_sys="alpha beta gamma delta"
level2_sys="mercury venus earth mars"

# This runs the ssh-agent which keeps track of ssh keys
# added using ssh-add.  Using eval facilitates placing
# values for SSH_AUTH_SOCK and SSH_AGENT_PID in the
# environment so that ssh-add can communicate with the agent.
eval `ssh-agent`
# This will prompt for a passphrase.  Once entered, you
# are not prompted again.
ssh-add /root/.ssh/autobackup

# Securely transfer the compressed tarballs
for system in $level1_sys; do
 scp ${level1_dir}/config.tgz ${system}:
done

foreach system in $level2_sys; do
 scp ${level2_dir}/config.tgz ${system}:
done

# Kill the agent we spawned
kill $SSH_AGENT_PID
This script requires a passphrase every time it is executed, so a person must initiate the transfer. Admittedly this script could be replaced by one that acts like a daemon, prompting for authentication once and then copying repeatedly at specified intervals. In this scenario, a passphrase would still be required every time the script is started—but this would occur perhaps only at boot time.
It is possible to generate ssh keys without an
associated passphrase. These are logically
similar to the key to your house door: if you have it, you can open
the door. There is an inherent danger in creating keys that provide a
means to log into a system without any additional checks. It is vital
that the private key in this case is very well protected (readable
only by the netcopy user).
This risk can be mitigated somewhat with a few options in the netcopy user’s ~/.ssh/authorized_keys file. For example, we could configure remote systems to restrict access not only by key, but also by host, as shown in Example 4-11.
Example 4-11. Restricting access by key and host, disabling pty(4)
from="mgmthost.example.com",no-pty,no-port-forwarding ssh-dss base64_key NETCOPYBefore our base-64 encoded ssh key, we provide
three options and the ssh-dss key type. The first
option specifies that not only does the source host have to provide
the private key to match this public key, but it must also come from
a host named mgmthost.example.com. Moreover, when
connections are made, no pty will be allocated
and port forwarding will be disabled.
Despite the
security concerns with using passphrase-less
keys, it becomes possible to automate file distribution. In this way,
modifications can be made to files on the master system with the
understanding that, given enough time, changes will propagate to all
systems to which files are regularly copied. The script required to
perform a secure copy is almost identical to that in Example 4-10, but the ssh-agent and
ssh-add commands can be removed.
We discussed earlier in this chapter a
way to track changes to configuration files using CVS. If you have a
CVS repository that contains all configuration files for your
systems, you already have a staging area from which you can copy
files to target systems. You need only decide which system will push
the files, and perform a cvs
checkout of your configuration data onto that
system. The rest of the procedure will be very similar.
Alternately, you may prefer a pull
method instead of a push. With little effort, you could write a
script to check the status of configuration files installed on the
system via cvs status
filename, and check out-of-date files out
of the repository as necessary. Since cvs will use
ssh for authentication, you are again in a
position to automate this procedure by placing the script in
cron and using an ssh key that
does not require a passphrase. Similarly,
organizations with a Kerberos infrastructure might choose to place a
service-only keytab on systems used for checking
configuration files out of your repository.
The script to gather files and copy
files to the remote system may easily be combined into one script.
The file copy will occur based on the successful authentication of
the netcopy user. A regular cron(8) job should
check for the existence of the file on all remote systems, and if it
exists, extract the contents into the appropriate folders.
Also, be aware we have glossed over an important mutual exclusion
problem in the sample scripts here. If, for some reason, either our
scripts that collect configuration files or our scripts that
un-tar configuration file blobs run slowly, the
next iteration of the script may interfere with this iteration by
clobbering or deleting files. Before building a system like this,
make sure to include some kind of lockfile (this can be as simple as
touching a specially named file in /tmp) to
ensure that one iteration does not interfere with another.
Although this approach requires a
great deal more initial configuration than NIS (because
ypinit performs the setup for you), the
vulnerabilities inherent in NIS are mitigated. This paradigm works
well for copying user account information and system configuration
and may be easily adapted to copy configuration files for other
software like djbdns and Postfix.
The naïve administrator will assume that once he sets the system clock, he need not concern himself with system time. After all, computers are good with numbers, right? Not so. As any experienced administrator knows system clocks drift. When systems in your network start drifting away from each other, you can run into a variety of problems including, but not limited to:
Being unable to build a reliable audit trail because it is impossible to reliably determine the ordering of events on different systems
Checking things into and out of version control repositories
Authenticating Kerberos tickets
Working with shared filesystems
Operating clustered or high availability configurations
Properly servicing DHCP and DDNS requests
Creating correct timestamps on emails within and leaving your organization
Fortunately, NTP on FreeBSD and OpenBSD systems is trivial to set up.
The ntp(8) package is included with the base of
both operating systems (as of OpenBSD 3.6), so there is nothing to
install. All that remains are security and architecture
considerations.
Trivial NTP security can be achieved through the use of restrict directives in the NTP configuration file: /etc/ntp.conf on FreeBSD systems and /etc/ntpd.conf on OpenBSD systems. These directives determine how your NTP server will handle incoming requests and are expressed as address, mask, and flag tuples. From a least privilege perspective, you would configure NTP much as you would a firewall: initially restrict all traffic and subsequently describe which hosts should have what kind of access. A base configuration ought to look something Example 4-12.
From this point, additional servers may be listed. Example 4-13 is a contrived example that permits unrestricted access from localhost, while hosts on 192.168.0.0/24 may query the nameserver, and the final two NTP servers may be used as time sources.
Example 4-13. Specific ntp restrictions
restrict 127.0.0.1
restrict 192.168.0.0 mask 255.255.255.0 notrust nomodify nopeer
restrict 10.1.30.14 notrust nomodify noserve
restrict 10.1.30.15 notrust nomodify noserve
Tip
If you are unfamiliar with the restrict directive,
these configuration lines might look a little odd. Flags to the
restrict directive limit access, thus the lack of
flags for the localhost entry specifies no
restrictions rather than being fully restrictive.
This is an adequate solution when providing NTP services to known clients. There are situations where IP restrictions are not enough. In these cases, you may want to consider NTP authentication. Authentication provides a more flexible way of controlling access when:
You need to provide time service to a limited number of systems across untrusted networks.
You wish to grant certain entities the ability to query or modify your time server, but cannot rely on a static remote IP address.
You feel mere IP restrictions that permit runtime configuration are inadequate.
NTP authentication is supported using
both public and private key cryptography (via the Autokey protocol).
After keys have been generated using the
ntp-genkeys(8) utility, the server may be
configured to use specific keys with specific hosts, be they
symmetric or asymmetric. Bear in mind, sensitive symmetric keys will
have to be exchanged securely through some out-of-band mechanism.
Asymmetric keys contain a public portion that may be exchanged in the
clear. Additional details about the configuration of authentication
for ntp are beyond the scope of this book but are
addressed in the documentation available through http://www.ntp.org.
As with any other network service, providing time to your organization requires a little planning. NTP is typically woven into a network in tiers. The first (highest level) tier is authoritative time source for your organization. All NTP servers in this tier are configured as peers and use publicly accessible time servers as authoritative time source, or if your requirements dictate, acquire time from local time-keeping devices. The second tier of NTP servers for your organization will derive time from the first tier and provide time services for clients or subsequent tiers.
Unique security considerations exist for every tier. Top level organizational tiers that communicate with external servers are vulnerable to attack. One of the most effective ways to mitigate the risks associated with this exposure is to limit the external NTP servers that can communicate with your systems through firewall rules. This places implicit trust in your external time sources, which in most cases is acceptable. More stringent security requirements will necessitate local time-keeping devices.
Middle-tier systems that communicate with both upper- and lower-tier systems, but no clients should be configured such that only upper-tier systems may be used as time sources, and lower-tier systems may query time. All other requests should be denied. More stringent security requirements may dictate that upper-tier and lower- tier encryption keys must exist to authenticate communications. Smaller environments generally do not have a need for systems in this tier.
Finally, the lowest tier NTP servers provide time to internal clients. These systems should be configured so that only the immediate upper tier systems may be used as time sources, but anyone on the local network should be able to query time on the system.
As with the other tiers, high security requirements may require authentication to guarantee time sources are in fact the systems they claim to be.
Performance monitoring concerns might seem out of place in a book about system security, but system availability is a vital part of system security. After all, denial of service attacks are considered security concerns even though they merely make systems unavailable. Keeping a keen eye on things like disk usage, load averages, or the existence or absence of specific daemons will ensure that you are immediately aware of your systems behaving unusually.
Network monitoring can be a bit of a double-edged sword. Keeping track of what your systems are doing will definitely help you know when they misbehave. Yet to do this, you must invariably allow connections to your system from your management station; and most monitoring suites offer little in the way of authentication. Moreover, these suites often have a long history of vulnerabilities. Ironically you could increase your exposure to risks by installing software that helps monitor for risks. As with any other software you install, you should remain vigilant.
Moreover, a carefully deployed and administered monitoring suite will be a 24/7 guardian over your network. It will have a comprehensive view of every server, service, and vital application. It is imperative that any monitoring solution you deploy is very well protected against prying eyes. Employ the principal of least privilege here and allow very few shell accounts to the monitoring station. Access to any web interface should be tightly restricted and require authentication over an encrypted channel from known hosts. There are few better reconnaissance tools than a monitoring suite carefully configured by a conscientious system administrator.
There are several open source monitoring tools that can be deployed on FreeBSD and OpenBSD systems like Big Brother, which is free under certain conditions, Big Sister, and OpenNMS. There are also a variety of tools to monitor both hosts and network devices using SNMP. All of these are contenders in the network monitoring space, but we will be looking closely at one of the most flexible and widely deployed network monitoring packages, Nagios (formerly NetSaint).
Nagios
is available in FreeBSD’s ports tree or from the
Nagios web site, available at: http://www.nagios.org/. Nagios implements
host and service monitoring for systems across a network. The
nagios daemon runs on a single server and uses
various plugins to perform periodic checks.
The plug-ins distributed with Nagios (in the nagios-plugins package) are capable of performing local checks, which monitor load average, disk space usage, memory and swap utilization, number of logged in users, and so on. Of course there is more to system monitoring than only examining the monitoring host. Therefore, plug-ins are also included to monitor the availability of network services on remote systems, as long as a TCP or UDP port is open for probing. When problems are noticed, Nagios can be figured to send out notifications in a variety of ways, commonly via email.
Plug-ins for Nagios are constantly updated, and new plug-ins appear on a regular basis, as needed. Given a particular need in your environment, writing your own plug-in is very simple using just about any programming or scripting language you choose. In addition to plug-ins are add-ons. Add-ons extend Nagios’ functionality by providing a breadth of functionality too extensive to mention. One of these add-ons is the Nagios Remote Plugin Executor (NRPE). This daemon is configured on client systems with a variety of local checks allowing the monitoring host to check local statistics on remote systems.
Installation
on FreeBSD starts and ends with a make install
from the net-mgmt/nagios subdirectory of the
ports hierarchy. This installs both Nagios and the
nagios-plugins collection automatically. It will
also create a Nagios user and group for the execution of the daemon.
OpenBSD administrators will need to fetch the compressed tarball and
install the software in the traditional way per the documentation on
the Nagios web site. The rest of this overview
will assume that you have either installed Nagios
from ports or have installed it manually in compliance
with hier(7).
Default
configuration files for Nagios are installed to
/usr/local/etc/nagios. Many of these
configuration files can be left as they are, after the
sample suffix has been removed. There are three
main configuration files to look at when first configuring Nagios.
These are the main Nagios configuration file,
the CGI configuration file, and the object configuration files.
- nagios.cfg
The main Nagios configuration file, nagios.cfg by default, controls the way Nagios finds its configuration and subsequently operates. The sample file is well documented, but you should also consult the documentation on the nagios.org web site as you work through this file. There are sets of options in this file worth discussing.
The first is the
check_external_commandsoption, which enables the submission of commands through the web interface. If you feel your Nagios web interface is sufficiently protected (for instance, by using digest, Kerberos, or certificate-based authentication over SSL), you may wish to change this value to 1 to enable external commands. This will allow you to schedule service/host downtime, enable and disable various checks and notifications, delay checks, force checks, and issue other commands through the web interface. These web-submitted commands go into the file specified bycommand_file. Only the web server, users should have access to the directory in which this file is stored.The second set of options are those that point to the object configuration files
cfg_fileandcfg_dir. Each can be specified multiple times and may point to specific files or specific directories. When directories are specified, all files ending in .cfg within the directory will be processed. Directory specification allows for a little more flexibility and easier delegation of responsibility.You will want to peruse the rest of the settings in this file, but most will have reasonable defaults.
- cgi.cfg
The CGI configuration file, cgi.cfg by default, controls the behavior of the Nagios web interface. This includes how Nagios should build URLs within the interface, and which users have access to various aspects of the Nagios system. These users must be authenticated by the web server and gain access by username.
It is possible to both disable authentication and allow commands to be submitted through the web interface by specifying a
default_user_name. If you do this, make sure your Nagios web interface is protected in some other way so that only trusted administrators can access it.- Object configuration files
The object configuration files are the heart of Nagios’s configuration. These files describe the hosts Nagios will monitor, the services to monitor on these hosts, who will be contacted when problems are detected, when checks are performed, and so on. In order to get Nagios operational, your best bet is to look over all the sample configuration files and move them into a configuration subdirectory after you have modified them to suit your environment. Start with the most basic configuration files like hosts.cfg-sample, services.cfg-sample, timeperiods.cfg-sample, and contacts.cfg-sample. You will probably be able to simply rename the checkcommands.cfg-sample and miscocmmands.cfg-sample configuration files until you have a better idea of additional commands you need to run. Start by configuring Nagios to monitor local statistics. When you feel comfortable with the way that works, start monitoring remotely accessible services on other systems. Once this is done, you will be ready to tackle NRPE.
Tip
The information here is a cursory overview of Nagios configuration. For detailed explanations of all the available options, make sure to read the sample configuration files thoroughly and peruse the documentation available at http://www.nagios.org/.
The
Nagios Remote Plugin Executor makes local checks on remote systems
possible. NRPE is available in the FreeBSD ports tree in
ports/net-mgmt/nrpe2. OpenBSD administrators
must fetch the port from the addons page at nagios.org. Once
retrieved make sure you include support for OpenSSL. This may be done
on FreeBSD systems by running make WITH_SSL=yes from the port directory. OpenBSD
administrators will need to pass the --enable-ssl
argument to the configure script.
Ensuring that NRPE is built with OpenSSL
support means that all communications between the
check_nrpe program on the monitoring host and
nrpe daemon on client systems will be encrypted.
Remember that this is just encryption, not authentication.
Beware of enabling command-line arguments for
nrpe. Traditionally, nrpe is
configured on client systems with a known set of named commands. The
paths to these commands and associated arguments are hard coded on
the client systems. Enabling command-line arguments allows the
check_nrpe plug-in to not only tell client systems
to run a particular check, but also provides the specific
command-line arguments. While this allows you to manage your
configuration of client checks from the Nagios monitoring host, it
has a variety of unpleasant security ramifications. If you have
developed a means to securely distribute configuration files as
described earlier in this chapter, managing nrpe
configuration centrally should be trivial.
On the Nagios monitoring host, once the NRPE package has been
compiled, the check_nrpe binary must be copied
into /usr/local/libexec/nagios with the rest of
the Nagios plug-ins. On all client systems, copy the
nrpe binary to
/usr/local/sbin instead.
On the monitoring host, you will need to
tell Nagios to use NRPE to run local checks on
remote systems. To do this, add the following
check_nrpe command to your
checkcommands.cfg file as follows.
define command {
  command_name    check_nrpe
  command_line    /usr/local/libexec/nagios/check_nrpe -H $HOSTADDRESS$ -c $ARG1$
}
You will then need to add commands to one of your configuration files or create a new configuration file on the monitoring host that specifies which NRPE checks should be run on which remote systems. This procedure is fully documented in the README distributed with NRPE. No other configuration is required on the monitoring host.
NRPE on client systems may then be
configured to run out of inetd(8) (or
xinetd) to make use of tcpwrappers support and
rate limiting. Alternately it may be run directly as a service using
the startup script provided in the port. nrpe can
be configured with a list of IP addresses from which to accept
commands directly.
On
all client systems, you will need to install the
nagios-plugins port and configure NRPE by
creating an nrpe.cfg configuration file usually
located in /usr/local/etc. This file should
contain a list of local commands whose output the
nrpe daemon will send back to the Nagios process
on the monitoring host.
A complete description of configuring Nagios for the variety of environments out there would consume far more pages than we are able to spare, but rest assured, documentation exists. As a newcomer to Nagios, do not expect to get the system operational in a day, or even a few days. With the extensive documentation on the Nagios web site, the FAQ, the forums, and the mailing lists, however, you will not be short on help.
With Nagios and nrpe operational, you have a 24/7
observer of all the systems under your jurisdiction. Configure your
thresholds appropriately and you will become immediately aware when
unusual activity is detected. For instance, on an
ftp download-only server, it may be especially
important to detect even a small increase in disk usage. This might
indicate that the system is misconfigured and allowing people to add
content. Watching the number of smtpd processes on
a mail relay may provide an early warning allowing you to investigate
before the system goes down.
What to watch, and what thresholds to set, are questions you will have to answer for yourself. After you have Nagios set up, configure it to warn you earlier rather than later when it detects a problem. If you find that your thresholds are set too low, you can always raise them. Your goal is to know as soon as something unusual is happening on your system, but you don’t want to be badgered by useless alerts.
Building and maintaining a secure server is a nontrivial and never-ending task for the system administrator. Starting with a carefully built system, it is important to control who has access and what users and administrators can do. Keeping up to date with security and reliability fixes to the operating system and installed software requires that you stay informed and prepared. Finally, keeping tabs on how your systems are running will give you insight into whether any of them might be misbehaving. Following the guidelines set forth in this chapter will help you build a more easily maintained and secure systems infrastructure.
A list of resources follows.
FreeBSD release engineering: http://www.freebsd.org/releng/
FreeBSD mailing lists: http://www.freebsd.org/support.html#mailing-list
OpenBSD flavors: http://www.openbsd.org/faq/faq5.html#Flavors
OpenBSD mailing lists: http://www.openbsd.org/mail.html
Unix Backup and Recovery, W. Curtis Preston (O’Reilly), 1999
Big Brother: http://www.bb4.com/
Big Sister: http://bigsister.graeff.com/
Nagios: http://www.nagios.org/
OpenNMS: http://www.opennms.com/
Incident Response , Richard Forno and Kenneth R. van Wyk (O’Reilly), 2001
SecurityFocus: http://www.securityfocus.com/
SSH, The Secure Shell: The Definitive Guide, Daniel J. Barrett and Richard Silverman (O’Reilly), 2001
Topics in Cryptography: http://www.wikipedia.org/wiki/Topics_in_cryptography
Get Mastering FreeBSD and OpenBSD Security now with the O’Reilly learning platform.
O’Reilly members experience books, live events, courses curated by job role, and more from O’Reilly and nearly 200 top publishers.

