Managing Groups
As noted earlier in this chapter, the circuitry of Mac OS X’s file-sharing software seems to lack one feature that was present in earlier versions of the Mac OS: the ability to create and manipulate groups. As your networking setup becomes more complex, being able to work with subsets of the people on your network can be a great timesaver.
For example, you might create groups called Marketing, Temps, and Executives. Later, you can permit an entire group of these people access to a particular file, folder, or disk in one fell swoop. (And, as noted earlier in the chapter, groups are also the key to letting Normal account holders on your network see and access secondary drives on your Mac OS X computer.)
Phase 1 involves creating and naming the groups you want. It requires NetInfo Manager, an advanced utility program that comes with Mac OS X. Phase 2 involves assigning those groups to individual disks, files, or folders on your system. The following pages walk you through both procedures.
Phase 1: Creating Groups
To set up groups, start by opening NetInfo Manager, which is in your Applications→ Utilities folder (Figure 12-14).
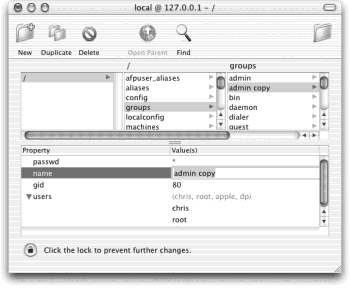
Figure 12-14. Consider yourself warned: NetInfo is an extremely technical program designed for network administrators with years of training and full employee benefits somewhere in corporate America. Not only do you need an administrator’s account to ...
Get Mac OS X: The Missing Manual, Second Edition now with the O’Reilly learning platform.
O’Reilly members experience books, live events, courses curated by job role, and more from O’Reilly and nearly 200 top publishers.

