Congratulations! You built the beginnings of a rudimentary game at the end of the previous chapter. You're making some real progress here. However, the way that we've done things thus far, while good for educational purposes, is very inefficient from a design standpoint. A sound design will always increase development efficiency.
You probably noticed how painful it was to add a new sprite object to your project. Especially if you need to add an object that will animate, use collision detection, and move, there are a lot of variables and other code that must be duplicated, and as a result your code is becoming quite a mess. If you continue down this path, things will quickly get out of hand. So, let's take a few minutes to apply some sound object-oriented design to your systemâthis will make things a lot easier for you down the road.
If you were doing serious game development, you'd want to expand further on the design in this chapter and fine-tune it to meet your needs. We don't have time to tweak your design to how you'd want it for a commercial-quality application, but there are some changes you can make that will result in a huge improvement over what you have thus far.
First things first, let's look at your objects. The basic visual object in a 2D game is a sprite. Based on the code you put together in previous chapters, you have two different types of objects: objects that are controlled by the player, and objects that are not. Aside from that, all other functionality of the animated sprites you've worked on thus far is exactly the same.
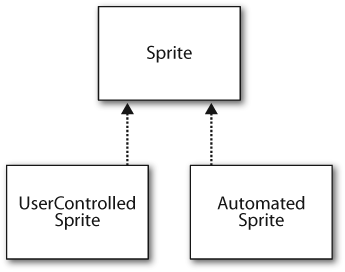
Think about what type of functionality those two objects share. They both get drawn on the screen, and they both animate using a sprite sheet. Thinking about that more in depth, you'd probably agree that all animated sprites will have those two functional elements. Based on that logic, it would make sense to create a base class that represents a standard sprite and has the ability to draw itself and animate via a sprite sheet. For more customized functionality, you could then look at deriving from that base class to create classes with added behavior. Based on the examples you've run through thus far, you can anticipate that your class hierarchy eventually will look something like the image in Figure 4-1.
Get Learning XNA 3.0 now with the O’Reilly learning platform.
O’Reilly members experience books, live events, courses curated by job role, and more from O’Reilly and nearly 200 top publishers.

