Chapter 4. Setting Up Our App
In Part I we looked at the tools you use to build applications on Apple platforms: Xcode, the Apple Developer Program, and the Swift language. Now weâre actually going to build an app using them!
In this chapter we will start building Selfiegram, an iOS app that lets us take new selfies and view old ones. Itâs not a new idea for an app, but it lets us explore a great number of the different features of Swift and the various frameworks Apple has provided to build apps. By the end of this part of the book weâll have a basic application that uses the images, location, filesystem, notifications, and map frameworks of iOS; then, in Part III, we will extend and polish it even further.
Note
Our goal isnât that by the end of the book youâll have an app capable of replacing an app like Instagram; we are simply aiming to show off how youâd actually go about building up an app such as this, while at the same time demonstrating just how much of the work of building apps is already done for you. So, even though Selfiegram might not be an original idea, there is a lot you can learn from it.
The application will be built up in small stages, with a little bit of code and UI work to do in each. We have tagged our repo on GitHub at each stage so you can look at how it progresses if you wish.
Warning
Throughout this book, we need to call some methods with rather long namesâfunc tableView(_ tableView: UITableView, cellForRowAt indexPath: IndexPath) -> UITableViewCell comes to mindâand paper and its electronic friends, like PDFs, are width-limited. This means in a few places in the book we will be breaking up our code over multiple lines just so it can be displayed neatly on the page. You donât have to write your code this way if you donât want to; writing the method calls on one line will work just as well as breaking them up across multiple lines.
Weâll begin by building up the skeleton of Selfiegram, which will give us a launching point for the later sections.
Designing Selfiegram
When we started to think about how this app should work, the only idea we had was âletâs make a selfie app,â which is a very broad goal. To lock this down to something a bit more concrete, we started drawing up some wireframes.
Tip
A wireframe is a very rough drawing of the app that youâre about to make. Itâs much faster to get your ideas down on paper (digital or physical) than it is to actually implement the app itself, and the act of drawing your ideas helps you think as well.
You can see the original wireframe for Selfiegram in Figure 4-1.
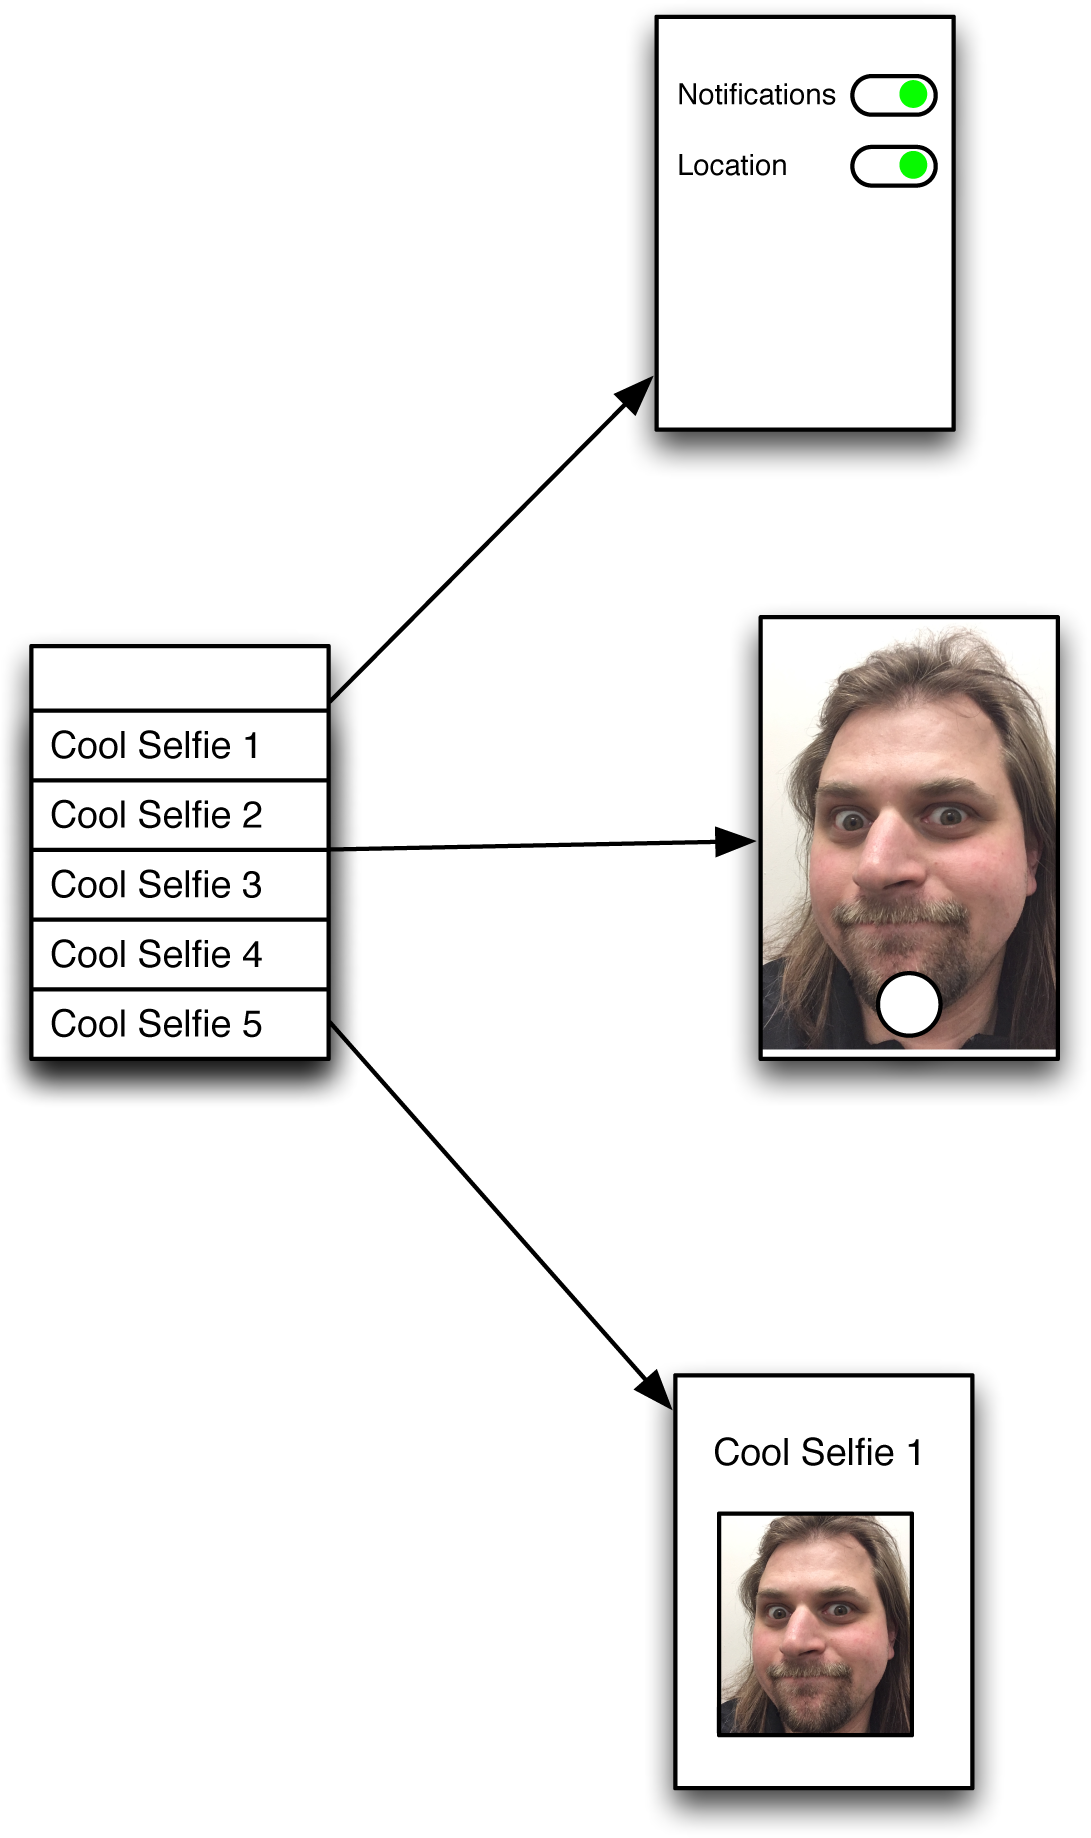
Figure 4-1. Selfiegramâs wireframe
There is no one correct way to do a wireframe. Ours were done in a drawing tool called OmniGraffle, which has an array of stencils for this sort of work. Theyâre quite high-fidelity in comparison to the initial wireframes you might find yourself making, but we did our first pass by hand on a whiteboard. We then moved them into OmniGraffle, as we needed something that we could use in a book. At each stage of redrawing the wireframes, things changed slightly, and this is a good thing, as you tend to discover things you missed on the first pass. You donât need to do wireframes as high-fidelity as the ones weâve done for this book; there is nothing wrong with using hand-drawn wireframes as long as everyone in the team knows how they are meant to work.
The main focus of the app is around the list of selfies you have taken, and that is going to be the hub for all the actions of the app. The selfies will be presented as a list shown in reverse order of when you took them, so most recent at the top. Tapping a selfie will let you edit its name as well as see it and its metadata in detail. From the list of selfies youâll be able to take a new selfie or open up the settings to configure the app.
By the end of Part II weâll have finished the app outlined in the wireframes in Figure 4-2.
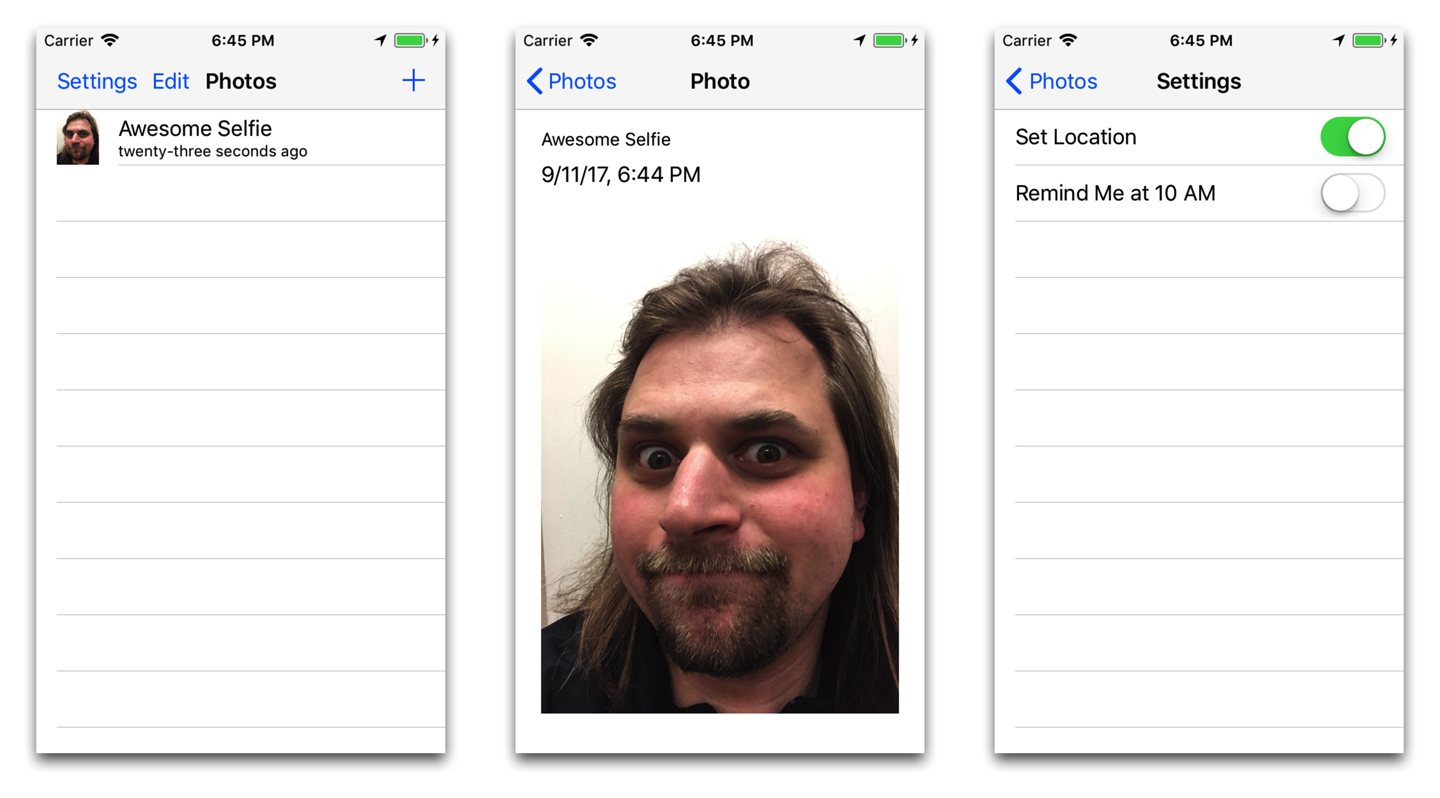
Figure 4-2. Initial version
Creating the Project
The first thing we need to do is create the Xcode project for Selfiegram. Weâll be using this for the majority of the book. If you need a refresher on Xcode and the development tools, check out âXcodeâ. When youâre ready, letâs get started:
-
Launch Xcode. Youâll see the Welcome to Xcode screen as shown in Figure 4-3.

Figure 4-3. The âWelcome to Xcodeâ screen
-
Click the âCreate a new Xcode projectâ button. The list of project templates will appear. Select iOS in the top row (which includes categories for Appleâs other platforms, such as macOS, tvOS, and watchOS), and choose the Master-Detail App template (Figure 4-4). Click Next.
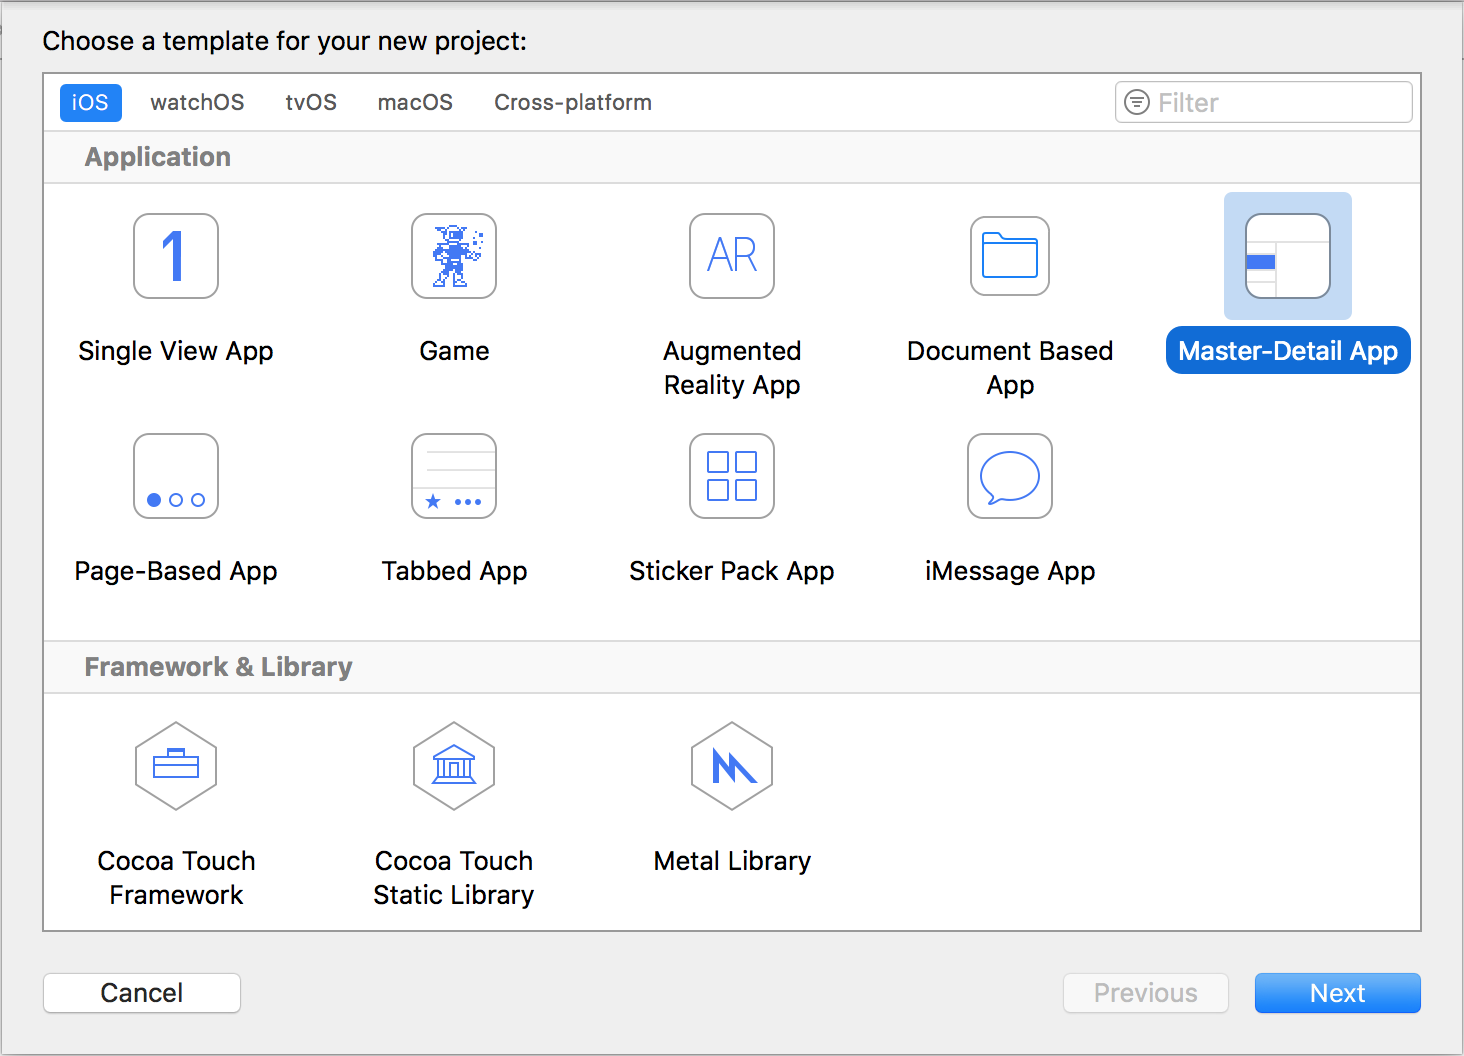
Figure 4-4. Select the Master-Detail App template
Tip
The templates provide default setups for different types of applications. You can do everything provided by each template manually, if you want; theyâre just collections of provided files and code. The templates shown in our screenshot are those provided by Apple, and ship with Xcode.
-
Youâll be prompted to give the project a name and provide some additional information. Use the following settings:
-
Product Name:
Selfiegram. -
Organization Name: Your companyâs name. Enter your own name if youâre not making this app for a company.
-
Organization Identifier: Your domain name, reversed; for example, if you own mycompany.com, enter
com.mycompany(customize this based on your domain name; if you donât have one, entercom.example).Note
The organization name and the product name are used to create the appâs bundle identifier. A bundle identifier is a period-separated string that uniquely identifies a bundle of code and resources. For example, if you use
com.exampleas your organization identifier, the bundle ID will becom.example.Selfiegram.Bundle identifiers are used everywhere in the macOS and iOS ecosystem. A bundle identifier forms the basis of your app ID, which is the unique string that identifies your app on the App Store. Your appâs bundle ID is also used as the basis of other IDs, such as the document uniform type identifier for document-based apps. The upshot of all this is that itâs worth keeping this ID in the back of your mind.
-
Language: Swift.
-
Devices: Universal.
-
Use Core Data: Off.
Note
Core Data is a framework provided by Apple that lets you store data in a manner similar to a database, but local to your app. Weâre not using Core Data in this book, as itâs a topic that befits a book all on its own. Additionally, the limits of Core Data are quite easy to hit, and itâs often more useful, as well as more of a learning experience, to build storage infrastructure for your app from scratch. If you turn this on, stubs for Core Data, as well as a data model, will be added to the project that Xcode will generate for you. If youâre a masochist, you can learn more about Core Data in the documentation. Donât say we didnât warn you!
-
Include Unit Tests: On.
-
Include UI Tests: On.
Note
Leaving these two on creates stubs for unit tests and UI tests, respectively. Weâll touch on these subjects in âTesting the SelfieStoreâ.
-
-
Click the Next button, and Xcode will ask you where youâd like to save the project (which will be a folder with the same name you put in the Product Name field).
Tip
Xcode will ask you if you want to create a Git repository for your project. We recommend that you store this project (and, indeed, anything else that you might work on) in Git, or a similar version control system. Itâs out of the scope of this book to explore Git, but we strongly recommend you take some time to do so if youâre not already using it. As an added bonus, Xcode has support for Git built in.
Then it will create a project for you to work with (see Figure 4-5).
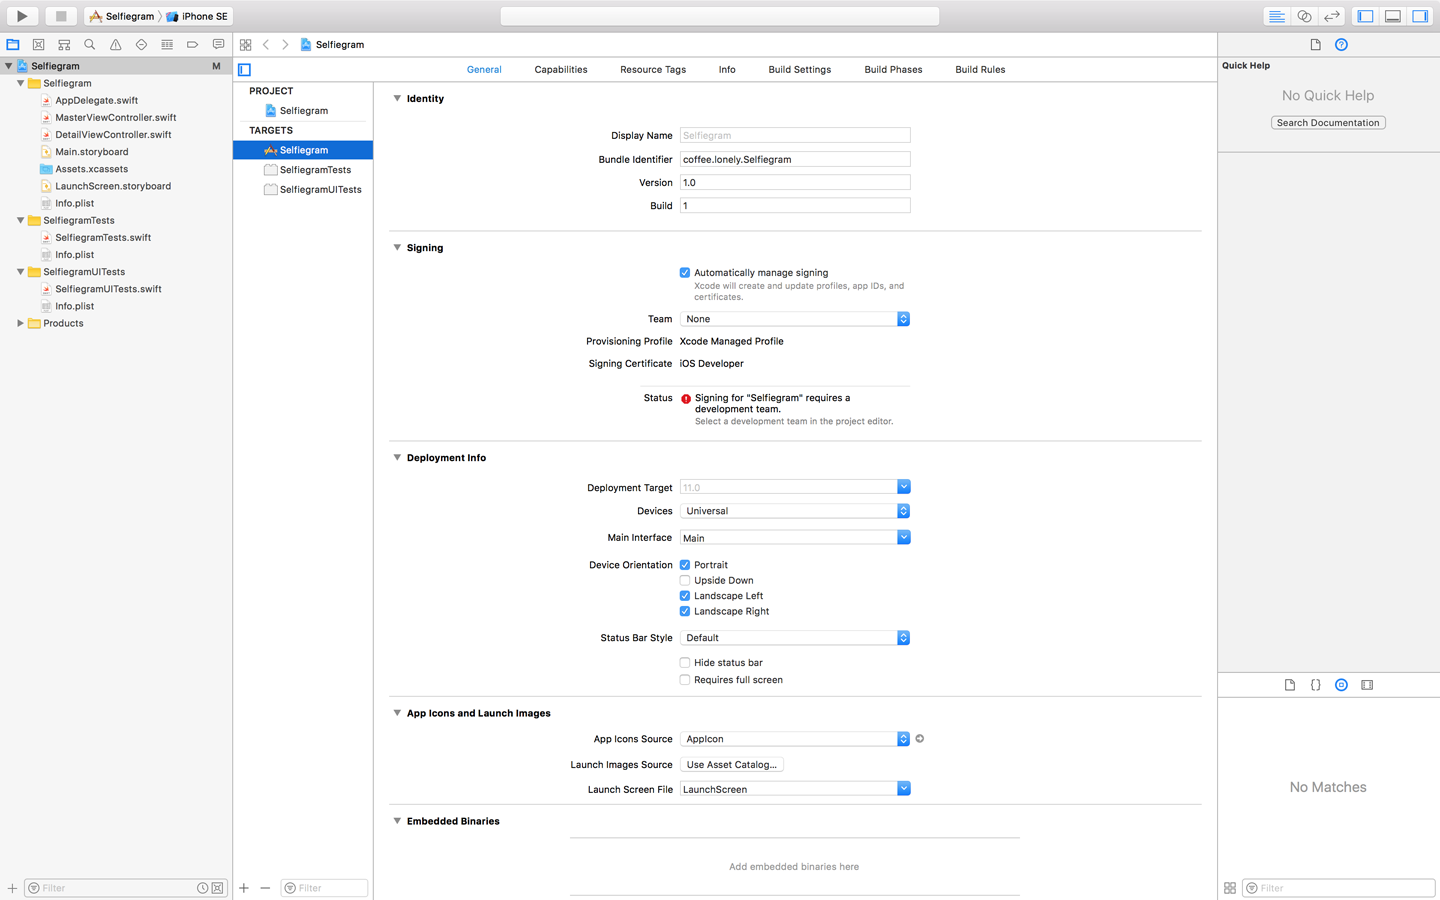
Figure 4-5. Our project
The Structure
The Master-Detail template is one of the most common templates youâll use when doing iOS development. It gives you a basic, ready-to-use UI, comprised of multiple view controllers. The top-level view controller is the split view controller, designed for presenting Master-Detail style information; it has two children, a master and a detail view controller.This view controller doesnât have an appearance of its own; it instead takes its appearance from the two view controllers it is attached to, and it can be configured to present them in any number of ways. By default on small devices the master and detail view controllers will each take up the whole screen when presented, while on larger devices the master will be overlaid on top of the detail view controller.
Below the split view controller are its two navigation controllers. There are two because of the nature of the split view controller; one points to the master and the other to the detail view controller (see Figure 4-6). A navigation controller provides a few nice features: by default it gives us a navigation bar, and it gives us a navigation hierarchy we can manipulate. The master view controller contains a table view, which is a common way to show lists of data; this will be where our list of selfies will go. The detail view controller contains just a labelâthis will be where we put our detailed selfie information. Tapping on an item in the master view controller will segue into the detail view controller, showing the details for that item.
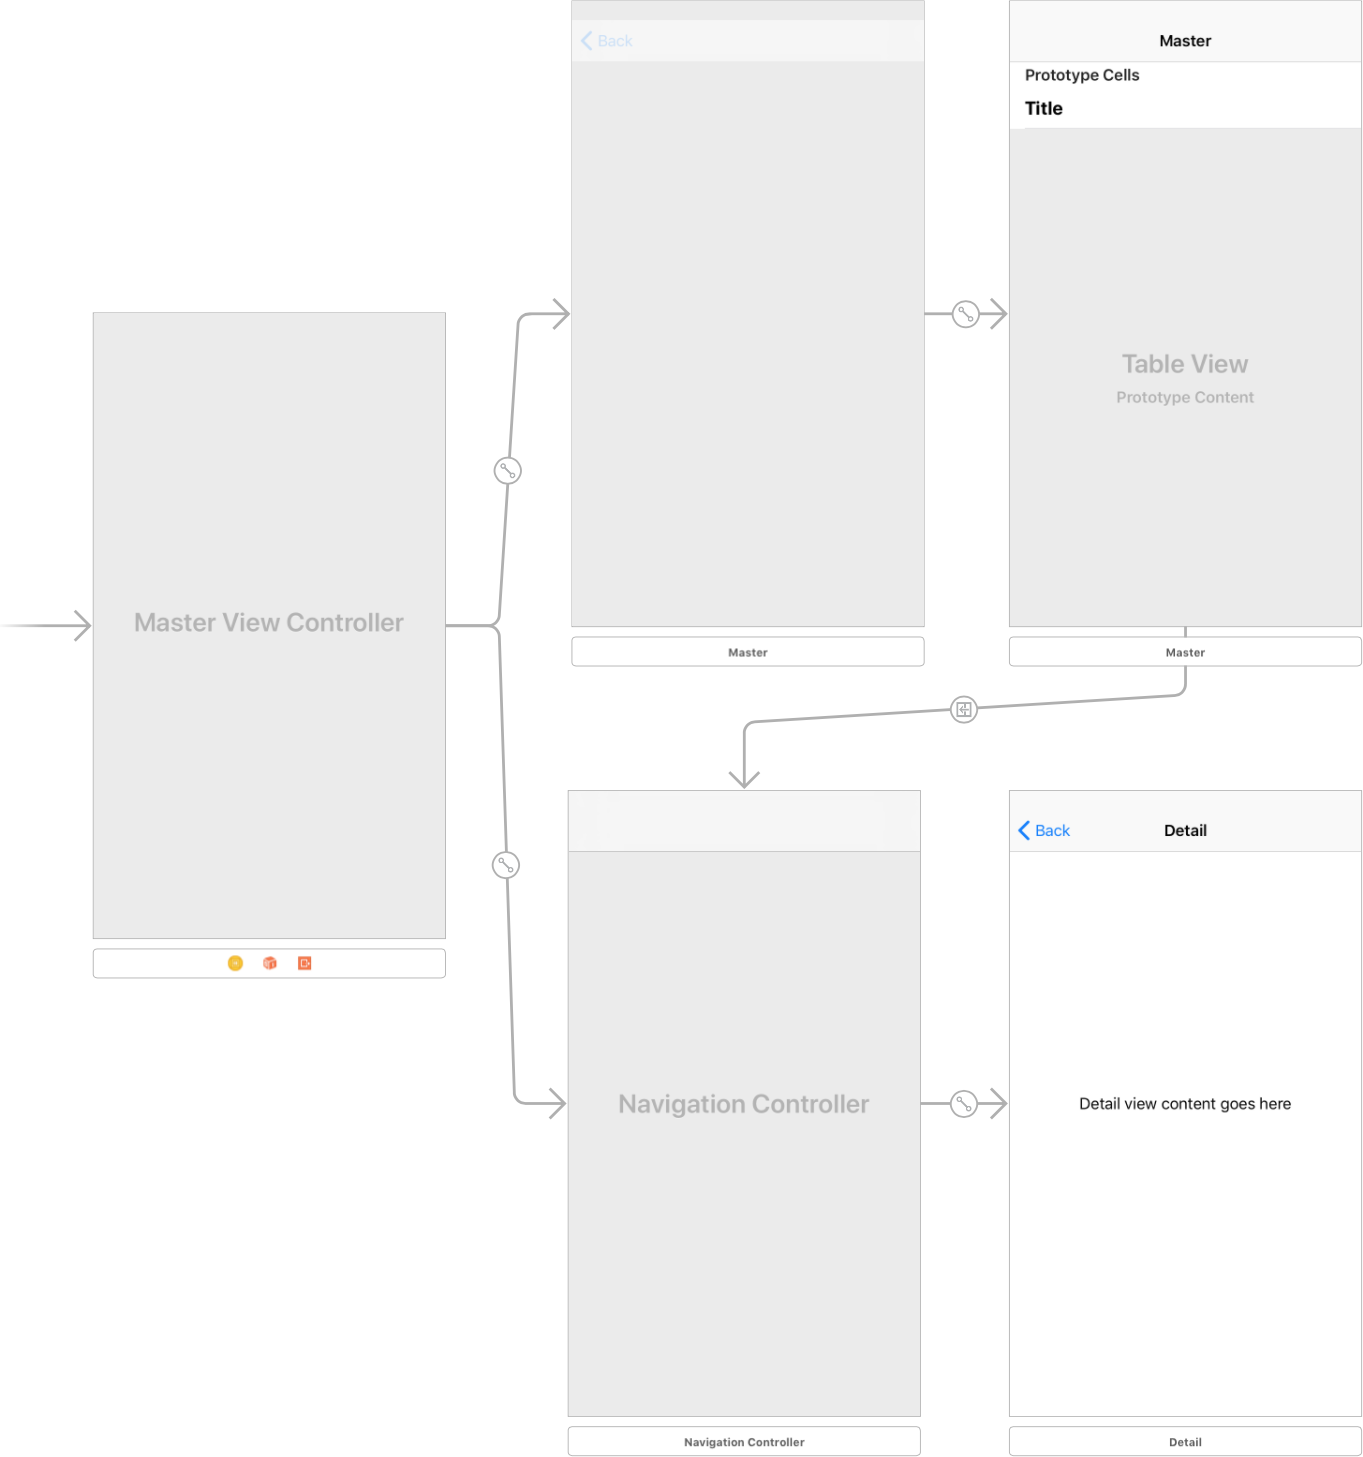
Figure 4-6. The Master-Detail template UI
Renaming the Views
Despite the UI that the template provided being pretty close to what we want, it does use some terminology that isnât really applicable to our app. So, letâs do some renaming:
-
Open Main.storyboard.
-
Select the master view controller from the Document Outline. There will be two of these; you want the one with the table view inside of it.
-
In the Attributes inspector, select the Title attribute and change it to
Selfies List. -
Select the navigation item inside the view controller.
-
Using the Attributes inspector, change its title to
Selfies. Figure 4-7 shows the result.
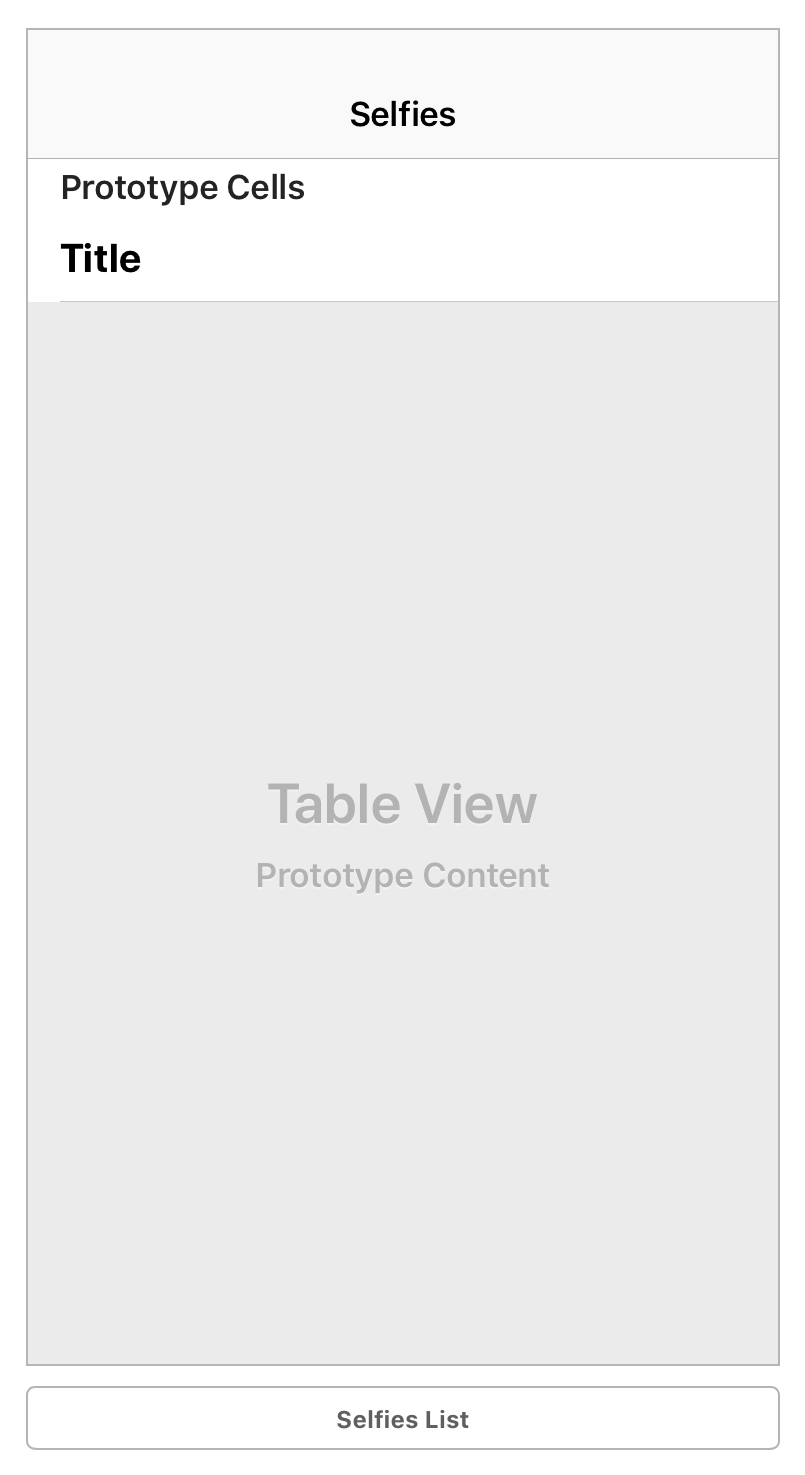
Figure 4-7. Renamed Selfie List
Changing these two properties means that when weâre in the document outline we can easily see our selfies list, and when we run the app the navigation bar will show the word âSelfiesâ instead of âMaster,â which makes a lot more sense. Now we need to do the same to the detail view controller:
-
Select the detail view controller from the document outline.
-
In the Attributes inspector, select the Title attribute and change it to
Selfie Detail. -
Select the navigation item inside the view controller.
-
Using the Attributes inspector, change its title to
Selfie.
With that done, our basic project is set up and ready to go. Most of the work was done for us by the Master-Detail template, which gave us our basic UI and some unit and UI tests that we will build up later on (for now, these are empty).
If you run the application right now, youâll be able to create a new entry in the list and view previous entries by selecting them, but otherwise it does very little. In the next chapter, weâll add some new functionality.
Get Learning Swift, 3rd Edition now with the O’Reilly learning platform.
O’Reilly members experience books, live events, courses curated by job role, and more from O’Reilly and nearly 200 top publishers.

