Chapter 1. Ruby Basics
Perhaps like you, I’ve learned to program in a number of languages over the years—BASIC, FORTRAN, C, C++, C#, Java, and JavaScript among others—but so far Ruby is my favorite. It has been the most fun to learn and use. Why? Because of its syntax. If you have a background in a variety of other languages, Ruby is easy to figure out. And it’s flexible: Ruby lets you do things in a variety of ways, not just one way, so you can decide how to do things your way.
Ruby is an interpreted rather than a compiled language. You can call it a scripting language, an object-oriented language, a refreshing language. It’s not a perfect language. It doesn’t have to be. It’s still my favorite. It has that certain je ne sais quoi. If it didn’t, why would I spend hundreds of hours writing a book about it? Certainly not for money and fame.
To me, one of the best aspects of Ruby is its composability. Composability is the degree to which you can express logic by combining and recombining parts of a language (see James Clark’s “The Design of RELAX NG” at http://www.thaiopensource.com/relaxng/design.html#section:5). Ruby’s got that, big time.
Also, Ruby isn’t under committee or corporate control. It’s open source. It was written by Matz, with some help from his friends. (It was written in C, by the way, and can take C extensions.)
“Matz” is short for Yukihiro Matsumoto (from Japan). He started working on Ruby in 1993, and first released it to the world in 1995, the same year Java came out. It took a while for Ruby to emerge in the West, but once it did, around the year 2000, it started to take off. With the help of people like Dave Thomas, Andy Hunt, Hal Fulton, and others, Ruby got a foothold. Now it has a fan base.
And Ruby has a killer app. It’s called Ruby on Rails (http://www.rubyonrails.org). Heard of it? It’s a web application framework for producing web sites with databases quickly and easily. A lot of people really like Rails. Not everyone, but a lot of people. And those people are discovering that one of the main reasons they like Rails is because it was written in Ruby.
Hello, Matz
I know many readers are expecting a “Hello, World” example right about now. In spite of a moral and ethical obligation to provide a “Hello, World” example, I have decided to change the first example to "Hello, Matz.” Given all that Matz has done for the programming world, don’t you think he deserves some acknowledgment?
Before you go any further, find out if you already have Ruby installed on your computer. If you are on Mac OS X or a Linux distribution of some sort, it might already be there, though it’s probably an older version; Tiger (Mac OS X 10.4 or later) ships with version 1.8.2, for example.
To discover if Ruby is lurking inside your box, just go to a shell prompt on a Unix/Linux system (this won’t work on a standard Windows system) and type:
$ which ruby
See if you get a reply like this one (good news if you do):
/usr/local/bin/ruby
Or just type a command to check the version of Ruby (this works on Unix/Linux and Windows):
$ ruby -v
or:
$ ruby --version
If Ruby is installed, you should get an answer that looks like this:
ruby 1.8.6 (2007-03-13 patchlevel 0) [powerpc-darwin8.9.0]
Tip
If Ruby is not installed on your box, and you’re a little nervous about figuring out how to install it on your own, go to the section "Installing Ruby,” later in this chapter. Follow the instructions there to install Ruby on your platform. Then come right back!
A Very Short Ruby Program
Now that you have Ruby up and running, type the following line in a plain-text editor such as TextPad or vim:
puts "Hello, Matz!"
This line of code is a programming statement, an instruction that
you want the program to carry out. The instruction will print the string Hello, Matz! on your screen, followed by a newline
character.
You can end a statement with a semicolon (;) if you
want, just like in C or Java, but you sure don’t have to: a newline will do fine. (Most
Ruby programmers don’t use ; except when writing
multiple statements on one line.)
Save the little program in a file as plain text and name it matz.rb. (The .rb file extension is the conventional extension for Ruby programs.)
Tip
It’s a good idea to save the file in a directory or folder where you plan to do your Ruby work so that all your Ruby files will be readily accessible in one location.
You run the program by running the Ruby interpreter. To do this, type the following at a shell or command prompt:
$ ruby matz.rb
The output from the program is displayed by default on the screen:
Hello, Matz!
Placing a # at the beginning of a line tells the
interpreter to ignore that line:
# a nice greeting for Matz
puts "Hello, Matz!"
Add the # and some text following it to your
program matz.rb. This is called a
comment. Whatever follows the #
is hidden from the Ruby interpreter. You’ll learn more about comments in Chapter 2.
Shebang!
If you run a Ruby program on Windows, you generally have to use the ruby command before the Ruby filename (unless you associate
the file extension .rb with a file type; to learn how
to do this, see "Associating File Types on Windows,” later in this
chapter). You can avoid typing ruby each time on
Unix/Linux systems by adding something called a shebang line (#!) at the top of your Ruby file. Add a shebang line to the top of matz.rb:
#!/usr/local/bin/ruby
# a nice greeting for Matz
puts "Hello, Matz!"
The shebang lets the system know where to find the Ruby interpreter, that is, in /usr/local/bin, which is a conventional place to install Ruby executables (see "Installing Ruby on Mac OS X Tiger,” later in this chapter). A more general alternative is #!/usr/bin/env ruby. Choose what works for you. I use the latter.
Tip
As mentioned earlier, Tiger comes installed with an older version of Ruby, version 1.8.2, which is stored in /usr/bin. We won’t bother using that version.
Go to a prompt on your Mac or Unix/Linux system and enter the filename by itself:
$ matz.rbYou’ll get the same answer as before:
Hello,
            Matz!
Tip
If you get a permission denied message when
running matz.rb, and you aren’t sure what to do
about it, I’d like to offer you a hand. Go to the section "Permission Denied" near the end of this chapter to find out what to
do.
I’ll now show you more ways you can output the text Hello,
Matz!, which will give you a glimpse of the power of Ruby. At this point, I
won’t get very deep into detail about what’s going on. Just follow along, typing in and
testing as much code as you want. To test the code, follow these steps.
Delete the previous code in matz.rb.
Enter the new code.
Run the program with the Ruby interpreter from the prompt to see the output.
You’ll be deleting the old code in matz.rb and
inserting new code, unless another Ruby file with a different name is presented in the
text. You can either recreate these other files with the given names, or you can download
all the files that come with this book from http://www.oreilly.com/catalog/9780596529864. After downloading the ZIP archive,
extract the files into the directory or folder of your choice. That’s where you’ll do your
work. Navigate to the directory in a shell or command window using the cd command.
Issue a System Command
You can run an operating system command with system:
system "echo 'Hello, Matz!'"Try this with and without single quotes ('), where
shown.
You can also submit each part of a command separately, as an argument to system:
system "echo", "Hello,", "Matz!"
The exec command is similar to system, but it replaces the current process and, after the
command is finished, exits—not always what you want to do.
Appending a String
Append one string to another with the +
method:
puts "Hello, " + "Matz!"You can also append a string with the <<
method:
puts "Hello, " << "Matz!"Multiply
What if you want to print out a line of text three times? How about:
puts "Hello, Matz! " * 3This would give you:
Hello, Matz! Hello, Matz! Hello, Matz!
Or you could use the times method:
5.times { print "Hello, Matz! " }It will show your enthusiasm:
Hello, Matz! Hello, Matz! Hello, Matz! Hello, Matz! Hello, Matz!
You could just print one word three times, then add or append more text with +:
puts "Hello, " * 3 + "Matz!"Then you’d get:
Hello, Hello, Hello, Matz!
Inserting a Shell Command
Let’s insert some output from a shell command:
puts "Hey Matz, I'm running " + `ruby --version`When you run this, the output from the shell command inside the grave accents or
backticks (`ruby --version`) is inserted into the
output:
Hey Matz, I'm running ruby 1.8.6 (2006-08-25) [powerpc-darwin8.8.0]
Using a Variable
You can give a value a name by assigning it to a variable:
hi = "Hello, Matz!"
puts hi # => Hello, Matz!
hi is an example of a local
variable. You can tell because its name starts with a lowercase letter.
You’ll learn more about local and other kinds of variables in Chapter 2 in the section
"Variables.”
Tip
In code examples, => will always follow a
comment character (#). Whatever follows => is the output you can expect from the line or block of
code, or from the whole program.
Put two or more variables together with the +
method:
hi = "Hello, "
person = "Matz!"
puts hi + person # => Hello, Matz!
Expression Substitution
Another way of inserting the value of a variable in a string is with expression substitution—very handy feature of Ruby:
person = "Matz!"
puts "Hello, #{person}" # => Hello, Matz!
The #{...} is replaced with the result of the
expression inside it. For example, #{2+2} would yield
the result 4.
Using expression substitution, you can grab an argument off the command line and add it to the output.
#!/usr/bin/env ruby

puts "Hello, #{ARGV[0]}!"
Ruby stores command-line arguments in a predefined Ruby variable called ARGV. ARGV[0] refers to the
first item on the command line, the 0th element in ARGV. Run the matz.rb
program you just edited with an argument to see the results:
$ matz.rb Matz
Hello, Matz!
Formatting a String
You can change the output on the fly with the %s
format flag and %:
hi = "Hello,%s" puts hi%"Matz!" # => "Hello, Matz!" puts hi%"people!" # => "Hello, people!" puts hi%"universe!" # => "Hello, universe!"
You can also use % like this:
"%s, %s!" % [ "Hello", "Matz" ]% is a method from the String class that formats a string. It is like using sprintf:
sprintf( "Hello, %s", "Matz!" ) # => "Hello, Matz!"Use printf to print the output to your display (the
default standard output device).
printf( "Hello, %s", "Matz!" ) # => Hello, Matz!You will learn about formatting strings with sprintf in Chapter 10 in the section "Formatting Output with sprintf.”
The eval Method and -e Option
The eval method evaluates a string enclosed in
quotes as a Ruby statement or expression and returns the result. It’s handy for
testing.
eval "puts 'Hello, Matz!'" # => Hello, Matz!Similarly, there is a way you can print Hello,
Matz! without using a separate file at all—with the -e (execute/evaluate) option:
ruby -e "puts 'Hello, Matz!'"Notice that you use single quotes inside of double quotes when using the -e option. You can also use multiple -e options:
ruby -e "print 'Hello, '" -e "puts 'Matz!'"Using both of these will give you the same output as before (or what looks like the same output):
Hello,
            Matz!
I used print in the first -e option because it doesn’t add an end-of-line or newline character at the
end of the line like puts does. If I used puts with both -e options,
the result would be:
Hello,
Matz!
You can use multiple statements, separated by semicolons, inside a single -e if you want:
ruby -e "three = 3; puts 'Matz! ' * three"
This will give you:
Matz! Matz! Matz!
Getting Input from the Keyboard
You can use the gets method to read from standard
input (text from your keyboard, by default).
#!/usr/bin/env ruby

print "Who do you want to say hello to? "
hello = gets
puts "Hello, " + hello
The program prints the message Who do you want to say hello
to? The gets method reads what you type and
assigns it to the hello variable. puts prints Hello, plus whatever is held in hello, to the standard output (your computer display, by default). Run the
program, then type your answer to the question.
$ matz.rb
Who do you want to say hello to? Matz!
Hello, Matz!Methods
You’ve had a chance to use a few methods like system and eval; now you’ll define your
own method with def/end:
defhello puts "Hello, Matz!"endhello# => Hello, Matz!
The method called hello contains a single statement
that prints Hello, Matz!. To see it in action, call the
method by invoking its name, hello.
The block
Redefine hello so that it contains only a yield statement, then call the new version of hello with a block (the code in
braces).
def helloyieldend hello{ puts "Hello, Matz!" }# => Hello, Matz!
The yield statement executes the block of code in
braces (that is, { puts "Hello, Matz!" }) associated
with the method call to hello. You’ll learn more about
blocks in the section "Blocks" in Chapter 2.
The each Method
Let’s go a step further. Let’s print all the elements in an array using the each method followed by a block:
[ "Hello, ", "Matz!"].each { |e| print e }An array is an ordered list of elements. The method each uses a block—again, the code enclosed in braces—to iterate over, or
repeatedly process, all the elements in the array. The |e| represents the elements fed from the array; the print e statement prints each element in the array. You’ll learn much more
about arrays in Chapter 6.
The proc
You can convert a block into an object. This object is called a
proc (procedure). The nice thing about procs is that they preserve
their execution environment and pack it along with them. The lambda method is one way to create a proc object. I’ll use it here to create
a now familiar greeting.
prc = lambda { |name| puts "Hello, " + name }The proc is stored in prc as the result of a call
to lambda, which stores the block as an object. You can
now call the proc with an argument; call executes the
proc with an argument, yielding a string.
prc.call "Matz!" # => Hello, Matz!You’ll learn more about procs in the section "Procs" in Chapter 2.
XML
For XML processing, REXML is built into Ruby. Use it to greet the revered founder of our feast, as shown in Example 1-1 and Example 1-2.
#!/usr/bin/env ruby

require "rexml/document"

file = File.new( "matz.xml" )
doc = REXML::Document.new file
puts doc.to_s
When you run it, the program grabs the XML file matz.xml and displays it.
The Class
Use the class Hello to greet Matz, as shown in
Example 1-3.
class Hello

  def initialize( name )
    @name = name
  end

  def hello_matz
    puts "Hello, " + @name + "!"
  end

end

hi = Hello.new( "Matz" )
hi.hello_matz # => Hello, Matz!
You’ll learn a bit about classes in Chapter 2. Chapter 9 is dedicated to bringing you fully up to speed on Ruby classes.
The Tk Toolkit
Create a graphical version of “Hello, Matz!” with the Tk toolkit (see http://www.tcl.tk/), as shown in Example 1-4.
#!/usr/bin/env ruby

require 'tk'
hello = TkRoot.new
TkLabel.new( hello ) do
    text "\n  Hello, Matz!  \n"
    pack
end
Tk.mainloop
The require method loads the Tk library. The next line creates a new TkRoot object called hello.
TkLabel.new adds a label to that object with the text
Hello, Matz!. Tk.mainloop makes the graphical event happen, displaying the graphic shown in
Figure 1-1. You can run the program by
typing the following at a shell prompt:
matz_tk.rb &The & puts the process in the background on a
Unix/Linux system. You’ll learn more about the Tk
library and other graphical user interfaces in the section "Using Tk" in
Chapter 10.

Editing and Running Ruby in TextMate
If you own a Mac, you will get more joy out of life if you get yourself a copy of TextMate. (Download a free trial or pay for a copy at http://www.macromates.com.)
TextMate has language bundles that make editing in a given language—such as HTML, C, Java, Python, Ruby, and Rails—a snap. Other IDEs have similar features, for sure, and I don’t spend any energy knocking them, in public or private. The difference to me is that TextMate is elegant; it doesn’t overwhelm you with complex features. It’s there to help without getting in your way.
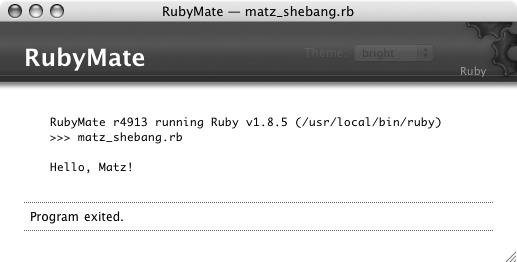
Figure 1-2 shows a version of matz.rb open for editing in TextMate. To run this program in TextMate, I simply type Command-R, and the results appear in a separate window (RubyMate), shown in Figure 1-3.

Here are a few of the Ruby shortcuts in TextMate:
Insert Ruby templates to make file creation quicker.
Insert Ruby keywords, such as
beginorif, followed by a tab, and TextMate completes the typing for you.Execute a single line as Ruby with Control-Shift-E. This inserts the result right into the file. You can do this in other files, too (HTML files, for example).
Validate syntax, without running the program, with Control-Shift-V.
Place the cursor on a Ruby keyword or method name, then enter Control-H to get documentation on that term.
Interactive Ruby
Interactive Ruby, or irb, is an interactive command-line environment for Ruby, allowing you to see results (or errors) after you enter each statement. When you install Ruby, you get irb along with it.
Start out by typing this at a prompt:
$ irb -v
In return, you should get irb’s version number:
irb 0.9.5(05/04/13)
If irb is present, you are ready to go; if it isn’t, go to the section "Installing Ruby,” later in this chapter, and follow the instructions.
When you enter irb at a shell prompt, you will get the irb prompt. Type a Ruby statement at the prompt, and then press the Return or Enter key:
irb(main):001:0> puts "Hello, Matz! "
Hello, Matz!
=> nil
Tip
nil, set off by => in the output of irb, is a value returned by the
method puts. nil has
a special meaning in Ruby. It denotes empty and always means false.
puts prints out the string Hello, Matz!, followed by a newline character.
Tip
The newline character varies, depending on your platform. On Mac OS X and Unix/Linux
systems, it is an LF (linefeed) character; on Microsoft
Windows, it’s CR+LF
(a carriage return character followed by a linefeed).
As mentioned earlier, you can assign a string, or just about any other value, to a name
(variable), and then reuse it. In the following command, Hello,
Matz! is assigned to the name hi and printed
by puts:
irb(main):002:0> hi = "Hello, Matz!" => "Hello, Matz! " irb(main):003:0> puts hi Hello, Matz! => nil
Print out hi three times:
irb(main):004:0> puts hi * 3 Hello, Matz! Hello, Matz! Hello, Matz! => nil
You can do some simple math:
irb(main):006:0> 10 + 10 => 20 irb(main):007:0> 4 * 5 => 20 irb(main):008:0> 100 / 5 => 20 irb(main):009:0> 50 - 30 => 20 irb(main):010:0> 80 % 60 => 20
We could go on and on. irb is a great environment for playing around with Ruby and learning how it works because you always get immediate feedback with every step you take.
You’ll have opportunities to fire up irb later in the book. In fact, you can use irb to run any Ruby program that you find here.
Resources
You can find a lot about Ruby at the official Ruby site, http://www.ruby-lang.org. There you can find news, downloads, tutorials, as well as documentation, mailing lists, and other good stuff. Ruby Central, Inc. (http://www.rubycentral.org) runs the annual International Ruby Conference (http://www.rubycentral.org/conference). It usually gets sold out way early, so plan accordingly.
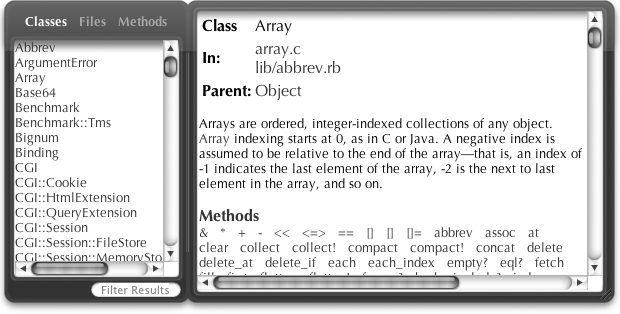
Aside from the documentation page on ruby-lang.org (http://www.ruby-lang.org/en/documentation), http://www.ruby-doc.org is a great place to hunt down information on all things Ruby. RDoc is a tool that generates documentation from Ruby source code. You can find the Ruby core documentation produced by RDoc at http://www.ruby-doc.org/core. On the Mac (Tiger or later), a good tool for looking things up quickly is the RDoc widget for Dashboard (see Figure 1-4), thanks to Precision Information Services (http://www.precisionis.com.au). You can download the widget from http://www.apple.com/downloads/dashboard/developer/rubyrdocwidget.html.
Ruby-Talk is the most popular general Ruby mail list. To sign up (easily), go to http://www.ruby-lang.org/en/community/mailing-lists. You’ll also see several other lists at this site. For a more complete list of mail groups, including lists in languages besides English, see http://www.ruby-forum.com.
RubyForge (http://rubyforge.org) is the host of a growing number of open source Ruby projects. Some of the more popular projects include Mongrel, a fast HTTP server (http://rubyforge.org/projects/mongrel), RubyGems (http://rubyforge.org/projects/rubygems), a dead-simple tool for installing Ruby packages, and Instant Rails (http://rubyforge.org/projects/instantrails), a single-step Windows installer that includes Ruby, Rails, Apache, and MySQL. The Ruby Application Archive (RAA) at http://raa.ruby-lang.org predates RubyForge and is still a popular site for hosting Ruby projects—more than 1,500 and counting.
For future reading, check out Dave Thomas’s Programming Ruby, Second Edition, published by Pragmatic (see http://www.pragmaticprogrammer.com/titles/ruby/index.html or http://www.oreilly.com/catalog/0974514055/index.html). This book, often referred to as the pickaxe book (for the pickaxe on its cover), is well-written and as complete it could possibly be. You won’t be disappointed. You can also find a free, online version of the first edition at http://www.rubycentral.com/book.
Hal Fulton’s The Ruby Way (Addison-Wesley) is also now in its second edition (http://www.samspublishing.com/bookstore/product.asp?isbn=0672328844&rl=1). It has also been well-received and is a worthwhile investment. Other books exist, and many more are on the way—too many to list (see http://www.ruby-lang.org/en/documentation/book-list)—but I note Dave and Hal’s books because they were in the game early, and are still in it.
Oh, and before I forget, you can’t be a complete Ruby programmer until you’ve read why’s (poignant) guide to Ruby, by why the lucky stiff. That’s his moniker. (I don’t know his real name. Frankly, I don’t want to know his “real” name. It would spoil the fun.) why’s guide is the funniest technical book I’ve ever read, and I highly recommend it. You’ll find it at http://poignantguide.net/ruby.
Installing Ruby
Ruby is available on the major platforms. The following sections show you how to install Ruby on Mac OS X, Windows, and Linux. Ruby’s general download page is at http://www.ruby-lang.org/en/downloads. Most of you could likely figure out how to install Ruby just by following the links there, but the material here provides a little extra guidance.
Installation procedures are a moving target, and print media can’t keep up with electronic media. That means that some of this material may get out of sync with what’s happening out there on the Web, so I’ll be as generally specific as I can.
Installing Ruby on Mac OS X Tiger
As shipped, Tiger comes with an older version of Ruby. Which version depends on what release of Tiger you’re dealing with. The release of Tiger on my system at the moment is 10.4.8, which comes with version 1.8.2. You’ll want an updated version, as I did.
The simple way to install Ruby (and a boatload of other software) is with Locomotive (http://locomotive.raaum.org). For information on what comes with the Locomotive download (a dmg file), which includes Ruby on Rails, see http://locomotive.raaum.org/bundles.html. It might be more than you want to deal with. You can find a mirror at http://prdownloads.sourceforge.net/locomotive/Locomotive_2.0.8.dmg?download. Select a mirror and then follow the steps just like you would when installing any other dmg.
The purest form of installation, at least in my mind, is to download and compile the
source files. In other words, you download the file distribution for a given release, pull
the files out of the release archive, compile the files (those that need compilation), and
then copy those files to their proper directories. Those are the basic steps, but there
are a few tools to make this job easier, like configure
and make. We’ll take advantage of them here as we
install a new version of Ruby on Tiger (these steps could apply to a Linux installation as
well).
These steps may appear daunting at first, but they really are not. Just follow along and things will come together in the end.
You can find excellent instructions on installing Ruby on Tiger in Dan Benjamin’s “Building Ruby, Rails, LightTPD, and MySQL on Tiger” (http://hivelogic.com/articles/2005/12/01/ruby_rails_lighttpd_mysql_tiger). He covers installing more software than you need to install now; I’ll only use his steps for installing Ruby, and I’ll update those steps to include the latest versions of software.
You need to have XCode installed on your Mac for this install procedure to work. XCode is a set of programming tools from Apple. You can learn about it at http://www.apple.com/macosx/features/xcode and download it from http://developer.apple.com/tools/download. The download instructions are easy to follow.
As shipped, Tiger has some issues with Ruby (see http://wiki.rubyonrails.com/rails/pages/HowtoInstallOnOSXTiger). One way to
resolve some of the problems is by downloading and installing readline (http://tiswww.tis.case.edu/~chet/readline/readline.html), which lets you do
command-line editing (irb uses readline). Here are the steps for downloading and installing
readline:
Go to ftp://ftp.gnu.org/gnu/readline to find the latest version (5.2 at this writing) and download it. (I put source archives in the directory /usr/local/src on my Mac so I can keep track of them.) You can avoid using the browser or FTP. Just use
curl(http://curl.haxx.se). The-Ooption takes the last part of the URL to create a desination filename.$ curl -O ftp://ftp.gnu.org/gnu/readline/readline-5.2.tar.gz
Extract the archive with
tar(xmeans extract,zmeans gunzip,vmeans verbose,fmeans use file archive):$ tar xzvf readline-5.2.tar.gz
Change directories:
$ cd readline-5.2
Run
configure(generated fromAutoconf, a tool that produces shell scripts for configuring software packages), replacing{$prefix}with/usr/local:$ ./configure --prefix=/usr/local
Run
make, a tool for building applications. This compiles the source files, and gets things ready to install. You can test the results, too:$ make $ make test
Finally, install:
$ make install
If you have not logged in as root, you can assume superuser powers by prefixing this command with the
sudoutility (http://www.sudo.ws), which will require a password:$ sudo make install
The steps to install Ruby are very similar:
While in
/usr/local/src, grab the archive for the latest version of Ruby (1.8.6 at this writing):$ curl -O ftp://ftp.ruby-lang.org/pub/ruby/ruby-1.8.6.tar.gz
Extract the archive:
$ tar xzvf ruby-1.8.6.tar.gz
Change directories:
$ cd ruby-1.8.6
Run
configure(enabling POSIX threads, withreadline):$ ./configure --prefix=/usr/local --enable-pthread --with-readline-dir=/usr/local
Run
makeand then test it:$ make $ make test
Install the software:
$ make install
You may need the
sudoutility (http://www.sudo.ws/), which will require a password):$ sudo make install
Then install the documentation:
$ make install-doc
or:
$ sudo make install-doc
Place /usr/local/bin in the path if it is not already. If you don’t know how to do this, see the sidebar "Setting Up the Path Environment,” later in this chapter.
Now test to make sure Ruby is in place:
$ ruby -v
You should get this happy reply:
$ ruby 1.8.6 (2007-03-13 patchlevel 0) [powerpc-darwin8.9.0]
Alrighty then. You are ready to roll with Ruby on Mac OS X.
Installing Ruby on Windows with the One-Click Installer
It’s easy to install Ruby on Windows with the One-Click Installer, available on RubyForge at http://rubyforge.org/projects/rubyinstaller. Here are the steps:
Go to the Ruby download site and click on the link labeled “1.8.6 One-Click Installer (or later),” or go to the One-Click Installer site and click the Download link. Click on the latest executable, which is ruby186-25.exe at this writing.
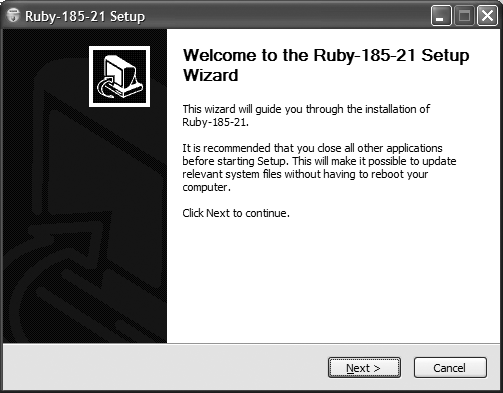
Open the executable. An install wizard will appear (see Figure 1-5). You’ll have a chance to include other goodies in the download, such as the SciTE editor (http://www.scintilla.org/SciTE.html). Also, be sure to enable RubyGems when asked, as it is installed by default, and you’ll no doubt want use it later.
Select a destination folder (such as C:\Ruby or C:\"Program Files"\Ruby). If you try to install over an older version of Ruby, you’ll be asked to uninstall the old version first.
Add the new Ruby bin directory to your path; for example, if your Ruby directory is C:\Ruby, add C:\Ruby\bin to your path (see the sidebar "Setting Up the Path Environment,” later in this chapter, if you don’t know how to do this; it’s OK to set up the path after the installation).
After you install Ruby, open a DOS window and type this line:
$ ruby -v
You should get something like the following response:
$ ruby 1.8.6 (2007-03-13 patchlevel 0) [i386-mswin32]
Check your system path variable and make sure it contains the path to the Ruby binaries in the bin directory. The One-click installer should take care of all this for you, however.
Installing Ruby on Windows with Binaries
Installing Ruby using binaries (precompiled executables) is just as easy as using the One-Click Installer. I think it is, anyway. Here are the steps I suggest:
Decide where you want to install the Ruby files—for example, C:\Ruby or C:\"Program Files"\Ruby.
Download the stable binary ZIP archive for the latest release of Ruby (1.8.6 at this writing). Go to the Ruby download page at http://www.ruby-lang.org/en/downloads, and find the “Ruby on Windows” section, then click the link Ruby 1.8.6 Binary. Or you can just point to ftp://ftp.ruby-lang.org/pub/ruby/binaries/mswin32/ruby-1.8.5-i386-mswin32.zip (or latest version) in a browser. This will download the file archive.
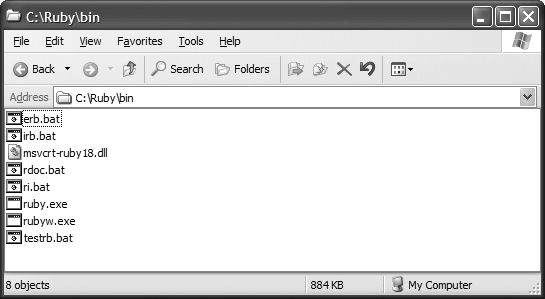
Open the archive (ruby-1.8.6-i386-mswin32.zip or later) with Windows Explorer, and then extract it to the directory you set up in step 1 (see Figure 1-6).
Place the new Ruby bin directory in your path; for example, if your Ruby directory is C:\Ruby, add C:\Ruby\bin to your path (see the sidebar "Setting Up the Path Environment,” later in this chapter, if you don’t know how to do this).
After you install Ruby, open a DOS window and type:
$ ruby -v
If you don’t get something like the following answer, check your system path variable and make sure it contains the path to the Ruby binaries in the bin directory:
$ ruby 1.8.6 (2006-08-25) [i386-mswin32]
Installing Ruby on Linux
The installation steps I discussed for installing Ruby on Mac OS X from source will also work for Linux, but I will just mention a few other options here. If you know Linux, you’ll know what I am talking about.
If you’re running Red Hat (http://www.redhat.com), you can find the latest version of Ruby at RPM Find (http://rpmfind.net/linux/rpm2html/search.php?query=Ruby) and then use
rpmto install it.On Debian (http://www.debian.org), you can use
apt-get(http://www.debian.org/doc/manuals/apt-howto).On Gentoo (http://www.gentoo.org), use
emerge(http://www.gentoo.org/doc/en/handbook/handbook-x86.xml?part=2&chap=1).
Permission Denied
If you are new to using the shell on Mac OS X or Linux, what do you do when you get a message like this?
-bash: ./matz.rb: Permission denied
This reply most likely means that the file is not set up as an executable. To fix this,
change the access control on the file using the chmod
command by typing:
chmod 755 matz.rb
755 makes the control list read rwxr-xr-x (where r means
read, w write, and x
execute). This means that the file is readable and executable by everyone (owner, group, and
others, in that order), but writable only by the owner. To find out more about chmod, type man chmod at a
shell prompt.
Associating File Types on Windows
This section is for those who use Windows and have never associated a file type before. If this is a familiar topic to you or you are on a different platform, you can skip it.
On its own, Windows doesn’t know or care about shebang (#!), which allows the program to execute by merely invoking its name in a shell
on Unix/Linux systems. However, you can achieve a similar effect to shebang by creating a
file type association with the assoc and ftype commands on Windows.
Tip
If you used the One-Click Ruby Installer for installing Ruby on Windows, the following was performed automatically for you, behind the scenes.
First, find out if an association exists for .rb
with the assoc command:
C:\Ruby Code>assoc .rb
File association not found for extension .rbIt’s not found, so associate the .rb extension with a file type:
C:\Ruby Code>assoc .rb=rbFileTest to see if the association exists now:
C:\Ruby Code>assoc .rb
.rb=rbFileTest to see if the file type exists:
C:\Ruby Code>ftype rbfile
File type 'rbfile' not found or no open command associated with it.C:\Ruby Code>ftype rbfile="C:\Program Files\Ruby\bin\ruby.exe" "%1" %*Be sure to put the correct path to the executable for the Ruby interpreter, followed by
the substitution variables. %1 is a substitution variable
for the file you want to run, and %* accepts all other
parameters that may appear on the command line. Test it:
C:\Ruby Code>ftype rbfile
rbfile="C:\Program Files\Ruby\bin\ruby.exe" "%1" %*Finally, add .rb to the PATHEXT environment variable. Is it there already?
C:\Ruby Code>set PATHEXT PATHEXT=.COM;.EXE;.BAT;.CMD;.VBS;.VBE;.JS;.JSE;.WSF;.WSH;.tcl
No. What we want isn’t there, so let’s add it:
C:\Ruby Code>set PATHEXT=.rb;%PATHEXT%And then test it:
C:\Ruby Code>set PATHEXT
PATHEXT=.rb;.COM;.EXE;.BAT;.CMD;.VBS;.VBE;.JS;.JSE;.WSF;.WSH;.tclVery good. Now run a Ruby program by entering the program’s filename at the command prompt, without the file extension:
C:\Ruby Code> matz
Hello, Matz!To preserve these settings, you can add these commands to your autoexec.bat file or set the environment variables by selecting Start → Control Panel → System, clicking on the Advanced tab, and then clicking the Environment Variables button.
Review Questions
Ruby came out in 1995. What other programming language was released to the public that year?
Is everyone who writes a programming book morally or otherwise obligated to write a “Hello, World!” program?
What does the abbreviation irb stand for?
What is Ruby’s killer app?
What is the name of the funny book on Ruby?
Who wrote the pickaxe book?
What’s one of the author’s favorite programming environments on the Mac?
Get Learning Ruby now with the O’Reilly learning platform.
O’Reilly members experience books, live events, courses curated by job role, and more from O’Reilly and nearly 200 top publishers.

