Chapter 1. Cocoa Development Tools
Developing applications using Cocoa and Cocoa Touch involves the use of a set of tools developed by Apple. In this chapter, youâll learn about these tools, where to get them, how to use them, how they work together, and what they can do.
These development tools have a long and storied history. Originally a set of standalone application tools for the NeXTSTEP OS, they were adopted by Apple for use as the official OS X tools. Later, Apple largely consolidated them into one application, known as Xcode, though some of the applications (such as Instruments and the iOS Simulator) remain separate, owing to their relatively peripheral role in the development process.
In addition to the development applications, Apple offers memberships in its Developer Programs (formerly Apple Developer Connection), which provide resources and support for developers. The programs allow access to online developer forums and specialized technical support for those interested in talking to the framework engineers.
Now, with the introduction of Appleâs curated application storefronts for OS X and iOS, these developer programs have become the official way for developers to provide their credentials when submitting applications to the Mac App Store or iTunes App Storeâin essence, they are your ticket to selling apps through Apple. In this chapter, youâll learn how to sign up for these programs, as well as how to use Xcode, the development tool used to build apps for OS X and iOS.
The Mac and iOS Developer Programs
Apple runs two developer programs, one for each of the two platforms you can write apps on: iOS and OS X.
You need to have a paid membership to the iOS developer program if you want to run code on your iOS devices because signing up is the only way to obtain the necessary code-signing certificates. (At the time of writing, membership in the developer programs costs $99 USD per year, per program.) It isnât as necessary to be a member of the Mac developer program if you donât intend to submit apps to the Mac App Store (you may, for example, prefer to sell your apps yourself). However, the Mac developer program includes useful things like early access to the next version of the OS, so itâs worth your while if youâre serious about making apps. Downloading Xcode is free, even if you arenât a member of either developer program.
Both programs provide, among a host of other smaller features:
Access to the Apple Developer Forums, which are frequented by Apple engineers and designed to allow you to ask questions of your fellow developers and the people who wrote the OS.
Access to beta versions of the OS before they are released to the public, which enables you to test your applications on the next version of OS X and iOS and make necessary changes ahead of time. You also receive beta versions of the development tools.
A digital signing certificate (one each for OS X and iOS) used to identify you to the App Stores. Without this, you cannot submit apps for sale, making the programs mandatory for anyone who wants to release software either for free or for sale via the App Store.
As a developer, you can register for one or both of the developer programs. They donât depend on one another.
Finally, registering for a developer program isnât necessary to view the documentation or to download the current version of the developer tools, so you can play around with writing apps without opening your wallet.
Registering for a Developer Program
To register for one of the developer programs youâll first need an Apple ID. Itâs quite likely that you already have one, since the majority of Appleâs online services require one to identify you. If youâve ever used iCloud, the iTunes store (for music or for apps), MobileMe, or Appleâs support and repair service, you already have an ID. You might even have more than one (one of the authors of this book has four). If you donât yet have an ID, youâll create one as part of the registration process. When you register for a program, it gets added to your Apple ID.
To get started, visit the Apple site for the program you want to join.
For the Mac program, go to http://developer.apple.com/programs/mac/.
For the iOS program, go to http://developer.apple.com/programs/ios/.
Simply click through the steps to enroll.
You can choose to register as an individual or as a company. If you register as an individual, your apps will be sold under your name. If you register as a company, your apps will be sold under your companyâs legal name. Choose carefully, as itâs very difficult to convince Apple to change your programâs type.
If youâre registering as an individual, youâll just need your credit card. If youâre registering as a company, youâll need your credit card as well as documentation that proves that you have authority to bind your company to Appleâs terms and conditions.
Apple usually takes about 24 hours to activate an account for individuals, and longer for companies. Once youâve received confirmation from Apple, youâll be emailed a link to activate your account; when thatâs done, youâre a full-fledged developer!
Downloading Xcode from Apple Developer
To develop apps for either platform, youâll use Xcode, Appleâs integrated development environment. Xcode combines a source code editor, debugger, compiler, profiler, iPhone and iPad simulator, and more into one package, and itâs where youâll spend the majority of your time when developing applications.
There are two ways to download Xcode. If youâre running OS X Lion (10.7 or later), you can get Xcode from the Mac App Store. Simply open the App Store application and search for âXcode,â and itâll pop up. Itâs a free download, though itâs rather large (the current version is about 1.7GB at the time of writing).
If youâre running OS X Snow Leopard (10.6) or simply donât want to use the App Store, you can download Xcode from Appleâs site. Doing this requires enrollment in either of the developer programs. Visit http://developer.apple.com/xcode/ and sign in to your developer account to download the application. If youâre running Lion and want to download directly, visit https://developer.apple.com/downloads/ and search for âXcodeââyou can find the download link in the search results.
Once youâve downloaded Xcode, itâs straightforward enough to install it. The Mac App Store gives you an installer to double-click; if youâve downloaded it directly, you get a disk image to open, which contains the same installer. Follow the prompts to install.
Getting Around in Xcode
Xcode is designed around a single window. Each of your projects will have one window, which adapts to show what youâre working on.
To start exploring Xcode, youâll first need to create a project by following these steps:
Launch Xcode. Find Xcode by opening Spotlight (by pressing â-Spacebar) and typing
Xcode. You can also find it by opening the Finder, going to your hard drive, and opening the Applications directory. If you had any projects open previously, Xcode will open them for you. Otherwise, the Welcome to Xcode screen appears (Figure 1-1).Create a new project. Do this simply by clicking âCreate a new Xcode projectâ or go to FileâNewâProject.
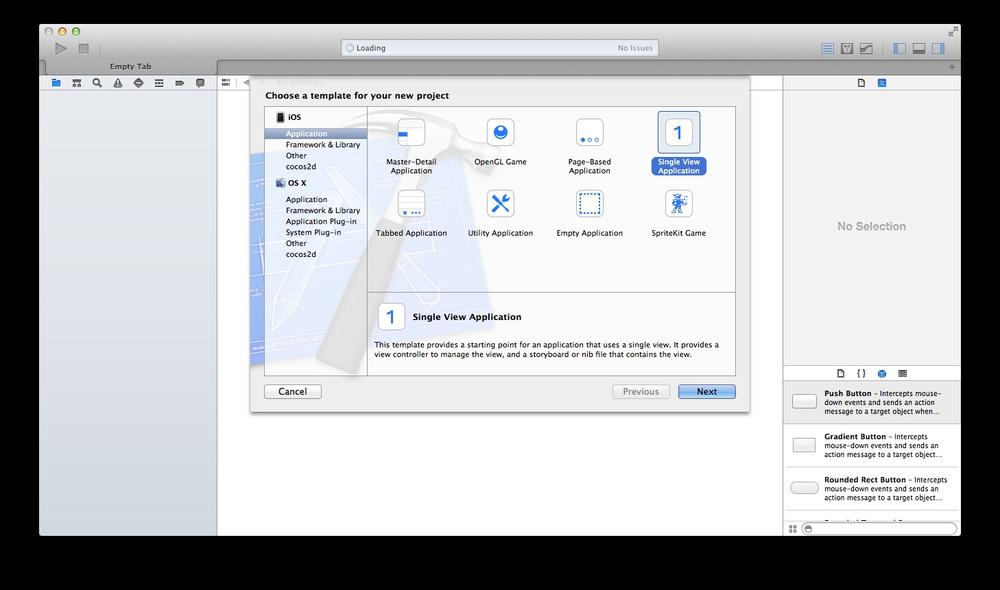
Youâll be asked what kind of application to create. The template selector is divided into two areas. On the lefthand side, youâll find a collection of categories that applications can be in. You can choose to create an iOS or Mac project template, which sets up a project directory that will get you started in the right direction.
Since weâre just poking around Xcode at the moment, it doesnât really matter, so choose Application under the OS X header and select Cocoa Application. This creates an empty Mac application.
Enter information about the project. Depending on the kind of project template you select, youâll be asked to provide different information about how the new project should be configured.
At a minimum, youâll be asked for the following info, no matter which platform and template you choose:
- The applicationâs name
This is the name of the project and is visible to the user. You can change this later.
- Your company identifier
This is used to generate a bundle ID, a string that looks like a reverse domain name. (For example, if OâReilly made an application named MyUsefulApplication, the bundle ID would be
com.oreilly.MyUsefulApplication.)Note
Bundle IDs are the unique identifier for an application, and are used to identify that app to the system and to the App Store. Because each bundle ID must be unique, the same ID canât be used for more than one application in either of the iOS or Mac App Stores. Thatâs why the format is based on domain namesâif you own the site
usefulsoftware.com, all of your bundle IDs would begin withcom.usefulsoftware, and you wonât accidentally use a bundle ID that someone else is using or wants to use because nobody else owns the same domain name.- The class prefix
Class prefixes are two- or three-letter codes that go on the front of your classes and prevent your class names from interfering with existing classes.
This means that a class called
Stringwith the class prefix ofLC(for âLearning Cocoaâ) would beLCString. Appleâs classes, for example, commonly useNSas their class prefixâtheirStringclass isNSString. Apple uses other prefixes as well.Since the release of Xcode 5, the class prefix is no longer a required field, however it is still good practice to use a class prefix for all your own code.

If youâre writing an application for the Mac App Store, youâll also be prompted for the App Store category (whether itâs a game, an educational app, a social networking app, and so on).
Depending on the template, you may also be asked for other information (for example, the file extension for your documents if you are creating a document-aware application such as a Mac app).
Creating Your First Cocoa Project
Follow the steps below to create a new iOS application project named HelloCocoa, which will help familiarize you with the Xcode environment.
Create a new Cocoa Touch application for iOS. Create your new project by choosing FileâNewâProject or pressing â-Shift-N. Choose Application from the iOS list, select Single View Application, and then click Next. This creates an app that has only one screen (Figure 1-2).
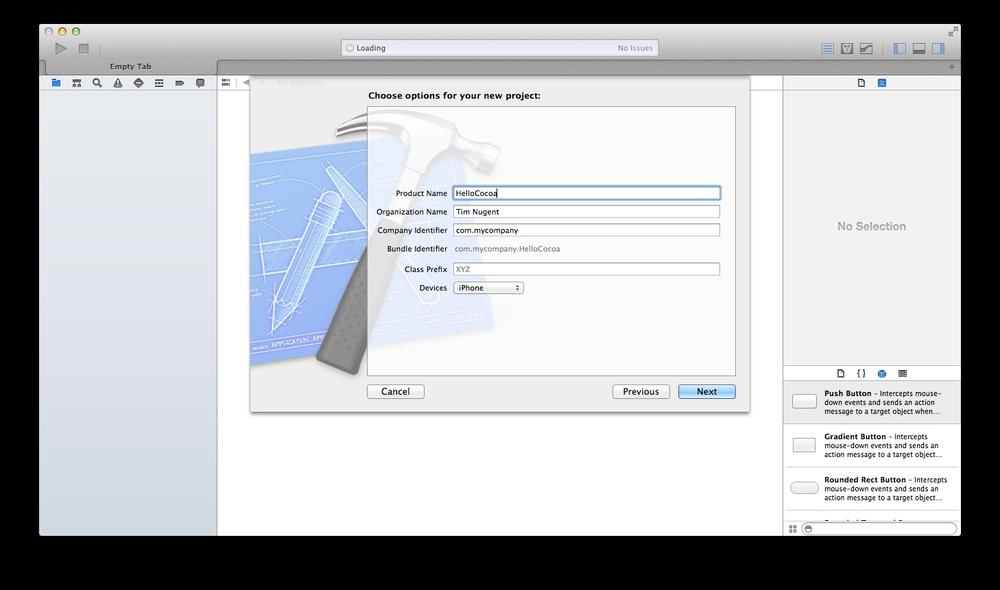
Name the application. Enter
HelloCocoain the Product Name section.Make the application run on the iPhone. Choose iPhone from the Devices drop-down list.
Note
iOS applications can run on the iPad, iPhone, or both. Applications that run on both are called âuniversalâ applications and run the same binary but have different user interfaces. For this exercise, just choose iPhone.
Set your company identifier. Enter your siteâs domain name backwards. So our domain name,
oreilly.com, would be entered ascom.oreilly.If you donât have a domain name, enter anything you like, as long as it looks like a backwards domain name.
com.mycompanywill do.Note
If you plan on releasing your app, either to the App Store or elsewhere, itâs very important to use a company identifier that matches a domain name you own. The App Store requires it, and the fact that the operating system uses the bundle ID that it generates from the company identifier means that using a domain name that you own eliminates the possibility of accidentally creating a bundle ID that conflicts with someone elseâs.
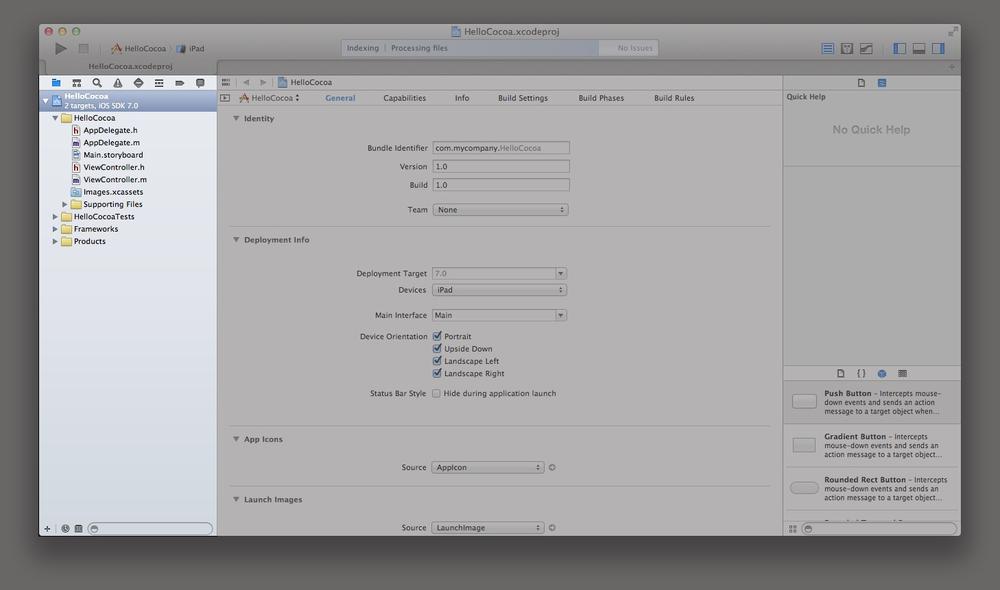
Click Next to create the project. Leave the rest of the settings as shown in Figure 1-3.
Choose where to save the project; youâll be asked where to put it. Choose a location that suits you.
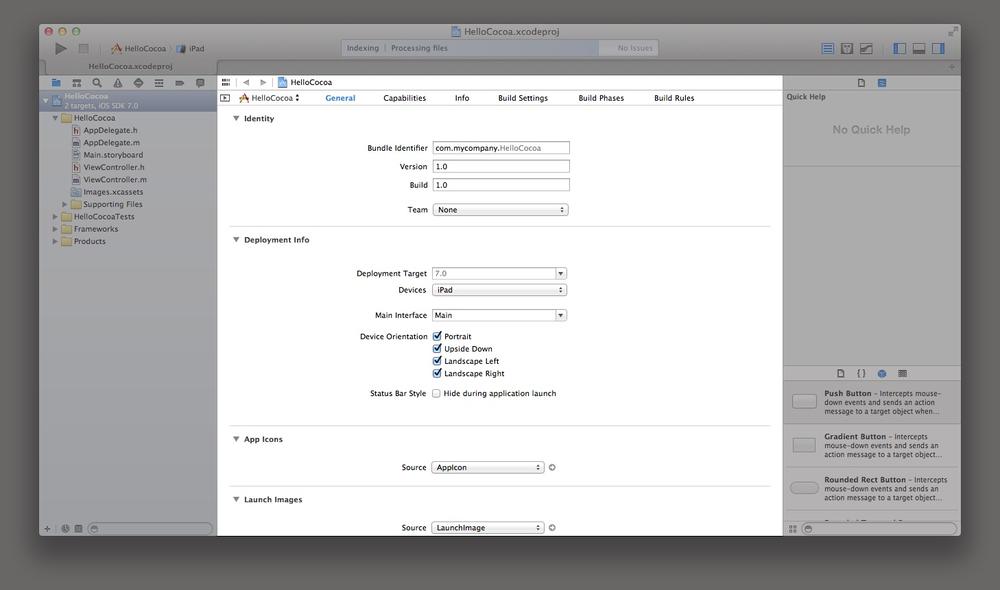
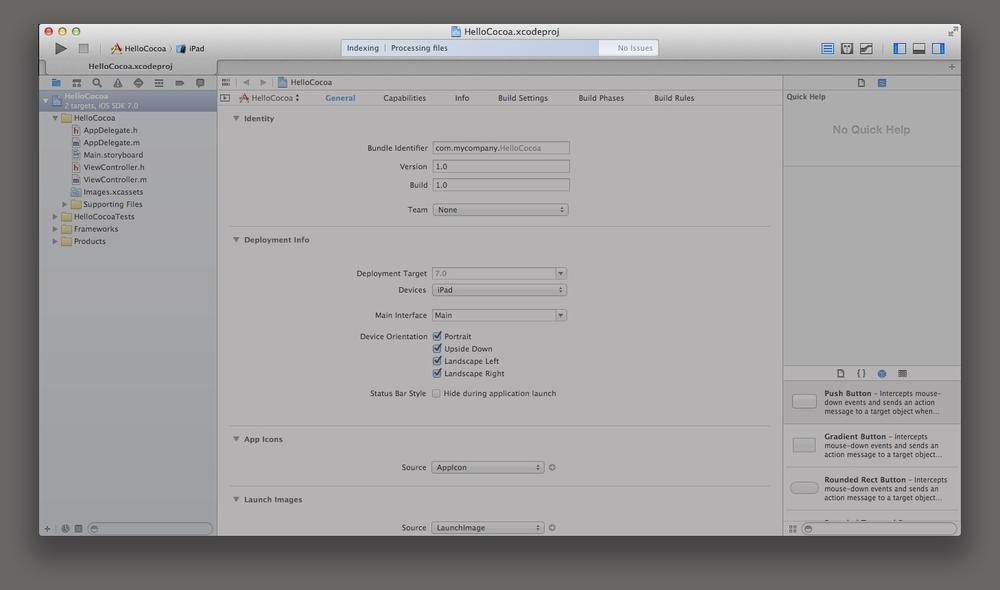
Once youâve done this, Xcode will open the project and you can now start using the entire Xcode interface (Figure 1-4).

The Xcode Interface
As mentioned, Xcode shows your entire project in one window, which is divided into a number of sections. You can open and close each section at will, depending on what you want to see.
Letâs take a look at each of these sections and examine what they do.
The editor
The Xcode editor (Figure 1-5) is where youâll be spending most of your time. All source code editing, interface design, and project configuration take place in this section of the application, which changes depending on which file you currently have open.
If youâre editing source code, the editor is a text editor, with code completion, syntax highlighting, and all the usual features that developers have come to expect from an integrated development environment. If youâre modifying a user interface, the editor becomes a visual editor, allowing you to drag around the components of your interface. Other kinds of files have their own specialized editors as well.
The editor can also be split into a main editor and an assistant editor. The assistant shows files that are related to the file currently open in the main editor. It will continue to show files that have that relationship to whatever is open, even if you open different files.
For example, if you open an interface file and then open the assistant, the assistant will, by default, show related code for the interface youâre editing. If you open another interface file, the assistant will show the code for the newly opened files.
You can also jump directly from one file in the editor to its counterpartâfor example, from an interface file to the corresponding implementation file. To do this, hit Control-â-Up Arrow to open the current fileâs counterpart in the current editor. You can also hit Control-â-Option-Up Arrow to open the current fileâs counterpart in an assistant pane.
The toolbar
The Xcode toolbar (Figure 1-6) acts as mission control for the entire interface. Itâs the only part of Xcode that doesnât significantly change as you develop your applications, and it serves as the place where you can control what your code is doing.
From left to right, the toolbar features the following items:
- Run button
Clicking this button instructs Xcode to compile and run the application.
Depending on the kind of application youâre running and your currently selected settings, this button will have different effects:
If youâre creating a Mac application, the new app will appear in the Dock and will run on your machine.
If youâre creating an iOS application, the new app will launch in either the iOS Simulator or on a connected iOS device, such as an iPhone or iPad.
If you click and hold this button, you can change it from Run to another action, such as Test, Profile, or Analyze. The Test action runs any unit tests that you have set up; the Profile action runs the application Instruments (see Chapter 16); the Analyze action checks your code and points out potential problems and bugs.
- Stop button
Clicking this button stops any task that Xcode is currently doingâif itâs building your application, it stops, and if your application is currently running in the debugger, it quits it.
- Scheme selector
Schemes are what Xcode calls build configurationsâthat is, whatâs being built and how.
Your project can contain multiple targets, which are the final build products created by your application. Targets can share resources like code, sound, and images, allowing you to more easily manage a task like building an iOS version of a Mac application. You donât need to create two projects, but rather have one project with two targets that can share as much code as you prefer.
To select a target, click on the lefthand side of the scheme selector.
You can also choose where the application will run. If you are building a Mac application, you will almost always want to run the application on your current Mac. If youâre building an iOS application, however, you have the option of running the application on an iPhone simulator or an iPad simulator. (These are in fact the same application that simply changes shape depending on the application that is run inside it.) You can also choose to run the application on a connected iOS device if it has been set up for development correctly.
- Status display
The status display shows what Xcode is currently doingâbuilding your application, downloading documentation, installing an application on an iOS device, and so on.
If there is more than one task currently in progress, a small button will appear on the lefthand side, which cycles through the current tasks when clicked.
- Editor selector
The editor selector determines how the editor is laid out. You can choose to display either a single editor, the editor with the assistant, or the versions editor, which allows you to compare different versions of a file if youâre using a revision control system.
- View selector
The view selector controls whether the navigator, debug, and detail views appear on screen. If youâre pressed for screen space or simply want less clutter, you can quickly summon and dismiss these parts of the screen by clicking each of the elements.
The navigator
The lefthand side of the Xcode window is the navigator, which presents information about your project (Figure 1-7).
The navigator is divided into seven tabs:
The project navigator gives you a list of all the files that make up your project. This is the most commonly used navigator, as it determines what is shown in the editor. Whatever is selected in the project navigator is opened in the editor.
The symbols navigator lists all the classes and functions that exist in your project. If youâre looking for a quick summary of a class or want to jump directly to a method in that class, the Symbols navigator is a handy tool.
The search navigator allows you to perform searches across your project if youâre looking for specific text. (The shortcut is â-Shift-F.)
The issue navigator lists all the problems that Xcode has noticed in your code. This includes warnings, compilation errors, and issues that the built-in code analyzer has spotted.
The test navigator shows all the unit tests associated with your project. Unit tests used to be an optional component of Xcode, but since Xcode 5âs release, unit tests are built into Xcode directly.
The debug navigator is activated when youâre debugging a program, and it allows you to examine the state of the various threads that make up your program.
The breakpoint navigator lists all of the breakpoints that youâve currently set for use while debugging.
The log navigator lists all the activity that Xcode has done with your project (such as building, debugging, and analyzing). Because logs donât get deleted, you can go back and view previous build reports at any time.
Utilities
The utilities pane (Figure 1-8) shows additional information related to what youâre doing in the editor. If youâre editing an interface, for example, the utilities pane allows you to configure the currently selected user interface element.
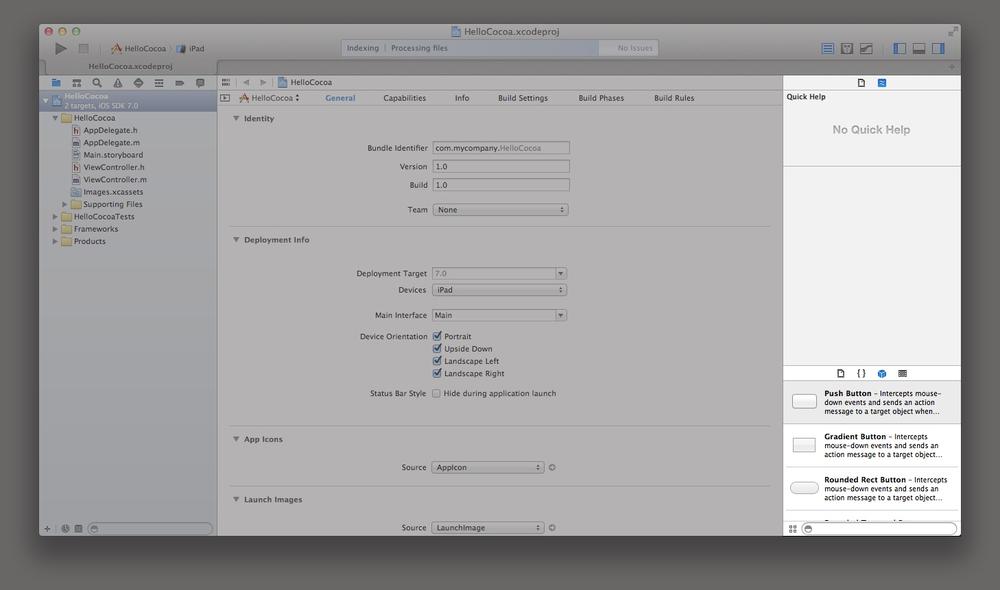
The utilities pane is split into two sections: the inspector, which shows extra details and settings for the currently selected item, and the library, which is a collection of items that you can add to your project. The inspector and the library are most heavily used when building user interfaces; however, the library also contains a number of useful items such as file templates and code snippets, which you can drag and drop into place.
The debug area
The debug area (Figure 1-9) shows information reported by the debugger when the program is running. Whenever you want to see what the application is reporting while running, you can view it in the debug area.
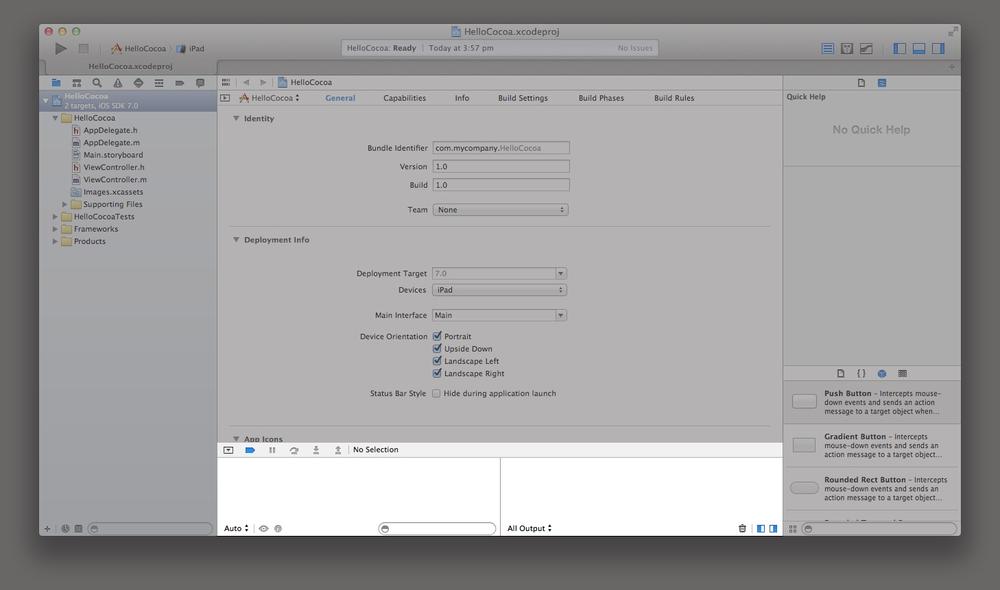
The area is split into two sections. The left section shows the values of local variables when the application is paused; the right section shows the ongoing log from the debugger, which includes any logging that comes from the debugged application.
Developing a Simple Objective-C Application
Letâs jump right into working with Xcode. Weâll begin by creating a simple iOS application and then connect it together. If youâre more interested in Mac development, donât worryâthe same techniques apply.
This sample application will display a single button that, when tapped, will pop up an alert and change the buttonâs label to Test!. Weâre going to build on the application we created in the section Getting Around in Xcode, so make sure that you have that project open.
Itâs generally a good practice to design the interface first and then add code. This means that your code is written with an understanding of how it maps to what the user sees.
To that end, weâll start by designing the interface for the application.
Designing the Interface
When building an applicationâs interface for iOS, you have two options. You can either design your applicationâs screens in a storyboard, which shows how all the screens link together, or you can design each screen in isolation. This book covers storyboards in more detail later; for now, this first application has only one screen, so it doesnât matter much either way.
Start by opening the interface file and adding a button:
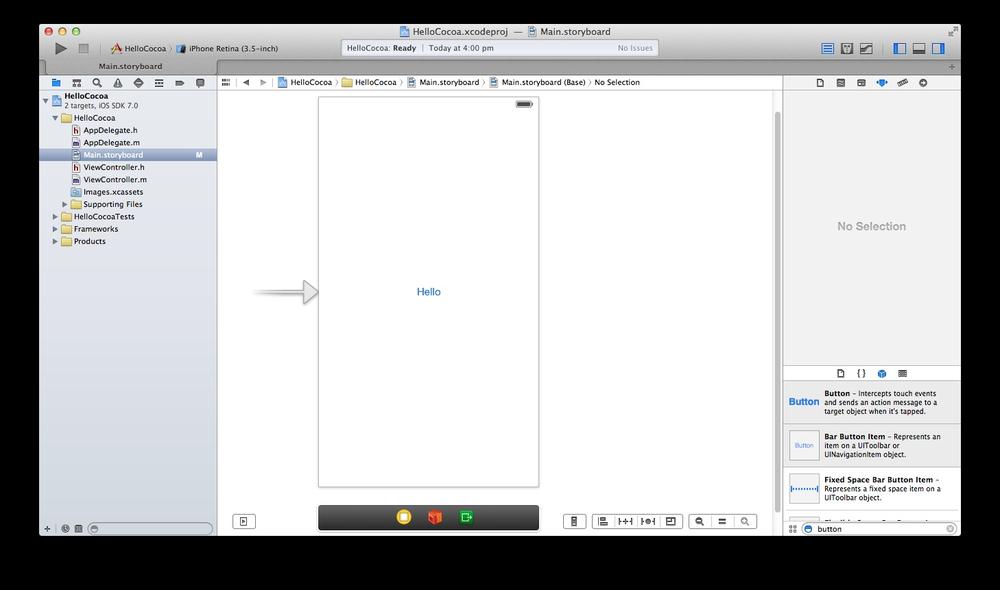
Open the main storyboard. Because newly created projects use storyboards by default, your appâs interface is stored in the file Main.storyboard.
Open it by selecting it in the project navigator. The editor will change to show the applicationâs single, blank screen.
Drag in a button. Weâre going to add a single button to the screen. All user interface controls are kept in the object library, which is at the bottom of the Details pane on the righthand side of the screen.
To find the button, you can either scroll through the list until you find Button, or type
buttonin the search field at the bottom of the library.Once youâve located it, drag it into the screen.
Configure the button. Every item that you add to an interface can be configured. For now, weâll only change the label.
Select the new button by clicking it, and select the Attributes inspector, which is the third tab to the left at the top of the Utilities pane. You can also reach it by pressing â-Option-4.
Change the buttonâs Title to
Hello!Note
You can also change the buttonâs title by double-clicking it in the interface.
Our simple interface is now complete (Figure 1-10). The only thing left is to connect it to code.
Connecting the Code
Applications arenât just interfacesâas a developer, you also need to write code. To work with the interface youâve designed, you need to create connections between your code and your interface.
There are two kinds of connections that you can make:
Outlets are variables that refer to objects in the interface. Using outlets, you can instruct a button to change color or size, or hide itself. There are also outlet collections, which allow you to create an array of outlets and choose which objects it contains in the Interface Builder.
Actions are methods in your code that are run in response to the user interacting with an object. These interactions include the user touching a finger to an object, dragging a finger, and so on.
To make the application behave as weâve described aboveâtapping the button displays a label and changes the buttonâs textâweâll need to use both an outlet and an action. The action will run when the button is tapped, and will use the outlet connection to the button to modify its label.
To create actions and outlets, you need to have both the interface editor and its corresponding code open. Then hold down the Control key and drag from an object in the interface editor to your code (or to another object in the interface editor, if you want to make a connection between two objects in your interface).
Note
The word interface has a double meaning in Cocoa programming. It refers to both the GUI that you design and to the publicly exposed methods and properties made available by Objective-C classes. For more information on this second meaning, see Interfaces and Implementations.
Weâll now create the necessary connections:
Open the assistant. To do this, select the second tab in the editor selector in the toolbar.
The assistant should show the corresponding code for interface ViewController.h. If it doesnât, click the small tuxedo icon (which represents the assistant) and navigate to AutomaticâViewController.h.
Create the buttonâs outlet. Hold down the Control key and drag from the button into the space between the
@interfaceand@endlines in the code.A pop-up window will appear. Leave everything as the default, but change the Name to
helloButton. Click Connect.A new line of code will appear: Xcode has created the connection for you, which appears in your code as a property in your class.
Create the buttonâs action. Hold down the Control key, and again drag from the button into the space between the
@interfaceand@endlines. A pop-up window will again appear.This time, change the Connection from
OutlettoAction. Change the Name toshowAlert. Click Connect.A second new line of code will appear. Xcode has created the connection, which is a method inside the
ViewControllerclass.Open ViewController.m by selecting it in the project navigator. You might want to close the assistant by selecting the leftmost tab in the editor selector in the toolbar.
Scroll down to the
showAlert:method. Youâll find it at the bottom of the file.Add in the new code. Select the entire method and delete it. Replace it with the following code:
-(IBAction)showAlert:(id)sender{UIAlertView*alert=[[UIAlertViewalloc]initWithTitle:@"Hello!"message:@"Hello, world!"delegate:nilcancelButtonTitle:@"Close"otherButtonTitles:nil];[alertshow];[self.helloButtonsetTitle:@"Click"forState:UIControlStateNormal];}
This code creates a UIAlertView, which displays a message to the user in a pop-up window. It
prepares it by setting its title to Hello and the text inside the window
to âHello, world!â The alert is then shown to the user. Finally, the
button has its title text changed to âClick.â
The application is now ready to run. Click the Run button at the top-left corner. The application will launch in the iPhone simulator.
Note
If you happen to have an iPhone or iPad connected to your computer, Xcode will by default try to launch the application on the device rather than in the simulator. To make Xcode use the simulator, go to the Scheme menu at the top-left corner of the window and change the currently selected scheme to the simulator.
When the app finishes launching in the simulator, tap the button. An alert will appear; when you close it, youâll notice that the buttonâs text has changed.
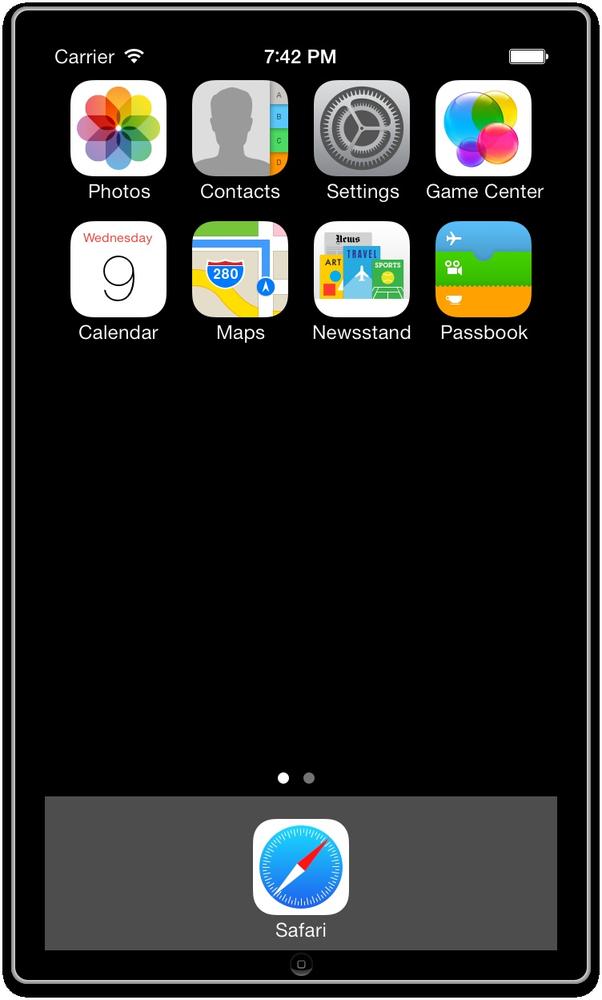
Using the iOS Simulator
The iOS Simulator (Figure 1-11) allows you to test out iOS applications without having to mess around with devices. Itâs a useful tool, but keep in mind that the simulator and a real device behave very differently.
For one thing, the simulator is a lot faster than a real device and has a lot more memory. Thatâs because the simulator makes use of your computerâs resourcesâif your Mac has 4GB of RAM, so will the simulator, and if youâre building a processor-intensive application, it will run much more smoothly on the simulator than on a real device.
The iOS Simulator is able to simulate five different kinds of devices: retina-display 3.5 inch iPhone-sized devices; retina-display 4 inch iPhone-sized devices; retina-display, 64-bit 4 inch iPhone-sized devices; and nonretina and retina-display iPad-sized devices.
To change the device, open the Hardware menu, choose Device, and select the device you want to simulate. You can also change which simulator to use via the Scheme selector in Xcode.
You can also simulate hardware events, such as the home button being pressed or the iPhone being locked. To simulate pressing the home button, you can either click the virtual button underneath the screen, choose HardwareâHome, or press â-Shift-H. To lock the device, press â-L or choose HardwareâLock.
Note
If thereâs no room on the screen, the simulator wonât show the virtual hardware buttons. So if you want to simulate the home button being pressed, you need to use the keyboard shortcut â-Shift-H.
There are a number of additional features in the simulator, which weâll examine more closely as they become relevant to the various parts of iOS weâll be discussing.
Get Learning Cocoa with Objective-C, 4th Edition now with the O’Reilly learning platform.
O’Reilly members experience books, live events, courses curated by job role, and more from O’Reilly and nearly 200 top publishers.

