Marking the Seams
The first step to unwrap will be to mark the seams to tell Blender from where you want your UVs to be unfolded. In Edit Mode (Tab), select the edges shown in Figure 8.5. You don’t need to mark them all at once; you can mark some of them now and then mark seams in other areas as you proceed. To mark edges as seams, press Ctrl + E to access the Edge menu and click Mark Seam.
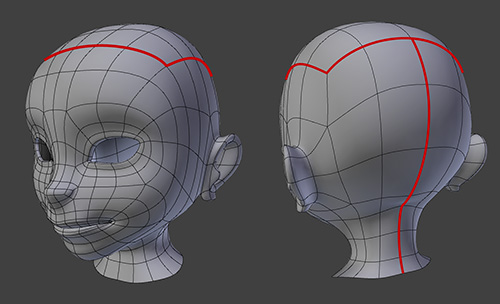
Figure 8.5 Seams marked to unwrap Jim’s head (edges shown in red)
Pay attention to how the edges selected to be the seams of the UVs are placed in areas that won’t be very visible; they appear on the back and sides of the head, and over the forehead, where ...
Get Learning Blender: A Hands-On Guide to Creating 3D Animated Characters now with the O’Reilly learning platform.
O’Reilly members experience books, live events, courses curated by job role, and more from O’Reilly and nearly 200 top publishers.

