Adding Details to the Cap
Now that we have the cap’s base and visor, let’s keep going and add some details to them! The steps for this are shown in Figure 7.25.
10. Move the sides of the cap’s visor back until there is no empty space between them and the cap’s body.
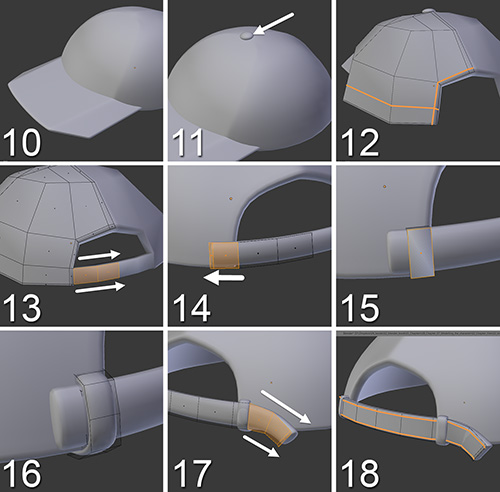
Figure 7.25 Adding some cool details to Jim’s cap
11. Create a little sphere, scale it on the Z-axis, and place it at the top of the cap.
12. Go back to the cap’s body and use the Knife tool (K) to create a new loop around the hole at the back of the cap. If you have to create some triangles to perform that cut, do so and merge the vertices afterward to leave only quads. Also, create ...
Get Learning Blender: A Hands-On Guide to Creating 3D Animated Characters now with the O’Reilly learning platform.
O’Reilly members experience books, live events, courses curated by job role, and more from O’Reilly and nearly 200 top publishers.

