Creating and Configuring the Custom HTML Module
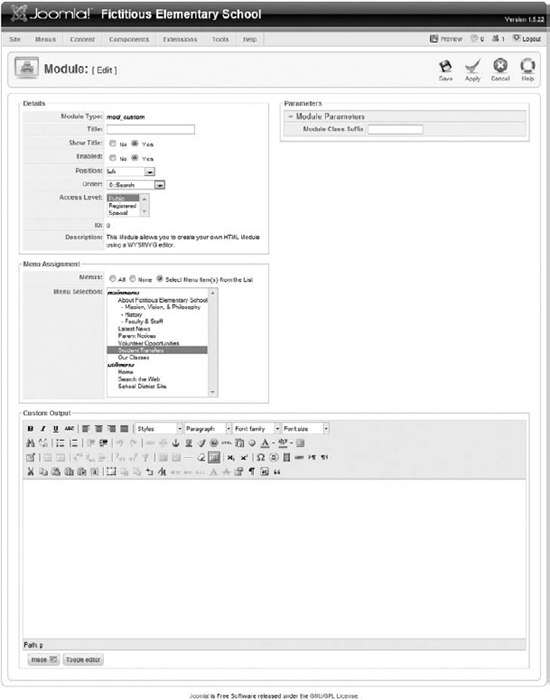
To create the custom HTML module, go to Extensions ![]() Module Manager, click the New button in the upper right, and select Custom HTML from the list of modules. You should see a screen similar to Figure 22-1.
Module Manager, click the New button in the upper right, and select Custom HTML from the list of modules. You should see a screen similar to Figure 22-1.
On the left side of the screen, enter We Welcome Your Child! for Title, and choose Yes for Show Title, Yes for Enabled, and right for Position. Set the module to appear only on the Student Transfers page of the site.
FIGURE 22-1

![]() Remember that all modules have the same configuration options on the left side of the screen. These options are covered in detail in Lesson 18 if you need more information about setting them up.
Remember that all modules have the same configuration options on the left side of the screen. These options are covered in detail in Lesson 18 if you need more information about setting them up.
Scroll down just under the Menu Assignment area, and you will see a box for Custom Output. This looks very much like the box you use for article entry, and it works the same way.
Enter some text into the box. On my site, I entered the following:
We welcome your child's enrollment to Fictitious Elementary! We'll try to make the process as simple as possible for you, and we'll make sure your child is adjusting to his or her new school.
You can format this text if you wish, or add links, images, or anything else you ...
Get Joomla!® 24-Hour Trainer now with the O’Reilly learning platform.
O’Reilly members experience books, live events, courses curated by job role, and more from O’Reilly and nearly 200 top publishers.

