Handy as it might be to have some prefab layouts for simple documents like letters and envelopes, Pages templates really shine in projects requiring more lavish layouts. The Newsletters category of page-layout templates, for example, offers a particularly rich collection of starter documents to create your own news bulletin.
Here’s an example newsletter project to tackle: Up & Away is Megaville’s leading outfitter for superheroes, providing essential gear (capes, utility belts, jet packs) and services (secret-identity counseling, sidekick placement, tights repair) to the city’s crime fighters. The shop’s quarterly newsletter features new items for sale as well as how-to articles and features about trends in the caped community. As editor, your superpower is newsletter design, and Pages is your secret weapon.
Launch Pages and, in the Template Chooser, click the Newsletters category under Page Layout; select your preferred template in the right pane. For this example, choose Extreme Newsletter; Pages fills your document window with a colorful full-page newsletter layout (Figure 1-8).
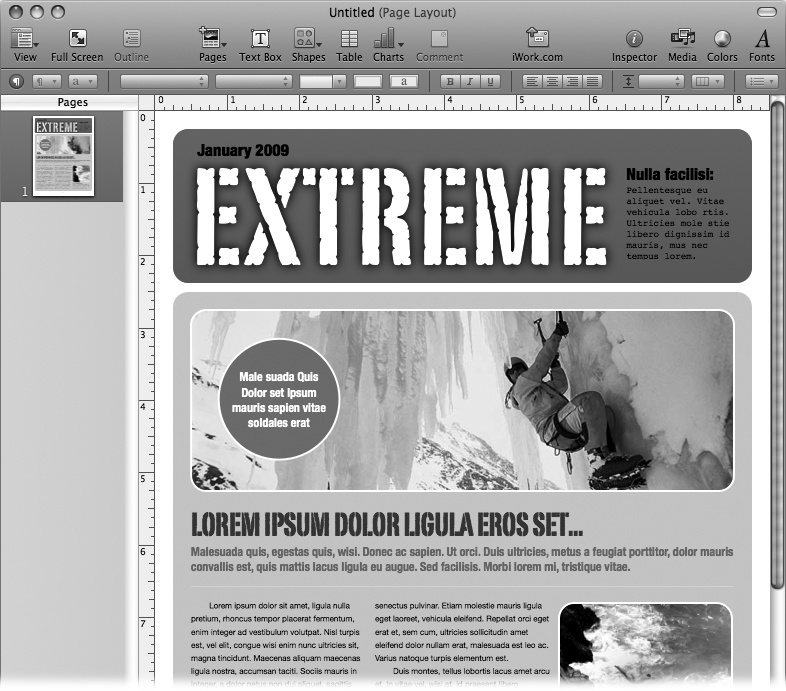
Figure 1-8. Page-layout documents feature lots of design elements, including text boxes, photos, and fields of color—quite a departure from traditional word-processing documents with a single primary text area.
As with the letter template you saw earlier, your new document includes placeholder text waiting to be replaced with your own words. This time, though, the page also includes sample pictures, called media placeholders, which you can swap out with your own photos or graphics. Also, while your letter consisted of a single body of text which filled the document window, this page-layout document has several text boxes, individual snippets of text carefully placed around the page.
With word-processing documents like a letter, you always have a single primary area for prose—the window itself is one big text area and you simply click in the document window and type. With page-layout documents like a newsletter, however, there’s no main text. Instead, the document is composed of a collection of design elements called objects: text, shapes, images, movies, and even sound. Each object is contained in its own little box which you can drag, resize, and layer inside the document. At the most basic level, working with a page-layout document is all about arranging these boxes into a balanced composition and filling them with words and pictures.
Chapters Chapter 6 and Chapter 7 explore the ins and outs of page layout and working with objects. For now, though, your newsletter template has given you a head start by providing a layout prestocked with objects. All that remains is to fill in your content.
To edit any text on the page, just click it. Clicking once selects the containing text box, which lets you work with the entire text block at once, as shown in Figure 1-9. Clicking the text box a second time lets you type and edit the text inside. For text boxes containing a template’s placeholder text, Pages highlights the entire text block when you click, and typing new text replaces the whole shebang. Give it a try:
Give your newsletter a title.
Click the title, “EXTREME,” to select it, and replace it with the name of your newsletter, Up & Away. Pages automatically displays your text in the same font and all-caps style. Whoops! It doesn’t fit—time to make the text smaller: Click to place the insertion point inside the title and choose Edit → Select All to highlight the text. Keep tapping ⌘-– (that’s ⌘-hyphen) to shrink the text until it fits.
Replace the text above the title.
Click the text and type, Outfitting Superheroes Since 1963.
Replace the right-column caption.
The text box to the right of the title contains a headline and caption text. Each section of text acts as separate placeholder text. Double-click the headline and type, In this edition. Now click the caption text and type in your own heroic text.
You get the idea. Just go through all the text boxes on the page and replace the template text with your own. With the text in place, you’re ready to add some eye-popping imagery.
Note
If you run out of space in a text box but keep pouring in more words, Pages snips the overflow and shows you a + symbol at the bottom of the text box. That’s the clipping indicator, which lets you know that there’s more text waiting in the wings. You’ll learn how to liberate this missing text on Continuing text from a previous page.
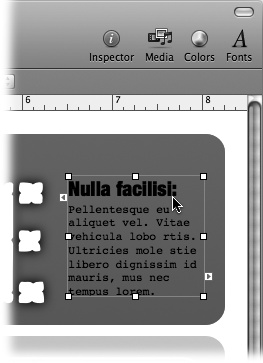
Figure 1-9. Clicking once on a text box selects the entire text box, allowing you to drag it to a new location or resize it by grabbing one of the eight square handles on the box around the selection. Click again inside the text to edit it, and click anywhere outside the box to deselect it. For more about selecting and editing text boxes, see Adding Objects.
Nearly all the page-layout templates contain placeholder images that you can replace with your own pictures (Figure 1-10).
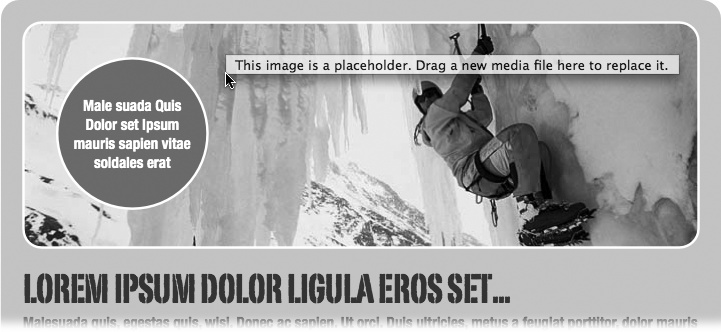
Figure 1-10. Media placeholders reveal themselves when you point to them, prompting you to replace them by dragging your own pictures into place. When you drop a new picture on top of the placeholder, Pages tugs and squeezes it into just the right size so that it still fits the layout. You can drag pictures onto the placeholder from your desktop or directly from your iPhoto collection via the Media Browser.
Say that you want to feature an article about the safety considerations of X-ray vision, and you’ve decided to add a photo of super goggles to the front page of your newsletter. You know that you already have the perfect picture in your iPhoto library, and happily, all the iWork programs make it easy to slurp pictures from iPhoto straight into your documents:
Click the Media button on the toolbar.
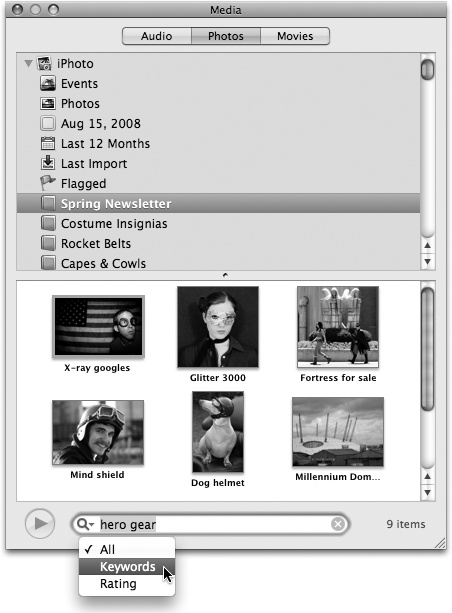
Pages pops up the Media Browser, the window into your computer’s collections of audio, photos, and movies, as shown in Figure 1-11.
Figure 1-11. The Media Browser is a window into your computer’s collections of audio, photos, and movies. The Photos tab gathers your personal photo collections from iPhoto, Photo Booth, and—if you have it—Aperture. In the top pane, click the arrow to the left of iPhoto to expand the display to show all your photo albums and events, and select the album to browse. You can also search the selected album by typing a word or phrase into the search field at the bottom of the Media Browser. The magnifying-glass pop-up menu lets you fine-tune your iPhoto collections search by using keywords, descriptions, and ratings.
Choose your photo.
Select the thumbnail preview of the photo you want to use from the Media Browser.
Drag the photo into your document window and drop it onto the placeholder image.
Pages replaces the placeholder image with your photo, automatically resizing it to fit the placeholder’s dimensions.
Tip
If you don’t like the first photo you choose, then try, try again. The image keeps its placeholder powers even after you add a new picture. Just drag another photo onto the placeholder, and Pages performs its placeholder squeezery again, formatting the new picture to fit the layout.
When you exchange a placeholder image with your own picture, Pages pulls and squeezes the picture into the right size, hiding parts of the image that don’t quite fit, as shown in Figure 1-12.
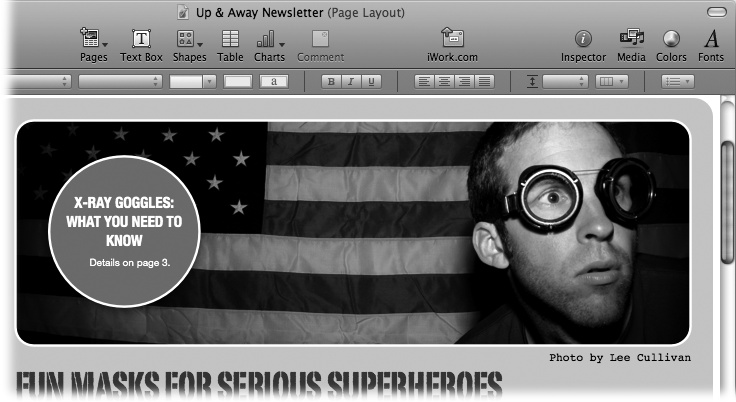
Figure 1-12. Pages sliced off the top and bottom of the photo to fit the placeholder’s horizontal layout.
Never fear, the missing bits of the photo aren’t gone for good; they’re just hidden by a mask. You use masks to crop pictures in iWork. Think of a mask as a cover with a window where part of the image peeks through. You can adjust the size of the mask’s window and also slide or resize the picture under the mask to control the exact portion of the picture you want to show.
Time to unmask our masked man. Figure 1-13 shows how Pages’ mask-editing features gives you your own X-ray vision to work with the hidden portion of the image. To edit the mask, click the photo once to reveal the Edit Mask controls and then click the Edit Mask button. Pages reveals the entire photo, with the hidden parts of the image dimmed and transparent so that you can see what’s masked and what’s not.
When you’re done editing the mask, hit Return, or click anywhere outside of the image, and Pages shows you the final result. For complete details about adding, editing, and removing image masks, see Cropping images with masks.
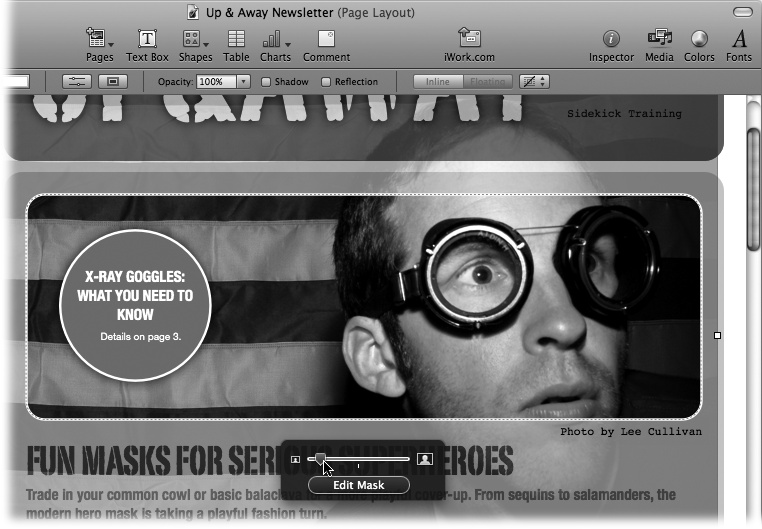
Figure 1-13. Editing a mask lets you change which part of the picture to reveal. Zoom the image in or out by dragging the slider above the Edit Mask button. When you point to the image, the cursor turns into a hand, which you can use to drag the image to a new position behind the mask. (When you’re not in mask-editing mode, dragging the picture moves the whole thing to a new position on the canvas; if that happens, choose Edit → Undo, click the Edit Mask button, and try again.)
After you’ve finished updating the first page of your newsletter with your own text and photos, you’re ready to add more pages. In word-processing documents, when you hit the bottom of a page, Pages just gives you a new one and bumps you over to the top of the fresh page automatically. Page-layout documents are a bit fussier: You have to add new pages manually and give Pages some hints about how you want to handle text that doesn’t fit on the page.
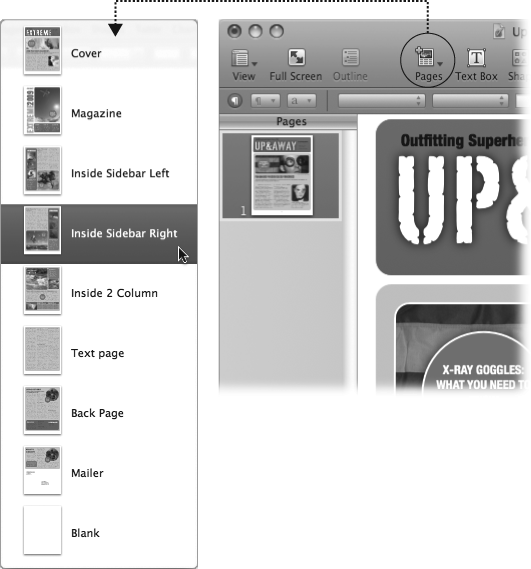
To add a new page, click the Pages button in the toolbar, or choose Insert → Pages. A pop-up menu appears, offering previews of all your template’s template pages, its prefab collection of page layouts (Figure 1-14). Choose the template page you want to use for your new page.
If your feature about the changing fashions in superhero cowls and masks is longer than space allows on the first page, you can continue it in a new text box on another page. Pages lets you know that your text box is bursting with copy by flipping on the clipping indicator, a “plus” sign at the bottom of the text box, which tells you that the box contains more text than it can display. You can fix that by linking your overstuffed text box to another text box, as shown in Figure 1-15. Instead of unceremoniously lopping off the text, Pages flows the text into the second text box. Here’s how you do it:
Click the first text box.
When you select a text box, blue arrows appear at the top left and bottom right of the box.
Figure 1-14. The Pages pop-up menu displays all the preformatted layouts in your template, giving you lots of options to change up the look of each of your pages. Menu mavens can find the same options in the Insert → Pages submenu. The Pages pop-up menu and submenu are available only in page-layout documents. (Word-processing documents offer a similar set of options, but the menu is labeled Sections instead of Pages.)
Click the text box’s lower-right arrow.
Pages shows a message prompting you to click the other text box you want to link to.
Click the other text box (or press Escape to cancel).
Pages indicates that you’ve linked the two text boxes by connecting them with a line, as shown in Figure 1-15, bottom.
Note
You don’t have to wait until a text box is full to link it to another one—you can string together your text boxes anytime you like. If you know in advance that you’re going to need more space, you can go ahead and link up your layout beforehand. For more about linking text boxes, see Linking text boxes.
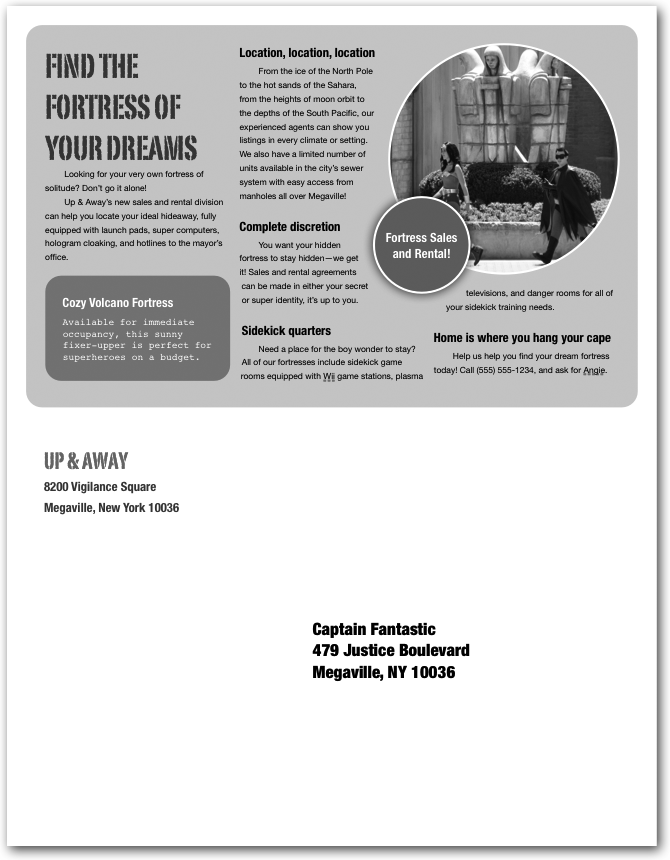
And so it goes: Keep adding pages, choosing the layouts that match your needs and filling them in with your photos of anti-gravity boots, ads for secret-fortress rentals, and your promotion for spray-on invisibility (“Now in fresh floral scents!”).
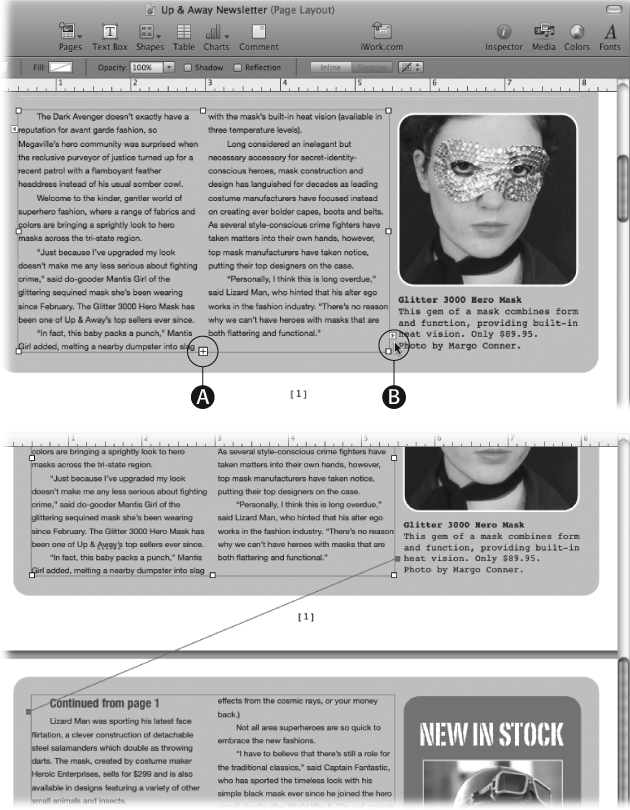
Figure 1-15. Linking text boxes lets you jump your text from one place to another in your document. Top: Pages displays the plus-sign clipping indicator (A) at the bottom of text boxes that contain more content than they can display. To flow the content into another text box, click the arrow in the lower right (B) and then click a second text box. Bottom: After you select the second text box, Pages shows the connection by drawing a line between them. Text from the first text box now flows into the second. Pages updates the two text boxes automatically: When you add or delete text in the first page, the text at the bottom gets nudged back and forth across the page jump.
When you get to the back page, Pages thoughtfully provides a template page named “Mailer” for all its newsletter templates. Figure 1-16 shows an example. Save, print, staple, and voilà—you’ve created a pro-quality newsletter layout in just a few minutes.
Tip
Like the letter template you saw earlier, these Mailer pages also include merge fields, making it easy to do mass mailings from Address Book or a Numbers spreadsheet. See Displaying the Filename for more about Pages’ mail merge features.
Get iWork '09: The Missing Manual now with the O’Reilly learning platform.
O’Reilly members experience books, live events, courses curated by job role, and more from O’Reilly and nearly 200 top publishers.

