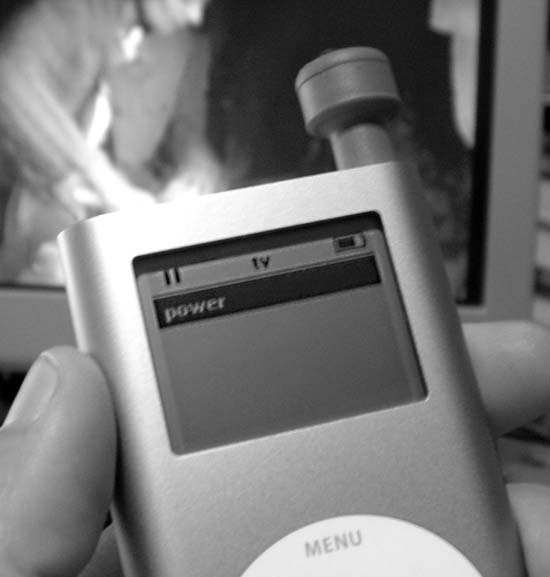
Use a Pocket PC to record the “sounds” an infrared remote makes, transfer them to your iPod, and start changing channels with your new universal remote control.
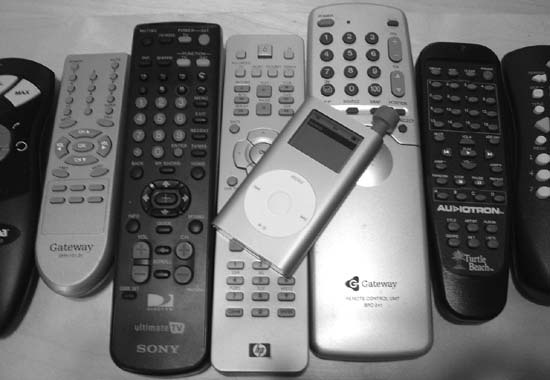
We’re going to take an iPod and turn it into a universal infrared (IR) remote control, which can be used to control all your home electronic equipment, or just about anything that uses a remote control. For example, in my home, my iPod controls my TV, DVD player, Direct TV, Ultimate TV PVR, Media Center PC, Xbox, XM Satellite Radio, Roomba, and a few other random things, such as a robot. Figure 1-14 shows a variety of remotes your iPod can replace.
To do this, we are going to “record” the “sounds” an infrared remote makes on a PC and then put them on an iPod as songs. Adding a special sound-to-IR converter then turns those sounds back to IR and allows you to use your iPod as a remote control. As an added bonus, it works from up to 100 feet away. It’s a slick all-in-one unit, and you’ll never go back to using multiple remotes again.
Here’s what you’ll need for this hack:
An iPod (doesn’t matter which one)
A Mac or PC with sound recording software
A Pocket PC (any Pocket PC 2002/2003 should work)
Griffin’s Total Remote software and IR device (http://www.griffintechnology.com/griffinmobile/totalremote/; $24.99)
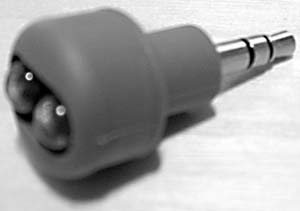
The most important element is the sound-to-IR converter from Griffin, shown in Figure 1-15. This device (and software) was meant to extend the range of Pocket PCs and add consumer IR capabilities. You are first going to use the Pocket PC software to input the IR signals from your remotes, convert these signals to sound files, and then use your iPod to play those sounds through the sound-to-IR converter to control your devices.
First, install the Total Remote software on your Pocket PC. Follow the instructions and start entering all the remotes you’ll ultimately want to use on your iPod. To keep this example simple, we’re going to begin by turning the TV on and off.
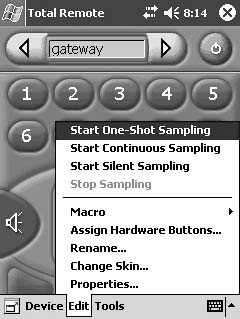
On the Pocket PC, choose Start → Programs → Total Remote. Then, choose Edit → Start One-Shot Sampling, as shown in Figure 1-16. Pick the power button on the interface.
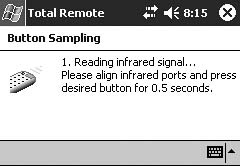
As shown in Figure 1-17, Total Remote prompts you to hold the remote (in our example, the TV remote) up to the IR port on the Pocket PC. This records the IR signal.
Once you’ve captured the IR signal, you can test it by using the IR device included with Total Remote. After you verify that it works, it’s time to get that IR signal off the Pocket PC and onto a computer as a sound file.
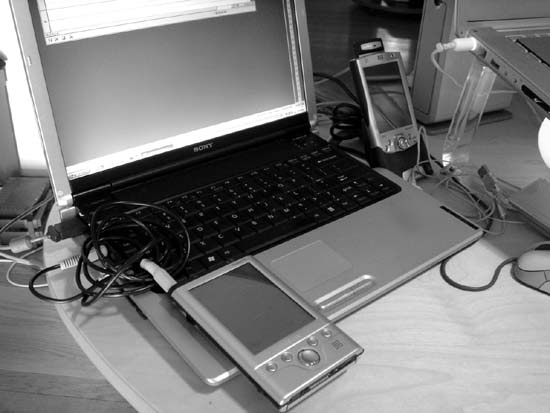
Remove the Total Remote IR device from the Pocket PC headphone jack and run a line-out cable from the Pocket PC to the microphone or line-in port. You can get a 3.5 mm stereo audio cable such as this from RadioShack or any computer store. Many computers come with one to run sound out to speakers; that’ll work too.
On your desktop computer (for our example, a PC, as shown in Figure 1-18), use a sound-editing program that can edit sounds and remove channels (left and right). This example uses SoundForge (http://mediasoftware.sonypictures.com/Products/; $399.00).
In your recording application, set the recording format to the following (this is really important):
44 Hz, 16bit Stereo. PCM
We’re ultimately going to save the signal as a WAV (Windows sound file).
Press Record in the sound-recording application. Then, on the Pocket PC (with the line out from the headphone jack to the line in on the desktop computer), press the button to which you assigned the Power signal.
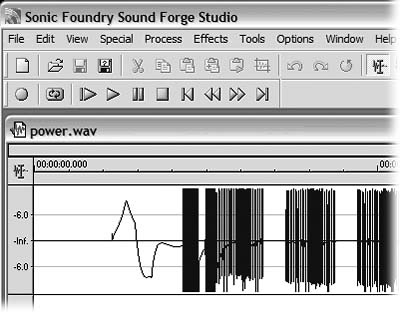
Stop the recording and press Play. If you recorded the signal properly, you’ll hear some weird beeps and pulses. That’s what the IR signal “sounds” like. In SoundForge, you can actually see the pulses and signal on a WAV graphic, as shown in Figure 1-19.
Next, highlight the right channel and mute it. If you skip this step, the sound won’t process through the IR device properly.
Now, save the sound recording as a 44 Hz, 16 bit Stereo, PCM WAV file. We called ours power.wav.
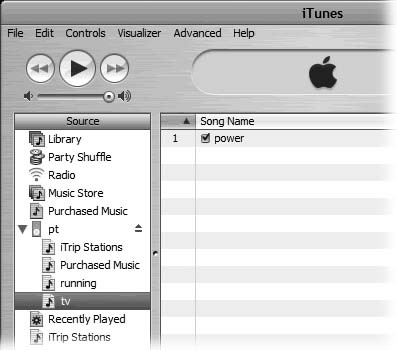
Pop your iPod in the cradle. In iTunes, make a new playlist (I called mine TV) and then add the WAV file to the playlist, as shown in Figure 1-20.
The file transfers to the iPod, and we’re ready to test our new remote.
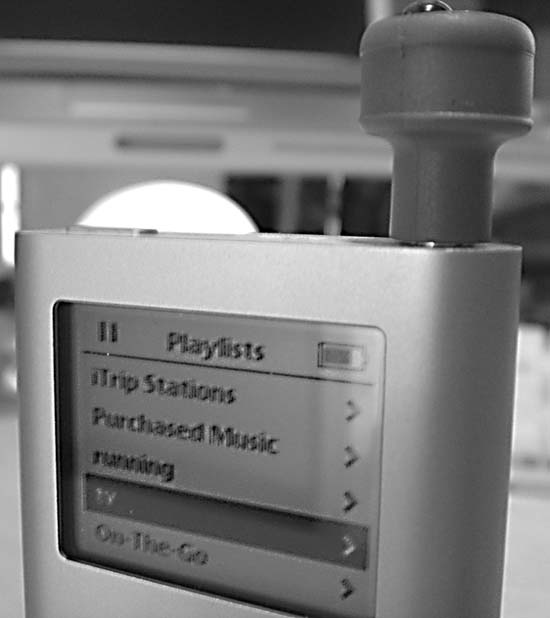
Remove the iPod from the cradle and put the Total Remote IR device in the iPod’s headphone jack, as shown in Figure 1-21.
Go to the playlist and point the iPod at the TV, as shown in Figure 1-22.
Click Play. If you’ve done everything right, your TV should turn on and off each time you play this sound. Go back and input all your other devices. Congratulations! You can now control your TV—or anything else, for that matter—with your iPod.
—Phillip Torrone
Get iPod and iTunes Hacks now with the O’Reilly learning platform.
O’Reilly members experience books, live events, courses curated by job role, and more from O’Reilly and nearly 200 top publishers.
