Create a view (could be a label, image view, etc., anything that
directly or indirectly subclasses UIView), and assign that view to the header
and/or the footer of a section of a table view. You can also allocate
specific number of points in height for a header or a footer, as we will
soon see.
A table view can have multiple headers and footers. Each section in a table view can have its own header and footer, so if you have three sections in a table view, you can have a maximum of three headers and maximum of three footers. You are not obliged to provide headers and footers for any of these sections. It is up to you to tell the table view whether you want a header and/or a footer for a section and you pass these views to the table view through its delegate, should you wish to provide header(s)/footer(s) for section(s) of your table view. Headers and footers in a table view become a part of the table view, meaning that when the table view’s contents scroll, so do the header(s) and footer(s) inside that table view. Let’s have a look at a sample header and footer in a table view (Figure 4-7).
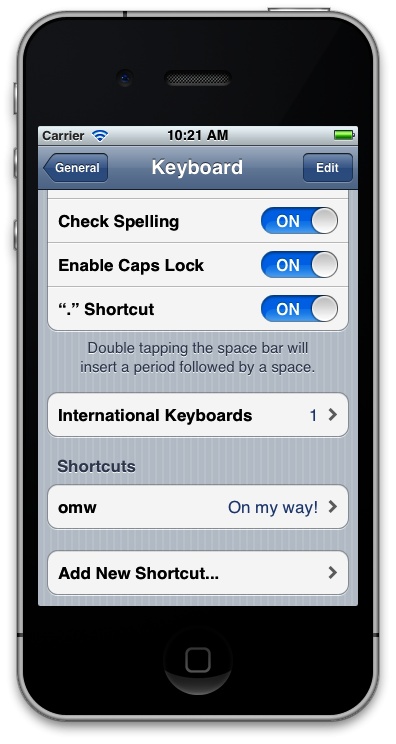
As you can see, the top section (with items such as “Check Spelling” and “Enable Caps Lock”) has a footer that says “Double tapping the space bar will insert a period followed by a space.” That is the footer of the top section of that table view. The reason why it is a footer rather than a header is because it is attached to the bottom of that section rather than the top. The last section in this table view also has a header that reads “Shortcuts.” The reason why this is a header rather than a footer is because it appears on the top of the section rather than the bottom.
Note
Specifying the height of a header and footer in a section inside a table view is
done through methods defined in the UITableViewDataSource. Specifying the actual
view that has to be displayed for the header/footer of a section in a
table view is done through methods defined in the UITableViewDelegate protocol.
Let’s go ahead and create a simple app with one table view in it.
Then let’s provide two labels, of type UILabel, one as the header and the other as
the footer of the only section in our table view, and populate this one
section with only three cells. In the header we will place the text
“Section 1 Header,” and in the footer label we will place the text
“Section 1 Footer.” Starting with the header file of our root view
controller, we will define a table view:
#import <UIKit/UIKit.h>@interfaceConstructing_Headers_and_Footers_in_Table_ViewsViewController:UIViewController<UITableViewDataSource,UITableViewDelegate>@property(nonatomic,strong)UITableView*myTableView;@end
Now we will create a grouped table view and load three cells into it:
-(UITableViewCell*)tableView:(UITableView*)tableViewcellForRowAtIndexPath:(NSIndexPath*)indexPath{UITableViewCell*result=nil;staticNSString*CellIdentifier=@"CellIdentifier";result=[tableViewdequeueReusableCellWithIdentifier:CellIdentifier];if(result==nil){result=[[UITableViewCellalloc]initWithStyle:UITableViewCellStyleDefaultreuseIdentifier:CellIdentifier];}result.textLabel.text=[[NSStringalloc]initWithFormat:@"Cell %ld",(long)indexPath.row];returnresult;}-(NSInteger)tableView:(UITableView*)tableViewnumberOfRowsInSection:(NSInteger)section{return3;}-(void)viewDidLoad{[superviewDidLoad];self.myTableView=[[UITableViewalloc]initWithFrame:self.view.boundsstyle:UITableViewStyleGrouped];self.myTableView.dataSource=self;self.myTableView.delegate=self;self.myTableView.autoresizingMask=UIViewAutoresizingFlexibleWidth|UIViewAutoresizingFlexibleHeight;[self.viewaddSubview:self.myTableView];}-(BOOL)shouldAutorotateToInterfaceOrientation:(UIInterfaceOrientation)interfaceOrientation{returnYES;}
Here is the exciting part. We can now use two important methods
(which are defined in UITableViewDelegate) to provide a label for
the header and another label for the footer of the one section that we
have loaded into our table view. These methods are:
tableView:viewForHeaderInSection:This method expects a return value of type
UIView. The view returned from this method will be displayed as the header of the section specified by theviewForHeaderInSectionparameter.tableView:viewForFooterInSection:This method expects a return value of type
UIView. The view returned from this method will be displayed as the footer of the section specified by theviewForFooterInSectionparameter.
Our task now is to implement these methods and return an instance
of UILabel. On the header label we
will enter the text “Section 1 Header,” and on the footer label the text
“Section 1 Footer,” as we had planned:
-(UIView*)tableView:(UITableView*)tableViewviewForHeaderInSection:(NSInteger)section{UILabel*result=nil;if([tableViewisEqual:self.myTableView]&§ion==0){result=[[UILabelalloc]initWithFrame:CGRectZero];result.text=@"Section 1 Header";result.backgroundColor=[UIColorclearColor];[resultsizeToFit];}returnresult;}-(UIView*)tableView:(UITableView*)tableViewviewForFooterInSection:(NSInteger)section{UILabel*result=nil;if([tableViewisEqual:self.myTableView]&§ion==0){result=[[UILabelalloc]initWithFrame:CGRectZero];result.text=@"Section 1 Footer";result.backgroundColor=[UIColorclearColor];[resultsizeToFit];}returnresult;}
If you run your app on the iPhone Simulator now, you will certainly see something strange, as shown in Figure 4-8.
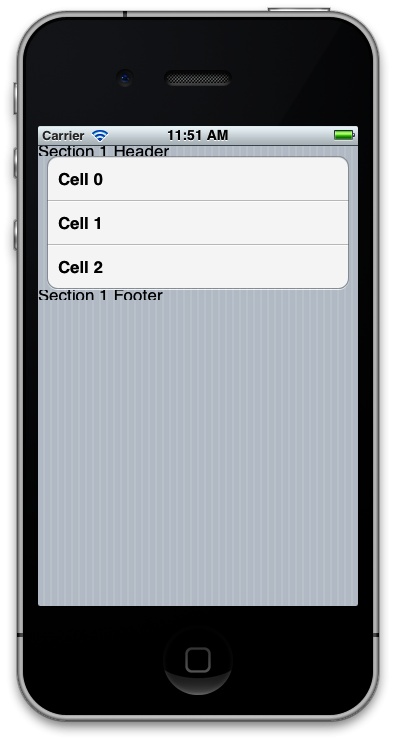
The reason for this misalignment of the labels is because the table view doesn’t really
know the height of these views. To specify the height of the header and
footer views, we need to use the following two methods which are
defined in the UITableViewDelegate protocol:
tableView:heightForHeaderInSection:The return value of this method is of type
CGFloat, and it specifies the height of the header for a section in a table view. The section’s index is passed through theheightForHeaderInSectionparameter.tableView:heightForFooterInSection:The return value of this method is of type
CGFloat, and it specifies the height of the footer for a section in a table view. The section’s index is passed through theheightForHeaderInSectionparameter.
-(CGFloat)tableView:(UITableView*)tableViewheightForHeaderInSection:(NSInteger)section{CGFloatresult=0.0f;if([tableViewisEqual:self.myTableView]&§ion==0){result=30.0f;}returnresult;}-(CGFloat)tableView:(UITableView*)tableViewheightForFooterInSection:(NSInteger)section{CGFloatresult=0.0f;if([tableViewisEqual:self.myTableView]&§ion==0){result=30.0f;}returnresult;}
Running the app, you can see that the height of the header and the footer labels is fixed. There is still something wrong with the code we’ve written—the left margin of our header and footer labels. Take a look for yourself in Figure 4-9.
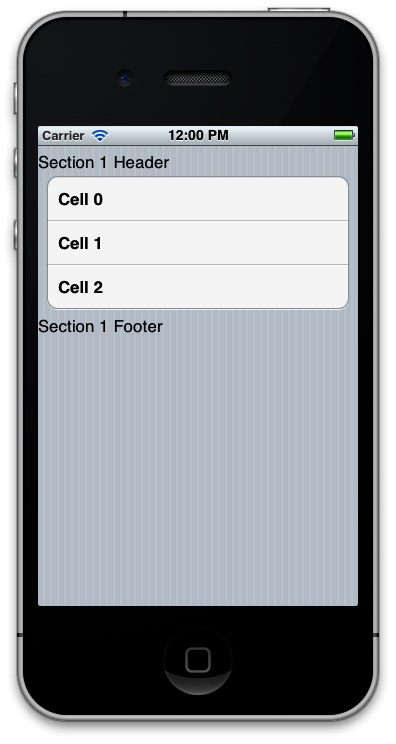
The reason for this is that the table view, by default, places
header and footer views at x point 0.0f. You might think that changing the frame
of your header and footer labels will fix this issue, but unfortunately
it doesn’t. The solution to this problem is creating a generic UIView and placing your header and footer
labels on that view. Return the generic view as the header/footer, but
change the x position of your labels within the
generic view. We now need to modify our
implementation of the tableView:viewForHeaderInSection: and the tableView:viewForFooterInSection:
methods:
-(UIView*)tableView:(UITableView*)tableViewviewForHeaderInSection:(NSInteger)section{UIView*result=nil;if([tableViewisEqual:self.myTableView]&§ion==0){UILabel*label=[[UILabelalloc]initWithFrame:CGRectZero];label.text=@"Section 1 Header";label.backgroundColor=[UIColorclearColor];[labelsizeToFit];/* Move the label 10 points to the right */label.frame=CGRectMake(label.frame.origin.x+10.0f,5.0f,/* Go 5 points down in y axis */label.frame.size.width,label.frame.size.height);/* Give the container view 10 points more in width than our labelbecause the label needs a 10 extra points left-margin */CGRectresultFrame=CGRectMake(0.0f,0.0f,label.frame.size.width+10.0f,label.frame.size.height);result=[[UIViewalloc]initWithFrame:resultFrame];[resultaddSubview:label];}returnresult;}-(UIView*)tableView:(UITableView*)tableViewviewForFooterInSection:(NSInteger)section{UIView*result=nil;if([tableViewisEqual:self.myTableView]&§ion==0){UILabel*label=[[UILabelalloc]initWithFrame:CGRectZero];label.text=@"Section 1 Footer";label.backgroundColor=[UIColorclearColor];[labelsizeToFit];/* Move the label 10 points to the right */label.frame=CGRectMake(label.frame.origin.x+10.0f,5.0f,/* Go 5 points down in y axis */label.frame.size.width,label.frame.size.height);/* Give the container view 10 points more in width than our labelbecause the label needs a 10 extra points left-margin */CGRectresultFrame=CGRectMake(0.0f,0.0f,label.frame.size.width+10.0f,label.frame.size.height);result=[[UIViewalloc]initWithFrame:resultFrame];[resultaddSubview:label];}returnresult;}
Now if you run your app, you will get results similar to Figure 4-10.
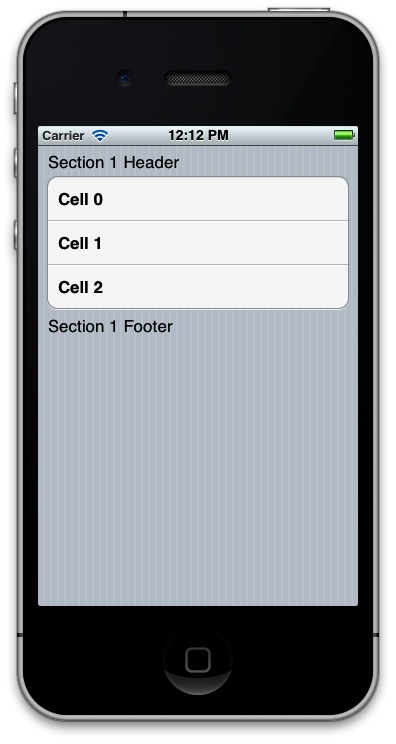
With the methods you just learned, you can even place images as the header/footer
of your table views. Instances of UIImageView have UIView as their superclass, so you can easily
place your images in image views and return them as headers/footers of a
table view. If all you want to place is text as the header/footer of
table views, you can use two handy methods defined in the UITableViewDataSource protocol, which will
save you a lot of hassle. Instead of creating your own labels and
returning them as headers/footers of your table view, you can simply use
these methods:
tableView:titleForHeaderInSection:The return value of this method is of type
NSString. This string will automatically be placed inside a label by the table view and will be displayed as the header of the section, which is specified in thetitleForHeaderInSectionparameter.tableView:titleForFooterInSection:The return value of this method is of type
NSString. This string will automatically be placed inside a label by the table view and will be displayed as the footer of the section, which is specified in thetitleForFooterInSectionparameter.
So to make our app’s code simpler, let’s get rid of our
implementation of the tableView:viewForHeaderInSection: and the
tableView:viewForFooterInSection:
methods, and replace them with the implementation of the
tableView:titleForHeaderInSection: and the tableView:titleForFooterInSection:
methods:
-(NSString*)tableView:(UITableView*)tableViewtitleForHeaderInSection:(NSInteger)section{NSString*result=nil;if([tableViewisEqual:self.myTableView]&§ion==0){result=@"Section 1 Header";}returnresult;}-(NSString*)tableView:(UITableView*)tableViewtitleForFooterInSection:(NSInteger)section{NSString*result=nil;if([tableViewisEqual:self.myTableView]&§ion==0){result=@"Section 1 Footer";}returnresult;}
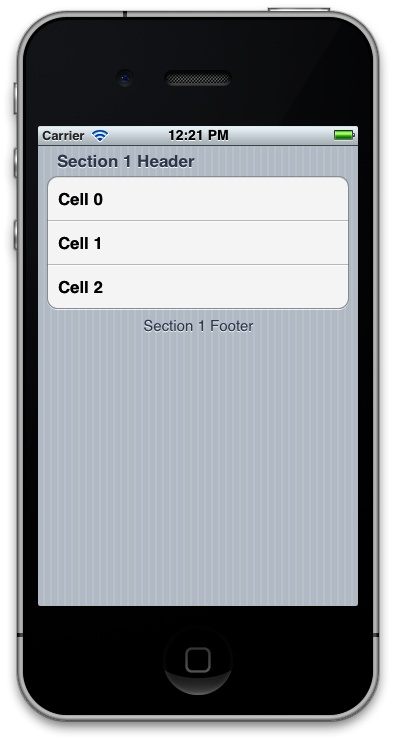
Now run your app in the iPhone Simulator, and you will see that the table view has automatically created a left-aligned label for the header and a center-aligned label for the footer of the only section in our table view. The alignment of these labels is the default alignment that every table view creates its header/footer labels with (see Figure 4-11).
Get iOS 6 Programming Cookbook now with the O’Reilly learning platform.
O’Reilly members experience books, live events, courses curated by job role, and more from O’Reilly and nearly 200 top publishers.

