Chapter 4. Router Basics
In the previous chapter, we tracked mouse clicks to select movies. We also discussed how changes in models and collections can notify Backbone.Views. Yet, the state of a model or collection was invisible from the outside.
Referencing state across the Web is very important, however. Links are one of the main drivers behind hypertext media. How can we let users share their browser states with other users? And how can Backbone.js support us with “deep” linking?
Addressability of state is provided by Backbone.Router, and this is the scope for this chapter. Additionally, we will render details of a movie and see how the router orchestrates the setup of views.
In summary, we will discuss the following topics:
- Using a router for navigating between states
- Sharing a layout across routes
- Rendering child views
Addressing State
With Backbone views, we were able to trigger state changes in a Backbone collection. Now let’s look at another way to select movies: by using routes. In an abstract sense, both a router and a view are similar in controlling state changes.
The goal of a Movies router is to provide a mapping from the URL for movies to an application state (e.g., a selected movie).
Users will then be able to share details of The Artist with a friend, or simply bookmark the URL for later:
http://example.com/#movies/the-artist
Note the hash in the URL. The hash (or sometimes hashbang) indicates a separation from server-side and client-side parts of a URL. This break in the URL can cause problems for some use cases, as search engines prefer semantic URLs without hashes or hashbangs.
But with newer browsers that support so-called pushState() from the HTML5 history API, it is also possible to keep semantic URLs:
http://example.com/movies/the-artist
What approach you should use depends on your application. Does your application face search engines? Can your application stack integrate a pushState setup?
For many cases where you want to share content with others, it is advisable to use the new functions around the HTML5 History API. If you want to follow the upcoming examples with pushState enabled, you will need to work with a server process that will deliver index.html for all requested routes.
You could install the pushstate-server project with:
npm install pushstate-server --save
Then you can set up a simple server process with:
var server = require('pushstate-server');server.start({
port: 5000,
directory: './static'
});You can run this server with:
$ node server.js
And from here on, you will have the advantage of using semantic URLs.
Note
Working with static pages can bring you a long way for content-driven projects. Check out the superstatic server from divshot for starting a static server process in the command line. In addition, superstatic allows you to define simple routing patterns in a file named divshot.json.
Besides tracking URL changes, you can use a router to a certain degree to organize views. This chapter shows how to use a Layout view for this purpose.
Preparing
Before entering the router realms, let’s shortly recap the setup we have from the previous chapter.
So far, we build a collection view (MoviesList) that can support users in selecting a movie. The main application made the views and data modules available, such that when you “required” the “app” module, you could play around with the views and data.
Let’s first make a small change in the HTML for the upcoming examples, by moving the index.html file into the static/index.html directory:
<html>
  <head>
    <script src="/bundle.js"></script>
    <link rel="stylesheet" href="/style.css" type="text/css">
  </head>
<body>
  <a href="/">Home</a>
  <div id="movies">
  </div>
  <script>
  </script>
</body>
</html>
If you work with the pushState server, it makes sense to have all static files in the same directory, as you see for the paths of the bundle.js and style.css files.
Also, we clean up the app/main.js file, because most of the application will be loaded from the router:
var Backbone = require('backbone');
var $ = require('jquery-untouched');
Backbone.$ = $;
$(document).ready(function() {
console.log('Init app ...');
});To start the app as soon as it is loaded, you can use a shorter browserify command, leaving out the -r option from earlier:
$ browserify app/main.js > static/bundle.js
To autorun browserify compilation, it is a good idea to use this code from now on:
$ watchify ./app/main.js -o static/bundle.js
But remember that watchify bundles your app as a whole, not as a module. This means that your app is loaded as soon as the bundle.js is loaded, and that you must remove require( from your HTML.app)
Give this setup a try, and we are ready to start.
Defining Routes
To understand what a Backbone router can do, we look at some code next. You should create an app/routers directory first:
$ mkdir app/routers
$ cd app/node_modules
$ ln -sf ../routers
Then, you write the following module in app/routers/movies.js:
var Backbone = require('backbone');// data
var Movies = require('collections/movies');
var data = require('../../../movies.json');
var movies = new Movies(data);// views
var MoviesList = require('views/moviesList');This is not different so far from other examples. The first router-specific syntax is defining a routes hash, URL fragments that will trigger a callback function. Let’s look at this idea in the second part of app/routers/movies.js:
var MoviesRouter = Backbone.Router.extend({

  routes: {
    'movies/:id': 'selectMovie',
    '': 'showMain'
  },

  selectMovie: function(id) {
    this.movies.resetSelected();
    this.movies.selectByID(id);
  },

  showMain: function() {
    this.moviesList.render();
  },

  initialize: function(options) {
    this.movies = movies;
    this.moviesList = new MoviesList({
      el: options.el,
      collection: movies
    });
  }
});
module.exports = MoviesRouter;
In this example, you have defined two routes. The first route matches the pattern /movies/:id. and triggers a callback selectMovie. The second route matches empty routes and triggers the showMain callback. Note how similar the Movies router is to the MoviesList view. Both encapsulate the same steps to set up the views. The approach to manage views in the router will quickly change though.
To see the MoviesRouter in action, you need to tell Backbone to monitor events from URL changes. You do this by adding the following steps in app/main.js:
$(document).ready(function() {
  var router = new MoviesRouter({el: $('#movies') });
  Backbone.history.start({
    pushState: true,
    root: '/'
  });
});
Monitoring route changes happen by calling start() on the history API. We pass pushState: true to use pushState features. You can use pushState: false, if you prefer to work with hashes in the URL. We set the root property to /, because the Backbone.js application will be the main application. If we wanted the Backbone application only active for browsing search results, we might change the root to /search.
Next, we check that our setup works by changing routes manually in the browser. When you enter:
/movies/1
or, you set:
/
You should be able to select and unselect all movies, just as you did with the mouse clicks earlier. And, from here on, you can share this link, by email, for example.
The URL can also be linked with an HTML anchor tag from a movie view. Then, the default behavior of the anchor tag automatically triggers the movies route. Note that you must not use ev.preventDefault(), since this would break the intended page change.
A nice plus of using the anchor tag directly is that you don’t need extra view callbacks to change routes—the route change can be triggered via the view template. In the movies view app/views/movie.js, you can edit the template such:
template: '<h1><a href="/movies/<%= id %>"><%= title %></a><hr></h1>'
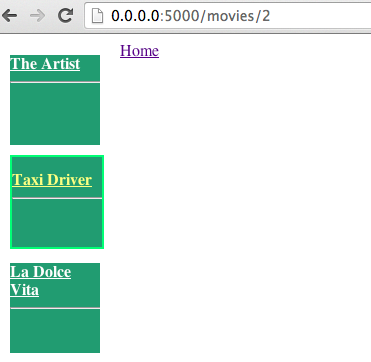
When you now click on the movie’s title, you should see the URL change as in Figure 4-1.
Navigating
You can load application states from a URL not only via links in anchor tags, but also from inside the application. For example, the Movie view captures click events and should be able to set the URL of a selected movie.
For this, Backbone.Router provides the navigate function.
Because we need a router reference from different views, you can pass the router as an option during View initialization. For example, in app/views/movie.js, you can add a router reference as follows:
initialize: function(options) {
  this.router = options.router;
}
As you’ll see in a moment, we use the new router variable in the Movie view. Let us first look at triggering a navigation. To navigate to another movie, you can call navigate as follows after a movie is selected:
selectMovie: function(ev) {
  console.log('event on ' + this.model.id);
  if (!this.model.get('selected')) {
    this.model.collection.resetSelected();
    this.model.collection.selectByID(this.model.id);
    this.router.navigate("/movies/" + this.model.id);
  }
}
The navigate function accepts an option hash. By passing {trigger: true}, the code in the router is executed after the URL is updated. Like this, you could share the same code between router and view:
this.router.navigate("movies/" + this.model.id, {trigger: true});There is another option that might be useful: say you want to keep the application state changes private from the browser history. This is interesting, for example, if a user browses tens or hundreds of movies, as she should be able to go back to the beginning with one click on the browser Back button. This interaction can be implemented with the replace: true option. Try it out with:
this.router.navigate("movies/" + this.model.id, {trigger: true, replace: true});Since Movie views are built from a movies list view, the router reference must be copied on the moviesList object too. A good moment to do this is in the initialization of ./app/routers/movies.js:
initialize: function(options) {
  this.movies = movies;
  this.moviesList = new MoviesList({
    el: options.el,
    collection: movies
  });
  _.extend(this.moviesList, {router: this});
  this.moviesList.render();
 ;
}
Then, you pass the router reference from MoviesList to its children. In the constructor of app/views/moviesList.js, you do the following:
initialize: function(options) {
  this.router = options.router;
}
And, when creating the movies item views, you can do this:
var that = this;
var moviesView = this.collection.map(function(movie) {
  return (new MovieView({model : movie, router: that.router})).render().el;
});
Adding the router reference to the views was quite a lot of work. If you could not follow right now, you can check the results at http://pipefishbook.com/ch_4/routes/. You now have a working router. When you reload the page, click the movies, and click Back in the browser, the movie views and the URL should be in sync.
Orchestrating Views
A router is a common place to set up views of an application. But be careful, as a router can quickly be overloaded with concerns that should be managed elsewhere. To prevent a large router that manages many views, let’s look at a specialized object to set up and hide views.
Preparing for a Layout View
In the example application so far, there was not yet much need to add and remove views. In reality, the situation is different. Depending on the URL state, or on the state of collections and models, views are dynamically added or removed.
To manage views, you have some options again. By default, there is no explicit “controller” in a Backbone application, but you can easily create one. If you prefer to reuse best practices, you can take a look at Backbone Marionette or Chaplin. Both frameworks support a “controller” abstraction out of the box, and links will be mentioned in The Role of Frameworks.
Let’s prepare an application setup where views can easily be added, changed, and removed. To start, you should first hide the construction of views in the router.
Let’s create a app/views/layout.js file to support us with that:
var Backbone = require('backbone');// import the moviesList
var MoviesList = require('views/moviesList');var Layout = Backbone.View.extend({render: function() {
this.$el.append(this.moviesList.render().el);
return this;
},initialize: function(options) {
this.moviesList = new MoviesList({
el: options.el,
collection: options.collection,
router: options.router
});
}});
To hide the view construction in the router, the Layout can construct a view instance including the movies list. In app/views/layout.js, you can add this:
  var instance;
  Layout.getInstance = function(options) {

    if (!instance) {
      instance = new Layout({
        el: options.el,
        router: options.router,
        collection: options.router.movies
      });
    }

    return instance;
  }
  module.exports = Layout;
You can now clean up references to the MoviesList view in the router and proceed with the Layout instance to address view concerns in the router:
initialize: function(options) {
  this.movies = movies;
  this.layout = Layout.getInstance({
    el: '#movies', router: this
  });
  this.layout.render();
}
As you see, we replaced this.moviesList with this.layout. This might not look like much of a win yet, but the idea of a layout to manage subviews will become more concrete in the upcoming sections.
Parent and Child Views
Building views with subviews can quickly become complicated. In this section, you are going to learn a simple strategy to render subviews from a parent view.
First, let’s define the parent view in app/views/layout.js:
var _ = require('underscore');
var Backbone = require('backbone');
var Layout = Backbone.View.extend({
template: _.template(' \
<div id="overview"> \
</div> \
<div id="details"> \
</div>')// ... more to come });
Here you use the templating engine of Underscore.js, as is common for many Backbone examples. You will learn more on using different view templating engines in Chapter 6. In the template, there are two interesting DOM elements to which we will attach subviews: $("#overview") and $("#details").
The layout view (parent)--not the Router—will manage a number of DOM elements. Here is a short overview of the views to come:
- A details view will show users detailed information about a movie, such as the showtime and a description. We could add images or a movie rating here too. This view will be built in ./app/views/details.js.
- Since no movie is initially selected, we will add a view for a “welcome” message. It basically asks the user to select a movie. We will build this view in ./app/views/chose.js.
-
We can introduce a view for controls, or a view to display additional information to a user. As the principle is important here, we will mainly focus on the details view. Don’t forget to add a
require, such asrequire('views/details'), for each view that you add.
Now, let’s look at the changes in the layout first.
Let’s start with the overview on movies, which will be our MoviesList from earlier. In the constructor of app/views/layout.js, we create the views as follows:
initialize: function(options) {
  this.overview = new MoviesList({
    collection: options.router.movies,
    router: options.router
  });
  this.currentDetails = new ChoseView();
}
Besides a list of movies, the layout will show an additional view that is set by this.currentDetails.
Note how we leave out the el properties for the this.overview and this.currentDetails subviews for now. The references to the DOM will be made when we render the layout.
The render function of the Layout view is the place where we bring in the DOM references as follows:
render: function() {
  this.$el.html(this.template());
  this.currentDetails.setElement(this.$('#details')).render();
  this.overview.setElement(this.$('#overview')).render();
return this; }
By using setElement, you prevent destroying elements in the DOM and reuse existing DOM nodes. As this.currentDetails and this.overview are Backbone views, you can re-render these after the initial DOM nodes are created by the Layout template.
How can we now update these subviews from the router? In the layout app/views/layout.js, you can add some small helper to set a new DetailsViews as needed, and re-render the parent. For this, you use the following:
setDetails: function(movie) {
if (this.currentDetails) this.currentDetails.remove();
this.currentDetails = new DetailsView({model: movie});
this.render();
}Similarly, you can add a helper for a “chose” view in app/views/layout.js when you don’t want to show details of a movie:
setChose: function() {
if (this.currentDetails) this.currentDetails.remove();
this.currentDetails = new ChoseView();
this.render();
},To prevent memory leakage in the application, it is important to remove an old view. Backbone supports removing view with remove().
After having defined this layout view including its helpers, you surely can’t wait to see the rendering of a DetailsView in action. For this, you add the following view to app/views/details.js:
var Backbone = require('backbone');
var _ = require('underscore');var DetailsView = Backbone.View.extend({
el: '#details',
template: _.template('<%= showtime %> <br> <%= description %>'),
render: function() {
this.$el.html(this.template(this.model.toJSON()));
  return this;
}
});
module.exports = DetailsView;To see the view switching in action, you can now run the setDetails function from the router app/routers/movies.js:
selectMovie: function(id) {
  this.movies.resetSelected();
  this.movies.selectByID(id);
  this.layout.setDetails(this.movies.get(id));
}
By extending the data in movies.json with showtimes and descriptions, you should be able to click your way through the movies program, as shown in Figure 4-2.

As a minor additional detail, you might want to welcome new visitors with a welcome view. The layout can take care of this as well:
var Backbone = require('backbone');var ChoseView = Backbone.View.extend({template: '<h1>Welcome to Munich Cinema</h1>\
<h2>Please choose a movie</h2>', className: 'details',
render: function() {
this.$el.html(this.template);
return this;
}
});
module.exports = ChoseView;And, you can add a reference in the router, too:
showMain: function() {
  this.movies.resetSelected();
  this.layout.setChose();
}
With the live example at http://pipefishbook.com/ch_4/subviews, visitors and your project manager might be happy about the interface for selecting and browsing movies. But technically, there is more to come. For example, how do you improve browsing the movies with filters and sorting? How do you create view templates?
We will address these questions soon, but for now, it’s worth mentioning the following Backbone plug-ins that can help with managing complicated views:
Conclusion
This chapter gave you an overview on state changes by using the URL in the browser. The URL is an important source for application state, and we can monitor and write the URL in the browser with the help of the Backbone.Router.
The router is also an important place to set up the layout of the user interface. You first learned how to use the singleton pattern to refer a view layout. You then have filled the layout with details of a movie.
So far, our example application is managing only three movies, but in real-world applications, we often deal with much more data. That is the goal of the next chapter, where we will look closer at setting up an API and introduce a Backbone plug-in to boost data transformations.
Get Full Stack Web Development with Backbone.js now with the O’Reilly learning platform.
O’Reilly members experience books, live events, courses curated by job role, and more from O’Reilly and nearly 200 top publishers.

