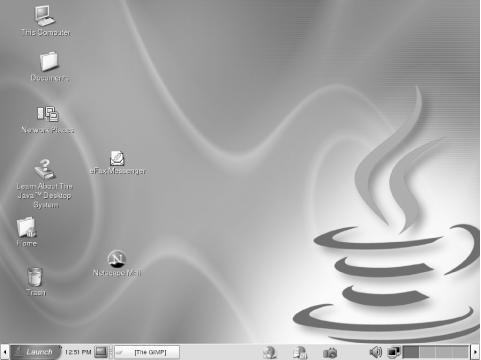
When you start a session for the first time, you will see a startup screen, as in Figure 1-1, with a strip at the bottom of the screen called a panel and various icons, which are small pictures related to particular files or functions of the system.
When you double-click on an icon, it opens a window that appears to float above the desktop screen. After you open a window, you can usually open items within the window, such as folders, programs, and documents.
In JDS, you can open, close, size, reduce, enlarge, and position windows on the desktop. You can open multiple windows simultaneously and maneuver them. Whether you open a window to run a program, or display the contents of a file or the elements of your computer, some window frame characteristics remain constant. These include the Window menu on the top panel or the scroll bars on the right side and bottom of the pane. If you have used either Mac OS or Microsoft Windows, the JDS desktop should feel comfortable.
JDS always starts with at least five icons on the desktop. In this section, we summarize what each one does. You may be able to explore parts of the system right now, but many features may seem confusing until we explain them in later chapters.
Most of the icons run a general-purpose system browser called Nautilus, which we describe in detail in Chapter 3. For now, all you need to know is that you can double-click on anything that appears in the window to work with it. You can also drag objects around the screen and use the drop-down menus at the top of the Nautilus screen. The Go menu has a number of interesting features, some of which we describe in upcoming chapters.
Figure 1-2 shows the icon for the This Computer feature.
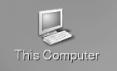
When clicked, this icon displays the hard drive icons, the floppy disk and CD icons, a folder for preferences, network places, and documents.
Preferences allow you to manage your environment. For instance, you can change how your display looks, configure devices (such as the keyboard, mouse, printers, PDAs, and sounds), change your password, and determine how you connect to the Internet.
The Display selection allows you to set your desktop’s background or wallpaper. You can also change your default fonts (styles in which text appears), menus, and tool bars. You can alter the themes (aesthetic aspects of how the desktop appears), the screen resolution, the screen saver, and window behavior.
The System icon also serves an important role on JDS. If you have little or no experience using Linux, you may want to peek at the items here but not try to change anything yet. If you have a working knowledge of Linux, you’ll find several administrative tools you can use under this icon.
Figure 1-3 shows the icon for the Documents feature.

This folder gives you quick access to files stored in the default directory used by the main tools that are utilized on JDS for document manipulation: the StarOffice tools described in Chapters 6-8.
Figure 1-4 shows the icon for the Network Places feature.

Most people’s computers are on a network, whether it is their company’s campus or their own home. This icon provides access to the computers on the network, organized into a hierarchical tree of folders, just as documents are on a local system. As you click on each icon, you see smaller subsets of the network, individual systems within the network, and folders on the systems. Details on setting up a network are given in Chapter 4.
Some systems require you to provide a password before accessing resources. If you are supposed to have access, the system administrator will have told you what password to use. Sometimes you can gain access just by virtue of logging in to JDS, because the remote system can learn from your system who you are.
Figure 1-5 shows the icon for the Trash feature.

When you select documents or other objects and delete them, they go into your Trash and can be viewed using this icon. If you regret deleting them and want them back, you can simply drag them from the Trash into the folder where you want them. If you get low on disk space, you can permanently delete objects from this window.
Figure 1-6 shows the icon for the Learn About the Java Desktop System feature.
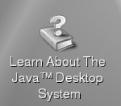
This icon launches a browser from which you can access help to learn about JDS and its applications.
Across the bottom of your screen is a gray strip, or panel, that provides both valuable information and powerful access to features on your system. Figure 1-7 shows this panel.
The following items appear in the panel by default:
- Main menu launch icon
Contains applications and tools to help you configure JDS for your hardware and preferences.
- Clock
Displays the current time.
- Network monitor
Looks like two small monitors and flashes to show when network activity is going on.
- Window list
Displays a button for each window that is open on this workspace. You can click on a window list button to minimize and to restore windows.
- Workspace Switcher
Displays a visual representation of your workspaces, which are discussed in the following section. You can use Workspace Switcher to switch between workspaces.
The JDS workspaces feature allows you to create multiple, personalized workspaces for different projects or purposes and place them on different virtual desktops. For instance, suppose you are working on project X and have a few documents on the desktop for easy referral. You also have project Y for which you need other documents and a multi-tabbed browser. By placing each project on a separate desktop in the workspaces switcher, you can quickly switch between the two projects at a moments notice. Workspaces also allow better organization of work and prevent pieces from being buried.
As another example of the use of workspaces, you may find that placing email and the browser on a separate desktop increases your work efficiency. Or perhaps you want to keep one workspace for business and one for family or fun. JDS takes multi-tasking to new levels with this Workspaces feature. As you learn more programs on JDS and increase your workload, you’ll discover the value of separating your tasks on multiple workspaces.
The Workspace Switcher is a separate program, known as an applet, and is located on the bottom right bar of the JDS desktop. The Workspace Switcher is a rectangle, divided into four boxes. Each box represents a workspace, or desktop, miniaturized into a small icon within the box. This miniaturized depiction helps you recognize what you placed in each workspace for easy switching between workspaces. Each workspace contains the same desktop background and menus that you are used to seeing. You may run different applications and open different windows in each workspace.
Figure 1-8 shows the Workspace Switcher applet when the user has started up a separate application in each of the four workspaces. The first workspace, on the left, is running the StarWriter word processor. The second is running email, the third has a folder window (Nautilus), and the fourth contains a web browser. The currently open workspace, the fourth window with the browser occupies your screen, is highlighted with a darker color, as shown in Figure 1-8.
Instead of displaying a pictorial representation of the workspaces on the JDS desktop, you can change the Workspace Switcher to display the numbers of the workspaces. This is available if you right-click on the Workspace Switcher and choose Preferences from the menu that pops up. In general, objects displayed by JDS provide a menu when you right-click them, and you can often customize them in radical ways by choosing Preferences.
To switch among workspaces, click on the box that represents the workspace you’re interested in. The associated workspace is maximized and occupies your screen. You can start a new window in that workspace simply by clicking on the document or program you want to open. You can move something from the current workspace to another workspace in two ways. The first is to drag the tiny depiction of the window from one box in the Workspace Switcher to another. The second is to go to the top frame of the window you want to move and right-click on the top strip. Select “Move to another workspace” and select the workspace into which you want to move the window.
If you’d like to change the number of workspaces, right-click on the workspaces applet, select Preferences, then choose the number of workspaces desired. You may also add additional rows in the same way.
Get Exploring the JDS Linux Desktop now with the O’Reilly learning platform.
O’Reilly members experience books, live events, courses curated by job role, and more from O’Reilly and nearly 200 top publishers.

