Creating New Documents
There are two main ways to create new documents in an existing library. They differ based on where you start:
Creating a new library document from Word is familiar to most of usâthere's little new to learn.
Creating from the library itself can provide a template to ensure all the documents are consistent.
The following sections show the two approaches.
Starting from Word
To create new document in a library from Word, simply save the document to a SharePoint library:
Create a new document in Word.
Choose File â Save.
Enter the address of the SharePoint library in File Name (for example, http://wombat/Shared Documents/). Word displays a list of the files in the library.
Enter a name for the file and choose Save. Word saves the file to the library.
Once you save a document to a library, Word can display information about the library in the Shared Workspace task pane. To see the other documents in the library from Word:
Choose View â Task Pane. Word displays the Shared Workspace task pane.
Choose the Documents icon to view other files in the library (Figure 6-6).
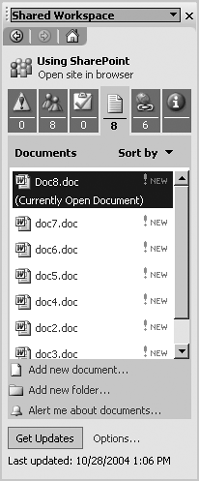
Figure 6-6. Viewing the library from Word
Word refers to this task pane as a workspace, even though it displays a document library from a team site.
Starting from the Library
To create a new document from the library:
In your browser, navigate to the library and choose New Document.
SharePoint displays a security ...
Get Essential SharePoint now with the O’Reilly learning platform.
O’Reilly members experience books, live events, courses curated by job role, and more from O’Reilly and nearly 200 top publishers.

