Archiving in Detail
When you added, modified, or deleted a posting in the last section, the modifications were applied to the associated archive file, as well as the main blog page. Not all changes are reflected this way — if you customize the template or choose a new default template, you have to republish the archive pages to pick up this change.
Generating New Archives
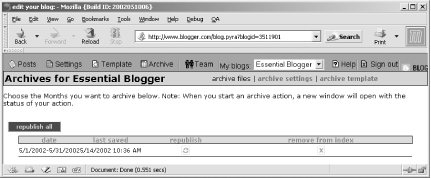
To generate new archive files due to a change in the template, click on the Archive button on the Blogger toolbar. The Blogger Archive view page opens, listing each archive file with icons next to it to republish or delete the specific archive file. Because you’ve just started your blog, only one archive file is present, as shown in Figure 3-10.

Figure 3-10. Blogger Archive view
To republish one specific archive, just click the small recycle button next to the archive filename. When you do, a page opens providing the status of the republication process. When finished, this window closes and the new date and time the archive was republished is shown in the Last Saved column.
Note that occasionally, a blog error page appears instead of a status page. This usually means the Blogger system is under a great load at the time. Wait about an hour and then republishing the archive file again — this time you should be able to see the status page.
If you have more than one archive file, you can click the Republish All button. ...
Get Essential Blogging now with the O’Reilly learning platform.
O’Reilly members experience books, live events, courses curated by job role, and more from O’Reilly and nearly 200 top publishers.

