5.2. Testing an Application with JUnit
Problem
You want to create a JUnit test case.
Solution
Create a JUnit-based class, and implement the tests you want to run. Then use the JUnit plug-in to see your test results immediately.
Discussion
As an example, we’re
going to test the
application TestApp, shown in Example 5-1, which uses a class named
TestClass. This application has two methods:
get, which returns a string, and
set, which returns a confirming value of
true if the value you pass is 0
or greater.
Example 5-1. A simple Java class
package org.cookbook.ch05;

public class TestClass
{
    public String get( ) {
         return "Test String";
    }

    public boolean set(int index) {
         if (index < 0) {
             return false;
         } else {
             return true;
         }
    }
}
To test this application, use the JUnit Wizard plug-in to create a new class in
the project that extends the JUnit TestCase class.
To invoke the wizard, right-click the class you want to test,
TestClass here, and select New→ Other to
open the New dialog shown in Figure 5-3.
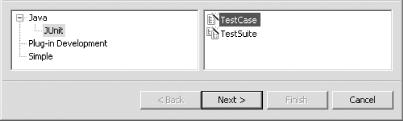
Figure 5-3. Creating a new JUnit TestCase-based class
Expand the Java node in the left pane, and select JUnit. In the right
pane, select TestCase. Click Next, displaying the
dialog shown in Figure 5-4.
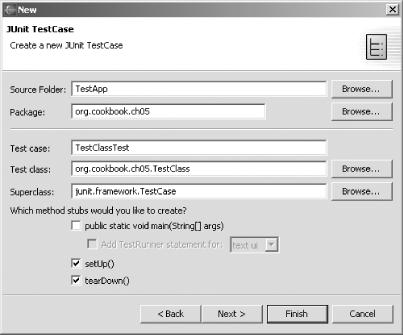
Figure 5-4. Configuring a JUnit test class
The JUnit convention is to name test cases by adding “Test” ...
Get Eclipse Cookbook now with the O’Reilly learning platform.
O’Reilly members experience books, live events, courses curated by job role, and more from O’Reilly and nearly 200 top publishers.

