5.1. Installing JUnit
Problem
You want to install JUnit so that you can use it in Eclipse.
Solution
Add junit.jar to your project’s
classpath.
Discussion
In Eclipse 2.1.x and in the current versions of Eclipse 3.0, you can
find junit.jar in
eclipse/plugins/org.junit_3.8.1/junit.jar.
If you’re going to be using JUnit regularly, it
helps to create a new classpath variable; I named mine
JUNIT. Select Window→
Preferences→ Java→ Classpath Variables, and click
the New button to open the New Variable Entry dialog; now enter the
name of the new variable—JUNIT—and the
path to junit.jar.
You also can let Eclipse know where JUnit’s source
code is; this is a useful step for debugging, giving Eclipse access
to a JAR file’s code so that it can display it as
needed. Note that this is an optional step because you
don’t need to see the JUnit code. To create a new
variable for the JUnit source, which we’ll call
JUNIT_SRC, connect that variable to
eclipse/plugins/org.eclipse.jdt.source_x.y.z/src/org.junit_3.8.1/junitsrc.zip,
where x.y.z is your version of Eclipse. Then
right-click your project, click Properties, click the Java Build Path
node and the Libraries tab, and then expand the node for the
JUNIT entry, as shown in Figure 5-1.
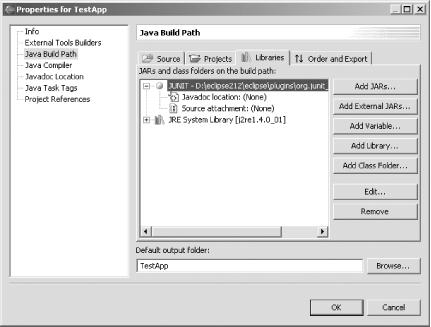
Figure 5-1. Making source code accessible to Eclipse
When you expand a JAR file’s node, you can specify
where to find the associated source code and Javadoc. To use
JUNIT_SRC
Get Eclipse Cookbook now with the O’Reilly learning platform.
O’Reilly members experience books, live events, courses curated by job role, and more from O’Reilly and nearly 200 top publishers.

