Emailing Photos with Picasa
Emailing your photos with Picasa couldn’t be easier. You simply select the photos and click a button. Picasa automatically resizes the photos to email-friendly size and attaches them to a new email message. There’s only one possible hitch in this rosy scenario: You may have to tweak Picasa’s email settings before you send photos. (But unless you change your mind, you don’t have to tinker with the settings again.)
Here’s how to email photos with Picasa, start to finish:
At the top of Picasa’s window, choose Tools→Options.
Picasa’s Options box opens.
Select the Email tab (Figure 15-2).
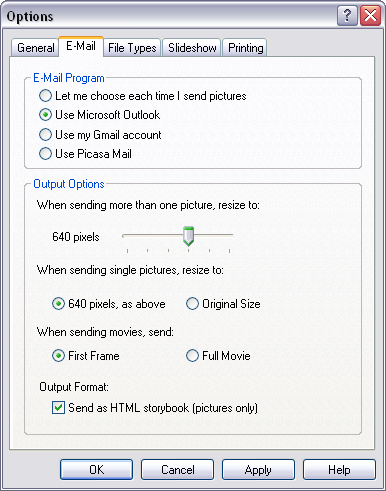
Figure 15-2. Picasa’s Options dialog box lets you decide exactly what the program does when you send photos by email. For example, control the size of your photos by adjusting the slider. Choices range from 160 pixels to 1024 pixels (applied to the longest side of your photo).
Click the radio button for the email method you want to use.
On your desktop PC, choose the same email program you use every day. If you’re setting up Picasa on a laptop, your email method may vary depending on your location. The first option, “Let me choose each time,” means Picasa asks what program to use each time you email pictures. For example, you might use Outlook when your laptop’s plugged in at work, and Gmail when you’re on the road. If you don’t use either of these email programs, pick Use ...
Get Digital Photography: The Missing Manual now with the O’Reilly learning platform.
O’Reilly members experience books, live events, courses curated by job role, and more from O’Reilly and nearly 200 top publishers.

