The Smart Fix
The secret weapon in the Quick Fix window is the Smart Fix command, which automatically adjusts a picture’s lighting, color, and contrast, all with one click. You don’t have to figure anything out. Elements does it all for you.
You’ll find the Smart Fix in the General Fixes palette, and it’s about as easy to use as hitting the speed dial button on your phone: Click the Auto Smart Fix button, and if the stars are aligned, then your photo looks considerably better. Figure 11-5 gives you a glimpse of the Smart Fix’s capabilities. You can download this photo—finch.jpg—from the “Missing CD” page at http://www.missingmanuals.com if you want to try these fixes yourself.
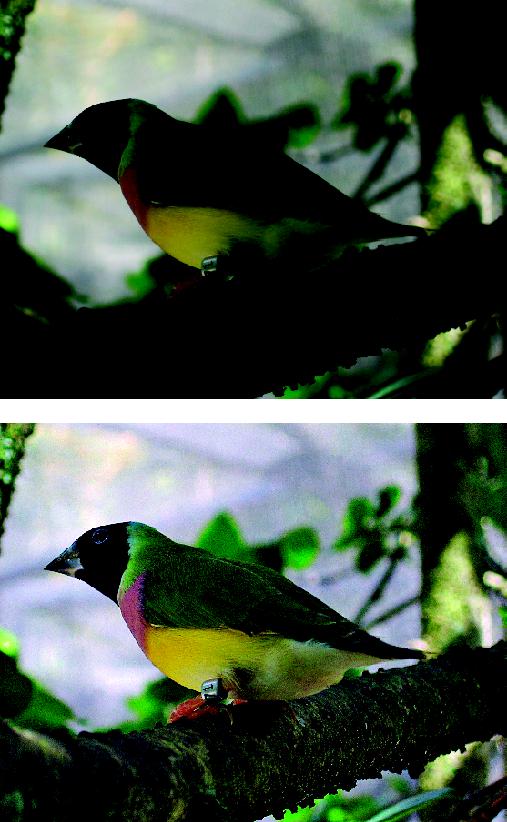
Figure 11-5. Top: This photo is so dark you may think it’s beyond help.Bottom: The Auto Smart Fix button did all this with just one click. (A click of the Auto Sharpening button, explained in Section 11.7, was added to make it look really spiffy.)
If you’re happy with the Auto Smart Fix button’s changes, you can move onto a new photo, or try sharpening your photo a little (Section 11.7) if the focus appears a little fuzzy. You don’t need to do anything to accept the Smart Fix changes.
But if you’re not ecstatic with your results, take a good look at your photo. If you like what Auto Smart Fix has done, but the effect is too strong or too weak, press Ctrl+Z to undo it, and try playing with the Smart Fix Amount ...
Get Digital Photography: The Missing Manual now with the O’Reilly learning platform.
O’Reilly members experience books, live events, courses curated by job role, and more from O’Reilly and nearly 200 top publishers.

