Cheapo digital cameras are often called point-and-shoot models with good reason: You point, you shoot.
Sometimes these cameras let you pick from a few pre-programmed settings like Night Snapshot or Kids & Pets, but for the most part your camera is doing all the thinking for you. More expensive cameras, on the other hand, let you take your camera off autopilot.
If you’re a first-time buyer, you may think a point-and-shoot is a safe starting point. Before you decide, read Chapter 3 to learn about special situations—sports photography, nighttime shots, fireworks, indoor portraits, and so on—where you can get amazing results with the help of manual controls. If you’re looking for a camera that you can grow with as your photo skills increase, manual controls are worth paying for.
On the other hand, you may have chosen your digital camera for its gorgeous flip screen or powerful zoom lens, but never use the manual modes that these models often include. If so, you need Chapter 3 even more. It will help you unleash your camera’s potential—and your own creativity.
The following are the most popular manual features (see Chapter 3 for full coverage about when to use each setting).
In aperture-priority mode, you specify how wide the camera’s shutter opens, and the camera takes care of the other settings (like shutter speed or flash). It’s probably the most popular manual mode, because it puts you in control while ensuring proper exposure. Using aperture-priority mode you can create portraits with softly out-of-focus backgrounds, among other professional effects.
Shutter-priority mode lets you decide how fast the shutter opens and closes; the camera automatically sets the aperture width—and flash, if you’re using it—accordingly. A fast shutter freezes sports action; slow speeds are handy for night photography. You can even use a slow shutter to turn a babbling brook into an abstract, fuzzy blur.
To compensate for different background light variations (the noon sun, the late afternoon sun, ugly office lighting, and so on) that can sometimes look crummy in print, most cameras offer a white balance control, a setting that lets you pick between conditions with names like Daylight, Cloudy, Tungsten, and Fluorescent. Section 3.2.2.3 has full details on how to use this extremely useful setting.
Back in the old days, when photographers had to walk through ten-foot snow drifts just to get to school, they also had to carry around different film types for different lighting situations. For dim lighting, you needed film that was more sensitive to light, since there’s only so long you can leave the camera’s shutter open to let in more light. Light-sensitive film provided a faster (shorter) exposure time (lessening the chance of jiggling the camera while the shutter’s open). For bright outdoor light, you’d switch to a slower (that is, less light sensitive) film to avoid washed-out, overexposed pictures. Film speeds were expressed in an ISO (International Standards Organization) number; higher numbers meant higher light sensitivity and faster exposure times. Popular ISO speeds were 100 for bright (usually outdoor) light, and 400 or even 1000 for low light and indoor shots. To avoid constantly reloading your camera, you could try 200-speed film for the best of both worlds.
On some film cameras, you also had to manually set an ISO dial to match the current film’s speed. The ISO setting adjusted the camera’s light meter so that you could set the shutter and aperture optimally for that type of film. (Later models automatically read the ISO off the film canister and adjusted themselves accordingly.)
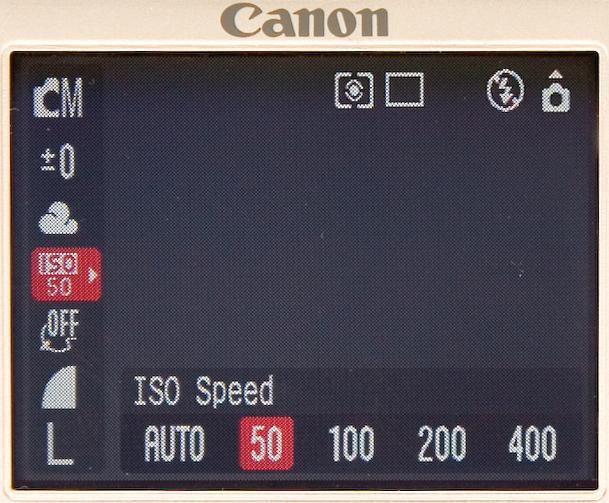
Even though digital cameras don’t take film, many give you a manual ISO setting so you can replicate the effect of different film speeds—and that lets you do some pretty cool things. For instance, if you set your digital camera’s ISO setting to 100, it’s like you’re telling the camera, “I’m taking pictures on Miami Beach in July, so act like you’re a film camera with 100-speed film.” That way, you get better pictures because the digital camera’s manual and automatic settings adjust for low light sensitivity—warning you when you need to use a larger aperture setting or a flash, for example. Or, if you want to take pictures in dim light without a flash, you can bump up the ISO to 400 and make your digital camera more light-sensitive. Figure 1-4 shows an example of one digital camera’s ISO settings.
Get Digital Photography: The Missing Manual now with the O’Reilly learning platform.
O’Reilly members experience books, live events, courses curated by job role, and more from O’Reilly and nearly 200 top publishers.

