Putting the Pieces Together
Now that we have figured out how to isolate the parts of our composition, let's look at the process of putting those images together. Once I have my recipient file prepared, I call up all the other images I'll use in my composition. Assuming we'll be using the selection techniques we discussed earlier to isolate the pieces, we now need only to make those selections and copy and paste or drag the elements over to the new image. You have a couple of options to bring an image in to the new composition: you can Select All, and then copy and paste it into the new composition, or you can drag and drop the image layer over to the new composition. Either way will get the job done.
Making a Simple Composition
I will start with the image of my guy on the beach and my lizard, shown in Figure 6-29.
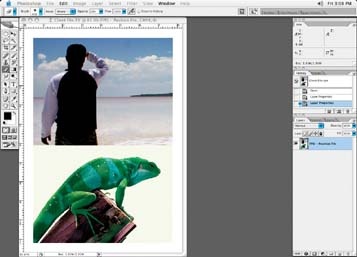
Figure 6-29. All the pieces ready to place in a composition
Once I have all the pieces, I change the image element's opacity to 50% so I can see the FPO through my image for correct positioning. This a much better way of positioning a file than using guidelines. I have seen images rotated slightly and distorted; guides would not work effectively in a case like this. Notice how, since I am able to see both pieces of my composition at once, I can put the lizard right where I want to, as shown in Figure 6-30.
I usually resize the image elements that make up my composition as ...
Get Commercial Photoshop Retouching: In the Studio now with the O’Reilly learning platform.
O’Reilly members experience books, live events, courses curated by job role, and more from O’Reilly and nearly 200 top publishers.

