Creating Shadows for Complex Objects
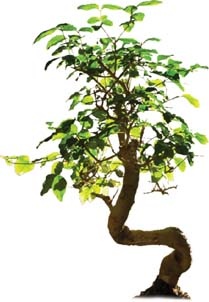
Figure 2-27. Before: a picture of a lonely tree
Note
Normally, I would start a project like this by making a mask of the object. Masks will be covered in a later chapter, so for now, we'll assume that the tree has been cropped out.
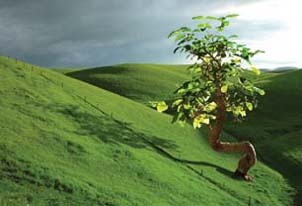
Figure 2-28. After: tree in its new environment with proper shadow
Creating a shadow for a complex object is a little more involved than the freehand shading we've done so far. In this section, we'll create a shadow for a more intricate object, the complex tree shown in Figure 2-27. By the time we get to the final image, Figure 2-28, we'll have replanted this tree on a hillside with the proper shadow intact.
First, make a selection of the tree and create a new multiplied shadow layer. On the new multiplied layer, fill the selection with a 98% black, as I've done in Figure 2-29.
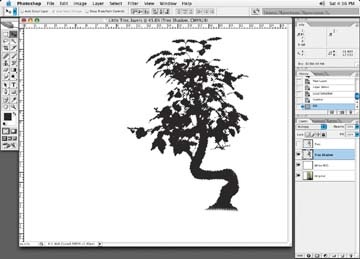
Figure 2-29. The tree selected and filled with 98% black
Next, select Edit â Transform Path â Skew. Move the transform center pivot point of the transform tool to the bottom of the tree, so that it will be the pivot point of the shadow, as in Figure 2-30. Then, adjust the corner handles and distort the shadow layer until the desired shadow ...
Get Commercial Photoshop Retouching: In the Studio now with the O’Reilly learning platform.
O’Reilly members experience books, live events, courses curated by job role, and more from O’Reilly and nearly 200 top publishers.

