ActiveX controls are a great way for Visual Basic programmers to reuse functionality written by other programmers. Using the Messaging Application Programming Interface (MAPI) ActiveX controls, a Visual Basic programmer can create mail-enabled code in less than five minutes. The controls encapsulate the know-how of dealing with the underlying mail system, leaving the programmer free to focus on business requirements.
The downside is that the MAPI controls don’t expose MAPI’s full functionality. For example, MAPI has rich features for creating and accessing multiple folders, but the MAPI controls are able to access only the Inbox folder. Similarly, MAPI makes it easy to define custom fields on message items, but the MAPI controls are unable to access custom fields. This lack of depth comes from the fact that the MAPI controls are built on Simple MAPI. Simple MAPI was introduced in Chapter 1.
If you need a rich interface to MAPI, skip ahead to Chapter 5. However, if you need to work with legacy code that uses the MAPI controls, or if you just need a quick way to send emails programmatically, read on.
The remainder of this chapter assumes that you’re familiar with ActiveX controls in general—that is, you know how to add a control to a form, how to set and read properties in code and at design time, and how to call methods.
The MAPI controls are included in the Professional and Enterprise editions of Visual Basic. The Learning Edition doesn’t include them. Microsoft doesn’t sell the controls individually, and it’s not legal to get them from a friend, so Learning Edition owners must upgrade if they want to use these controls.
Of course, before the MAPI controls can be used, your computer must have MAPI installed, it must have message store, address book, and transport providers installed, and a MAPI profile must be set up. Chapter 2, discussed these requirements at length. The best test that your computer is set up correctly for messaging application development is to ensure that you can send and receive emails using an existing commercial MAPI-compliant email application, such as Microsoft Outlook.
By default, the MAPI controls do not appear in your Toolbox. To add them to the Toolbox for your project, choose Components from the Project menu. The Components dialog box appears, as shown in Figure 4-1.
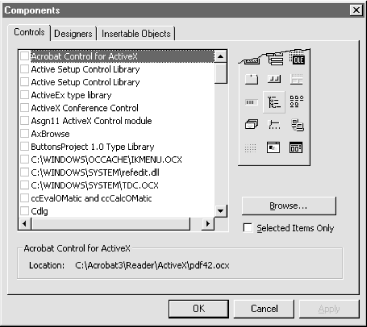
Scroll down the list of components until you find Microsoft MAPI Controls 6.0. Select the checkbox if it’s not selected already, then click OK. After doing so, you’ll see the two MAPI controls in your Toolbox. (If you don’t see the Toolbox at all, choose View → Toolbox from the Visual Basic menu.) The tool icons are shown in Figure 4-2.
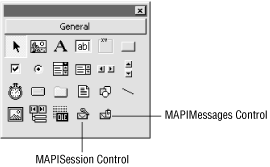
Once the Toolbox has the MAPI controls, the controls can be added to a form. Typically, one of each is added to one of the forms in a project. The MAPI controls are invisible at runtime, so it doesn’t matter where they’re placed. Once they’ve been added to a form, they can be referred to in code to manipulate messages.
Let’s look briefly at each control, and then we’ll dive into sending and receiving messages.
Get CDO & MAPI Programming with Visual Basic: now with the O’Reilly learning platform.
O’Reilly members experience books, live events, courses curated by job role, and more from O’Reilly and nearly 200 top publishers.

