Chapter 4. Development Tools
Embedded system developers, like other software developers, need compilers, linkers, interpreters, integrated development environments (IDEs), and other such tools. The embedded developer’s tools are different, however, in that they typically run on one platform while building applications for another. This is why these tools are often called cross-platform development tools, or cross-development tools for short.
There are two ways to acquire the tools for embedded development: download the source code freely available on the Internet and build them yourself, or get binary versions compiled by another person, company, or project.
As mentioned in Reasons for Choosing Linux in Chapter 1, several commercial vendors distribute integrated embedded Linux packages, including development environments. Two such offerings are MontaVista DevRocket and Wind River WorkBench. Some hardware and board vendors provide free compiled toolchains together with their hardware offerings. In addition, several community projects provide compiled toolchains for download over the Web, such as the Denx ELDK package at http://www.denx.de/wiki/DULG/ELDK.
Typically, such offerings include a ready-to-use toolchain, an Eclipse-based IDE, and sometimes proprietary “added value” plug-ins that extend Eclipse abilities and integrate them with hardware debuggers that are part of the offerings. Eclipse-based tools may allow configuration of the root filesystem and kernel within the Eclipse IDE, using a Java GUI that integrates well with the rest of the Eclipse IDE. This sample of enhancements gives you an idea of what prebuilt environments offer.
The value of an integrated, tested, and debugged toolchain and other development tools should not be taken lightly. Although all the development tools needed to build and develop for embedded Linux system are freely available, the tasks of integrating, building, and testing require time and come with a learning curve for the newly initiated embedded Linux developer. Thus, a prebuilt offering that fits your project’s requirements can save time and help you and your team focus on their number-one priority: getting a successful product out the door.
As you might guess, however, using a prebuilt suite comes with the cost of locking you into the chosen suite. If you build the suite yourself—or at least understand what goes into the build process, which we will discuss in this chapter—you preserve your independence. An understanding of the process may let you have the best of both worlds: a ready-made and vendor-supported offering that saves time and manages risk, along with the ability to switch from one vendor to another or even migrate to a self-supported embedded Linux development environment.
This chapter, therefore, discusses the setup, configuration, and use of cross-platform development tools. First, we will suggest a layout for a practical project workspace. Then, we’ll discuss the GNU cross-platform development toolchain, the C library alternatives, Java, Perl, Python, Ada, and other programming languages, IDEs, the GDB debugger, profilers, bounds checkers, terminal emulation programs, and system emulators.
Even if you opt to buy or download a ready-made toolchain, we recommend that you go through this chapter to get acquainted with the various terms and options involved in the process.
Note
Although debuggers, profilers, and bounds checkers may be be considered part of the development toolchain, these topics are large enough to deserve their own chapter, and therefore are covered in Chapter 11.
Throughout this chapter, we assume that you are using a Linux (or at least Unix-derived) development workstation. As previously mentioned in Windows (Vista, XP, 2000, NT, 98, etc.) Workstation in Chapter 2, you run many of the procedures in this chapter to produce a working toolchain on the Windows platform as well, using the Cygwin compatibility library mentioned in Chapter 2. In addition, because Eclipse is a Java-based application, it can be deployed on a Windows platform just as easily as on Linux. It is worth noting, however, that some Cygwin-specific issues might complicate the effort of following this chapter’s instructions, and so it is generally not recommended for developers taking their first steps with embedded Linux to use Cygwin.
A Practical Project Workspace
In the course of developing and customizing software for your target, you need to organize various software packages and project components in a comprehensive and easy-to-use directory structure. Table 4-1 shows a suggested directory layout that you may find useful. Of course, there is nothing special about the specific layout presented here and, in fact, some of the automated toolchain and root filesystem build tools we are about to describe use a different layout. Feel free to use whatever works for you. However, we will assume the layout shown in Table 4-1 in examples throughout the rest of this book.
Note
The directory layout presented here is aimed to host third-party packages you download from the Net as part of your project. We recommend highly that you separate your own code from the third-party code used to build the system, and we even go so far as to recommend that the two types of code reside in different source control modules. This will minimize any confusion regarding the source’s ownership and licensing status and will make it easy to comply fully with the requirements of some of the open source packages we will use.
|
Directory |
Content |
|
bootldr |
The bootloader or bootloaders for your target |
|
build-tools |
The packages and directories needed to build the cross-platform development toolchain |
|
debug |
The debugging tools and all related packages |
|
doc |
All the documentation you will need for your project |
|
images |
The binary images of the bootloader, the kernel, and the root filesystem ready to be used on the target |
|
kernel |
The different kernel versions you are evaluating for your target |
|
project |
Your configuration files and settings for this project |
|
rootfs |
The root filesystem as seen by the target’s kernel at runtime |
|
sysapps |
The system applications required for your target |
|
tmp |
A temporary directory to experiment with and store transient files |
|
tools |
The complete cross-platform development toolchain and C library |
Of course, each of these directories contains many subdirectories. We will populate the directories as we continue through the rest of the book.
The location of your project workspace is up to you, but we strongly encourage you not to use a system-wide entry such as /usr or /usr/local. Instead, assume as a general rule that the directory structure is being checked out of a source control system by each member of your development group into his own home directory.
Note
One common exception to this rule is the cross-platform development toolchain and related files, which some system builders prefer to keep in a system-wide (or even network-wide) location, as rebuilding them from source is time consuming.
Should you work on a project that supports multiple systems, create a separate directory layout for each component or board type.
For the example embedded control system, we will use the following layout:
$ ls -l ~/control-project
total 4
drwxr-xr-x   13 karim    karim        1024 Mar 28 22:38 control-module
drwxr-xr-x   13 karim    karim        1024 Mar 28 22:38 daq-module
drwxr-xr-x   13 karim    karim        1024 Mar 28 22:38 sysmgnt-module
drwxr-xr-x   13 karim    karim        1024 Mar 28 22:38 user-interface
Since they all run on different targets, each control system component has a separate entry in the control-project directory. Each entry has its own project workspace as described previously. Here is the daq-module workspace, for example:
$ ls -l ~/control-project/daq-module
total 11
drwxr-xr-x    2 karim    karim        1024 Mar 28 22:38 bootldr
drwxr-xr-x    2 karim    karim        1024 Mar 28 22:38 build-tools
drwxr-xr-x    2 karim    karim        1024 Mar 28 22:38 debug
drwxr-xr-x    2 karim    karim        1024 Mar 28 22:38 doc
drwxr-xr-x    2 karim    karim        1024 Mar 28 22:38 images
drwxr-xr-x    2 karim    karim        1024 Mar 28 22:38 kernel
drwxr-xr-x    2 karim    karim        1024 Mar 28 22:38 project
drwxr-xr-x    2 karim    karim        1024 Mar 28 22:38 rootfs
drwxr-xr-x    2 karim    karim        1024 Mar 28 22:38 sysapps
drwxr-xr-x    2 karim    karim        1024 Mar 28 22:38 tmp
drwxr-xr-x    2 karim    karim        1024 Mar 28 22:38 tools
Because you may need to provide the paths of these directories to some of the utilities you build and use, you may find it helpful to create a short script that sets appropriate environment variables. Here is such a script called develdaq for the DAQ module:
export PROJECT=daq-module
export PRJROOT=/home/karim/control-project/${PROJECT}
cd $PRJROOT
In addition to setting environment variables, this script moves you to the directory containing the project. You can remove the cd command if you would prefer not to be moved to the project directory right away. To execute this script in the current shell so that the environment variables are immediately visible, type:[23]
$ . develdaqFuture explanations will rely on the existence of the PROJECT and PRJROOT environment variables.
Warning
Because the distribution on your workstation has already installed many of the same packages you will be building for your target, it is very important to clearly separate the two types of software. To ensure such separation, we strongly encourage you not to carry out any of the instructions provided in the rest of this book while logged in as root, unless we provide explicit instructions to the contrary. Among other things, logging in as an unprivileged user will avoid any possible destruction of the native GNU toolchain installed on your system and, most importantly, the C library most of your applications rely on. Therefore, instead of logging in as root, log in using a normal user account with no particular privileges.
GNU Cross-Platform Development Toolchain
A toolchain is a set of software tools needed to build computer software. Traditionally, these include a linker, assembler, archiver, C (and other languages) compiler, and the C library and headers. This last component, the C library and its headers, is a shared code library that acts as a wrapper around the raw Linux kernel API, and it is used by practically any application running in a Linux system.
Additional components in some toolchains include extra code libraries (such as the zlib library, which provides compression services) and more supplementary tools such as a debugger, profiler, and memory checker.
Last but not least, you might choose to work within an IDE that provides a frontend for these tools, although an IDE is not traditionally counted as part of the toolchain itself.
A cross-platform toolchain—or as it is commonly abbreviated, a cross toolchain—is built to run on one development platform (most commonly x86) but build programs that run on another platform, as is customary when developing for embedded systems.
The cross toolchain we will discuss in this chapter includes the binary utilities, such as the ld linker, the gas assembler, gcc compilerthe ar archiver, the gcc compiler collection, and either glibc or an alternative C library.
In addition, we will touch upon acquiring and building the GDB source-level symbolic debugger, the Valgrind memory checker, and the Eclipse graphical integrated developer environment.
Most of the components of the toolchain are part of the GNU project and can be downloaded from the FSF’s FTP site, either at ftp://ftp.gnu.org/gnu or any of its mirrors. The binutils package is in the binutils directory, the GCC package is in the gcc directory, and the glibc package is in the glibc directory. For any components we discuss in this chapter that are not part of the GNU project, we will describe their creators and how to obtain them.
Note that all the targets discussed in Chapter 3 are supported by the GNU toolchain.
Introduction to Building a GNU Toolchain
Configuring and building an appropriate GNU toolchain is a complex and delicate operation that requires a good understanding of the dependencies between the different software packages and their respective roles, the status of different software packages versions, and a lot of tedious work. The following section will provide a high-level walk-through of the various components, terms, and choices involved in creating a cross toolchain.
Terms and GNU configuration names
As our first step, we will introduce some terms describing the various systems that participate in building and using a cross toolchain:
For standard, nonembedded uses, all three are the same (although some people download binaries and don’t care what the build system is). In most embedded scenarios, the build and the host will be the same machine—the workstation on which the developers work—whereas the target will be the embedded board for which you are developing an application.[24]
When you build software using the GNU configure and build system, as we do here for the various toolchain components, you specify the build, host, and target systems through names in GNU configuration files, which follow a standardized format:
cpu-manufacturer-kernel-os
The kernel component, being a later
addition, is optional. In fact, triplets containing only the
cpu,
manufacturer, and
os are still quite common. The various
components specify:
-
cpu The system’s chip architecture. Where both a big-endian and little-endian variant exists, it is customary to denote the little-endian variant by appending
elto the architecture name.-
manufacturer A specific maker or family of boards using the aforementioned CPU. As this rarely has any effect on the toolchain itself, it is not uncommon to specify an
unknownmachine type or simply to omit the machine description altogether.-
kernel Used mainly for GNU/Linux systems, and even in that case it is sometimes omitted for brevity.
-
os The name of the operating system (or ABI) used on the system. Configuration names may be used to describe all sorts of systems, including embedded systems that do not run any operating system; in those cases, this field indicates the object file format, such as Elf or COFF.
Some examples of possible host, target, or build triplets follow:
- i386-pc-linux-gnu
A PC-style x86 Linux system
- powerpc-8540-linux-gnu
A Freescale 8540 PowerQuickIII Linux system
- mips-unknown-linux
A big-endian MIPS Linux system from an unspecified manufacturer
- mipsel-linux
A little-endian MIPS Linux system from an unspecified manufacturer
- xscale-unknown-linux
An XScale (formely StrongARM) Linux system from an unspecified manufacturer
Typically, cross toolchain component names are prefixed with the target triplet. Thus, for example, a cross-compiler for a Freescale 8541 PowerQuickIII Linux system will be called powerpc-8540-linux-gnu-gcc (gcc being the executable name for the GNU Compiler Collection), whereas the linker for a little-endian MIPS Linux system might be named mipsel-linux-ld, (ld being the executable name of the GNU linker).
Linux kernel headers
The first component required for building a toolchain is the set of the Linux kernel headers. Because the C library, which is part of the toolchain, is a wrapper that presents a more palatable API to the application programmer for the raw Linux kernel system calls, compiling the library requires a subset of the Linux kernel header files that describes the kernel API.
In theory, one should always build the toolchain using the Linux kernel headers from the exact same Linux kernel version that will be used on the target. In practice, however, this is rarely done. Because the ABI of the Linux kernel rarely changes (or more correctly, the parts of it described by the headers rarely changes), using the headers from a different, but similar, kernel version is commonplace.
In Linux kernel releases prior to the 2.6 series, C library builds were based on a verbatim copy of the headers found in the Linux kernel directories include/asm-architecture and include/linux. Since the release of Linux 2.6, however, this is no longer supported, as the kernel headers contain much code that is unsuitable for inclusion in user space applications and can easily break the build of user programs, including the C library. Instead, builds use a sanitized version of the Linux kernel headers, suitable for use by user space code such as the C library. As of version 2.6.23 of the Linux kernel, the kernel source is equipped with an automated Make target for building such a “sanitized” version of the Linux kernel headers.
Tip
For earlier versions, you can use the external utility available at http://headers.cross-lfs.org to accomplish the same task.
From the kernel source directory, simply issue the following
commands, replacing ppc with your
architecture and headers/ with the path to
the directory where you would like the sanitized headers
installed:
$make ARCH=ppcheaders_check$make ARCH=ppcINSTALL_HDR_PATH=headers/ headers_instal;
Binutils
Another important component of the toolchain is the binutils package. This package includes the utilities most often used to manipulate binary object files. The two most important utilities in the package are the GNU assembler, as, and the linker, ld. Table 4-2 contains the complete list of utilities found in the binutils package.
Note
Although as supports many processor architectures, it does not necessarily recognize the same syntax as other assemblers available for a given architecture. The syntax recognized by as is actually a machine-independent syntax inspired by BSD 4.2 assembly language.
The C library
The standard C library most often used with current day Linux systems is thein GNU C library, often abbreviated as glibc. glibc is a portable, high-performance C library supporting all relevant standards (ISO C 99, POSIX.1c, POSIX.1j, POSIX.1d, Unix98, and the Single Unix Specification). It also supports internationalization, sophisticated name resolution, time zone information, and authentication through the use of the NSS, the Name Service Switch, and PAM, the Pluggable Authentication Modules architecture.
The main website for the glibc development project, containing links to the development source tree, bug database, and many resources, can be found at http://www.gnu.org/software/libc. A list of all platforms the library supports can be found at http://www.gnu.org/software/libc/ports.html, and the library itself can be downloaded from the mirrors found at http://ftp.gnu.org/gnu/glibc.
Note
For recent glibc releases, supported architectures are separated into those supported by the core maintainers (x86, PowerPC, SPARC, SuperH, and their 64-bit counterparts are currently the most interesting to embedded system developers) and those supported by volunteers outside the main glibc core group (currently Arm and MIPS). Code for the latter architectures is in a separate glibc-ports package, which can be downloaded from the same location.
glibc is truly a robust, complete, and modern C library, and it can fit very well in many system designs. Indeed, many embedded Linux systems, especially in the telephony and networking market segments, are based on it. However, because it was never designed to be used in an embedded system context, developers building embedded Linux systems with more limited resources, such as consumer electronic devices, often find its resource usage less compelling.
Being rich and full-featured, glibc is huge. To compound the problem for embedded systems, it is not very modular: removing features is a cumbersome and sometimes even impossible job. Additionally, glibc’s designers and implementors have traditionally optimized for performance instead of resource use. For instance, they have optimized for speedier operation at the expense of RAM utilization.
How much of a burden does the size of glibc impose? First of all, the various library files in a minimal glibc take up as much as 2 MB of storage space. But this is by no means the full extent of the problem. Keep in mind that almost every application is compiled against the C library headers. So, the C library also affects the size of application executable files and other libraries.
Executables built with alternative C libraries can be as little as one half the size as those built with glibc, depending on the actual program code and the compiler version used. Savings of 50 percent are quite rare, though; the difference varies widely and occasionally executables end up just as large as they would with glibc.
A similar effect, although usually much less dramatic, can be seen on application runtime RAM usage.
As a rule of thumb, glibc can be a good fit for projects with Flash storage sizes of 16 MB or more. If your project requires smaller RAM, however, you might want to consider popular embedded alternatives such as uClibc and diet libc, which we will describe in the upcoming sections.
The first decision facing a builder of a new toolchain, therefore, is which C library to use. Because the C library is a component in both the toolchain (both as part of the compiler, for support of C++ and other languages, and in the form of library headers) and the runtime image (the code library itself and the allocation code that is compiled to use it), it is impossible to change this decision later without affecting the entire system.
The threading library
Threads are a popular modern programming technique involving several
independent, asynchronous tasks residing in the same process address
space. The Linux kernel, prior to the 2.6 series, provided very little
support for threads. To fill the gap, a few different threading
libraries were developed that implemented much of the required support
in user space with minimal kernel assistance. The most common was the
LinuxThreads library, which was an implementation of the POSIX Threads
standard and was distributed as a glibc add-on until Linux version
2.5. LinuxThreads was a noble and useful project, but it suffered from
problems with scalability and adherence to standards, due to
limitations imposed by the weakness of support for threads in the
Linux kernel at that time. For example, both the getpid() system call and signal handling in
LinuxThreads are non-compliant vis-à-vis the POSIX standard, on
account of kernel-imposed limitations.
The release of the Linux 2.6 series was accompanied by a new thread implementation called the New POSIX Threading Library (NPTL). NPTL relies on Linux kernel supports for threads. A key piece of the implementation, known as a fast user space mutex (futex), provides a robust, POSIX-compliant threading implementation that scales up to thousands of threads. NPTL is now the supported Linux threading library and is distributed as part of recent versions of glibc.
For any new project making use of recent kernel versions and glibc releases, NPTL is the threading library of choice. However, because all Linux kernel releases prior to 2.6.16 contain bugs affecting the threading library, and because it is not unheard of for embedded system builders to base systems on older kernel and glibc releases (mainly due to vendor support issues), LinuxThreads can still be a valid option, especially if your system is only expected to make very limited use of threads.
You can also start off with LinuxThreads and migrate to NPTL, because both conform (at least roughly) to the POSIX standard.
Tip
The confstr()
function can be used to test which threading library
implemention is in use at runtime:
#define _XOPEN_SOURCE
#include <unistd.h>
#include <stdio.h>

int main(void)
{
  char name[128];
  confstr (_CS_GNU_LIBPTHREAD_VERSION, name, sizeof(name));
  printf ("Pthreads lib is: %s\n", name);
  return 0;
}
Component versions
The first step in building the toolchain is to select the version of each component you will use: GCC, glibc, and binutils. Because these packages are maintained and released independently, not all versions of one package will build properly when combined with different versions of the other packages. You can try using the latest versions of each, but this combination is not guaranteed to work either.
To select the appropriate versions, you have to test a combination tailored to your host and target. You may be lucky and find a previously tested combination. If not, start with the most recent stable version of each package and replace it with successively older versions if it fails to build.
Tip
In some cases, the version with the highest version number may not have had the time to be tested enough to be considered “stable.” At the time glibc 2.3 was released, for example, it may have been a better choice to keep using glibc 2.2.5 until 2.3.1 became available.
At the time of this writing, for instance, the latest version of binutils is 2.18, the latest version of GCC is 4.2.2, and the latest version of glibc is 2.7. Most often, binutils will build successfully and you will not need to change it. Hence, let us assume that GCC 4.2.2 fails to build even though all the appropriate configuration flags have been provided. In that case, we would revert to GCC 4.2.1. If that failed, we would try 4.2, and so on.
You must understand, however, that you cannot go back like this indefinitely, because the most recent package versions expect the other packages to provide certain capabilities. You may, therefore, have to go back to older versions of packages that you successfully built if the other packages down the line fail to build. Using the versions just mentioned, for example, if we had to go back to glibc 2.6.0, it might be appropriate to change back to GCC 4.1 and binutils 2.17, even if the most recent GCC and most recent binutils may have compiled perfectly.
In addition, it is quite common to apply patches to some versions to get them to build correctly for your target. The websites and mailing lists provided for each processor architecture in Chapter 3 are good places to find such patches and package versions suggestions.
Whenever you discover a new version combination that compiles successfully, make sure you test the resulting toolchain to ensure that it is indeed functional. Some version combinations may compile successfully and still fail when used. Version 2.2.3 of glibc, for example, builds successfully for a PPC target on an x86 host using GCC 2.95.3. The resulting library is, nevertheless, broken and will cause a core dump when used on the target. In that particular setup, you can obtain a functional C library by reverting to glibc 2.2.1.
There are also cases where a version combination was found to work properly on certain processors within a processor family while failing to work on other processors of the same family. Versions of glibc earlier than 2.2, for example, worked fine for most PPC processors, except those that were part of the MPC8xx series. The problem was that glibc assumed 32-byte cache lines for all PPC processors, whereas the processors in the MPC8xx series have 16-byte cache lines. Version 2.2 fixed this problem by assuming 16-byte cache lines for all PPC processors.
Additional build requirements
To build a cross-platform development toolchain, you will need a functional native toolchain. Most mainstream distributions provide this toolchain as part of their packages. If it was not installed on your workstation or if you chose not to install it to save space, you will need to install it at this point, using the procedure appropriate to your distribution. With a Red Hat distribution, for instance, you will need to install the appropriate RPM packages.
Build overview
With the appropriate tools in place, let’s take a look at the procedure used to build the toolchain. The five main steps involve setting up:
Linux headers
Binary utilities
The bootstrap compiler
The C library
The full compiler
The first thing that you probably noticed is that the compiler seems to be built twice. This is normal and required, because some languages supported by GCC, such as C++, require glibc support. Hence, a bootstrap compiler is built with support for C only, and a full compiler is built once the C library is available.
Although we listed the Linux headers as the first step, the headers will not be used until the C library setup. Hence, you could alter the steps and set up the Linux headers right before the C library setup.
Each of the steps involves many iterations of its own. Nonetheless, the steps remain similar in several ways. Most toolchain build steps involve carrying out the following actions:
Unpack the package.
Configure the package for cross-platform development.
Build the package.
Install the package.
Some toolchain builds differ slightly from this sequence. The Linux headers, for instance, do not require you to build or install the kernel, as we have already seen. Also, because the compiler will have already been unpacked for the bootstrap compiler’s setup, the full compiler setup does not require unpacking the GCC package again.
Workspace setup
According to the workspace directory layout suggested earlier, the toolchain will be built in the ${PRJROOT}/build-tools directory, while the components built will be installed in the ${PRJROOT}/tools directory. To this end, we need to define some additional environment variables. They ease the build process and are based on the environment variables already defined. Using the same example project as before, here is the new develdaq script with the new variables:
export PROJECT=daq-module
export PRJROOT=/home/gby/bels/control-project/${PROJECT}
export TARGET=powerpc-unknown-linux
export HOST=i686-cross-linux-gnu
export PREFIX=${PRJROOT}/tools
export TARGET_PREFIX=${PREFIX}/${TARGET}
export PATH=${PREFIX}/bin:${PATH}
cd $PRJROOT
The TARGET variable
defines the type of target for which your toolchain will be built. It
is expressed as a host/target/build triplet, as explained
earlier.
The HOST variable defines the
type of host on which the toolchain will run, namely your workstation
type. Note that we have slightly modified the host triplet and,
instead of using i686-pc-linux-gnu,
actually use i686-cross-linux-gnu.
The reason for this is that it is possible and sometimes desirable to
be able to build a cross toolchain for an x86- based system, such as a
PC104 platform. If that was done, the host and target triplets could
have been identical, which would have caused a regular toolchain to be
created. Although no such issue exists in our earlier example, because
its toolchain runs on x86 but builds binaries for a PowerPC system, we
still use this convention for good measure.
The PREFIX variable
provides the component configuration scripts with a pointer to the
directory where you would like the target utilities to be installed.
Conversely, TARGET_PREFIX is used for the
installation of target-dependent header files and libraries. To have
access to the newly installed utilities, you also need to modify the
PATH variable to point to the
directory where the binaries will be installed.
Some people prefer to set PREFIX to /usr/local. This installs the tools and
libraries within the /usr/local
directory, where any user can access them. We don’t find this approach
useful for most situations, however, because even projects using the
same target architecture may require different toolchain
configurations.
If you need to set up a toolchain for an entire development team, instead of sharing tools and libraries via the /usr/local directory, we recommend that you build the toolchain within a directory shared by all project members, such as a subdirectory of /opt or a directory on a shared network.
If you choose to set PREFIX
to /usr/local, you will also have
to issue the commands shown later while logged in as the superuser,
with all the risks this entails. You could instead set the permission
bits of the /usr/local directory
to allow yourself or your user group to issue the commands without
requiring root privileges.
Notice that TARGET_PREFIX is
set to ${PREFIX}/${TARGET}, which
is a target-dependent directory. Thus, successive installations of
development toolchains for different targets will place the libraries
and header files of each installation in different subdirectories of
${PREFIX}.
Regardless of the value you give to PREFIX, the ${PREFIX}/${TARGET} combination is the
configuration the GNU toolchain utilities expect to find during their
configuration and installation. Hence, we strongly suggest that you
use this value for TARGET_PREFIX.
The following explanations may require changes if you modify TARGET_PREFIX’s value.
Again, you can remove the cd command from the script if you would prefer not to move directly to the project directory.
Resources
Before proceeding to the actual building of the toolchain, let’s look at some resources you might find useful in case you run into problems during the build process.
First and foremost, each package comes with its own documentation. Although the binutils package is the leanest in terms of installation documentation, it is also the least likely to cause any problems. The GCC and glibc packages, however, are amply documented. Within the GCC package, you will find an FAQ file and an install directory containing instructions about how to configure and install GCC. This includes an extensive explanation of the build configuration options. Similarly, the glibc package contains FAQ and INSTALL files. The INSTALL file covers the build configuration options and the installation process, and it provides recommendations for compilation tool versions.
In addition, you may want to try using a general search engine such as Google to look for reports by other developers who may have already encountered and solved problems similar to yours. Often, this will be the most effective way to solve a build problem with a GNU toolchain.
One extremely useful resource is the Cross-Compiled Linux From Scratch website (http://trac.cross-lfs.org), mentioned earlier. The combination of component versions used in the example toolchain build in the following section has been taken mostly from this resource.
Finally, you can check the crosgcc mailing list, hosted by Red Hat, at http://sources.redhat.com/ml/crossgcc. You will find this mailing list quite useful if you ever get stuck, because many people on this list have a great deal of experience with the process of building cross-platform development toolchains. Often, just searching or browsing the archive will immediately help you locate answers to your questions.
Building the Toolchain
As must be obvious by now, building a cross toolchain is a delicate and complicated process. It requires arcane knowledge concerning versions, patches, and tweaks of the various toolchain components for various architectures—knowledge that is not only scattered among many locations, but also changes from version to version of the components. It is certainly not a task for the novice, or even intermediate, embedded Linux system builder to tackle unassisted.
In fact, this is how Dan Kegel, the main author of Crosstool, described the process of building a cross toolchain manually:
“Building a [ … ] cross-toolchain for use in embedded systems development [ is ] a scary prospect, requiring iron will, days if not weeks of effort, lots of Unix and Gnu lore, and sometimes willingness to take dodgy shortcuts.”
Manually building a toolchain
If you are truly brave of heart or happen to have a lot of free time on your hands and desire to learn the process of cross toolchain inside and out, the authors highly recommend following the Cross Linux From Scratch project (http://trac.cross-lfs.org) as a reference. Otherwise, skip to the next section, where we will describe Crosstool, an automated cross toolchain build system.
Version 1.0.0 of the Cross LFS guide, covering the x86, PPC, MIPS, and Sparc V8 architectures, is available at http://cross-lfs.org/view/1.0.0.
Note
The development branch of the guide—with more updated information but possibly less reliable—can be found at http://cross-lfs.org/view/svn.
Automated cross toolchain build systems
Although it is certainly possible and educational to build a toolchain using a step-by-step manual process, it is not the recommended way to build one for a production system. Instead, we recommend an automated cross toolchain build system, which has the following advantages:
- Reproducible
Because the build is done in an automated fashion, it can be exactly repeated should that be necessary to update a component or fix an error. There is no danger of accidentally omitting an important step.
- Documented
Practically all automated cross toolchain build systems use some sort of configuration file to document the build components, versions, and other choices related to producing the toolchain. This configuration file becomes a form of “executable documentation” for the toolchain and its build process.
- Sharable
This advantage follows from the previous two. Because the cross toolchain build process can be reproduced from a configuration file, you can publish the configuration file to share with other developers.
Indeed, all automated cross toolchain build systems that we will cover come bundled with several pretested components and version combinations that are known to produce working toolchains for specific architectures. This enables novice and intermediate embedded Linux system builders to build working toolchains easily, without needing to become experts on the states of various toolchain components versions.
We’ll describe several automated cross toolchain build systems later in this section.
Crosstool
Crosstool is a set of scripts that build and test several versions of GCC and glibc for most architectures supported by glibc. Crosstool will even download and patch the original tarballs for you. The resulting script and associated patches, and the latest version of the documentation, are available at http://kegel.com/crosstool.
It originated as a script by Bill Gatliff called crossgcc, which Dan Kegel generalized and hacked on until it took its current shape.
Crosstool comes with a set of patches for the toolchain components, which are required to build cross toolchain combinations. It supports the Alpha, ARM, i686, ia64, MIPS, PowerPC, PowerPC64, SH4, SPARC, SPARC64, s390, and x86_64 architectures. Supported software includes GCC versions gcc-2.95.3 through gcc-4.0.0 and glibc versions glibc-2.1.3 through glibc-2.3.5.
It is portable and can be used to build cross toolchains that run on Linux, Mac OS X, Solaris, and Cygwin for building Linux binaries.
Grab the Crosstool archive and unpack it as follows:
$cd $PRJROOT/tools-build/$wget http://kegel.com/crosstool/crosstool-0.43.tar.gz$tar -xzvf crosstool-0.43.tar.gz$cd crosstool-0.43
Crosstool is comprised of a couple of shell scripts and data files used by those scripts. The following are the major scripts:
- crosstool.sh
The main script, containing the logic to compile GCC and glibc.
- getandpatch.sh
This script is in charge of downloading, unpacking, and patching the various toolchain components’ source packages.
- crosstest.sh
This script can run the GCC and glibc regression tests remotely on your target machine. It can be very useful to verify that the toolchain you have just created is indeed working.
- testhello.sh
This script tries to build a trivial “Hello World” program using the newly generated toolchain as a sanity check.
- mkdistcc.sh and mkdistcclinks.sh
These scripts contain Crosstool support for building DistCC-supported cross toolchains.
Note
DistCC achieves faster build times by distributing the build work across a cluster of computers. It is outside the scope of this book, but if you are interested, we recommend the DistCC website at http://distcc.samba.org.
-
demo-
cpu.sh Example scripts that serve as starting points. One exists for each supported architecture (e.g., demo-i686.sh).
- demo.sh
A big demo file that runs all the architecture demo files. Used mainly for testing Crosstool itself.
- clean.sh
As the name implies, a script that cleans up a Crosstool working directory.
- all.sh
The script that actually generates a toolchain; an example of its use appears later in this section. It is a general control script that has the logic to invoke all other scripts in order, according to the parameters supplied. Parameters include:
-
--nounpack Instructs the script not to run getandpatch.sh. Useful for quickly restarting a build.
-
--nobuild Instruct the script not to run crosstool.sh. Useful for downloading the sources for a later build or for running the regression tests.
-
--notest Instructs the script not to run crosstest.sh, thus skipping the regression suite tests.
-
These scripts are mostly architecture- and version-generic. The information pertaining to different architectures and tool versions is stored in separate data files:
-
cpu.dat One such file exists for each supported architecture (e.g., arm.dat) or specific CPU (e.g., ppc-8540.dat). The file contains the information needed to configure Crosstool for a specific architecture. It sets the GNU target name and additional related options.
-
gcc-
version-glibc-version.dat One such file exists for each combination of GCC and GLibc versions (e.g., gcc-3.4.0-glibc-2.3.2.dat). The file contains the information needed to configure Crosstool for that combination. It sets the binutils, GCC, glibc versions, and related options.
-
patches/
program/*.patch These are patch files required to properly build various components’ versions. The
programis the name of the program and version the patch is intended for. Each patch file header contains comments about what it is for and has links to any associated discussion.
Using Crosstool is very simple and straightforward: create a shell script to set up some important shell variables and invoke the build script. For the purpose of the following example, we’ll assume we named the file mytoolchain.sh.
Tip
Use one of the example scripts included with Crosstool as a starting point and adapt it to your needs.
Here are the first lines of our script:
TARBALLS_DIR=download        # where it will save source tarballs
RESULT_TOP=$PRJROOT/tools/   # where it will install the tools
GCC_LANGUAGES="c,c++"        # which languages it will make compilers for
To build the cross toolchain, create an architecture description file and a description file for the GCC and glibc versions. Then invoke the build script.
For example, to build a toolchain based on gcc-3.4.0 and glibc-2.3.2 for i686, add the following line to the mytoolchain.sh script:
eval `cat i686.dat gcc-3.4.0-glibc-2.3.2.dat` sh all.sh --notest
Then execute the script:
$ sh mytoolchain.shAt this point, the script will run for quite some time as it downloads each and every toolchain component, patches them, configures them, and builds them.
When the script finishes, the new toolchain will be ready and you can run the newly created compiler from $PRJROOT/tools/gcc-3.4.0-glibc-2.3.2/i686-unknown-linux-gnu/bin/i686-unknown-linux-gnu-gcc. Of course, you might need to replace gcc-3.4.0-glibc-2.3.2 and i686-unknown-linux-gnu with your actual GCC and glibc versions and architecture.
Your toolchain is ready for use now, but the long pathname of its location is not very convenient to use. As our last step, therefore, we will create a shortcut by making a soft link from the tools directory to the bin directory of the toolchain:
$ln -s $PRJROOT/tools/gcc-3.4.0-glibc-2.3.2/i686-unknown-linux-gnu/bin \$PRJROOT/tools/bin
Henceforth, you can access the toolchain at $PRJROOT/tools/bin/i686-unknown-linux-gnu-gcc, and if you have added this directory to your run path in your workspace setup script, you can use simply 686-unknown-linux-gnu-gcc.
Ptxdist
Ptxdist is a build system for userlands started by the German company Pengutronix e.K. It is maintained as an open source project under a GPL, with the active participation of Pengutronix, which also sells commercial support for it under the brand name OSELAS. The project website can be found at http://www.pengutronix.de/software/ptxdist/index_en.html.
Ptxdist overview
Much more then just an automated cross toolchain building framework, Ptxdist can be considered “executable documentation.” It builds a cross toolchain, then uses this toolchain to build a Linux kernel image and root filesystem for the target, which it then packs as a binary image in one of many available formats.
In this section, however, we will cover Ptxdist just for use as an automated cross toolchain build system. Later in the chapter, we’ll use it as an automated build system for an entire embedded Linux project.
The process for building a cross toolchain with Ptxdist has two phases. First, we’ll download and install the core Ptxdist package and the Ptxdist patches packages. Then, we’ll download an example Ptxdist project that can generate a few different cross toolchain variants.
Installing Ptxdist
First, grab the latest version of the project from its website and install it. At the time of this writing, the latest version is 1.0.1:
$wget http://www.pengutronix.de/software/ptxdist/download/v1.0/ptxdist-1.0.1.tgz$wget http://www.pengutronix.de/software/ptxdist/download/v1.0/ptxdist-1.0.1-patches.tgz
Next, unpack the compressed tar archives and move to the project’s directory:
$tar zxvf ptxdist-1.0.1.tgz$tar zxvf ptxdist-1.0.1-patches.tgz$cd ptxdist-1.0.1
Now, configure Ptxdist for use on your system, build it, and install it:
$./configure --prefix=$PRJROOT/build-tools/$make$make install
Setting up Ptxdist
After Ptxdist has been installed, you can set it up to build a toolchain. Although the default configuration works quite well in most cases, local network and security policies might require a good deal of configuration.
To set up your new Ptxdist installation, issue the following command:
$ ptxdist setupIt presents the Ptxdist setup menu, shown in Figure 4-1.
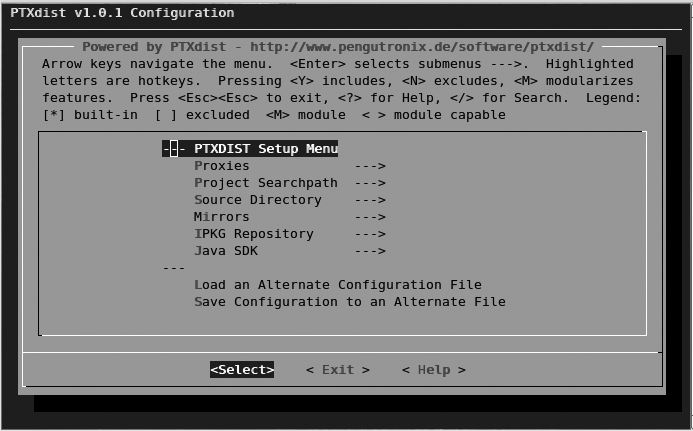
The setup menu allows you to configure many options. You can
obtain information regarding each option using the ? key. This displays a paragraph
explaining how the current option is used and provides its default
values.
The following submenus are available:
- Proxies
Set up HTTP and FTP proxy servers for Ptxdist to use when downloading source packages from the Internet.
- Project Searchpath
Choose a default project working directory. Set this to your project tools directory.
- Source Directory
Choose a directory into which all source packages will be downloaded. Set this to a subdirectory under your project build-tools directory.
- Mirrors
Allows you to specify places to download Debian, GNU, and Xorg source packages. Normally, there is no reason to change this, but if some source packages fail to load due to an unavailable server, you may try to specify a different mirror for the appropriate project.
- IPKG Repository
IPKG is a binary packaging format used in many Linux-based embedded system distributions. Ptxdist can create a custom IPKG repository for you from the packages it builds. For a toolchain building project, leave this at the default value.
- JAVA SDK
Ptxdist allows you to build some Java-based packages. This submenu can be used to point to the relevant Java SDK required to build Java programs. You can leave this as the default value for a toolchain building project.
Tip
If the configuration menu did not show up, make sure that your executable path is set correctly (for example, by running the development environment setup script described earlier) and that your terminal has at least 19 lines by 80 columns.
When you finish, choose the button and press Enter, and then choose the button to save your new configuration.
Creating a toolchain project
Ptxdist is organized around the concept of a project, a set of configuration files and patches required to build a certain set of software. To start building our cross toolchain using the Ptxdist framework, we’ll download an example toolchain Ptxdist project from the Ptxdist website and uncompress the archive:
$wget http://www.pengutronix.de/oselas/toolchain/download/OSELAS.Toolchain-1.1.1.tar.bz2$tar jxvf OSELAS.Toolchain-1.1.1.tar.bz2$cd OSELAS.Toolchain-1.1.1/
Now pick a sample toolchain to build from the included examples. Each toolchain example is represented by a configuration file in the ptxconfigs directory:
$ ls ptxconfigs/
arm-1136jfs-linux-gnueabi_gcc-4.1.2_glibc-2.5_linux-2.6.18.ptxconfig
armeb-xscale-linux-gnueabi_gcc-4.1.2_glibc-2.5_linux-2.6.18.ptxconfig
armeb-xscale-linux-gnu_gcc-4.0.4_glibc-2.3.6_linux-2.6.17.ptxconfig
arm-ep93xx-linux-gnueabi_gcc-4.1.2_glibc-2.5_linux-2.6.18.ptxconfig
arm-iwmmx-linux-gnueabi_gcc-4.1.2_glibc-2.5_linux-2.6.18.ptxconfig
arm-v4t_hardfloat-linux-gnu_gcc-4.0.4_glibc-2.3.6_linux-2.6.18.ptxconfig
arm-v4t-linux-gnueabi_gcc-4.1.2_glibc-2.5_linux-2.6.18.ptxconfig
arm-v4t-linux-gnu_gcc-4.0.4_glibc-2.3.6_linux-2.6.18.ptxconfig
arm-xscale_hardfloat-linux-gnu_gcc-4.0.4_glibc-2.3.6_linux-2.6.17.ptxconfig
arm-xscale-linux-gnueabi_gcc-4.1.2_glibc-2.5_linux-2.6.18.ptxconfig
arm-xscale-linux-gnu_gcc-4.0.4_glibc-2.3.6_linux-2.6.17.ptxconfig
i586-unknown-linux-gnu_gcc-4.1.2_glibc-2.5_linux-2.6.18.ptxconfig
i686-unknown-linux-gnu_gcc-4.1.2_glibc-2.5_linux-2.6.18.ptxconfig
mips-r6000-linux-gnu_gcc-4.1.2_glibc-2.5_linux-2.6.18.ptxconfig
powerpc-603e-linux-gnu_gcc-4.1.2_glibc-2.5_linux-2.6.18.ptxconfig
powerpc64-970-linux-gnu_gcc-4.1.2_glibc-2.5_linux-2.6.18.ptxconfig
To build one of the example toolchains, you need to tell Ptxdist which configuration file you want to use and then tell it to build the toolchain according to the instructions in the configuration file.
As an example, let’s build a cross toolchain for the a ARM Xscale EABI, using GCC 4.1.2 and glibc 2.5 with kernel headers from version 2.6.18, including NPTL support. The example file you will use will therefore be ptxconfigs/arm-xscale-linux-gnueabi_gcc-4.1.2_glibc-2.5_linux-2.6.18.ptxconfig.
Before you do so, however, you must make a small change in the example configuration file in order to use it, because the example configuration files were generated using an earlier version of the Ptxdist framework. The version number of that earlier version is embedded in the configuration file, which will cause Ptxdist to fail with an error message if you try to use the example configuration as is.
Luckily, the configuration files are simple text files. You can simply edit the configuration file and update the version number to match the latest version you use. While this can easily be done manually with a text editor, the following shell hackery does the trick very well:
$sed s/PTXCONF_CONFIGFILE_VERSION=.*/PTXCONF_CONFIGFILE_VERSION="1.0"/ \ptxconfigs/arm-xscale-linux-gnueabi_gcc-4.1.2_glibc-2.5_linux-2.6.18.ptxconfig > \ptxconfigs/arm-xscale-linux-gnueabi_gcc-4.1.2_glibc-2.5_linux-2.6.18.ptxconfig.tmp$mv ptxconfigs/arm-xscale-linux-gnueabi_gcc-4.1.2_glibc-2.5_linux-2.6.18.ptxconfig.tmp \ptxconfigs/arm-xscale-linux-gnueabi_gcc-4.1.2_glibc-2.5_linux-2.6.18.ptxconfig
After running this command, instruct Ptxdist to use your “patched” configuration file through the following command:
$$PRJROOT/build-tools/bin/ptxdist select \ptxconfigs/arm-xscale-linux-gnueabi_gcc-4.1.2_glibc-2.5_linux-2.6.18.ptxconfig
Now you can customize our chosen example toolchan project configuration. Issue the following command:
$ ptxdist menuconfigYou will be presented with the Ptxdist toolchain project menu, shown in Figure 4-2.
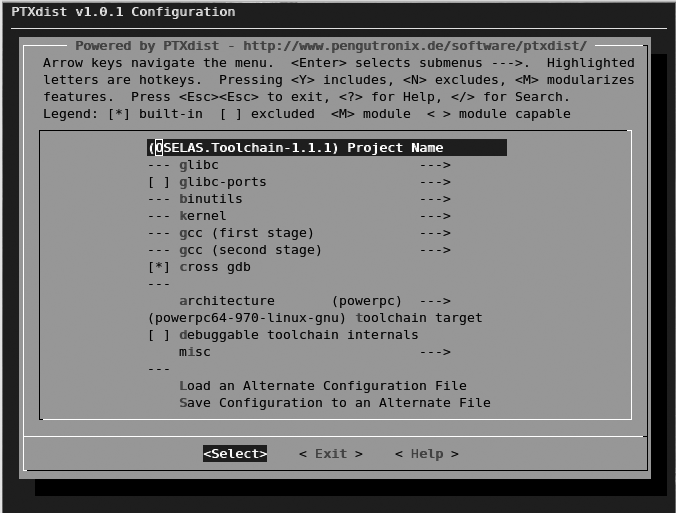
The menu contains the following options and submenus:
- Project Name
A text box to enter a long name for the project. Useful if you are maintaining several different Ptxdist toolchain projects.
- glibc
This submenu allows you to specify the glibc version, any extra configuration options you might wish to pass to the package configuration script, a file list, a series of patches to apply to the library source before the build, the minimum supported kernel version, extra environment variables you might want to pass to the glibc configuration script, which threading library to use (NPTL or LinuxThreads), and whether the resulting glibc will support thread-local storage.
- glibc-ports
This submenu lets you list a series of patches to apply to glibc from the glibc-ports archive, which contains patches for glibc originating outside the glibc core team.
- binutils
This submenu lets you pick which binutils package version to include in the toolchain built.
- kernel
This submenu sets the kernel version and the configuration file for the Linux kernel headers required to build the toolchain. It also lets you specify whether or not to use sanitized headers. For more on kernel configuration, see Configuring the Kernel in Chapter 5.
- gcc (first stage)
This submenu lets you specify the GCC version to use for the first stage (bootstrap) compiler, as well as a patch series file and extra options to provide to the GCC configuration script.
- gcc (second stage)
This submenu allows you to choose which programming languages the newly created toolchain will support. The languages supported depend on the GCC version, but all versions support C and C++.
- cross gdb
This checkbox can be checked to ask PTxdist to build a cross debugger as part of the toolchain.
- architecture
This drop-down box lets you specify the toolchain’s target architecture. Currently ARM, MIPS, PowerPC, and x86 are supported.
- toolchain target
This text box allows you to set your toolchain GNU configuration string (e.g., powerpc64-970-linux-gnu).
- debuggable toolchain internals
This checkbox allows you to specify whether full debugging information should be generated for the toolchain’s glibc and libstdc++ libraries. Selecting this checkbox lets you step into functions defined in these basic libraries, but it will make your toolchain about 500 MB bigger. (It does not affect the target filesystem size, though.)
- misc
The misc submenu allows you to specify the version of Ptxdist that is compatible with the current toolchain project, as well as set the filesystem prefixes into which the generated filesystem will be installed. Set the first prefix to the tools directory under the project root, and leave the second prefix field blank.
After you finish configuring these items, choose the button and press Enter, then choose the button to save your configuration.
Building the toolchain
Finally, you are ready to let Ptxdist build your toolchain. In the process, Ptxdist will automatically download, configure, patch, build, and install all required components. To start the build process, issue the following command:
$ ptxdist goNote
The build process can take from one to a few hours, depending on the speed of your workstation and Internet connection.
When the build finishes, the new toolchain will be ready in the tools/bin directory of your project root.
Using the Toolchain
The steps in the previous sections should have created a fully functional cross-development toolchain, which you can use much as you would a native GNU toolchain; you just need to prepend the target name to every command. For instance, instead of invoking gcc and objdump for your target, you will need to invoke something such as i386-linux-gcc and i386-linux-objdump.
A Makefile for the control daemon on the DAQ module follows, which provides a good example of the cross-development toolchain’s use:
# Tool names
CROSS_COMPILE = ${TARGET}-
AS            = $(CROSS_COMPILE)as
AR            = $(CROSS_COMPILE)ar
CC            = $(CROSS_COMPILE)gcc
CPP           = $(CC) -E
LD            = $(CROSS_COMPILE)ld
NM            = $(CROSS_COMPILE)nm
OBJCOPY       = $(CROSS_COMPILE)objcopy
OBJDUMP       = $(CROSS_COMPILE)objdump
RANLIB        = $(CROSS_COMPILE)ranlib
READELF       = $(CROSS_COMPILE)readelf
SIZE          = $(CROSS_COMPILE)size
STRINGS       = $(CROSS_COMPILE)strings
STRIP         = $(CROSS_COMPILE)strip

export AS AR CC CPP LD NM OBJCOPY OBJDUMP RANLIB READELF SIZE STRINGS \
         STRIP

# Build settings
CFLAGS        = -O2 -Wall
HEADER_OPS    =
LDFLAGS       =

# Installation variables
EXEC_NAME     = command-daemon
INSTALL       = install
INSTALL_DIR   = ${PRJROOT}/rootfs/bin

# Files needed for the build
OBJS          = daemon.o

# Make rules
all: daemon

.c.o:
        $(CC) $(CFLAGS) $(HEADER_OPS) -c $<

daemon: ${OBJS}
        $(CC) -o $(EXEC_NAME) ${OBJS} $(LDFLAGS)

install: daemon
        test -d $(INSTALL_DIR) || $(INSTALL) -d -m 755 $(INSTALL_DIR)
        $(INSTALL) -m 755 $(EXEC_NAME) $(INSTALL_DIR)

clean:
        rm -f *.o $(EXEC_NAME) core

distclean:
        rm -f *~
        rm -f *.o $(EXEC_NAME) core
The first part of the Makefile specifies the
names of the toolchain utilities we are using to build the program. The
name of every utility is prepended with the target’s name. Hence, the
value of CC will be
i386-linux-gcc, the cross-compiler we built
earlier. In addition to defining the name of the utilities, we also
export these values so that subsequent Makefiles called by this Makefile
will use the same names. Such a build architecture is quite common in
large projects that have one main directory containing many
subdirectories.
The second part of the Makefile defines the build
settings. CFLAGS provides the flags
to be used during the build of any C file.
As we saw in the previous section, the compiler is already
using the correct path to the target’s libraries. The linker flags
variable, LDFLAGS, is therefore
empty. If the compiler wasn’t pointing to the correct libraries or was
using the host’s libraries (which shouldn’t happen if you followed the
instructions provided earlier), you would have to tell the compiler
which libraries to use by setting the link flags as follows:
LDFLAGS = -nostdlib -L${TARGET_PREFIX}/libIf you wish to link your application statically, you need to
add the -static option to LDFLAGS. This generates an executable that
does not rely on any shared library. But given that the standard GNU C
library is rather large, this will result in a very large binary. A
simple program that uses printf()
to print “Hello World!”, for example, is less than 12 KB in size when
linked dynamically and around 350 KB when linked statically, even when
stripped.
The variables in the installation section indicate what, where, and how to install the resulting binary. In this case, the binary is being installed in the bin directory of the target’s root filesystem.
In the case of the control daemon, we currently have only one file
to build. Hence, the program’s compilation requires only this single
file, but had you used the -nostdlib option in
LDFLAGS (which you should not
normally need to do) you would also need to change the section
describing the files required for the build and the rule for generating
the binary:
STARTUP_FILES = ${TARGET_PREFIX}/lib/crt1.o \
                ${TARGET_PREFIX}/lib/crti.o \
                ${PREFIX}/lib/gcc-lib/${TARGET}/2.95.3/crtbegin.o
END_FILES     = ${PREFIX}/lib/gcc-lib/${TARGET}/2.95.3/crtend.o \
                ${TARGET_PREFIX}/lib/crtn.o
LIBS          = -lc
OBJS          = daemon.o
LINKED_FILES  = ${STARTUP_FILES} ${OBJS} ${LIBS} ${END_FILES}
...
daemon: ${OBJS}
        $(CC) -o $(EXEC_NAME) ${LINKED_FILES} $(LDFLAGS)
The preceding Makefile excerpt adds five object files to
the one it generates from our own C file: crt1.o, crti.o, crtbegin.o, crtend.o, and crtn.o. These are special startup,
initialization, constructor, destructor, and finalization files,
respectively, which are usually automatically linked to your
applications. It is through these files that your application’s
main( ) function is called, for
example. Since we told the compiler not to use standard linking in this
case, we need to explicitly mention the files. If you disable standard
linking but forget to explicitly mention the files, the linker will
complain about a missing _start
symbol and fail. The order in which the object files are provided to the
compiler is important because the GNU linker, which is automatically
invoked by the compiler to link the object files, is a one-pass
linker.
The make rules themselves are very much the
same ones you would find in a standard, native Makefile. We added the
install rule to automate the install
process. You may choose not to have such a rule but to copy the
executable manually to the proper directory.
With the Makefile and the source file in your local directory, all you need to do is type make to build your program for your target. If you want to build your program for native execution on your host to test your application, for example, you could use the following command:
$ make CROSS_COMPILE=""C Library Alternatives
Given the constraints and limitations of embedded systems, the size of the standard GNU C library makes it an unlikely candidate for use on our target. Instead, we need to look for a C library that will have sufficient functionality while being relatively small.
Over time, a number of libraries have been implemented with these priorities in mind. In this section, we will discuss the two most important C library alternatives: uClibc and diet libc. For each library, we’ll provide background information, instructions on how to build the library for your target, and instructions on how to build your applications using the library.
uClibc
The uClibc library originates from the uClinux project, which provides a Linux that runs on processors lacking a memory management unit (MMU).[25] The library, however, has since become a project of its own and supports a number of processors, including ones that have an MMU. In fact, at the time of this writing, uClibc supports all the processor architectures discussed in-depth in Chapter 3.
Although it does not rely on the GNU C library, uClibc provides most of the same functionality. It is, of course, not as complete as the GNU library and does not attempt to comply with all the standards with which the GNU library complies. Functions and function features that are seldom used, for instance, are omitted from uClibc. Even so, most applications that can be compiled against the GNU C library will also compile and run using uClibc. To this end, uClibc developers focus on maintaining compatibility with C89, C99, and SUSv3.[26] They regularly run extensive test suites to ensure that uClibc conforms to these standards.
uClibc is available for download as a tar-gzipped or tar-bzip2’d archive or by using CVS from the project’s website at http://uclibc.org. The library is distributed under the terms of the LGPL. An FAQ is available on the project’s website, and you can subscribe to the uClibc mailing list or browse the mailing list archive if you need help. In the following description, we will use version 0.9.29 of uClibc, but the explanation should apply to subsequent versions as well. Versions earlier than 0.9.16 depended on a different configuration system and are not covered in the following discussion.
Buildroot
Because the C library is one of the major components of a toolchain, and uClibc is an alternative C library for embedded Linux systems, using it requires building a custom cross toolchain. Just as with glibc cross toolchains, the best way to build a uClibc-based cross toolchain is to use an automated build framework to do the heavy lifting. The uClibc distribution includes its own framework called Buildroot.
Note
Older versions of uClibc provided a wrapper around various toolchain components that allowed you to build applications against uClibc without the need for a custom toolchain.
Alas, this approach has been discontinued, as the wrappers have proved to introduce more complications than assistance.
Download Buildroot from the http://buildroot.uclibc.org website and extract the compressed tar archive:
$cd $PRJROOT/build-tools/$wget http://buildroot.uclibc.org/downloads/snapshots/buildroot-snapshot.tar.bz2$tar jxvf buildroot-snapshot.tar.gz$cd buildroot/
Run the configuration menu utility:
$ make menuconfigYou will be presented with Buildroot configuration menu, shown
in Figure 4-3. As in the
Ptxdist menu, you can obtain information regarding each option using
the ? key. Indeed, both Ptxdist and
Buildroot share the same configuration system, which uClibc, the Linux
kernel, and many other projects also use.
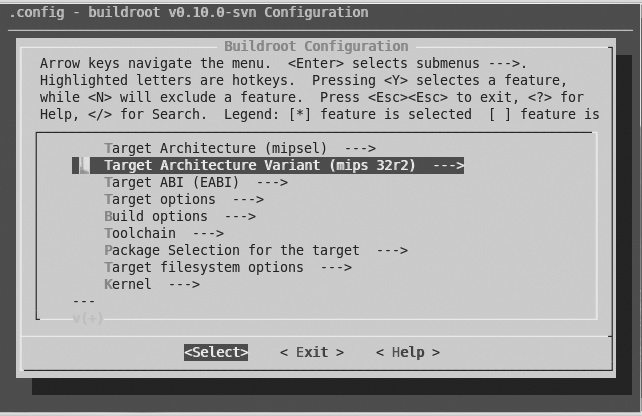
The Buildroot main menu includes the following options:
- Target Architecture
Lets you choose the target architecture for which the cross toolchain creates binaries.
- Target Architecture Variant (optional)
Configures a subarchitecture or generation to build for, such as 386, 486, or 686 for the x86 family, if applicable.
- Target ABI (MIPS only)
The target ABI option, which is offered only for the MIPS architecture, controls which of three available Application Binary Interfaces to use. Most embedded systems builders are likely to choose the new embedded targeted API, called EABI.
- Target options
This submenu controls several settings of interest only to people using Buildroot to build the entire root filesystems. They do not affect cross toolchain compilation.
- Build options
This submenu allows you to set several different options concerning the cross toolchain build process:
The commands used to perform such tasks as retrieving files from FTP and websites, checking out source code from Subversion and Git source control repositories, and uncompressing Gzip and Bzip2 archives, as well as any special command-line options to pass to the tar command. The defaults provided are quite sensible and will work out of the box for most modern Linux systems.
Mirrors and download locations for components such as the Linux kernel, GNU software (such as GCC, binutils, and GDB packages), and a Debian project mirror (used to fetch additional packages). Leaving the defaults is safe, but if you happen to know the URL of a nearby mirror, you may save considerable time by configuring it here.
The directory into which the cross toolchain and header files will be installed. Change this to the directory we have configured as $PRJROOT/tools/.
Note
Due to the way these configuration options are used, you cannot actually use the
$PRJROOTenvironment variable here and will have to enter its value.The
_nofpusuffix on the names of executables that support targets with no hardware floating point.The custom prefix and suffix for build directories’ names to allow the building of several architectures in a single location. Use of these options is not recommended.
An optional, custom GNU target suffix. You can use this to “brand” your cross toolchain.
A version of the strip utility. The traditional strip command is recommended, rather then the newer sstrip.
An option to configure the toolchain to use static libraries, rather then dynamic, loadable ones. Not recommended for novice users.
Several other options related to the use of Buildroot for building root filesystems, which are not relevant for toolchains.
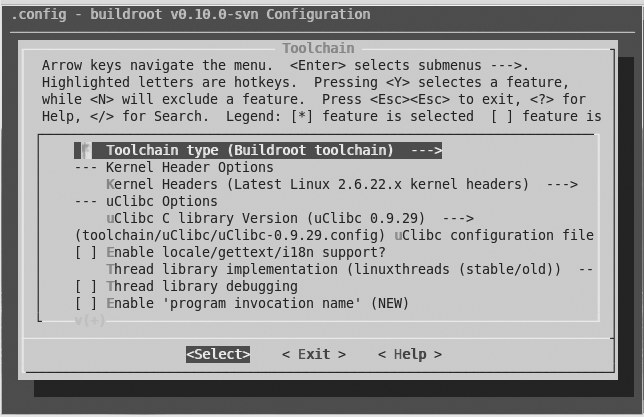
- Toolchain
This submenu, shown in Figure 4-4, controls several key configuration options for Buildroot-based toolchain builders:
Select whether you wish to use an external toolchain or build a new one. Use the default, called “Buildroot toolchain,” because you should have Buildroot generate a toolchain and not rely on an externally supplied toolchain.
Select a kernel headers version. Pick the version that most closely matches your target kernel version.
Choose a uClibc library version. Choosing one of the latest released versions (rather than the daily snapshot) is recommended.
Configure the location of the uClibc library configuration file. Leave it as the default at the moment; we will describe how to customise uClibc configuration in the next section.
Support internationalization (i18n). Not normally useful for embedded systems.
Pick a threading library implementation. NPTL is recommended.
Control whether to build the threading library with debug symbols. Most people will want to say “Yes” here.
Set an option to support the GNU “program invocation name” extension, which is used by some third-party programs (such as GNU tar) but not generally required. Choose “Yes” here.
Pick the version of the binutils package. Pick the most recent version offered.
Set additional options to pass when building the bintuils packages. Normally this is left empty.
Pick the GCC compiler version. Older versions usually produce smaller code but support fewer features and have known issues.
Enable your cross toolchain to use a custom sysroot, separate from the system’s. It is important to enable this option to separate the cross toolchain cleanly from the native toolchain and libraries that might be installed on your workstation.
Implement exception handling using setjmp/longjmp, rather then the more orthodox stack unwinding, to overcome issues with stack unwinding code. Choose “No” unless exceptions do not work correctly.
Set additional options to pass during the GCC build. Leave this empty.
Configure whether to build C++, FORTRAN, and Objective-C compiler and runtime support, in addition to C support.
Build and install a shared library version of libgcc, the GCC runtime code library. Most people will choose “Yes” here.
Build a toolchain supporting the ccache compiler cache tool.
Set options for building and installing GDB, the GNU debugger, as part of the toolchain. See additional discussion of GDB in Building and Installing gdb Components in Chapter 11.
Support the FLT format, which is used with uClinux systems (Linux for systems with no MMU support).
Choose whether to build and install sstrip (an enhanced version of the strip utility for editing ELF binary sections). As this is a useful tool, it is recommended that you set this option.
Choose whether to build and support libraries that support multiple target ABIs. Not usually needed or recommended.
Support files larger then 2 GB. Enabling this will require more runtime resources.
Enable support for the IPv6 and RPC network protocols in the uClibc library.
Support wide characters, or WCHAR, which is needed by some third-party software packages.
Select whether to include software floating-point emulation in the toolchain. Useful for targets with no FPU, and preferred over using Linux-kernel-based emulation on these systems for performance reasons.
Choose whether to install some useful target binaries (such as the debugger agent) in the toolchain directory.
Configure additional options related to the use of Buildroot to generate root filesystems.
- Package Selection for the target
As the name implies, this submenu allows one to ask Buildroot to fetch, build, and package additional software packages for the target filesystem using the cross toolchain. Although this is a very useful option, it is of not interest to us at this time. Unmark all the options in this menu. The next chapter discusses building the target filesystem.
- Target filesystem options
This submenu allows you to configure how Buildroot will package the root filesystem it builds. As explained in the previous entry, you should unmark all the options in this submenu at this time.
- Kernel
This submenu allows you to configure a Linux kernel version and configuration file to be automatically fetched and built by Buildroot using the cross toolchain. As before, leave all options unmarked at this time.
When finished, choose the button and press Enter, then choose the button to save your configuration.
Next, run make to let Buildroot fetch, patch, configure, build, and install your new uClibc-based cross toolchain:
$ makeNote
This stage can take quite some time and requires a working Internet connection.
The resulting toolchain will be installed in the $PRJROOT/tools/bin directory when the build completes.
Customizing the uClibc configuration
The previous section used Buildroot to build a uClibc-based toolchain, using the default uClibc options for our target architecture. These default options are very reasonable, and it is recommended you stick with them, at least in your first attempt to build a uClibc-based system.
Having said that, we recognize it is sometimes desirable to fine-tune and optimize certain options in the uClibc configuration itself. This can be done through Buildroot, after it is configured using the procedure outlined in the previous section, by issuing the following command:
$ make uclibc-menuconfigYou will be presented with the uClibc configuration menu, which includes the following submenus and options:
Target Architecture
Target Architecture Features and Options
General Library Settings
Advanced Library Settings
Networking Support
String and Stdio Support
Big and Tall
Library Installation Options
Security Options
uClibc Development/Debugging Options
Note that many options in the uClibc configuration menu (such as the architecture type and installation path) will already be set according to your previous choices in the Buildroot configuration menu.
Let us now take a look at the options found in each
configuration submenu. As mentioned earlier, you can use the ? key to obtain more information about each
option from the configuration system. Because some options depend on
the settings of other options, some of the options listed here may not
be displayed in your configuration. While most options are binary
choices (either enabled or disabled), others are text fields.
The Target Architecture option designates the target architecture for which uClibc will be built. The Buildroot configuration menu we described earlier set this option already.
The Target Architecture Features and Options submenu includes the following options:
- Target Processor Type
Which model of the specific architecture to optimize for.
- Target file format
Which executable file format to use. For targets using an MMU, the option is preset to ELF. For non-MMU-based targets, a choice of binary file types is available. For a discussion of the various formats and their relative weak and strong points, see http://www.linuxdevices.com/articles/AT3186625227.html.
- Target CPU has a memory management unit (MMU)
Specifies whether the specified target CPU has an MMU. If you chose a specific target model in the Target Processor Type option, this field may be preset for you.
- Do you want to utilize the MMU?
Even when hardware supports an MMU, you might want to conserve RAM and CPU cycles by not using it.
- Enable floating-point number support
This option allows you to omit all floating-point number support from uClibc. This will cause floating-point functions such as
strtod()to be omitted from uClibc. Other floating-point functions, such asprintf()andscanf(), will still be included in the library, but will not contain support for floating-point numbers.- Target CPU has a floating-point unit (FPU)
If your target CPU does not have a floating-point unit (FPU) or a kernel FPU emulator, but you still wish to support floating-point functions, uClibc can be compiled with soft floating-point support (using the -msoft-float option to the GCC). Unsetting this option will turn this behavior on.
- Enable full C99 math library support
If you want the uClibc math library to contain the full set of C99 math library features, set this option. If you leave it unset, the math library will contain only the math functions listed in the POSIX/IEEE 1003.1b-1993 standard, thus saving a couple of tens of kilobytes from the library size, depending on your architecture.
- Linux kernel header location
This field contains the kernel headers path and is preset by the Buildroot system.
The General Library Settings submenu includes the following options:
- Generate position-independent code (PIC)
Build uClibc entirely as position-independent code, even the static parts (shared library parts are always built as PIC code). This option is useful only if you want to statically link uClibc inside a shared library, and is very rarely turned on.
- Enable support for shared libraries
Unless you are building a static library only system, you should enable this option.
- Only load shared libraries which can share their text segment
This option will prevent the shared library loader from loading shared libraries that modify the program’s code section during the load in order to support relocations (thus requiring additional memory for each user of the shared library). Such modifications normally take place when a shared library is been compiled without the -fPIC or -fpic options, which enforce position-independent code.
Because building a shared library without position-independent code is rarely a good idea, this option can trap build mistakes that would otherwise cause a needless waste of RAM.
- Native ‘ldd’ support
Enables all the code needed to support the traditional ldd, which executes the shared library loader to resolve all dependencies and then displays a list of shared libraries that are required for an application to function. Disabling this option makes uClibc’s shared library loader a little bit smaller, but makes debugging certain link problems harder.
- Enable library loader cache (ld.so.conf)
Enable this to make use of /etc/ld.so.conf, the shared library loader cache configuration file, to support nonstandard library paths, similar to the equivalent behavior in glibc.
- Enable library loader preload file (ld.so.preload)
Enable this to make use of /etc/ld.so.preload. This file contains a whitespace-separated list of shared libraries to be loaded before the program. It also has an equivalent in glibc.
- Shared library loader naming prefix
Sets a custom prefix for all shared library loader files. Required only if you plan to support glibc and uClibc on the same system, which should practically never happen in a production embedded system, so leaving the default is recommended.
- Link ldconfig statically
Enable this option to statically link the ldconfig binary (thus making it a little bit bigger), which is useful if you are trying to debug shared library linkage problems. Otherwise, you might not be able to run the ldconfig tool, because it too is dependent upon a shared library. If space requirements permit, you should enable this option.
- Enable ELF RUNPATH tag support
The ELF executable format supports a dynamic RPATH/RUNPATH tag that allows it to dynamically override the default search path of shared libraries on an executable-by-executable basis. Use of this feature is not very common, so disabling support for it is a good way to lower the shared library’s loader size and the load time of shared libraries.
- Support global constructors and destructors
If you have no plan to use C++ or GNU extension constructor and destructor attributes (using the
__attribute__((constructor))and__attribute__((destructor))syntax), you can leave out support for them entirely, making each executable in the system a little smaller.- POSIX threading support
Enabling this option adds support for POSIX threads, which will increase the size of uClibc as well as have a slight impact on runtime performance, because locking primitives will be added to protect internal critical uClibc data structures. Enable this option unless you never plan to make use of threads.
- Build pthreads debugging support
Enabling this option will build the libthread_db shared library, which is necessary to debug multithreaded applications. Unless you never plan to debug multithreaded code on your target, you should enable this option.
Note
GDB must also be built with uClibc to make multithreaded debugging possible.
- Use the older (stable) version of LinuxThreads
Currently, uClibc supports only the legacy (LinuxThreads) threading library, although experimental support for NPTL is also available.
However, there are two versions of LinuxThreads supported by uClibc. The older (stable) version has been in uClibc for quite a long time but hasn’t seen too many updates other than bug fixes. The new version has not been tested much, and lacks ports for architectures glibc does not support (such as Blackfin and FRV), but is based on the latest code from glibc, so it may be the only choice for the newer ports (such as Alpha, AMD64, and HPPA).
- Large file support
Enabling this option allows uCLibc to support files larger then 2 GB, at the expense of a bigger footprint.
- Malloc implementation
This submenu allows a choice between three
malloc()implementations, ranging from a simplistic implementation suitable for systems with smaller RAM and allocations up to a standard implementation equivalent to the one found in glibc.- Malloc returns live pointer for malloc(0)
This option controls the behavior of
malloc()when asked to return an allocation of zero size. Enable this option for full glibc compatibility.- Dynamic atexit() support
Controls whether to support multiple dynamic
atext()callbacks. Required for proper C++ support.- Old (visible) atexit support
An outdated option included for backward compatibility with older releases of uClibc. Leave unset.
- Enable SuSv3 LEGACY functions and enable SuSv3 LEGACY macros
Enable support for defunct functions and macros (
bcopy,bzero,bcmp,index, andrindex) that some software packages might still need.- Shadow password support
Enable support for keeping the user password in a shadow file, separate from the master user database, for better security. This option is recommended.
- Support for program_invocation_name and support for __progname
These options enable support for very rarely used aliases to the
argv[0]argument containing a program name. Some software packages (notably GNU tar and coreutils) use these aliases to provide extra useful output. It is normally safe to leave this option unset.- Supports only Unix 98 PTYs
Unsetting this option enables legacy support for non-Unix 98 PTYs. Unless you are going to use older applications, it is safe to leave this set.
- Assume that /dev/pts is a devpts or devfs filesystem
Enabling this option assumes that the devpts virtual filesystem is used to keep track of pseudoterminal devices. This is normally true for modern Linux systems. But if you choose this option, enable devpts support in the kernel configuration.
- Various additional time related options
The last options in this menu control the handling of time and time zones in uClibc. For full glibc compatibility and best performance, you should turn on all these options.
The Advanced Library Settings submenu contains advanced options that allow expert developers to tweak the sizes of various buffers used internally in uClibc.
The Networking Support submenu includes the following options:
- IP version 6 support
Enables support for IPv6 in networking system calls.
- Remote Procedure Call (RPC) support
Enables RPC support. Unless you plan to make use of NFS, it is safe to unset this option.
- Full RPC support
Full-featured RPC support. Not required for NFS. Unless you have a very specific need for full RPC support, you can safely unset this option.
- Reentrant RPC support
Provides reentrant versions of the RPC calls. Required for some programs (such as exportfs).
- Use netlink to query interfaces
Query network devices via the newer Netlink interface rather then the old ioctl interface. Usually not recommended, as the newer Netlink interface requires a larger footprint but can be turned on to resolve issues with newer network device drivers that do not support the old interface.
- Support res_close() (bsd-compat)
Turns on the BSD-compatible network API. Usually not required.
The String and Stdio Support submenu includes various options to tweak and configure the behavior of functions related to strings and files. The major options are the following:
- Wide character support
Enables wide character support. This will make uClibc much larger. It is required for locale support (the next option), so this option is recommended only if you must support languages using characters greater than 8 bits in length.
- Locale support
Turns on full ANSI/ISO C99 locale support (except for
wcsftime()and collating items in regular expressions).Enabling this option will make uClibc much larger; used with the default set of supported locales (169 UTF-8 locales and 144 locales for other codesets) will enlarge uClibc by around 300 KB. Use this only if internationalization support at the system library level is a must.
- Include the errno message text in the library
Include the signum message text in the library Enable these options to display verbose error messages and signal descriptions at the cost of about 3.5 KB in uClubc library size. These options alter the displays shown by
strerror()andstrsignal(). Recommended for most systems.
Additional miscellaneous options and submenus allow you to change other, less critical string and file handling in uClibc.
The Big and Tall submenu provides several options allowing you to drop rarely used functionality from uClibc. As a general rule, the defaults are recommended.
The Library Installation Options submenu specifies several installation paths and prefixes used by the uClibc installer. The Buildroot environment will have already chosen the values of the options in this section; you shouldn’t change them.
The Security Options submenu provides options to turn on several security features, allowing you to harden the uCLibc installation against security attacks at the cost of runtime performance. It is safe to leave all these options unset.
The uClibc Development/Debugging Options submenu accesses some options that can be useful when debugging uClibc and uClibc-based applications, such as debug symbols for the library and runtime assertions in the uClibc library code for debugging uClibc itself. You would not normally ship a finished product with these debug options enabled, however.
After using the menus just described to adapt the uClibc configuration to your needs, copy the .config file to toolchain/uClibc/uClibc.config or toolchain/uClibc/uClibc.config-locale. The former is used if you haven’t selected locale support in the Buildroot configuration, and the latter if you have selected it.
$ cp toolchain_build_arm/uClibc-0.9.29/.config toolchain/uClibc/uClibc.configNow rebuild Buildroot:
$make clean$make
Diet libc
The diet libc project was started and is maintained by Felix von Leitner. Its goals are similar to uClibc. In contrast with uClibc, however, diet libc did not grow from previous work on libraries but was written from scratch with an emphasis on minimizing size and optimizing performance. Hence, diet libc compares quite favorably to glibc in terms of footprint and speed. In comparison to uClibc, though, we have not noticed any substantial difference.
Diet libc does not support all the processor architectures discussed in Chapter 3; it supports the ARM, MIPS, x86, and PPC. Also, the authors of diet libc favor static linking over dynamic linking. So, although diet libc can be used as a shared library on some platforms, it is intended to be used as a static library.
One of the most important issues to keep in mind while evaluating diet libc is its licensing. In contrast to most other libraries, including uClibc, which are usually licensed under the LGPL, diet libc is licensed under the terms of the GPL. As we explained in Chapter 1, this means that by linking your code to diet libc, you make the resulting binary a derived work and can distribute it only under the terms of the GPL. A commercial license is available from the package’s main author if you wish to distribute non-GPL code linked with diet libc.[27] If, however, you would prefer not to have to deal with such licensing issues, you may want to use uClibc instead.
Diet libc is available for download both as a tar-bzip2’d archive or using CVS from the project’s website at http://www.fefe.de/dietlibc/.[28] The package comes with an FAQ and installation instructions. In the following examples, we will use version 0.21 of diet libc, but the explanations should apply to other versions as well.
Library setup
As with uClibc, the first step to setting up diet libc is to download it into your ${PRJROOT}/build-tools directory. Here, too, you will build the library within the package’s source directory and not in another directory, as was the case for the GNU toolchain. No configuration is required for diet libc. Instead, you can proceed with the build stage immediately.
Once the package is extracted, move into the diet libc directory for the setup:
$ cd ${PRJROOT}/build-tools/dietlibc-0.31Before building the package for your target, build it for your host. This is necessary to create the diet utility, which is required to build diet libc for the target and later to build applications against diet libc:
$ makeIn the setup used for this example, this command creates a bin-ppc directory containing a PPC diet libc. You can now compile diet libc for your target:
$ make ARCH=i386 CROSS=i386-linux-You will see even more warnings than with the other packages, but you can ignore them. Here, you must tell the Makefile both the architecture for which diet libc is built and the prefix of the cross-platform development tools.
With the package now built, you can install it:
$ make ARCH=i386 DESTDIR=${PREFIX}/dietlibc prefix="" installThis installs diet libc components in ${PREFIX}/dietlibc. Again, as when building
the package for your target, you must specify the architecture. Also
specify the install destination using the DESTDIR variable, and reset the Makefile’s
internal prefix variable, which is
different from the capital PREFIX
environment variable.
Diet libc has now been installed in the proper directory. There is, however, one correction you may need to make to the installation. Because the example shown here installed the x86 version of diet libc, it also installed the x86 version of the diet utility in ${PREFIX}/dietlibc/bin. Since we intend to compile our applications on the host, we need to overwrite this with the native diet utility we built earlier:
$ cp bin-ppc/diet ${PREFIX}/dietlibc/binUsage
In order to use diet libc, you must first modify your system PATH variable, and then make use of a special diet libc wrapper when making calls to the various build tools.
First, change your path to include the directory containing the diet libc binary:
$ export PATH=${PREFIX}/dietlibc/bin:${PATH}Again, you will also want to change your development environment script. For example, the path line in our develdaq script becomes:
export PATH=${PREFIX}/bin:${PREFIX}/dietlibc/bin:${PATH}Notice that we assume you won’t be using both uClibc and diet libc at the same time. Hence, the path line has only diet libc added. If you would like to have both diet libc and uClibc on your system during development, you need to add both paths.
To compile the control daemon with diet libc, use the following command line:
$ make CROSS_COMPILE="diet i386-linux-"Because diet libc is mainly a static library, this will
result in a statically linked binary by default and you don’t need to
add LDFLAGS="-static" to the
command line. Using the same “Hello World!” program as earlier, we
obtained a 24 KB binary when linked with diet libc.
Java
Since Sun introduced it in 1995, Java has become one of the most important programming languages around. Today, it is found in every category of computerized systems, including embedded systems. Although still not as popular as C in the embedded programming world, it is nonetheless turning up in an ever-increasing number of designs.
As Sun has released most of the source of Java under the GPL version 2 license, with a clause excusing code using the Java runtime classes from the requirement to be licensed under the GPL, the Sun Java reference implementation is now (mostly) a true open source project. It can be downloaded and compiled like any other open source program, making it the most natural candidate for a Java runtime for an embedded Linux system.
Having said that, before Sun elected to release Java under an open source license, several other open source Java packages were created, and some of them were successfully used in embedded Linux systems.
In this chapter, we will briefly review some of these options and provide pointers to the various projects’ websites.
Note
There also exist numerous commercial, proprietary Java VMs for Linux. However, we will not cover them here.
Sun Java Micro Edition
Sun Java Micro Edition, also known as J2ME, is a subset of the Java platform that aims to provide a certified collection of Java APIs for the development of software for embedded and mobile devices, mostly mobile phones.
As of December 2006, the Sun reference specification of J2ME is available from Sun under the GNU GPL, under the PhoneME moniker from the Mobile and Embedded community web page on the Sun website at:
| http://community.java.net/mobileandembedded |
The source code for the latest releases and prebuilt binaries for Linux x86 and ARMplatforms are available at https://phoneme.dev.java.net/downloads_page.html#feature. A very detailed guide for building a current MR2 release of phoneME is available at https://phoneme.dev.java.net/content/mr2/index_feature.html.
Because Sun PhoneME is the reference Java platform for mobile devices, it is most compatible with the Java standard. However, it is not necessarily the one with the best performance or smallest footprint. One can hope that, with its release under an open source license, this might change in the future.
Non-Sun-Related Open Source Virtual Machines
Because Sun Java was released under an open source license only in late 2006, a number of older projects exist that provide open source, fully functional JVMs without using any of Sun’s source code. Since there isn’t any consensus on the feasibility of using any of the various open source VMs as the main JVM in an embedded Linux project, we will only mention the VMs briefly and will not provide any information regarding their use. You are invited to look at each VM and follow the efforts of the individual teams.
The Kaffe Java Virtual Machine (http://www.kaffe.org) is based on KaffePro VM, a product sold commercially by Transvirtual, Inc., and is a clean-room implementation of the JVM.[29] Although no new releases of the project have been made since July 2000, and although this VM is not 100 percent compatible with Sun’s VM (according to the project’s website), it is still the main open source alternative to Sun’s VM.
There are other projects that may eventually become more important, such as Japhar (http://www.japhar.org), Kissme (http://kissme.sourceforge.net), Aegis (http://aegisvm.sourceforge.net), and Sable VM (http://www.sablevm.org). For a complete list of open source VM projects, see the list provided by the Kaffe project at http://www.kaffe.org/links.shtml.
See each project’s respective website and documentation for information on how to install and operate the VM.
The GNU Java Compiler
As part of the GNU project, the GNU Compiler for the Java programming language (GCJ) is an extension to GCC that can handle both Java source code and Java bytecode. In particular, GCJ can compile either Java source code or Java bytecode into native machine code. In addition, it can also compile Java source into Java bytecode. It is often referred to as an ahead-of-time (AOT) compiler, because it can compile Java source code directly into native code, in contrast with popular just-in-time (JIT) compilers that convert Java bytecode into native code at runtime. GCJ does, nevertheless, include a Java interpreter equivalent to the JDK’s java command.
GCJ is a fairly active project, and most core Java class libraries are already available as part of the GCJ runtime libraries. Although most windowing components, such as AWT, are still under development, the compiler and its runtime environment can already be used to compile and run most command-line applications.
As with other GNU projects, GCJ is fairly well documented. A good starting place is the project’s website at http://gcc.gnu.org/java. In its documentation section, you will find a compile HOWTO, a general FAQ, and instructions on how to debug Java applications with gdb. You should be able to use the compilation HOWTO in conjunction with our earlier instructions regarding the GNU toolchain to build GCJ for your target.
Perl
Larry Wall introduced Perl in 1987, and it has since become a world of its own. If you are interested in Perl, have a look at Programming Perl by Larry Wall, Tom Christiansen, and Jon Orwant or Learning Perl by Randal Schwartz, Tom Phoenix, and brian d foy (both O’Reilly). Briefly, Perl is an interpreted language whose compiler, tools, and libraries are all available as open source under the terms of the Perl Artistic License and the GNU GPL from the Comprehensive Perl Archive Network (CPAN) at http://www.cpan.org. Because there is only one Perl toolset, you will not need to evaluate different toolsets to figure out which one best suits your needs.
The main component you will need to run Perl programs on your target is a properly compiled Perl interpreter. Unfortunately, at the time of this writing, Perl is not well adapted to cross-compilation, and it is currently not possible to cross-compile a full Perl package.
However, two build options for cross-compiling small versions of the full Perl package do exist: microperl and miniperl. Note that both options are part of the same package, available on CPAN, and you do not need to download any other package.
Microperl
Simon Cozens implemented the microperl build option, based on an idea by Ilya Zakhareivh. It is the absolute bare minimum build of Perl, with no outside dependencies other than ANSI C and the make utility. Unlike the other builds, microperl does not require that you run the Configure script, which performs a great deal of tests on the installation machine before generating the appropriate files for the package’s build. Instead, microperl provides default configuration files with minimal settings that allow the core Perl interpreter to build properly. None of the language’s core features is missing from this interpreter. Of course, it does not support all the features of the full interpreter, but it is sufficient to run basic Perl applications. Because this code is considered “experimental,” for the moment you will need to evaluate most of microperl’s capabilities on your own.
We have successfully built a microperl for our DAQ module using the toolchain set up earlier, uClibc, and Perl 5.7.3. The resulting interpreter was able to adequately execute all Perl programs that did not have any outside references. It failed, however, to run programs that used any of the standard Perl modules.
To build microperl for your target, you must first download a Perl version from CPAN and extract it into the ${PRJROOT}/sysapps directory. Place the package in the sysapps directory, because it will run only on the target and will not be used to build any of the other software packages for your target. After extracting the package, move into its directory for the build (here, you cannot use a different build directory, as we did for the GNU toolchain, because Perl does not support this build method):
$ cd ${PRJROOT}/sysapps/perl-5.10.0Since microperl is a minimal build of Perl, you do not need to configure anything. Build the package using the appropriate Makefile and instructing it to use the uClibc compiler wrapper instead of the standard GCC compiler:
$ make -f Makefile.micro CC=i386-uclibc-gccThis will generate a microperl binary in the package’s root directory. This binary does not require any other Perl components and can be copied directly to the /bin directory of your target’s root filesystem, ${PRJROOT}/rootfs.
When dynamically linked with either glibc or uClibc and stripped, the microperl binary is about 1.5 MB in size.
For more information on how microperl is built, have a look at the Makefile.micro Makefile and the uconfig.sh script. As work continues on microperl, it is expected that more documentation will become available.
Miniperl
Miniperl is less minimalistic than microperl and provides most of what you would expect from the standard Perl interpreter. The main component it lacks is the DynaLoader XS module, which allows Perl subroutines to call C functions. It is therefore incapable of loading XS modules dynamically. This is a minor issue, however, given the type of system miniperl will be running on.
As with the main Perl build, miniperl requires that you run the Configure script to determine the system’s capabilities. Since the system for which Perl must be built is your target, the script requires you to specify information about how to communicate with that target: a hostname, a remote username, and a target-mapped directory. The script uses this information to run its tests on your target and generate the proper build files.
The main caveat concerning this method is that it requires a direct network link between the host and the target. In essence, if your target does not have some form of networking, you will be unable to build miniperl for it.
The installation methodology for miniperl is explained well in the INSTALL file provided with the 5.10.0 Perl package, under the “Cross-compilation” heading.
Python
Guido van Rossum introduced Python to the world in 1991. It has since gathered many followers and, as with Perl, is a world of its own. If you are interested in Python, read Mark Lutz’s Programming Python or his Learning Python (both O’Reilly). Python is routinely compared to Perl, because it often serves the same purposes, but because this is the subject of yet another “holy war,” we will not go any further. Instead, feel free to browse the main Python website at http://www.python.org for more information. The Python package, which includes the Python interpreter and the Python libraries, is available from that website under the terms of a composite license called the Python license, which is an approved open source license.
As with Perl, you will need a properly configured interpreter to run Python code on your target. Although the main Python distribution does not support cross-compilation, a patch by Christopher Lambacher that allows cross-compilation of Python 2.5 is available at http://whatschrisdoing.com/~lambacck/Python2.5_xcompile.patch. A blog post by Lambacher at http://whatschrisdoing.com/blog/2006/10/06/howto-cross-compile-python-25 explains in detail how to get Python to cross-compile with this patch.
Follow the instructions, substituting the appropriate names for your
target in the place of the arm-linux
target used in the instructions. To follow the same project workspace
organization that we established earlier, download and extract the Python
package into the ${PRJROOT}/sysapps
directory. Also, instead of building Python directly in its source
directory, you can use a build-python
directory, as we did with the GNU tools, because Python supports this
build method. In addition, use the
--prefix=${PREFIX}/${TARGET}/usr option instead of
the values provided by the HOWTO. All the Python material will thereby be
installed in the ${PREFIX}/${TARGET}/usr directory. You can then
customize this directory and copy it onto the target’s root
filesystem.
There are a couple of observations to make about the resulting package. First, you will not be able to build Python with diet libc; use either glibc or uClibc. This means that glibc or uClibc will have to be on your target’s root filesystem. When storage space on your target is limited, we recommend you use uClibc instead of glibc.
Second, Python has installed many libraries in the ${PREFIX}/${TARGET}/usr/lib/python2.2 directory, and many of those are large. You may want to trim down the content of this directory by deleting the components you are unlikely to use. By itself, the dynamically linked and stripped Python interpreter is 725 KB in size.
Nevertheless, Python’s size and dependencies have not stopped developers from using it. A number of projects, including the OLPC’s entire “Sugar” environment, make heavy use of Python. And a growing number of major Linux distributions are now even requiring a minimal python interpreter in order to even boot normally.
Finally, you may see some warnings and failures during the build. This is because some libraries and applications are missing from your target. The Tkinter interface to libtk.a and libtcl.a will fail to build, for instance, unless you cross-compiled and installed Tcl/Tk for your target. This doesn’t mean the Python build has failed. Rather, it is an indication that one of the Python components has not built successfully. You will still be able to install and use the Python interpreter and the modules that built properly on your target.
Other Programming Languages
Linux, of course, supports many more programming languages. Whether you are looking for programming in Ada, Forth, Lisp, or FORTRAN, a short search on the Net with your favorite search engine should yield rapid results. A good starting point is the “Other Languages” section in Chapter 13 of Running Linux by Matthias Dalheimer and Matt Welsh (O’Reilly).
The cross-compiling and cross-development capabilities of the various language tools will need to be evaluated on a tool-tool basis, since few compilers and interpreters lend themselves well to cross-platform development.
Eclipse: An Integrated Development Environment
As we have seen in previous sections, the development tools for embedded Linux are a collection of standalone command-line programs. It has long been the preference of die-hard Unix and Linux developers to create software using a simple file editor and a command-line shell to invoke the development tool. However, most embedded software developers prefer to work in an IDE that provides a common graphical interface to all the functions of the development tools.
The Eclipse project, which IBM originally created in November 2001, and which has been an independent nonprofit corporation since 2004, provides an open development platform comprised of extensible frameworks, tools, and runtimes for building, deploying, and managing software. Its popularity, openness, and rich features make it an excellent choice as an IDE for embedded Linux development. A typical display by Eclipse appears in Figure 4-5.
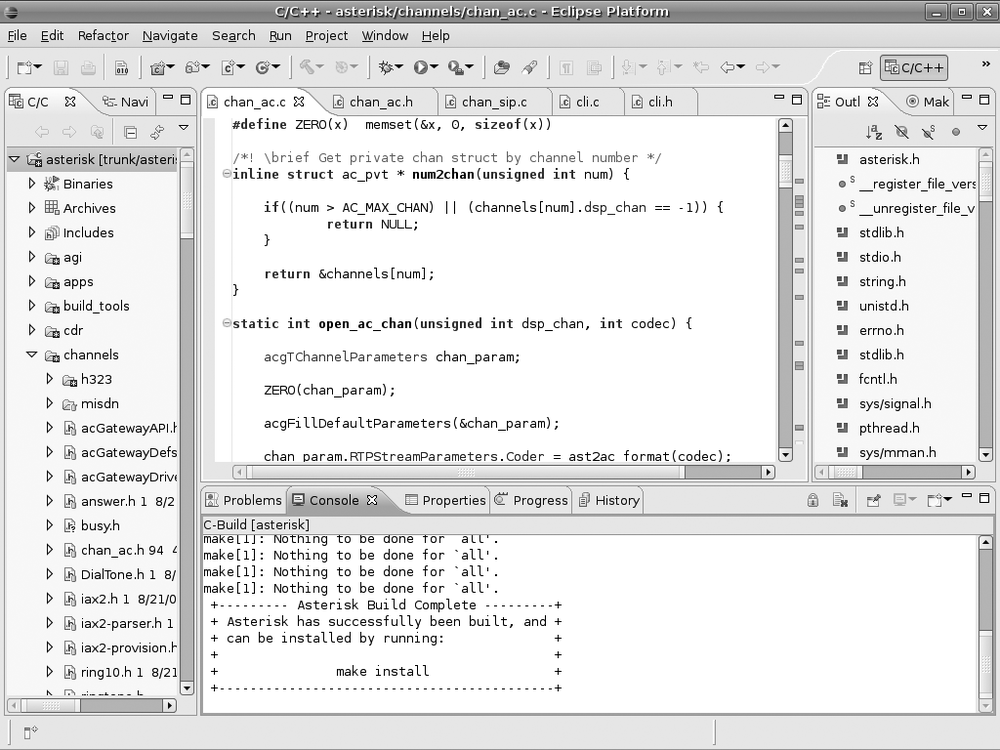
Instead of a monolithic IDE, Eclipse provides a modular framework on which many IDEs can be built by combining a common base and a plethora of plug-ins for various functionalities, such as the CDT plug-in for C/C++ developers and the Remote System Explorer for target management. You can read more about Eclipse on the project website at http://www.eclipse.org.
Although several other IDEs exist for Linux, no other such tool enjoys the widespread adoption of Eclipse, which is used by both commercial vendors (who base development environments on Eclipse and provide many plug-ins and extensions) and the open source community, which has extended Eclipse to support practically every need.
We will cover the installation, adaptation, and use of Eclipse in the following sections.
Installing Eclipse
Eclipse is a Java application, which makes it cross-platform. However, that means you need a Java runtime virtual machine (JVM) to run it. Most current Linux distributions come with a preinstalled JVM called GCJ. Unfortunately, although Eclipse does run on the GCJ, it is not one of the referenced JVMs on which it is regularly tested. We therefore recommend that you first install a free JVM for Linux from the Sun Java download website at http://www.java.com/en/download/manual.jsp.
Note
The Sun Java JV can peacefully coexist with GCJ, so you should not worry about trashing your current JVM installation.
After successfully installing the Sun JVM, proceed to download Eclipse from the project download page at http://www.eclipse.org/downloads. You will want to download the Eclipse IDE for C/C++ Developers edition, which integrates the basic common Eclipse core with the CDT plug-in for C/C++ developers.
After downloading the compressed tar archive, change into the directory to which you wish to install Eclipse and decompress the tar archive.
Note
You can install Eclipse in any location you wish, including your home directory, but if you wish to share the Eclipse installation with others using the same computer (such as a shared networked server), we recommend you open the archive in a location that is accessible to all users. This may require you to uncompress the archive as the superuser.
$cd $PRJROOT/tools$tar zxvf $PROJROOT/build-tools/eclipse-cpp-europa-fall2-linux-gtk-x86_64.tar.gz
Before you can run Eclipse, you need to configure the location of your alternative JVM. To do so, find the text file named eclipse.ini in the $PRJROOT/tools/eclipse folder, and make sure the following lines are present and point to the correct location where the Sun JVM has been installed:
...
-vm
/usr/lib/jvm/java-6-sun/jre/bin/java
...
Note
Do not try to put the path to the JVM in the same line as the
-vm argument. The text must appear on two separate
lines, as shown in the preceding excerpt.
Running Eclipse
Now you are ready to run Eclipse:
$ $PRJROOT/tools/eclipse/eclipse &The first time you invoke it, you will be presented with a dialog box asking you to select a workspace (Figure 4-6). An Eclipse workspace is the location where development projects and Eclipse configuration information are saved. Either accept the default workspace location of a directory named workspace in your home directory, or provide an alternate location and click OK.
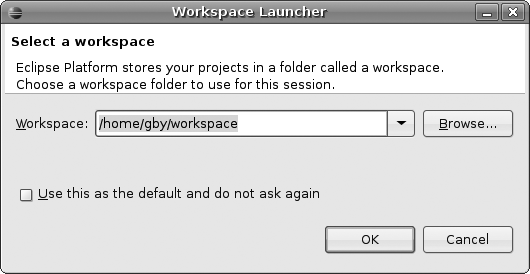
After Eclipse finishes loading, it presents you with a welcome screen.
Extending Eclipse
As we explained, Eclipse is a modular framework for building IDEs. Thus, apart from the common core framework, most Eclipse-based IDE functionalities are provided by plug-ins. Plug-ins allow Eclipse to support a wide range of languages, source control systems, targets, debugging facilities, and more.
As we chose to install the Eclipse IDE for C/C++ Developers edition, one plug-in is already installed in our new Eclipse installation: CDT, the C/C++ developer support plug-in. In order to make Eclipse a more useful developer environment for embedded Linux, we will add the the Target Management toolkit plug-in and the Subclipse Subversion source control integration plug-in.
Tip
You can find many more plug-ins (more than a thousand are listed at the time of this writing) in the Eclipse Plugin Central website at http://www.eclipseplugincentral.com.
Installing a plug-in
Eclipse contains a generic infrastructure for installing and updating plug-ins. Installation of practically all Eclipse plug-ins, therefore, follows the same procedure.
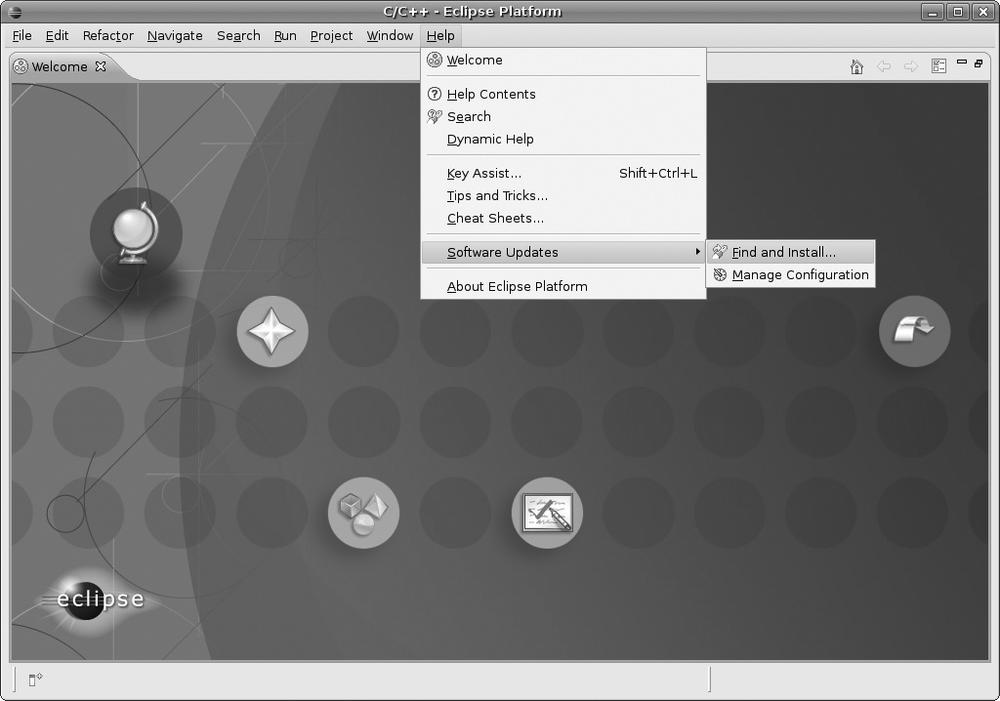
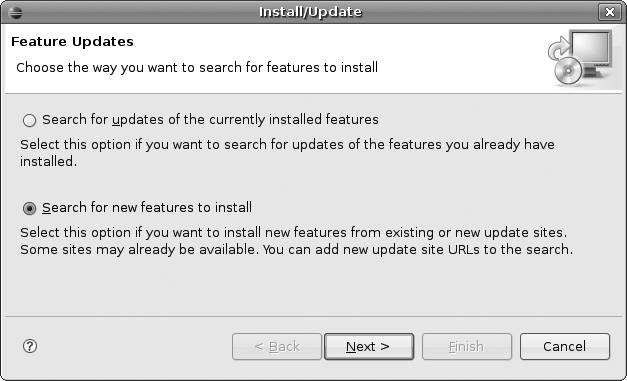
First, locate the requested plug-in’s update site URL. This is a web URL (e.g., http://download.eclipse.org/dsdp/tm/updates/2.0) that hosts a specific plug-in download and future updates. The update site URL tells the Eclipse plug-in framework where to download both the plug-in and future updates to it. The update site URL for a specific plug-in version is usually published on the plug-in website.
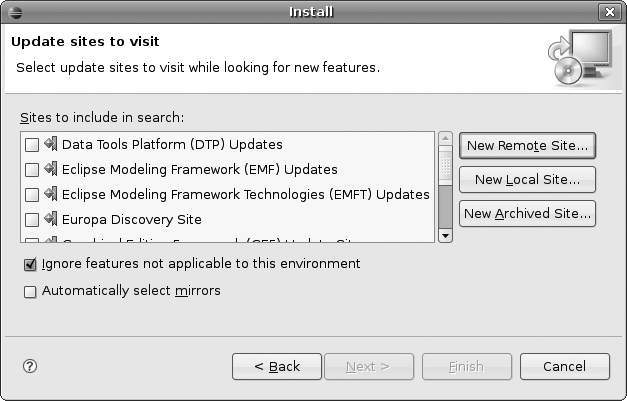
Now configure the Eclipse plug-in framework to pull the plug-in from the update site as follows:
From the Help menu, choose the Software Updates entry (Figure 4-7).
In the Install/Update dialog that appears, choose “Search for new features to install” and click Next (Figure 4-8).
In the Install dialog, click on the “New Remote Site…” button, which displays a list of update sites (Figure 4-9).
Enter a descriptive name for the new update site (such as the plug-in name) and the update site URL from the plug-in website. Click OK.
The new site will be added to the list of available update sites. Make sure the checkbox next to the new site entry is marked and click Finish.
In the new Updates dialog that appears, check all the requested plug-ins from the available list.
Click on the Select Required button to automatically add any additional plug-ins that your chosen plug-ins depend upon.
Click Finish.
The new plug-in will be now be installed.
Target Management toolkit
The Target Management project creates data models and frameworks to configure and manage remote systems, their connections, and their services. It has been found useful on all kinds of remote systems, from mainframes down to embedded devices. The base toolkit includes a Remote Files subsystem, which allows you to work on remote computers transparently, just as if you were on the local system. It also includes a shell and processes subsystem, a lightweight terminal, and a Network Discovery framework.
You can read more about the Target Management project at the project website, http://www.eclipse.org/dsdp/tm. An online tutorial for the Target Management toolkit is available at http://www.eclipse.org/dsdp/tm/tutorial.
You can find the update site URL for the latest version of the Target Management toolkit on the project website and can install it using the procedure outlined earlier in Installing a plug-in.”
Subclipse
Subclipse is an Eclipse Team Provider plug-in that provides support for Subversion within the Eclipse IDE. You can read more about Subclipse at the project website, http://subclipse.tigris.org. The update site for the latest version of the Subclipse plug-in is available on the project website.
Working With Eclipse
Eclipse is a modern IDE supporting many types of languages and setups, and it is very customizable. The following sections will walk you through the setup of a new embedded software project.
Projects
Like many IDEs, Eclipse groups the development of related software in the context of a project. To start a new project, choose “New entry” from the file menu, and you will be presented with the New Project wizard dialog (Figure 4-10).
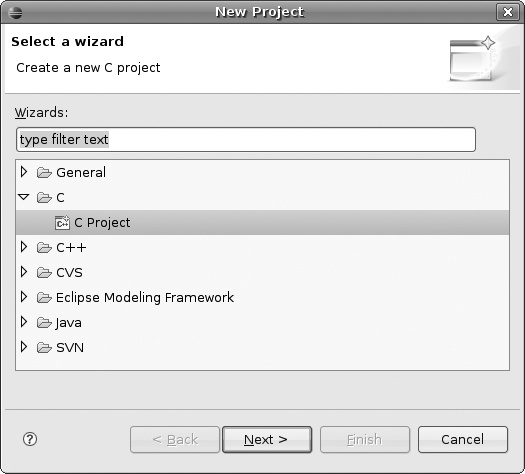
Choose a C (or C++) project and click on Next. You will be presented with the C Project configuration dialog (Figure 4-11). Its options involve a choice between two basic approaches: letting Eclipse manage the project build (called a managed project) or managing your own build system in the traditional fashion using your own Makefile.
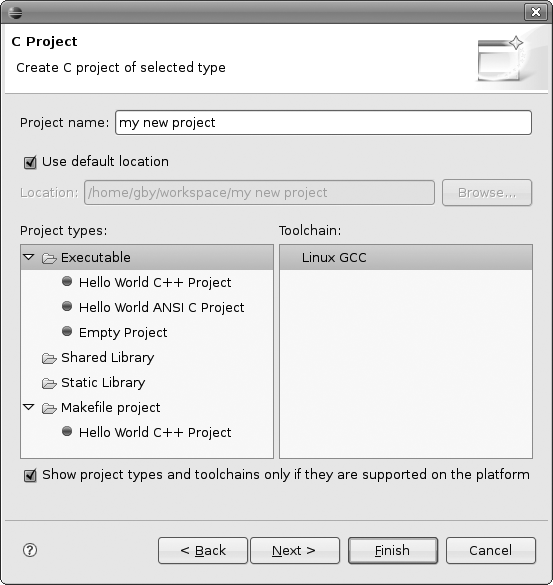
In managed build projects, Eclipse automatically creates a set of Makefiles to build the project based on project properties that you define (e.g., the toolchain to use) and the specific configuration (e.g., Debug versus Release). Eclipse builds the software by executing this automatically created Makefile.
Delegating the project build to Eclipse may seem very convenient, but it comes at a price: henceforth, you will be tightly dependent on the Eclipse IDE to build your project.
Indeed, such tasks as performing an automated nightly build may become much more complicated, and optimizing your build process might become much more difficult, if at all possible.
Consider carefully whether the time and effort saved by letting Eclipse create your Makefiles automatically might cost you extra time and effort later on.
If you are like most embedded systems developers, you’ll prefer to have as much control as you can over the build process of your projects. The best way to accomplish this is to create your own custom Makefile. This also allows you to import software projects that already have an existing build system. Finally, it frees you from depending on Eclipse for building your project, which can come in handy under circumstances such as implementing nightly builds.
Managed build projects
If you wish to let Eclipse manage your project’s build process, you must first tell Eclipse what kind of project you wish to create. The following are the available options:
- Executable
This project will produce an executable binary image.
- Shared library
This project will produce a dynamically loaded, shared library whose code can be shared between several processes at runtime.
- Static library
This project will create a standard static code library, whose code is added to the code of the executable that makes use of it at build time.
The same screen allows you to choose which toolchain you wish to work with. By default, Eclipse offers just the Linux GCC toolchain, the native toolchain installed by default on the host development machine. Choose this toolchain for now; we’ll edit the configuration later to make use of our custom cross toolchain.
To continue, click on the Next button. You will be presented with the configuration selection screen, which will let you define which configurations you wish to support. By default, Eclipse offers the Debug and Release configurations.
By default, Eclipse will configure your project to use the
native host toolchain. Since you wish to use a cross toolchain, you
need to make some changes to this default configuration. Thus, in
the same screen, choose the “Advanced settings…” button. In the
project properties screen that will open, choose the Settings entry
from the C/C++ Build submenu and replace the command fields of both
the “GCC C compiler” and “GCC C linker” entries with the cross
toolchain counterparts, such as arm-linux-gcc. See Figure 4-12.
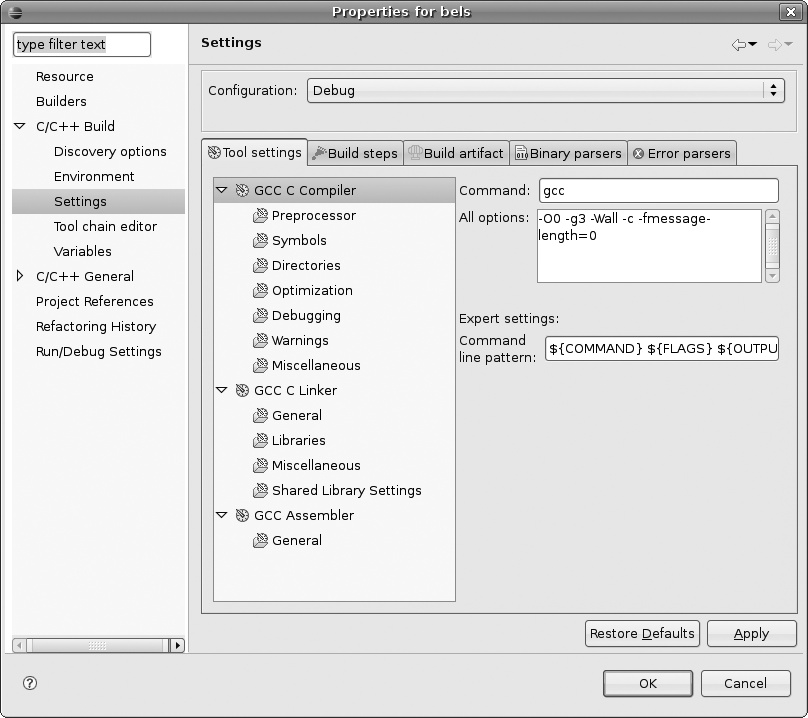
Makefile projects
To use your own Makefile, choose the “Hello World C++ Project” under the “Makefile project” entry in the “C/C++ Project” wizard dialog and click on the Finish button. Eclipse will create a template Makefile project for you with a single C++ file and a Makefile that builds it. You can then customize the Makefile.
Development
From the point where your new project has been created, the rest of the development cycle with Eclipse is no different from development with a native toolchain. Therefore, instead of documenting it here, we refer you to the Eclipse CDT website, where various Eclipse CDT functions and screens are documented: http://www.eclipse.org/cdt/.
Target management
One of the most convienient facilities Eclipse offers for embedded systems developers is the Remote System Explorer (RSE) subsystem, which is part of the Target Management toolkit plug-in we installed earlier. Features include:
- Remote filesystems
Browse, upload, and download files on the target board and remote server using SSH, FTP, or the dstore agent. dstore supports the seamless editing of remote files, including remote searches and comparisons.
- Remote shell access
Remote control of the target board.
- Remote process control
View the remote board tasks and state (requires a dstore agent running on the target).
- Remote debugging
This is offered through CDT, GDB, and the GDBServer proxy.
Defining remote connections
To use all the features the RSE framework has to offer, you must configure some remote machines or target boards to interact with. To do this, open the Open Perspective submenu in the Window menu and choose Remote Systems Prespective (Figure 4-13).
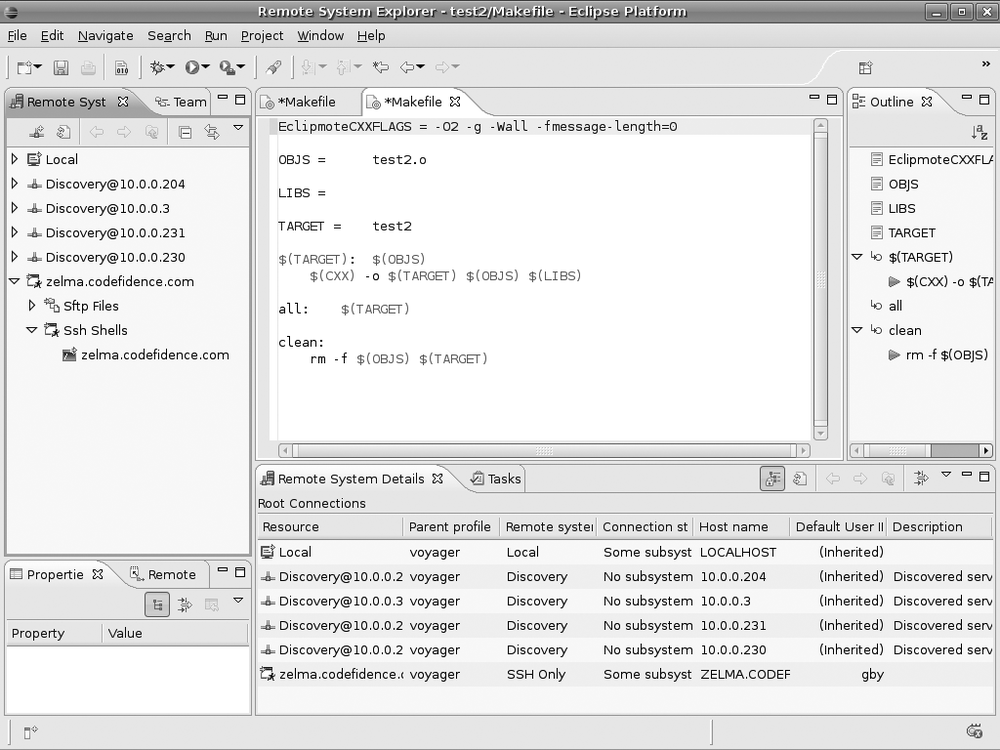
At the right of the screen, the Remote Systems list will open with a list of all previously configured remote systems. To create a new connection, right-click in the Remote Systems list window and choose New Connection. This displays a Remote System Type wizard (Figure 4-14).
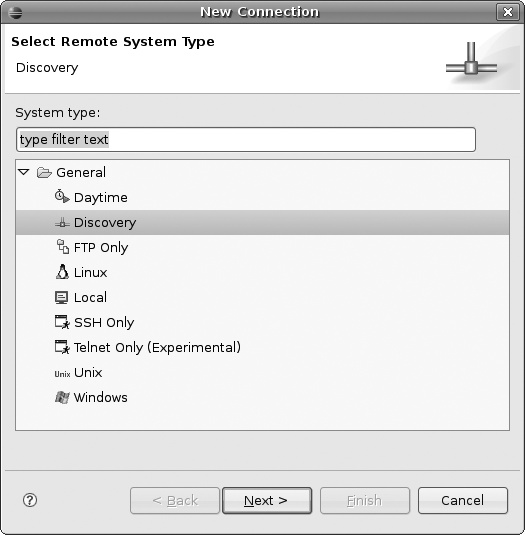
If autodiscovery via DNS-SD Service Discovery (previously known as Zeroconf) is available, it will be automatically selected for you. Otherwise, you can manually configure a new remote connection.
After a connection has been created, you can browse the resources it provides via the Remote Systems view. Resources include remote files, remote shells, and views of remote processes, if available. Not all types of connections provide all the functionality, and some require the dstore agent to be running on the remote target.
In addition, once a connection has been defined in such a fashion, it will show up in the list of available connections in the C/C++ Remote Application menu in both the Run and Debug menus, allowing you to run and debug your application remotely on the target board.
For further discussion of debugging with Eclipse, see Eclipse in Chapter 11.
Terminal Emulators
The most common way to communicate with an embedded system is to use a terminal emulation program on the host and communicate through an RS232 serial port with the target. Although there are a few terminal emulation programs available for Linux, not every one is fit for all uses. In the past, there have been well-know problems between minicom and U-Boot, for instance, during file transfers over the serial port. Hence, we recommend that you try more than one terminal application to communicate with your target. If nothing else, you are likely to discover one that best fits your personal preferences. Also, see your bootloader’s documentation for any warnings regarding terminal emulators.
Three main terminal emulators are available in Linux: minicom, cu, and kermit. The following sections cover the setup and configuration of these tools, but not their uses. Refer to each package’s documentation for its use.
Accessing the Serial Port
Before you can use any terminal emulator, you must ensure that you have the appropriate access rights to use the serial port on your host. In particular, you need read and write access to the serial port device, which is /dev/ttyS0 for permanently connected physical ports and /dev/ttyUSB0 for ports attached via USB. If you do not have these rights, any terminal emulator you use will complain at startup.[30]
To give your user account permission to access the serial port, add your username to the group of users with serial port access. The name of this group changes from one Linux distribution to another, so the easiest way to find it is to check the ownership on the serial port device file using the ls command:
$ ls -al /dev/ttyS0
crw-------    1 root     tty        4,  64 May  5  1998 /dev/ttyS0
In this example, the /dev/ttyS0 serial port device file is owned by the root user and the group named tty (the fourth field from the left). So, you will need to add your username to this group.
In addition, some terminal emulation applications also require your user to have access to the /var/lock directory, for the purpose of creating a lock file, to protect the serial port from concurrent use. Although the use of lock files for this purpose is outdated, some programs still make use of it for backward compatibility. For this reason, you also need to check which group has access to the /var/lock file and add your user to that group as well.
In similar fashion to our check with the serial port device file, you can examine the permission on the /var/lock directory using the following command:
$ ls -ld /var/lock
drwxrwxr-x    5 root     uucp         1024 Oct  2 17:14 /var/lock
As you can see in this example, the required group is called uucp.
You will need, therefore, to add your user to both the tty and the uucp groups. The easiest way to add a user to a group is to use the appropriate graphical user interface tool provided by your distribution. The following are a couple of popular distributions that currently offer the commands described here:
In addition, you can add a user to a group by editing the /etc/group file using the vigr command. The command is tailored for editing that file and sets locks to ensure that only one user is accessing the file at any time. Because the command requires superuser access, you usually invoke it as follows:
Once in vigr, locate the line that starts
with the group name (such as tty) and
add your username:
...
tty:x:5:karim
uucp:x:14:uucp,karim
...
See the vigr manpage for more information.
Finally, log out from superuser mode and from your own account, and log back into your account:
#exit$iduid=501(karim) gid=501(karim) groups=501(karim) $exitTeotihuacan login:karimPassword: $iduid=501(karim) gid=501(karim) groups=501(karim),5(tty),14(uucp)
As you can see, you need to log out and then log back in for the changes to take effect. Opening a new terminal window in your GUI may have similar effects, depending on the GUI you are using and the way it starts new terminal windows. Even if it works, however, only the new terminal window will be part of the appropriate groups, but any other window opened before the changes will still be excluded. For this reason, it is preferable to exit your GUI, completely log out, and then log back in.
For more information on the setup of the serial interface, have a look at the Serial HOWTO available from the Linux Documentation Project and Chapter 3 of the Linux Network Administrator’s Guide by Tony Bautts et al. (O’Reilly).
Eclipse Terminal
If you followed the instructions on the installation and configuration of the Eclipse IDE provided earlier in this chapter, a simple terminal is already installed as part of the Target Management toolkit plug-in. To use it, choose Show View from the Window menu and then choose the Terminal view.
A new terminal tab will open at the bottom of the screen and allow you to connect to any remote system via the Telnet protocol, the SSH protocol, or an RS232 serial connection. To connect to a remote system, simply choose the Connect button at the top of the tab.
The Telnet and SSH protocols do not require any additional installation. But to use a serial connection, a free third-party Java library called RXTX needs to be downloaded and installed.
The RXTX library is available at ftp://ftp.qbang.org/pub/rxtx/rxtx-2.1.-7-bins.zip.
Install it as follows, replacing the string x86_64-unknown-linux-gnu in the example with
the appropriate directory on your host system:
$wget ftp://ftp.qbang.org/pub/rxtx/rxtx-2.1-7-bins.zip$cd rxtx-2.1-7-bins/$cp RXTXcomm.jar /usr/lib/jvm/java-6-sun/jre/lib/ext/$cp Linux/x86_64-unknown-linux-gnu/librxtxSerial.so /usr/lib/
Minicom
Minicom is the most commonly used terminal emulator for Linux. Most documentation about embedded Linux assumes that you are using minicom. However, as we said earlier, there are known file transfer problems between minicom and at least one bootloader, so it may not be right for you.
Minicom is a GPL clone of the Telix DOS program and provides ANSI and VT102 terminals. Its project website is currently located at http://alioth.debian.org/projects/minicom. Minicom is also likely to be available through your distribution’s software package management tool. To install it, use yum install minicom if you are using a distribution based on Red Hat or SUSE, and apt-get install minicom for a distribution based on Debian or Ubuntu.
Use the minicom command to start it:
$ minicomThe utility starts in full-screen mode and displays the following at the top of the screen:
Welcome to minicom 1.83.0

OPTIONS: History Buffer, F-key Macros, Search History Buffer, I18n
Compiled on Mar  7 2000, 06:12:31.

Press CTRL-A Z for help on special keys
To enter commands to Minicom, press Ctrl-A and then the letter of the desired function. As Minicom’s welcome message states, use Ctrl-A Z to get help from Minicom. Refer to the package’s manpage for more details about its use.
UUCP cu
Unix to Unix CoPy (UUCP) used to be one of the most popular ways to link Unix systems. Though UUCP is rarely used today, the cu command in the UUCP package can be used to “call up” other systems. The connection used to communicate to the other system can take many forms. In our case, we are mostly interested in establishing a terminal connection over a serial line to our target.
To this end, we must add the appropriate entries to the configuration files used by UUCP. In particular, this means adding a port entry in /etc/uucp/port and a remote system definition to /etc/uucp/sys. As the UUCP info page states, “a port is a particular hardware connection on your computer,” whereas a system definition describes the system to connect to and the port used to connect to it.
Although UUCP is available from the GNU FTP site under the terms of the GPL, it is usually already installed on your system. On a system based on Red Hat or Fedora, enter rpm -q uucp to verify that it is installed.
Here is an example /etc/uucp/port file:
# /etc/uucp/port - UUCP ports
# /dev/ttyS0
port      ttyS0       # Port name
type      direct      # Direct connection to other system
device    /dev/ttyS0  # Port device node
hardflow  false       # No hardware flow control
speed     115200      # Line speed
This entry states that there is a port called ttyS0 that uses direct 115200 bps connections
without hardware flow control to connect to remote systems through
/dev/ttyS0. The name of the port in
this case, ttyS0, is used only to
identify this port definition for the rest of UUCP utilities and
configuration files. If you’ve used UUCP before to connect using a
traditional modem, you will notice that this entry resembles modem
definitions. Unlike modem definitions, however, there is no need to
provide a carrier field to specify
whether a carrier should be expected. Setting the connection type to
direct makes carrier default to false.
Here is an example /etc/uucp/sys file that complements the /etc/uucp/port file just shown:
# /etc/uucp/sys - name UUCP neighbors
# system: target
system  target   # Remote system name
port    ttyS0    # Port name
time    any      # Access is possible at any time
Basically, this definition states that the system called target can be called up at any time, using
port ttyS0.
With those files in place, you can use cu to connect to the target:
$ cu target
Connected.
Once in a cu session, you can issue
instructions using the ~ character,
followed by another character specifying the actual command. For a
complete list of commands, use ~?.
For more information on configuring and customizing UUCP for your system, look at Chapter 16 of the Linux Network Administrator’s Guide, the UUCP HOWTO available from the Linux Documentation Project (LDP), and the UUCP info page.
C-Kermit
C-Kermit is one of the packages maintained as part of Columbia University’s Kermit project (http://www.columbia.edu/kermit). C-Kermit provides a unified interface for network operations across a wide range of platforms. Although it features many capabilities, terminal emulation is the one we are most interested in.
Though you are free to download it for personal and internal use, C-Kermit is not open source software and its licensing makes it difficult for use in commercial distributions.[31] C-Kermit is available for download at http://www.columbia.edu/kermit/ckermit.html. Follow the documentation in the ckuins.txt file included with the package to compile and install C-Kermit. In contrast with most other tools we discuss in this book, C-Kermit should be installed system-wide, not locally to your project workspace. Once installed, C-Kermit is started using the kermit command.
In terms of usability, kermit compares quite favorably to both Minicom and UUCP. Although it lacks the menus provided by Minicom, kermit’s interactive command language provides a very intuitive and powerful way of interacting with the terminal emulator. When you initiate a file transfer from the target’s bootloader, for example, the bootloader starts waiting for the file. You can then switch to kermit’s interactive command line on the host using Ctrl-\ C and send the actual file using the send command.
Among other things, the interactive command line provides tab filename completion similar to that provided by most shells in Linux. Also, the interactive command line is capable of recognizing commands using the shortest unique character string that is part of a command name. The set receive command, for example, can be shortened to set rec.
To use the kermit command, you must have a .kermrc configuration file in your home directory. kermit runs this file at startup. Here is an example .kermrc file that one author uses on his workstation:
; Line properties
set modem type             none ; Direct connection
set line             /dev/ttyS0 ; Device file
set speed                115200 ; Line speed
set carrier-watch           off ; No carrier expected
set handshake              none ; No handshaking
set flow-control           none ; No flow control

; Communication properties
robust                          ; Most robust transfer settings macro
set receive packet-length  1000 ; Max pack len remote system should use
set send packet-length     1000 ; Max pack len local system should use
set window                   10 ; Nbr of packets to send until ack

; File transfer properties
set file type            binary ; All files transferred are binary
set file names          literal ; Don't modify filenames during xfers
For more information about each of the settings, try the help command provided by kermit’s interactive command line. For more information regarding the robust macro, for example, enter help robust. In this case, robust must be used before set receive, because robust sets the maximum packet length to be used by the remote system to 90 bytes, whereas we want it set to 1,000 bytes.
After creating your configuration file, you can start kermit:
$ kermit -c
Connecting to /dev/ttyS0, speed 115200
 Escape character: Ctrl-\ (ASCII 28, FS): enabled
Type the escape character followed by C to get back,
or followed by ? to see other options.
----------------------------------------------------
If you are looking for more information about the use of C-Kermit and intend to use it more extensively, think about purchasing Using C-Kermit by Frank Da Cruz and Christine Gianone (Digital Press). Apart from providing information regarding the use of C-Kermit, sales of the book help fund the project. Although the book covers version 6.0, supplements for versions 7.0 and 8.0 are freely available on the project’s website.
[23] All commands used in this book assume the use of the sh or bash shell, because these are the shells most commonly used. If you use another shell, such as csh, you may need to modify some of the commands.
[24] It’s so rare to use a different build system and host system that the situation has earned its own informal name: a “Canadian Cross” toolchain. A Canadian Cross build is most frequently used when building programs to run on a non-Unix system, such as DOS or Windows. It may be simpler to configure and build on a Unix system than to support the non-Unix system’s configuration machinery. The unusual name springs from the historical coincidence that Canada had three national political parties at the time developers wanted to invent a name for this procedure.
[25] Processors without MMUs are low-end, and Linux is increasingly used on embedded systems with MMUs. With special treatment, it can run on MMU-less systems, with the drawback that several features will not work (such as memory protection).
[26] Single UNIX Specification, version 3.
[27] It is not clear whether this license covers the contributions made to diet libc by developers other than the main author.
[28] Notice the final “/”. If you omit this slash, the web server will be unable to locate the web page.
[29] That is, it was written from scratch without using any of Sun’s Java source code.
[30] The actual changes required for your distribution may differ from those discussed in this section. Refer to your distribution’s documentation in case of doubt.
[31] Although the license was changed lately to simplify inclusion in commercial distributions such as Red Hat, C-Kermit has yet to be included in most mainstream distributions.
Get Building Embedded Linux Systems, 2nd Edition now with the O’Reilly learning platform.
O’Reilly members experience books, live events, courses curated by job role, and more from O’Reilly and nearly 200 top publishers.

